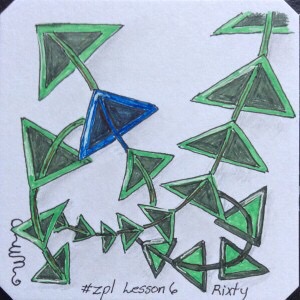
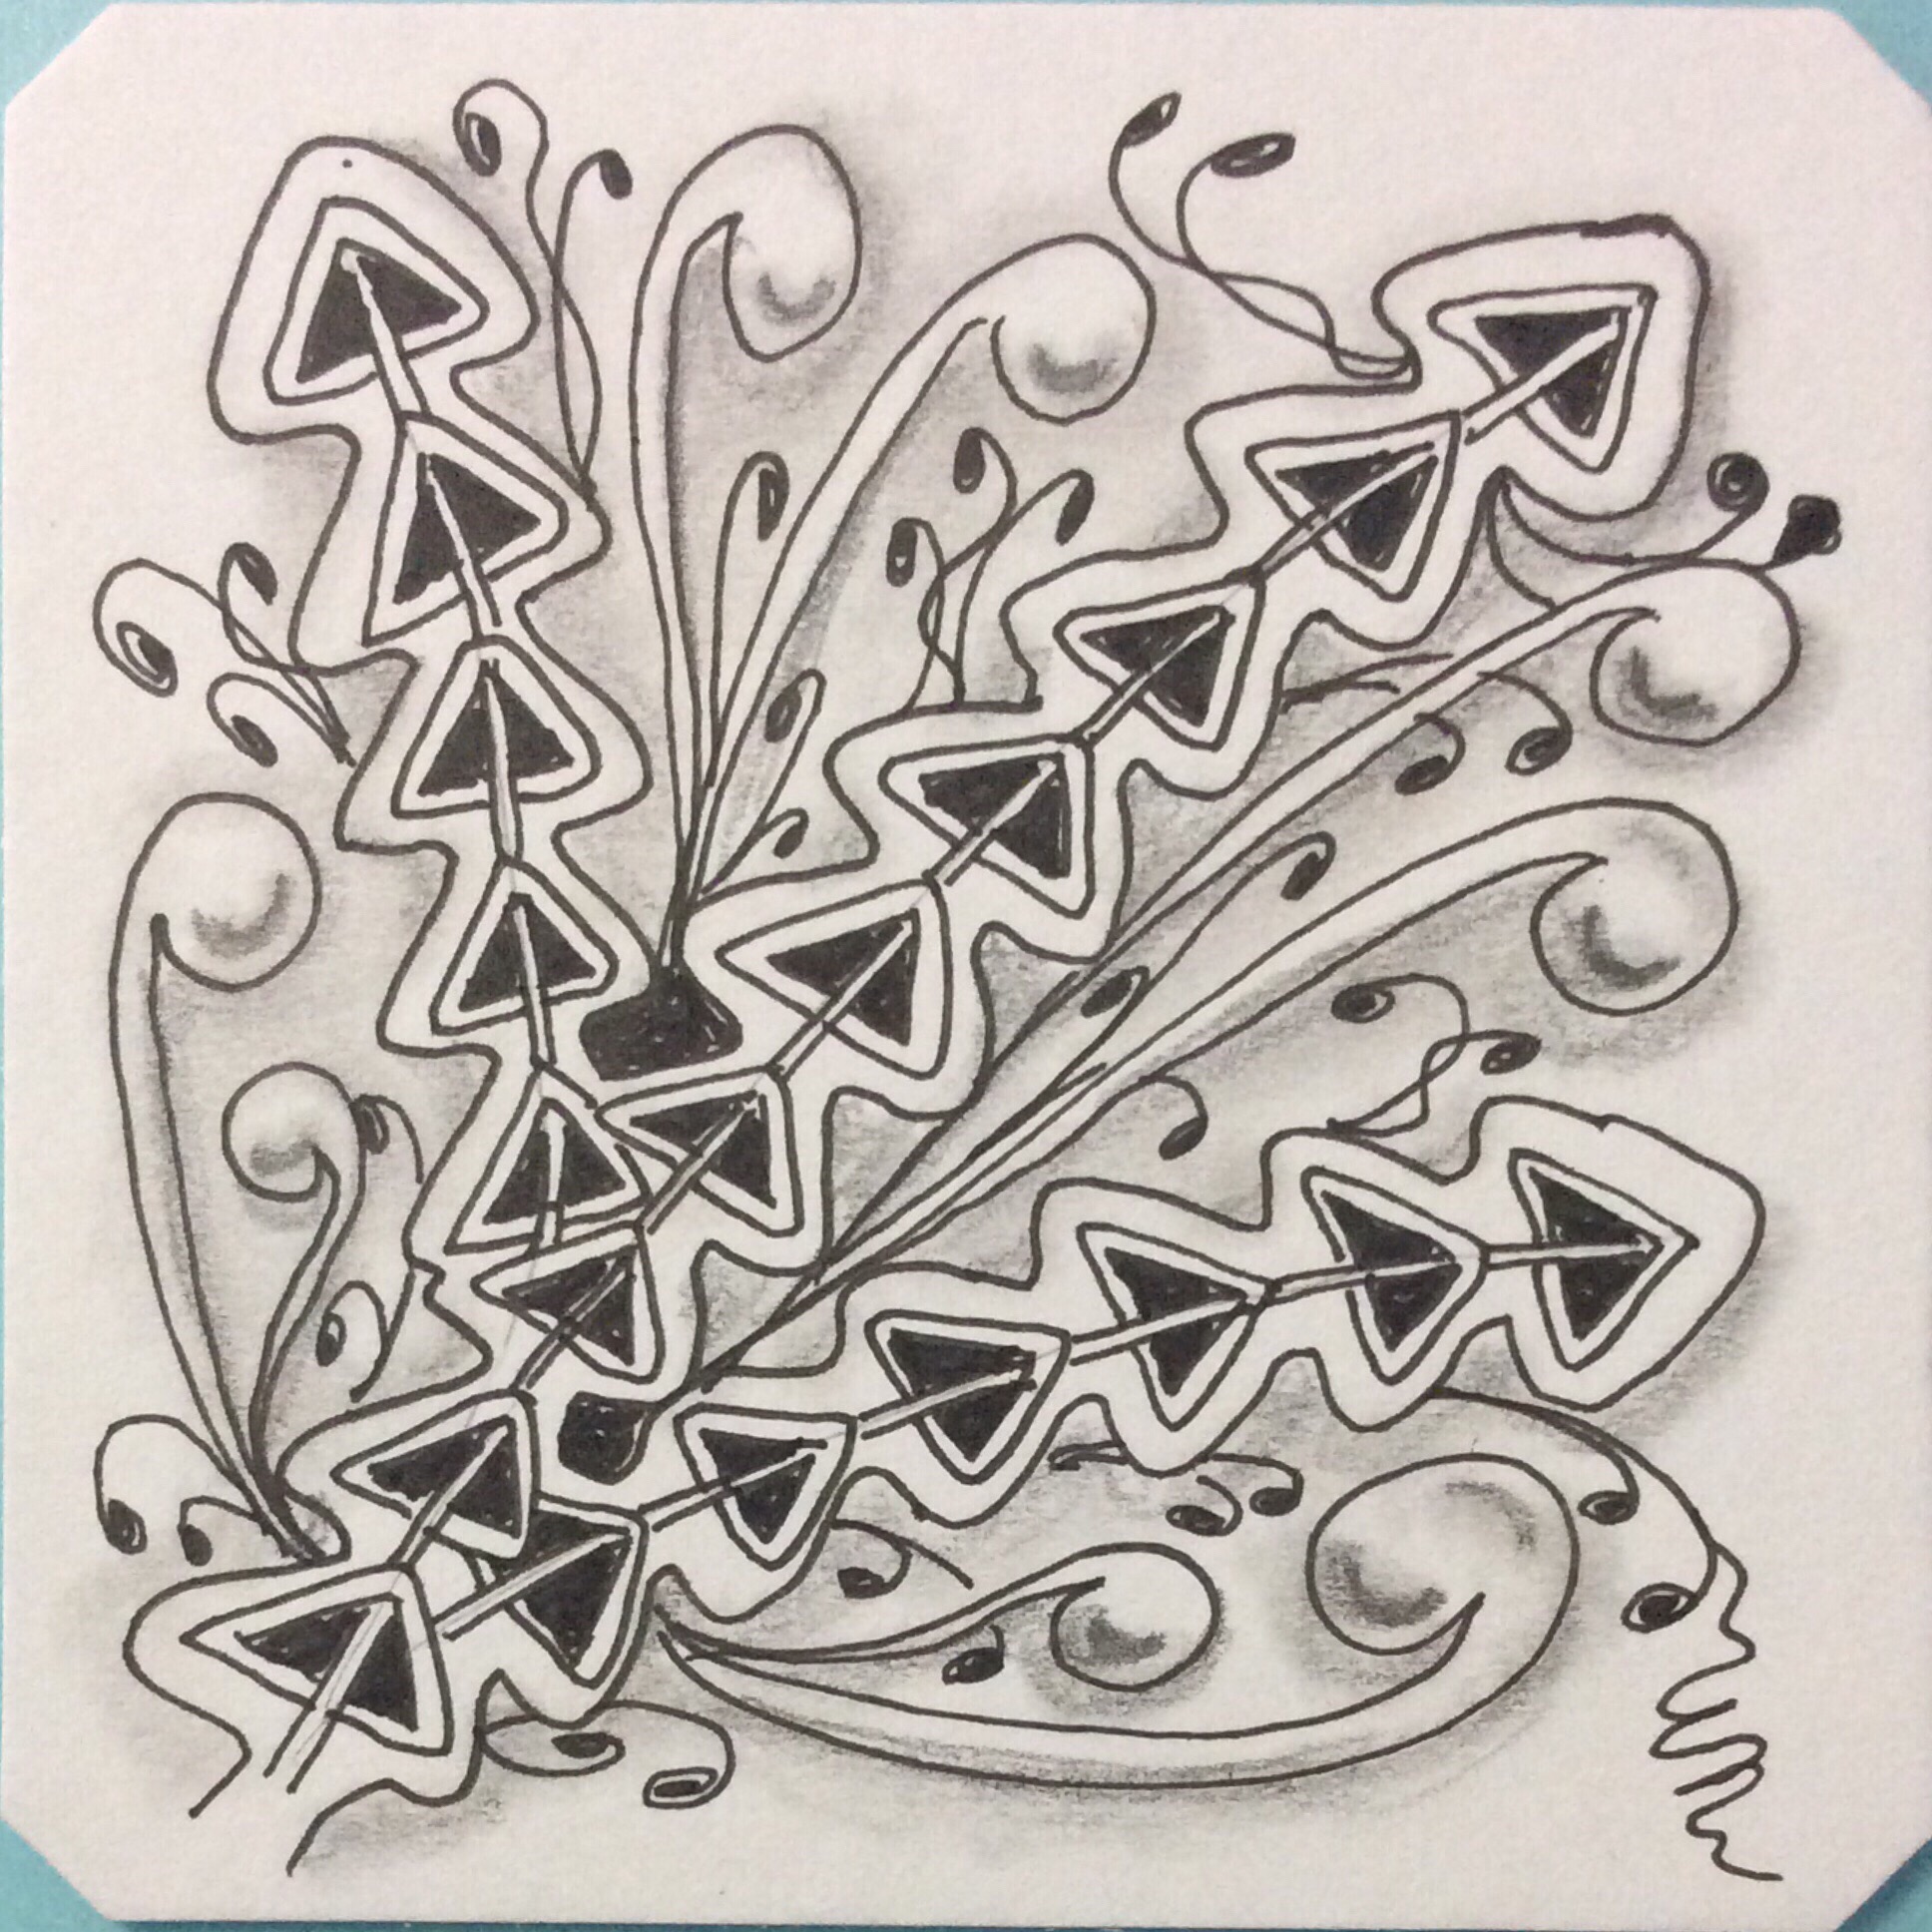
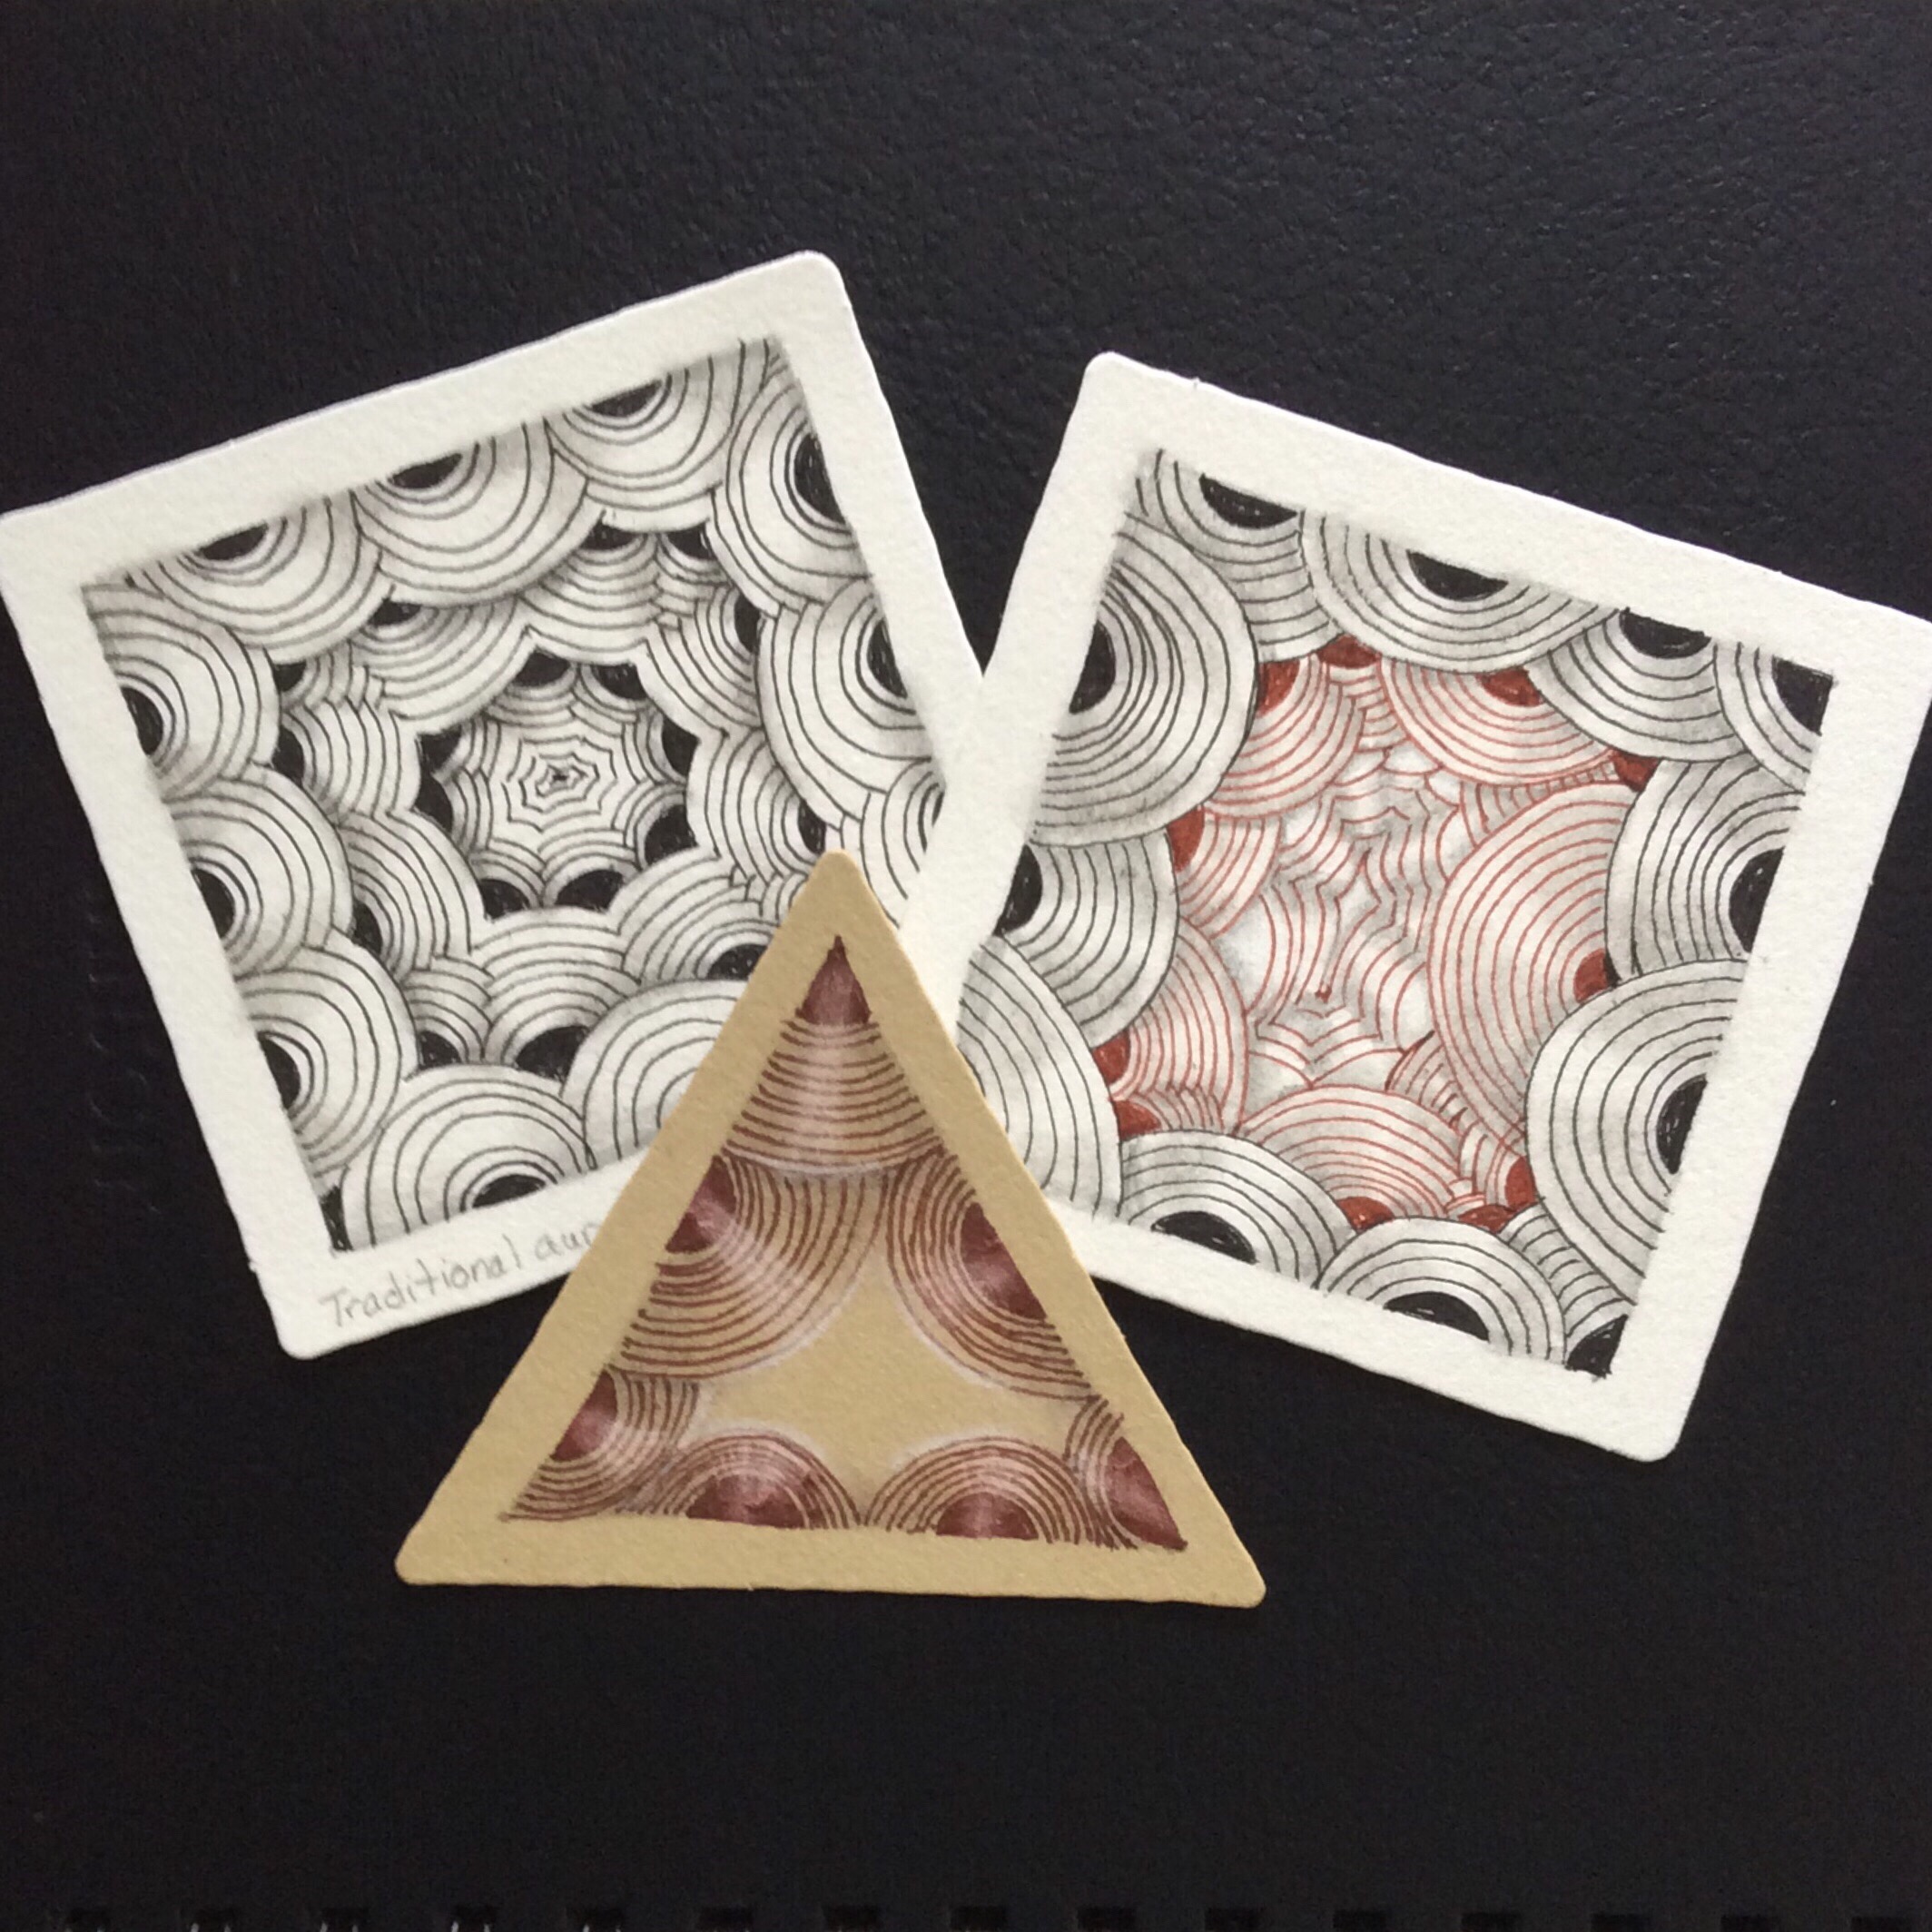
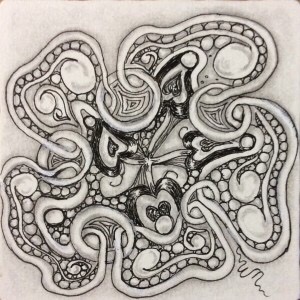
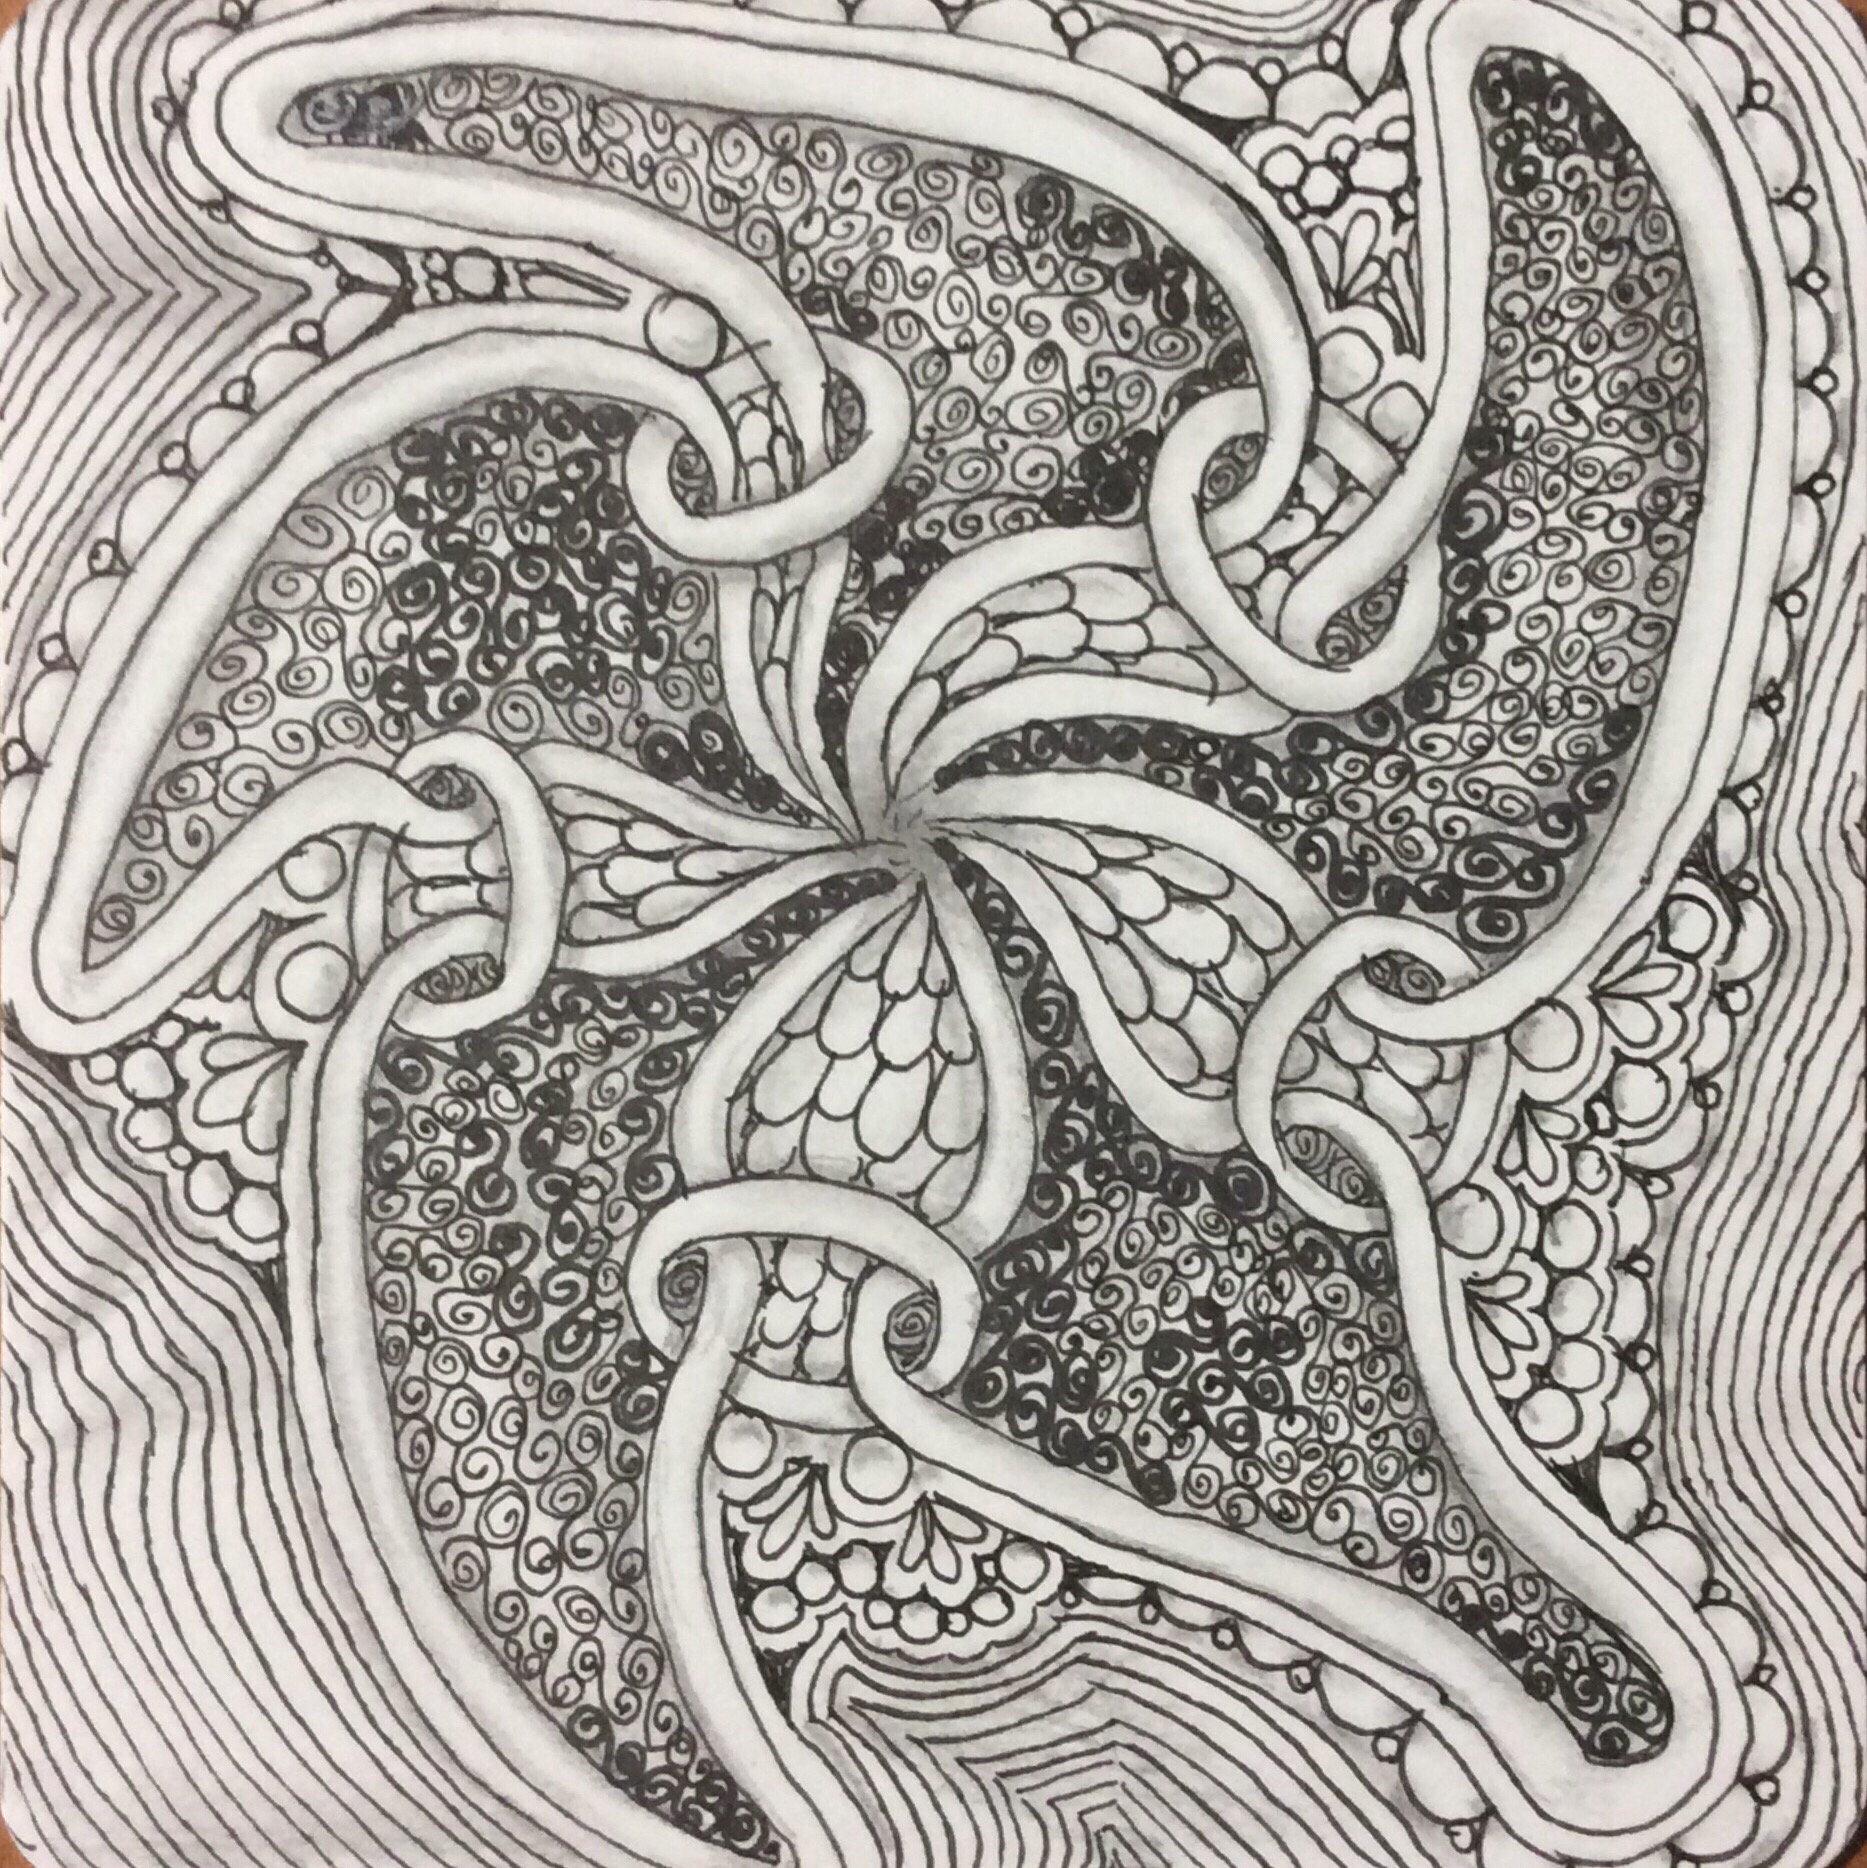
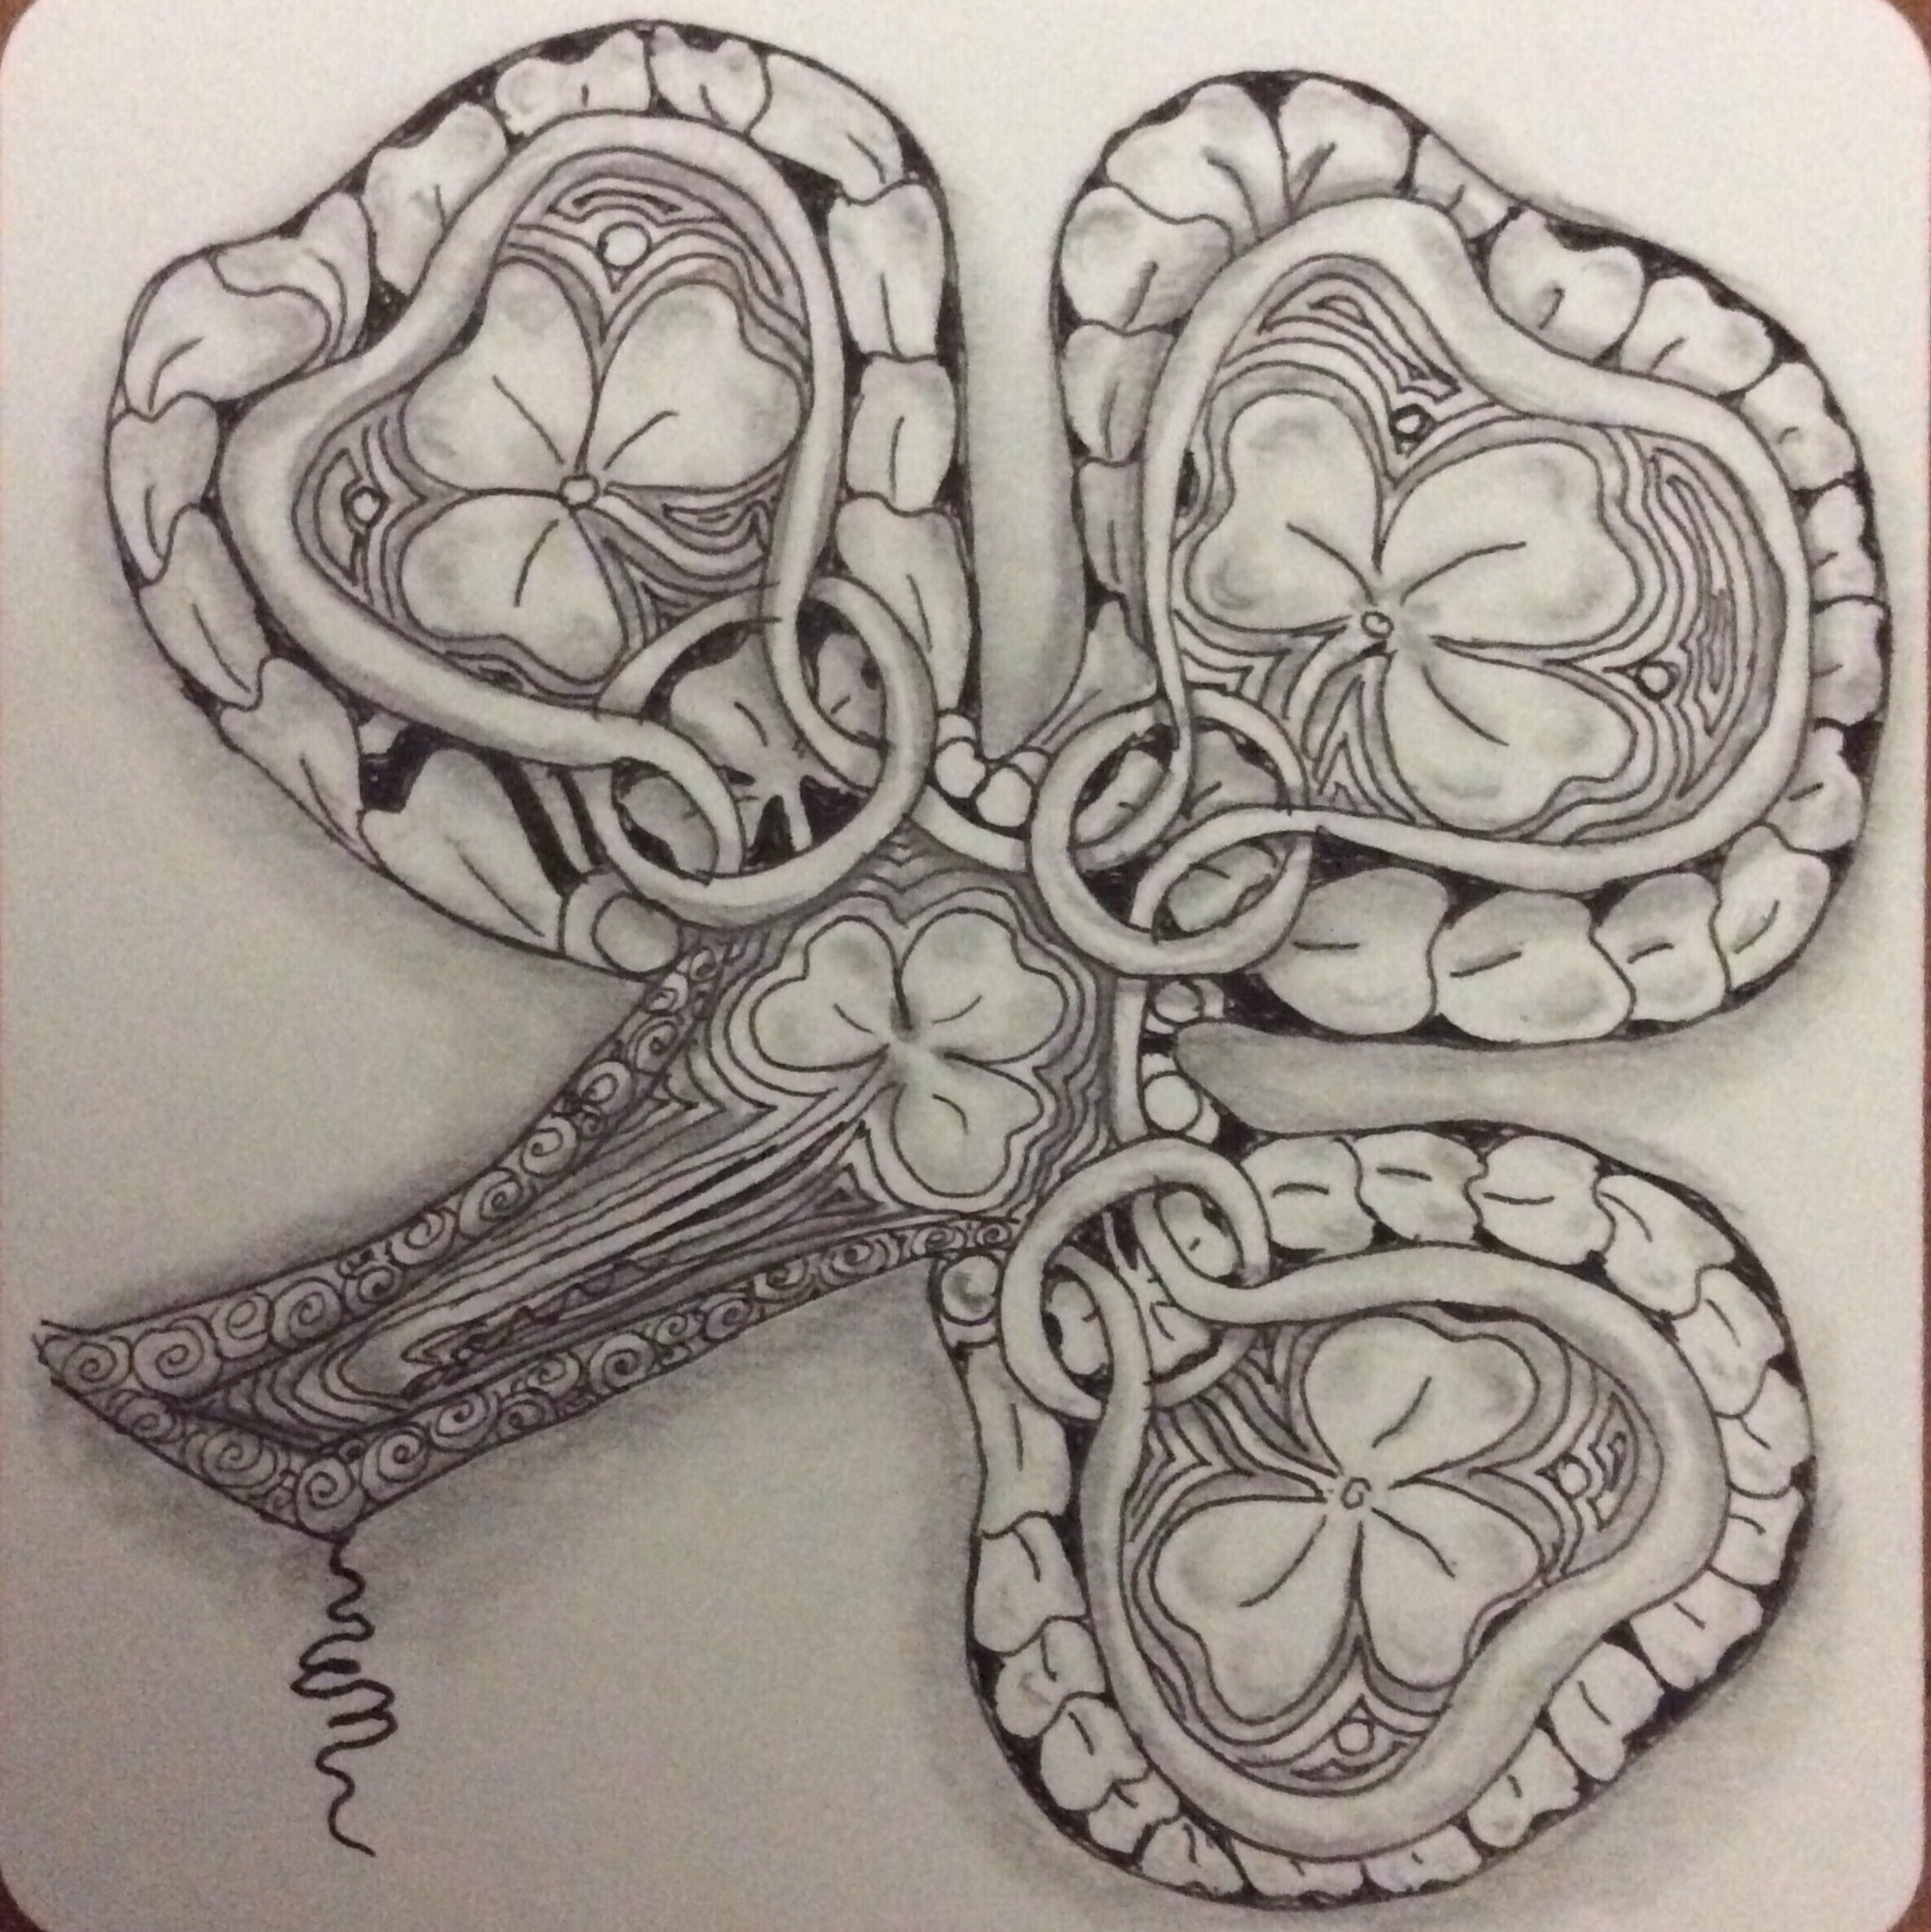
Working along on Lesson 6 in the Zentangle Primer, I drew two tiles of the next pattern, Rixty, and uploaded them to the Zentangle Mosaic app as I finished them. The first was a monotangle to which I decided to add color; the second featured Rixty, but had other tangles included. Rixty isn’t my favorite patterns, but I tried to do a good job just the same, even if I wasn’t concerned about drawing pretty tiles.
There is a major flaw in both of these tiles, although the compositions are barely affected. But I know the problem, and so do other tanglers who use Rixty.
The problem? The triangles are all upside down!
A few weeks ago, I was playing with the inverted triangles and morphing them into shamrocks to see if I could use them that way for a composition. The problem is that the inversion apparently “wrote over” the part of my brain that knew what Rixty is supposed to look like. Today, even though I reviewed the step-out and drew them correctly in a practice sketch, I turned them around again when I drew the tiles and never realized why they felt wrong while I was drawing them. The “wrongness” hit me as I was placing the tiles in my album.
Now, a very important tenet of the Zentangle philosophy is that there are no mistakes. If we perceive an error, we should view it as an opportunity to make something new or different. The idea is that there are no do-overs in life–not like a re-take for a TV show or movie–so that all we can do is make the most of what we did by accepting it, creating something new or different, and moving on. In some instances, there is a “fix” that can be applied to mask the problem area, but in most cases we need to use the inadvertent new pattern and use it in some way that lets us finish the work.
The “moving on” part doesn’t really relate to my new-styled Rixtys since I wasn’t even aware at the time that I had erred. The error neither stopped me in my tangling tracks nor affected the way I drew the rest of the tangle. In actuality, I created a tangleation of Rixty in the way I drew it. A tangleation is a change to an established pattern that adds something or changes part of the basic pattern concept. Despite the fact that it wasn’t my intent, I made a big change to the construct of Rixty. That others recognize it as Rixty regardless of the triangle orientation may add interest for tanglers who know the basic idea of Rixty. It could very well be that viewers think this was deliberate. And so, the error is not important, and maybe shouldn’t be considered an error at all.
Zentangle is such a forgiving and versatile art form. No wonder it is so relaxing! It is next to impossible to make a mistake!
Ten days ago, I talked about being so overwhelmed with so many new tangle patterns being developed and shared. I decided to spend time working on the basics of Zentangle and a more manageable number of patterns. I pulled out my handily shelved Zentangle Primer and started from the beginning, as though learning tangling for the first time. I have shared some of my Back to Basics work here and on the Zentangle Mosaic app, and I have temporarily removed myself from the world of Zentangle challenges (not that I take part in more than two or three!).
It has been an interesting week of tangling for me, as I draw for the lesson exercises, breaking things up with an occasional meditation with greater complexity. But I continue with the Basics to get my tangling back on track.
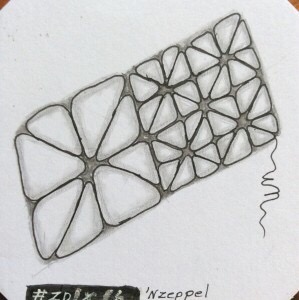
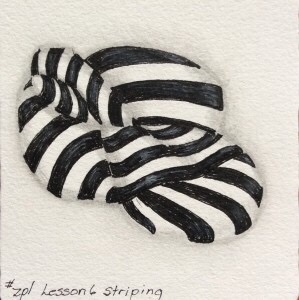
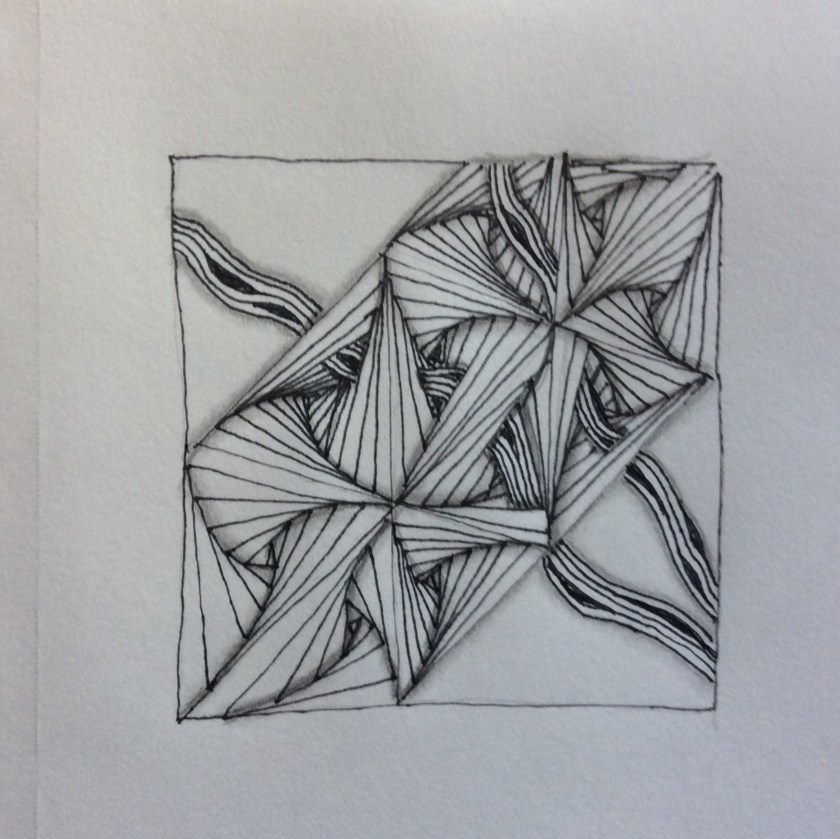
‘Nzeppel practiceStriping practiceCrescent Moon exercise
The ‘Nzeppel I shared previously, as I got it almost perfect with input from friends on Mosaic. The Striping exercise is the result of a “teaching session” in the Primer. The Crescent Moon tile is the result of an exercise challenging the tangler to shade Crescent Moon in several different ways. Interestingly, today a T3 (Tangles, Tips, &a Techniques) video was posted on the Mosaic app showing three specific things that could be done with Crescent Moon to make it look different on each tile. A lot was covered that I had recently completed in my tile, but there was a lot more information that kept me interested and following along. The resulting tiles, each containing only the single pattern, made me realize that I don’t need all those new tangles that are constantly showing up to produce something special. Three ways to tangle and enhance Crescent Moon
Today I practiced Crescent Moon as monotangles (one pattern tiles) three ways. I started practicing a tangle I am not especially fond of–Rixty–but am not ready to share where that pattern is taking me. It happens to be the next pattern introduced in Lesson 6 of the Primer. It’s a long chapter and will take some time to complete, even though none of the patterns are completely new to me. After all, this is not my first time through the book. Each time I go through it or check a step-out or seek inspiration, I learn something new or see the pattern from a different perspective.
There is so much to learn from practicing the art of Zentangle, not the least of which is meditation and relaxation. I hope to be tanglingin the physical company of others soon, as I will be attending a certification seminar in late April (2017). Afterwards, I hope to bring Zentangle, its methods, and its philosophy to people here on Sint Maarten who would find it beneficial to their health and outlook.
If you are in or near Sint Maarten, join me for a tangling session!
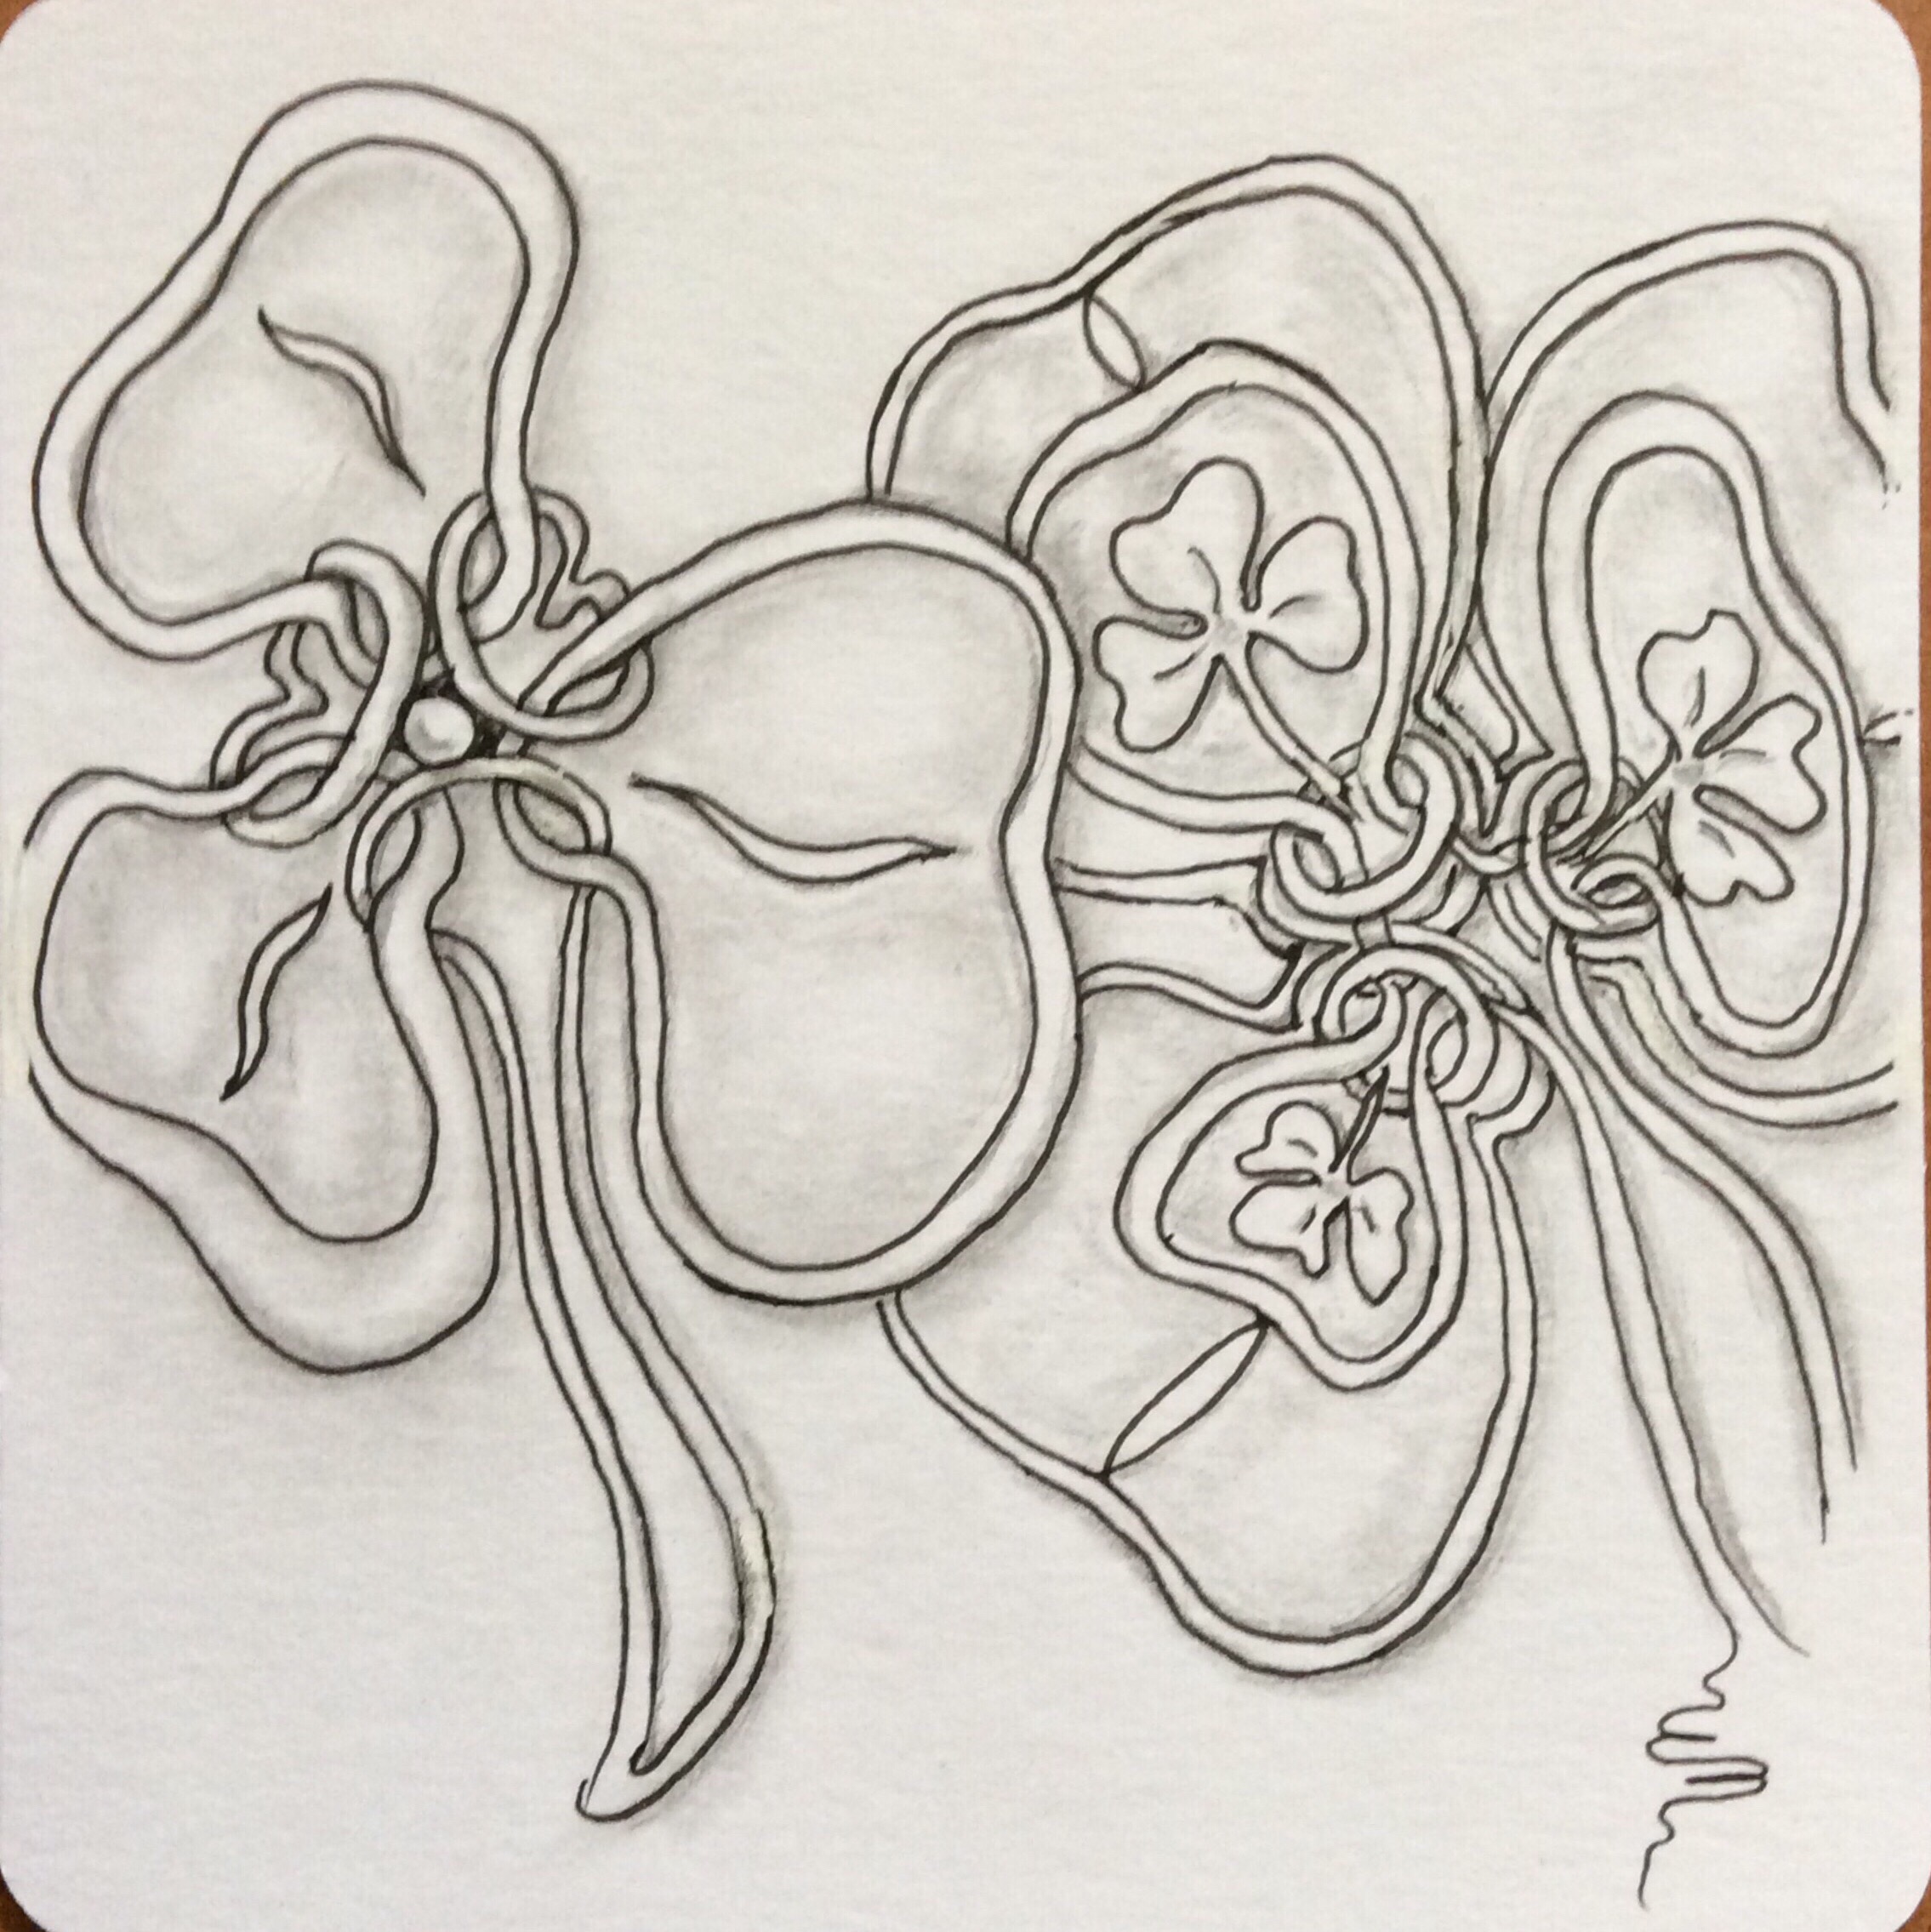
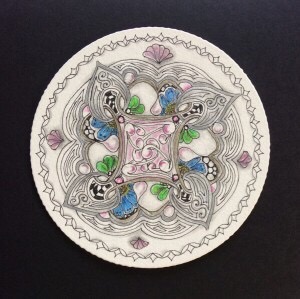
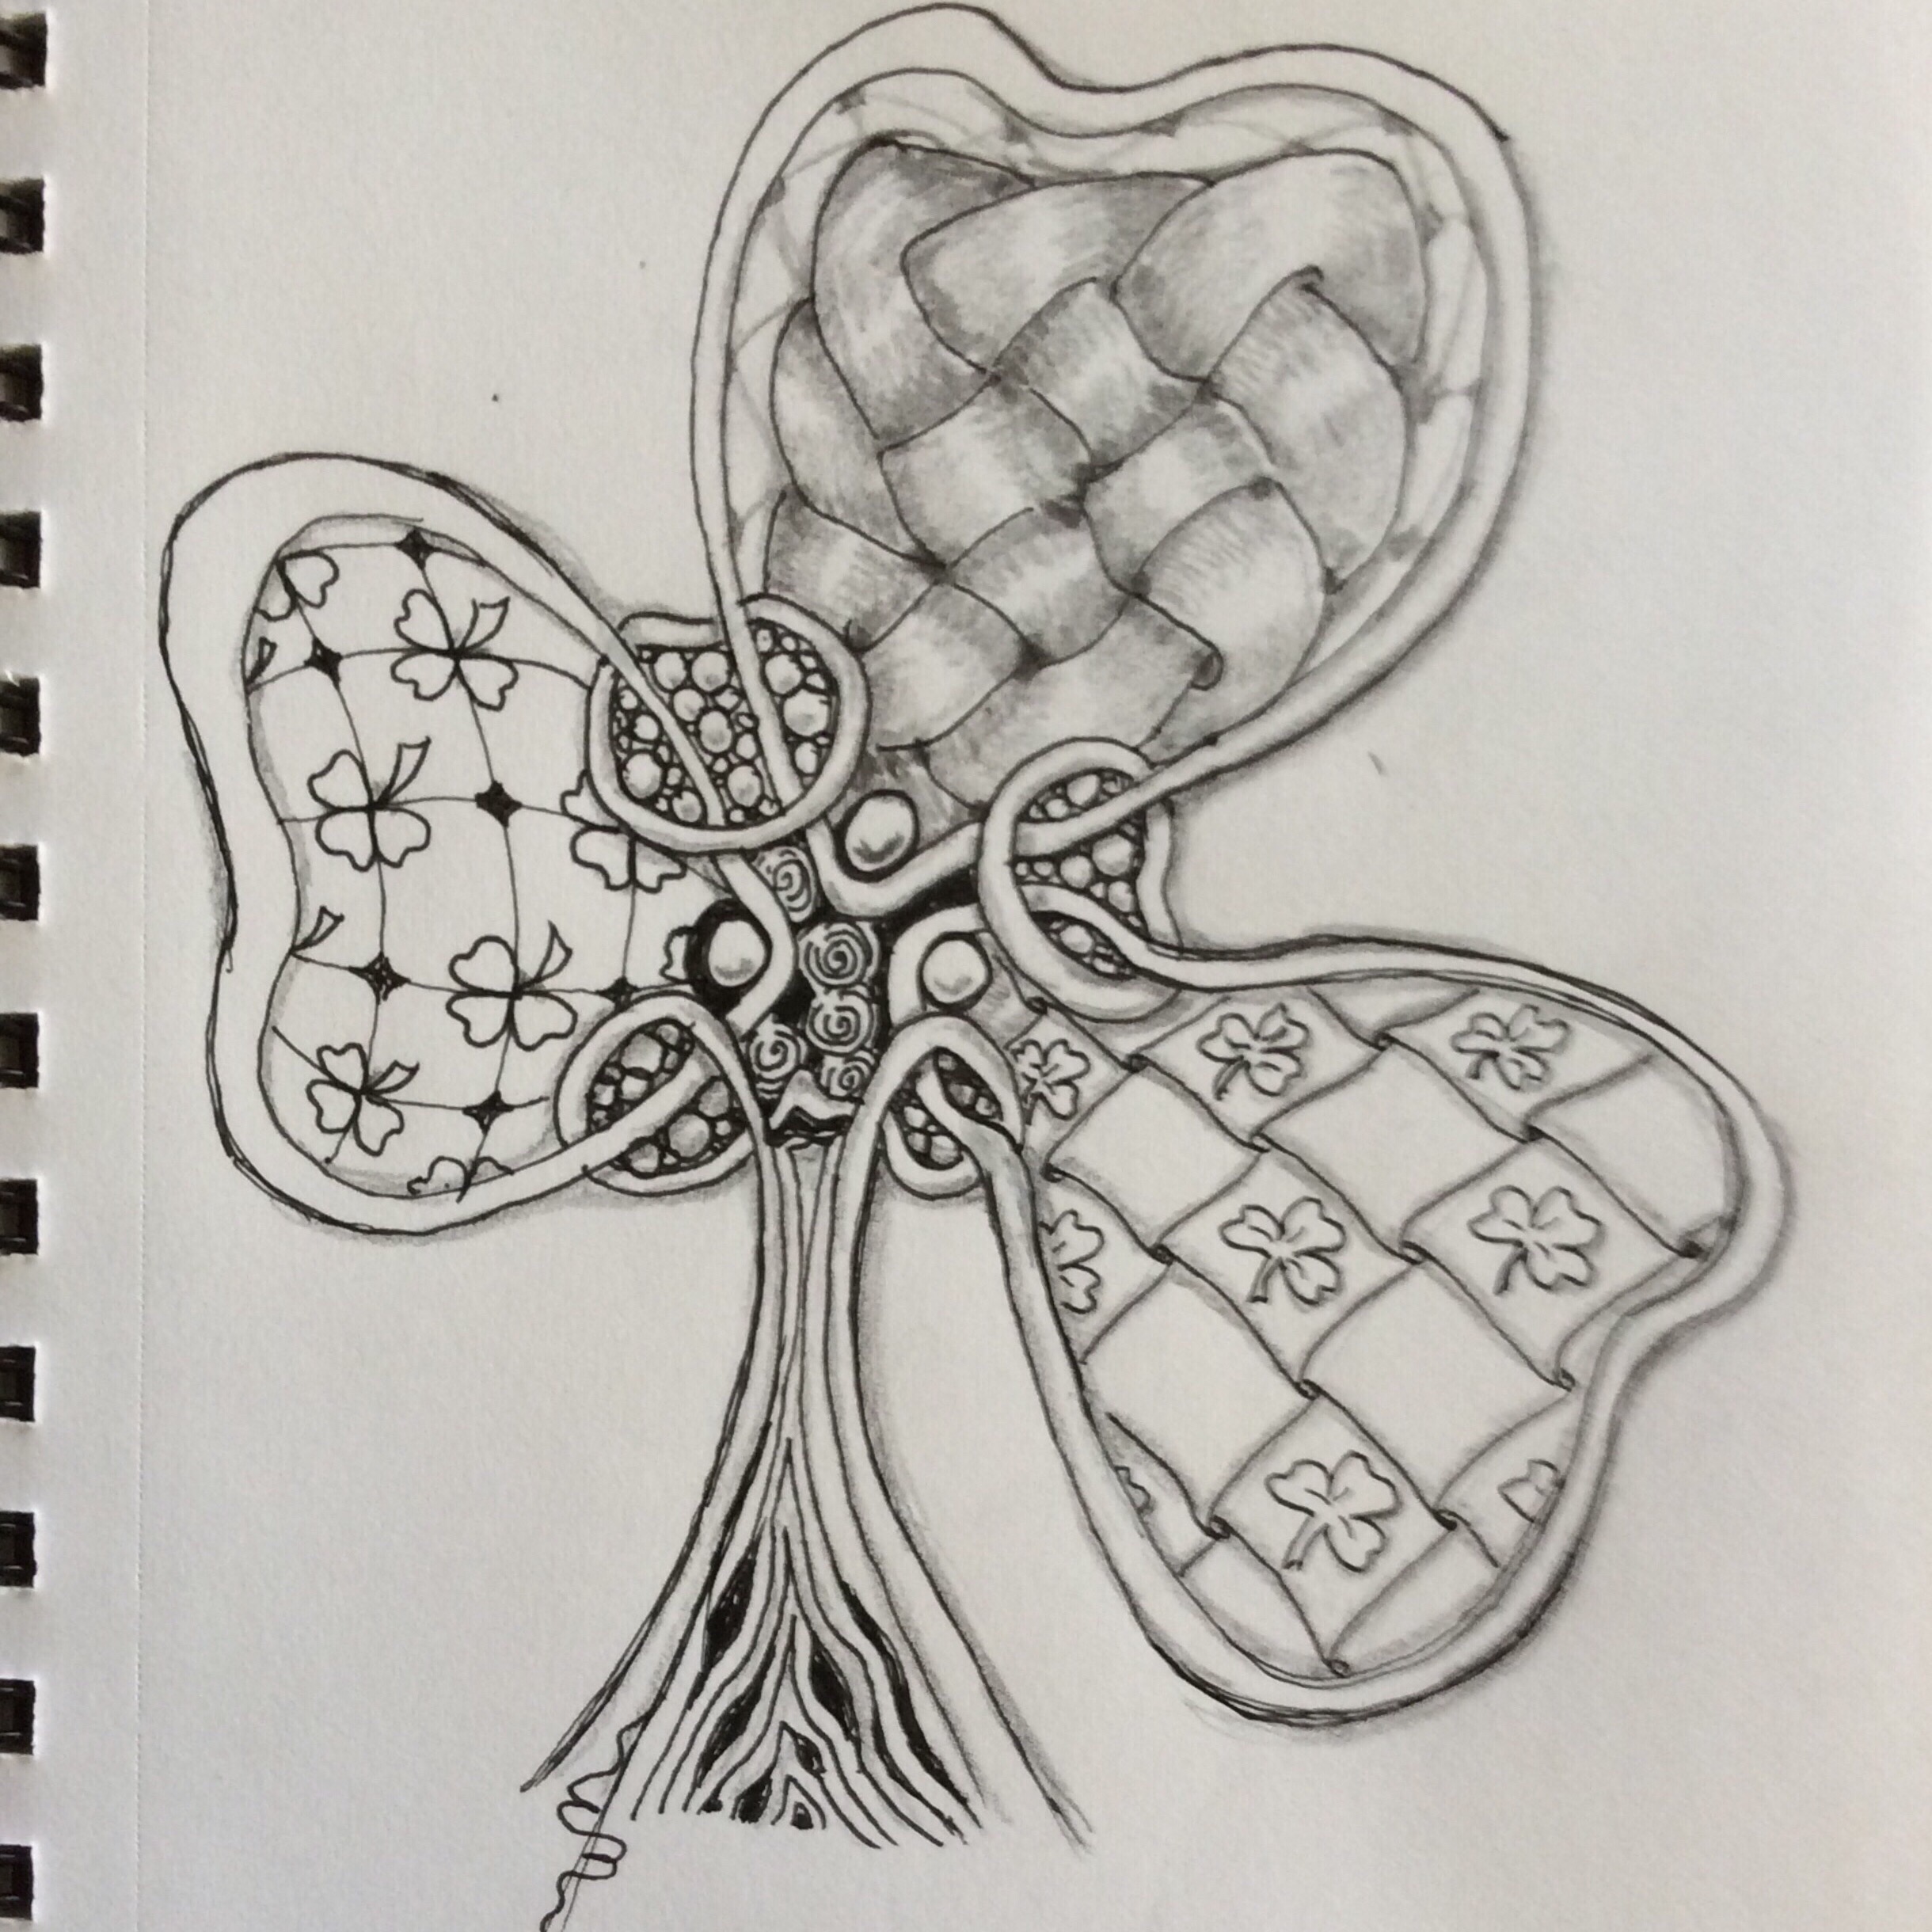
Yesterday was a big surprise. My morning email brought a request from Zentangle.com to use one of my tiles for part of a Mosaic App T3 (Tangles, Tips, & Techniques) post for St. Patrick’s Day. Shocked out of my mind, I agreed, of course, thanking them for the honor in my reply.
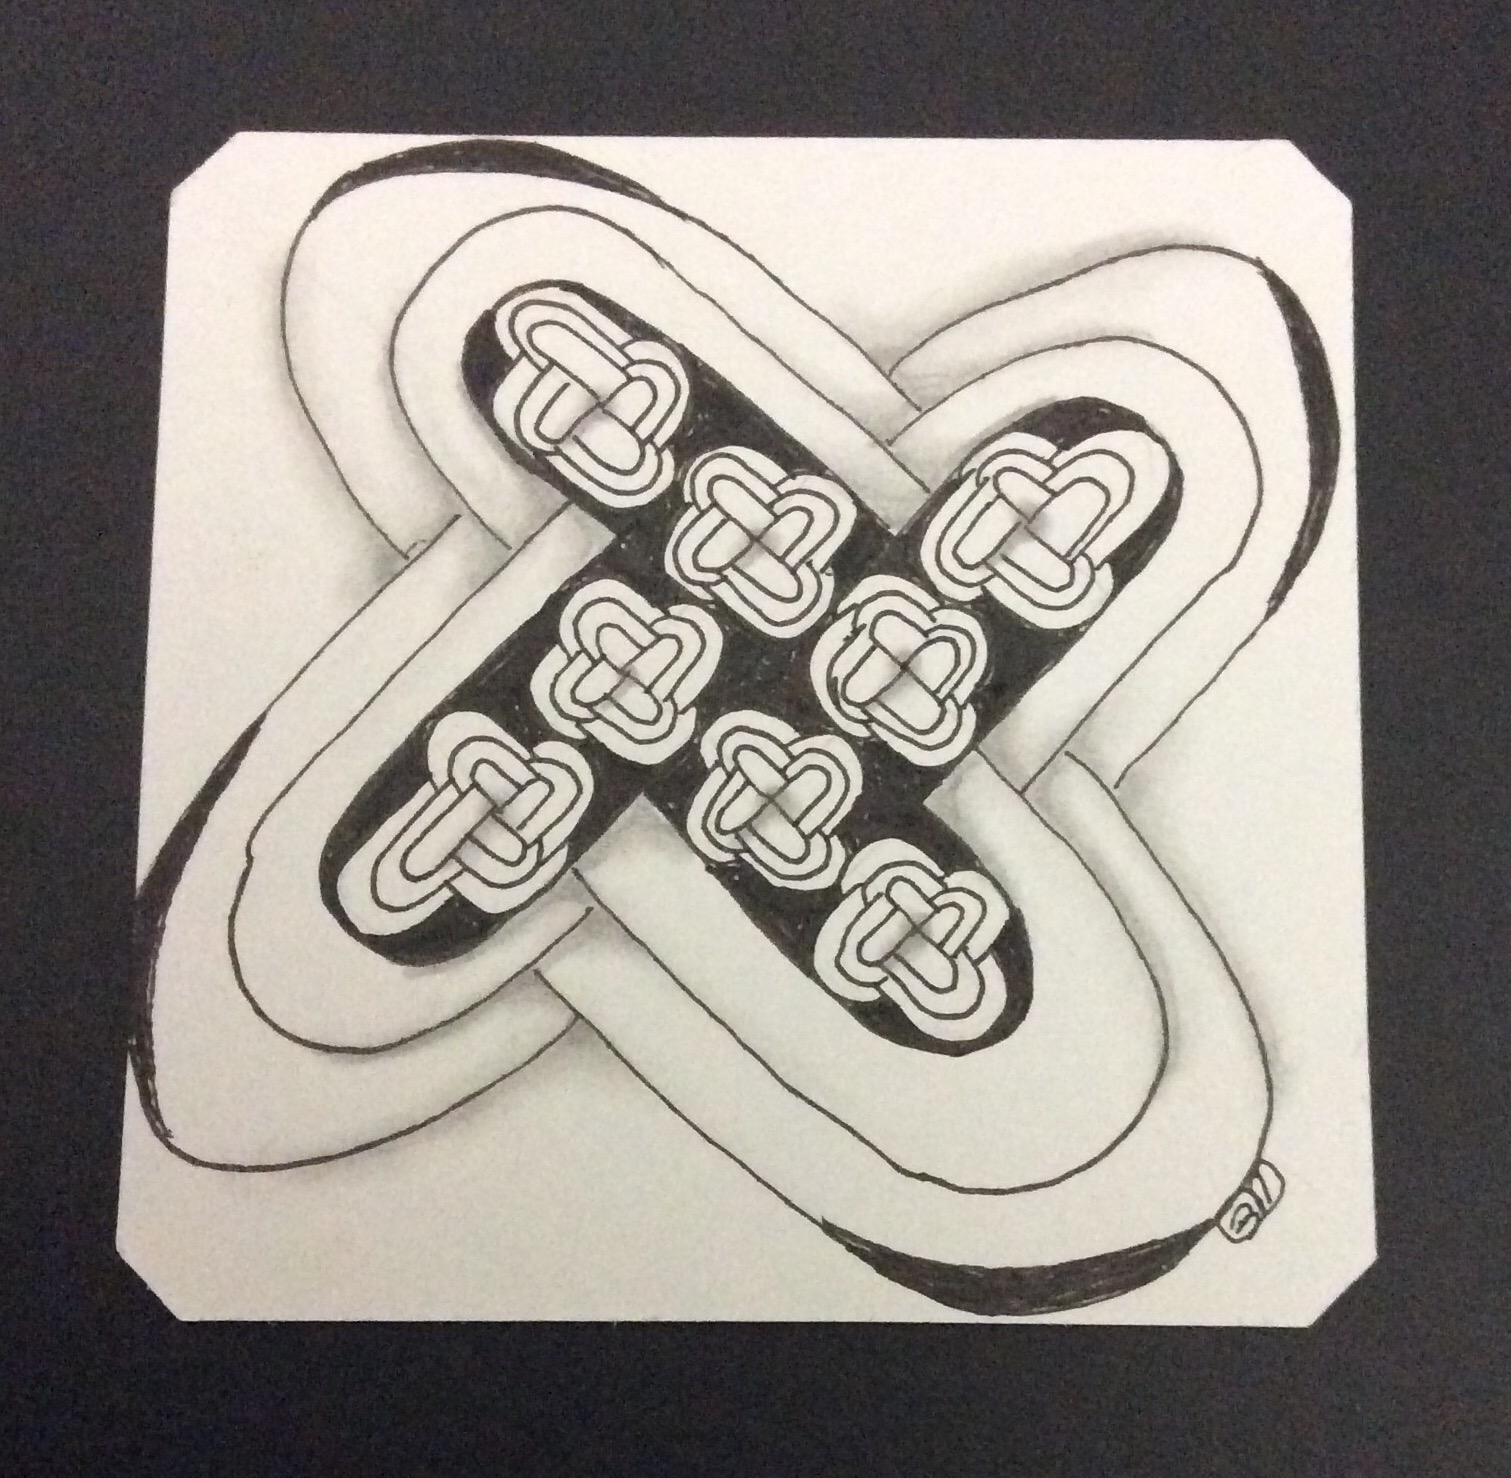
A St. Patrick’s Day Shamrock Way Bop tile.
Nothing fancy or exciting, I know. It was the idea that was being used, although maybe the shamrock doing a jig got someone smiling.
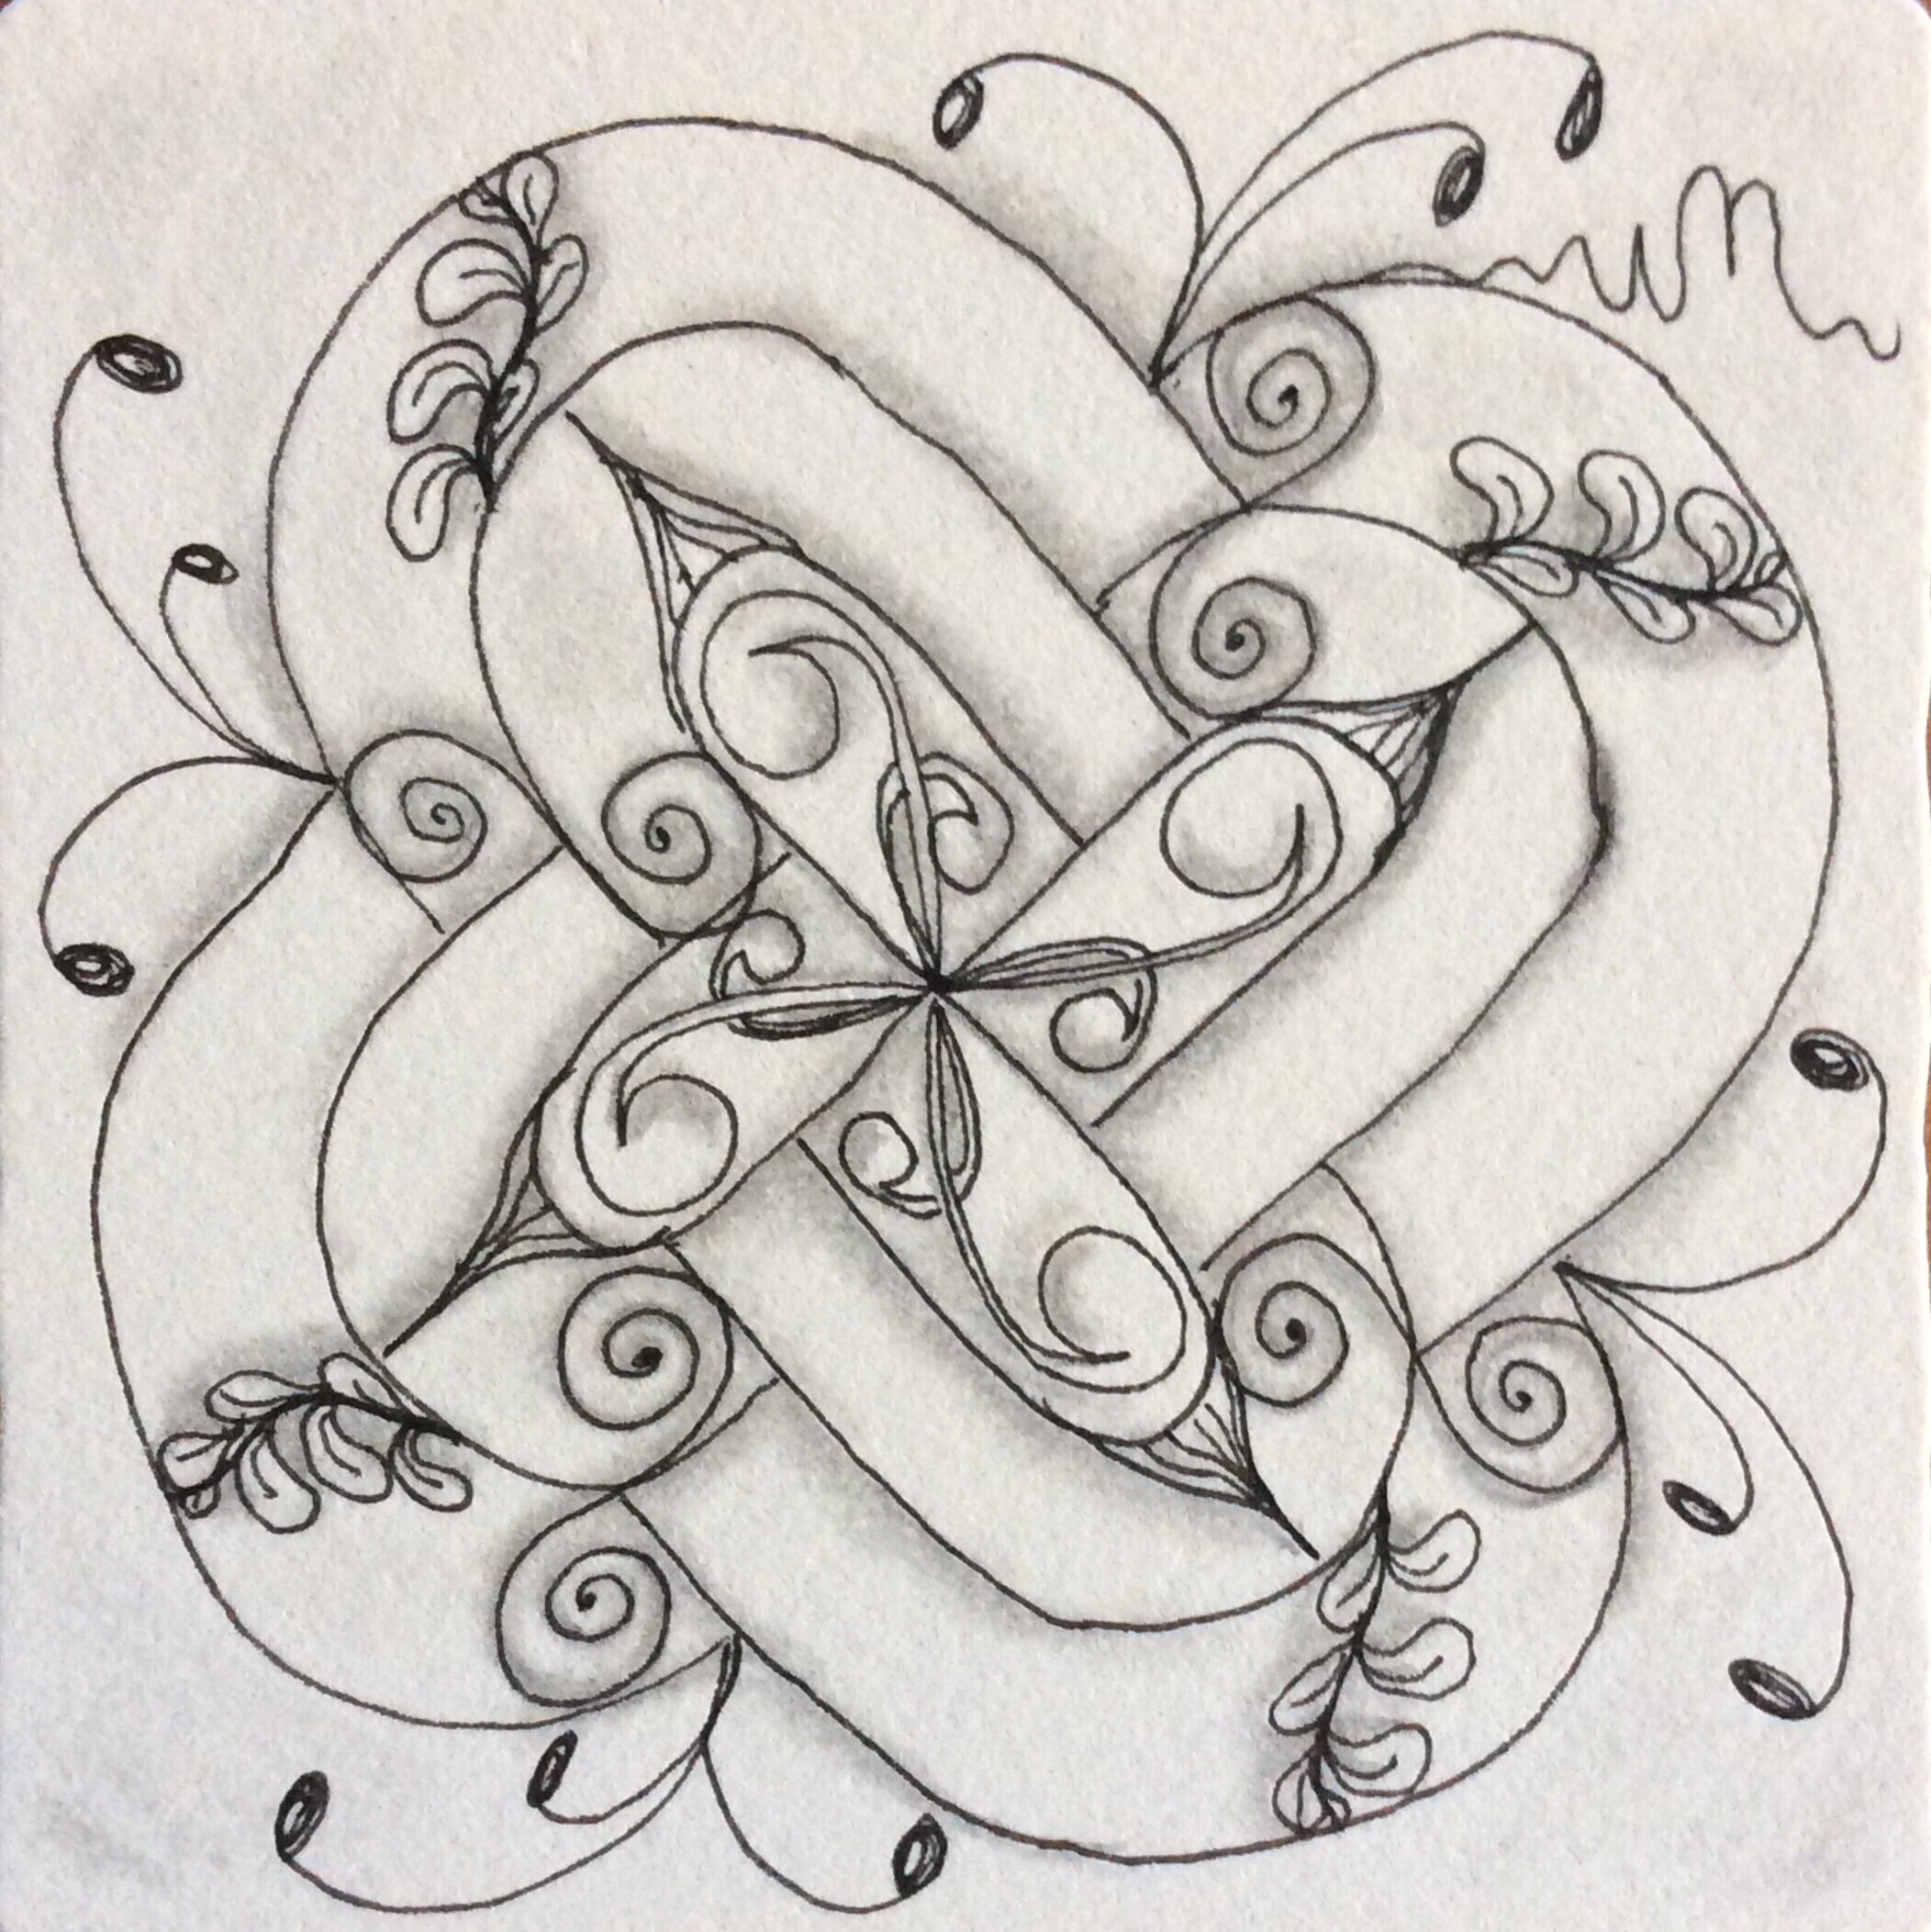
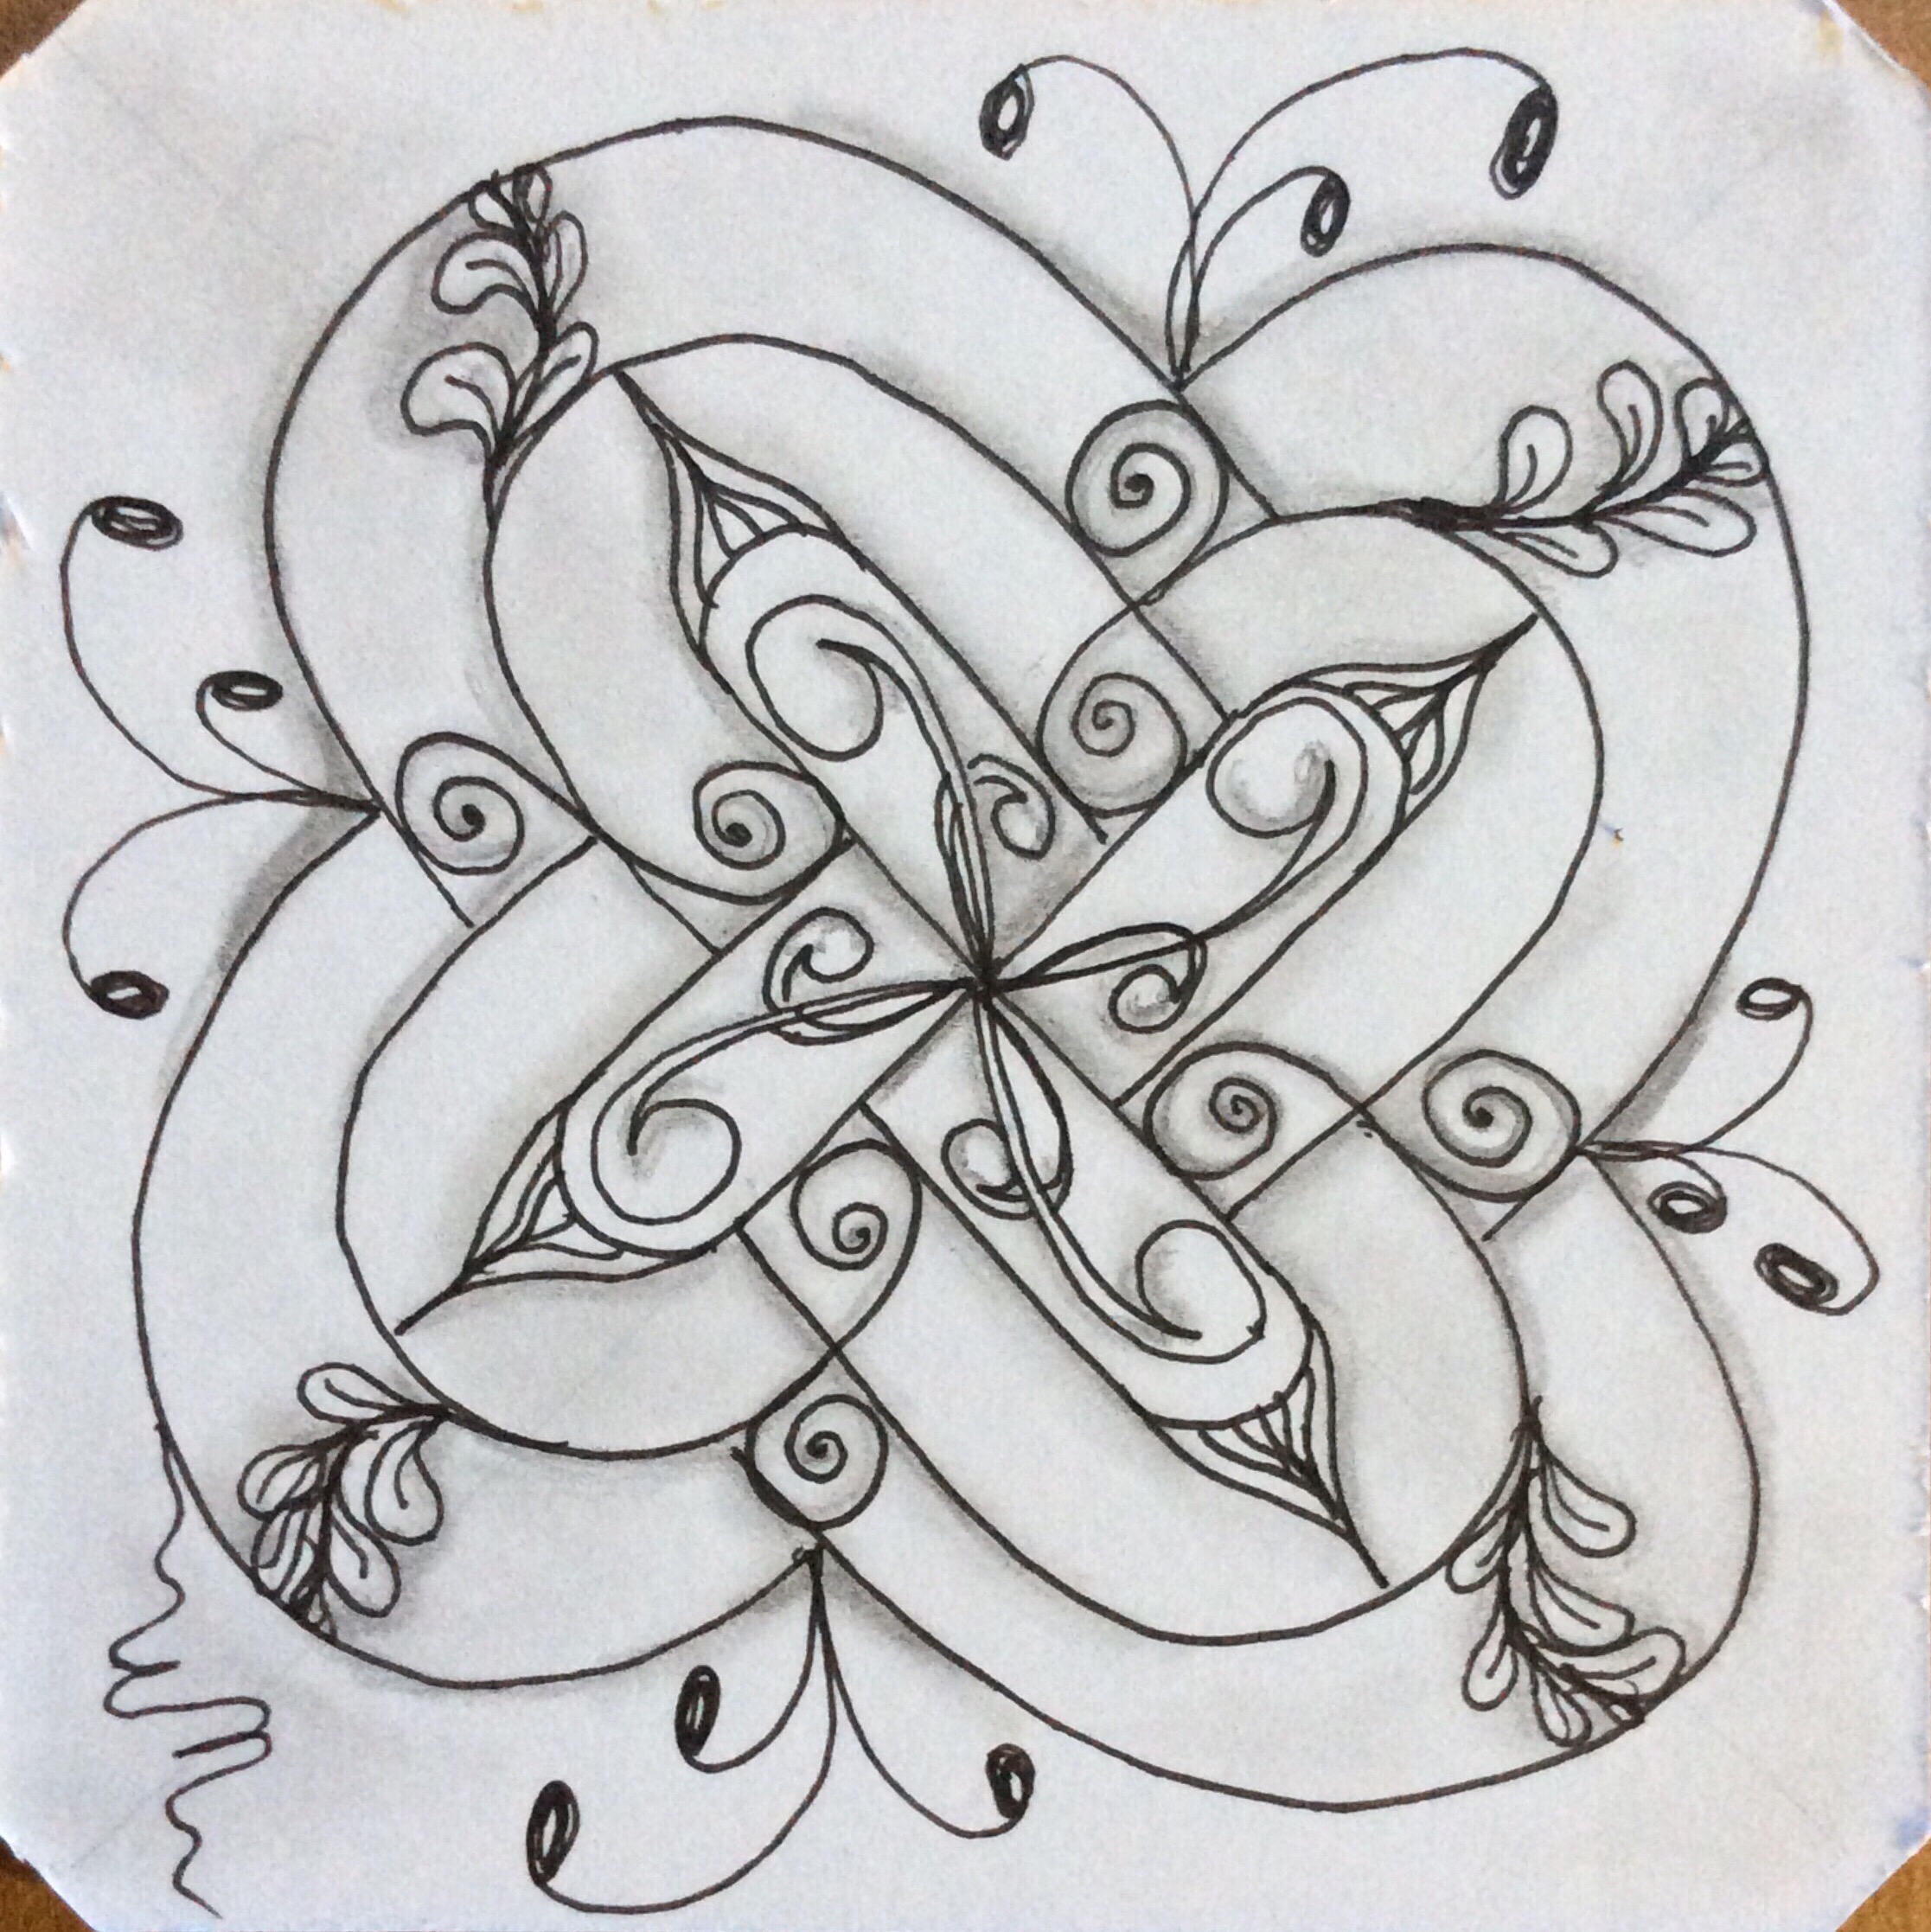
I love the tangle called Way Bop, and waited somewhat impatiently for months for a step-out to come out. I tried to mimic Way Bops as drawn by artists and tanglers for the Zentangle Mosaic app and for challenges all over the Internet. I came close, but the procedure I used was convoluted and the results were far from satisfying. I was certain there was an easier way to draw Way Bop, and that I would have to wait until the step-out was released.
About a month ago, Zentangle released the step-out for Way Bop (link to my post with step-outs) along with another step-out of a heart-shaped variation. I must admit that I was excited beyond words. I started drawing nice, conservative Way Bops, but realized I have a long way to go before I can draw ones that look like the fancy ones appearing all over tangling blogs and in Mosaic. So I started fooling around. Here is one of my favorites, called Anger Management. Anger Management And another that was inspired by a hibiscus outside of my patio door. Hibiscus — sort of
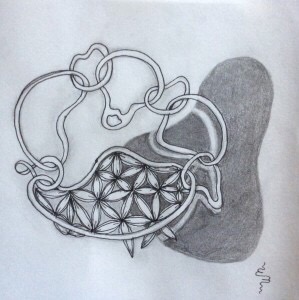
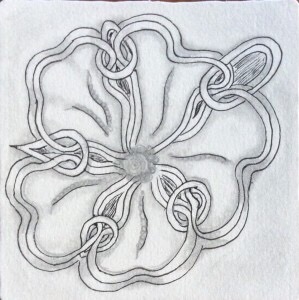
Way Bop is an amazingly versatile tangle that looks best when it is used as a structure for filling in with other tangles and “fragments.” But it is a flexible enough pattern to be morphed into all sorts of fun and modernistic shapes.
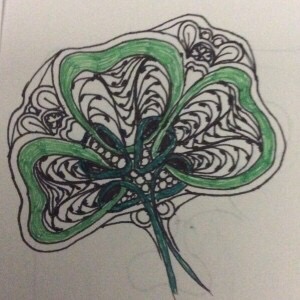
After tangling a heart-shaped Way Bop for the Valentangle 2017 challenge on Facebook, I figured other shapes could be made from the pattern, too. So last week I started fooling around with shamrock shapes. Here are some examples–nothing fancy or beautiful, but they definitely are shamrock shapes filled in with other tangles or shapes.
If you can’t tell, I love Way Bop! If you need the original step-out mentioned above, click on the link in the second paragraph. It takes you to the post that contains both the regular and the heart-shaped variation step-outs.
Where can Way Bop take your tangling? Anywhere you want it to go, of course!
Although I had tons of official Zentangle tiles purchased from Zentangle.com, for months most of my Zentangle work was done on comparatively inexpensive 3.5-inch square tiles from Peter Pauper Press that I purchased from Amazon. I was urged to use more of the “official” tiles by other tanglers on the Zentangle Mosaic app. The reasons given ranged from “you’re worth it!” to “it’s easier to work on the Zentangle tiles,” with lots of other reasons in between.
For weeks now, I have been doing more and more tangling on the official tiles and less and less on what I now refer to as practice tiles. More and more often, I have been using the practice tiles to try out new ideas or newly learned patterns. All my meditative tangling and mastered patterns are now done on the tiles purchased from the Zentangle site.
What’s the difference? There are a lot of differences, starting with the quality of the paper and how it feels to tangle on the different surfaces.
Zentangle (more expensive) tile was used for this version.PPP (less expensive) tile was used for this version.
Let me start with the price and why I did most of my work on the Peter Pauper Press tiles. The “official” Zentangle tiles cost $29 for 55 tiles from the Zentangle web site, plus postage. These can also be purchased from CZTs (Certified Zentangle Teachers). The price on Amazon for the PPP tiles is currently $5.53 for 75. Even if I didn’t have postage-free Amazon Prime benefits, the PPP tiles have a serious price advantage. The official tiles work out to about 53 cents a piece while the PPP tiles come out to less than 7.5 cents each. I get 7 of the less expensive tiles for the price of a single Zentangle tile. That’s quite a price difference! Just starting out, I felt this was a better option. I was wrong, by the way, and I will discuss why below.
Recently, in an e-book on tangling on black tiles, the author suggested that the cheaper tiles are fine for work on white tiles, suggesting that they are interchangeable. But there are a lot of reasons why this is not quite true.
As with most artist supplies, quality matters. The less expensive tiles are made from wood pulp and “post consumer products.” They are very smooth and lack absorbency, so that graphite sits on the surface while ink takes just long enough to dry that a fast tangler can smear the ink easily. Because the graphite has nothing to hold it, it is easy to accidentally rub the graphite over the surface where it is not wanted. It also takes more pressure on the pencil to leave a darker graphite line or shading. That makes the graphite line more difficult to blend out to hide a line while increasing the likelihood of smearing or “stamping” graphite. Since erasers are not used in Zentangle, smeared graphite can affect the finished work in surprising and often undesired ways.
The more expensive, official tiles are 100% cotton fibers. Aside from the luxurious “feel” of the cotton fiber tiles, the surface is textured and holds graphite well, much like good quality drawing paper. That means a lighter application of graphite can be made, minimizing the obviousness of a drawn line. The texture also helps control how far out blended graphite goes. The cotton tile is also absorbent, so ink appears to dry faster, minimizing accidental ink smearing–except on larger and purposely black areas, but that’s for another discussion. The textured surface also adds a slight “drag” to the pen tip, forcing a lighter hand during drawing. That’s actually a good thing because easing the grip helps prevent hand cramping and actually gives more control over the width or heaviness of a drawn line.
If color is to be added to the tangle, the cotton tiles have enough of a tooth to grab color from color pencils and markers, while the less expensive tiles require more work to achieve desired color effects. Color appears more vibrant on these tiles, too.
If watercolor is used to marble the tiles before drawing or color in sections after drawing, the less expensive tiles buckle and become deformed without either prior stretching or weighting down the paper to flatten the work afterwards. The cotton tiles are of watercolor paper weight, and basically return to the original flatness after drying–without the need for stretching and flattening. While the texture of the less expensive tiles actually changes after water and watercolor application, the cotton tile remains pretty much as it started.
Local weather and humidity affect the paper used to create. Here in Sint Maarten, in a very humid tropical climate, that makes a big difference in the way the paper behaves even before I start working. The cotton tiles are always flat when I take them out. The PPP tiles tend to have a slight curl to them, even though they are stored the same way and are weighted down between tangling sessions.
When I started, I thought the paper quality would make little difference to the finished work. I could not have been more wrong! Aside from the differences noted above, I find that tangling is much more enjoyable on the more expensive cotton tiles. The tiny bit of drag to my pen helps me loosen up and concentrate on the effect I want to create. Tangling on the smoother surface sometimes causes skips in my lines or patterns when I use a light hand. It is also more difficult to control the width or heaviness of the drawn line without switching to a pen with a different size nib or tip.
Shading makes such a difference in the overall result of the drawn patterns. The tooth of the cotton tiles allows greater control of blending out graphite with a blending stump or tortillion. The differences in blending are apparent when comparing the two tiles above. The cotton tile’s shading is softer, without the obviousness of where the graphite was laid down. On the less expensive tile, I needed a heavier hand to lay down the graphite, making the pencil lines obvious and less easy to blend out.
It may be hard to tell, but it was more difficult to maintain control over curves and lines drawn in ink on the PPP tile. The surface is so smooth that the pen tip has a tendency to go out farther than intended. The smoothness keeps the ink from being readily absorbed by the paper, increasing the likeliness that I will smear the ink, and actually causes me to press harder on the smooth surface. The cotton tile almost pulls the ink from the pen, so that less pressure needed to be applied and I was better able to control the ink flow. Overall, I think I save money on Micron pens because less ink is needed to obtain the same effect as on the smooth paper.
One last thing about the textured paper–it has a definite grain to it. It is easier to see the up/down and right/left of the tile when I am tangling. That helps to keep my lines straighter and grids more even. The complete lack of grain on the less expensive tiles makes me completely reliant on my eyes for straight lines and even distance. Because one works so close to the surface when creating on a small surface, it is easy for the eye to get fooled when drawing straight lines and grids. The grain helps me, anyway. Perhaps it is less important for someone else.
Tangling on the cheaper tiles caused me to develop some bad habits, like tightening up on my pen and pressing too hard on my graphite pencil. I am still “un-learning” some of those habits as I tangle more and more on official Zentangle tiles and less and less on the cheaper tiles or even my sketchbook.
The overall effects of my drawing on the cotton paper seems more finished and less amateurish. That may be psycological, but between the rich creamy color of the official tile, it’s texture, and the luxurious feel of the paper, I like my drawing results better.
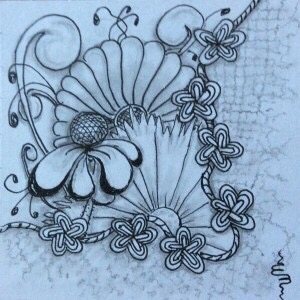
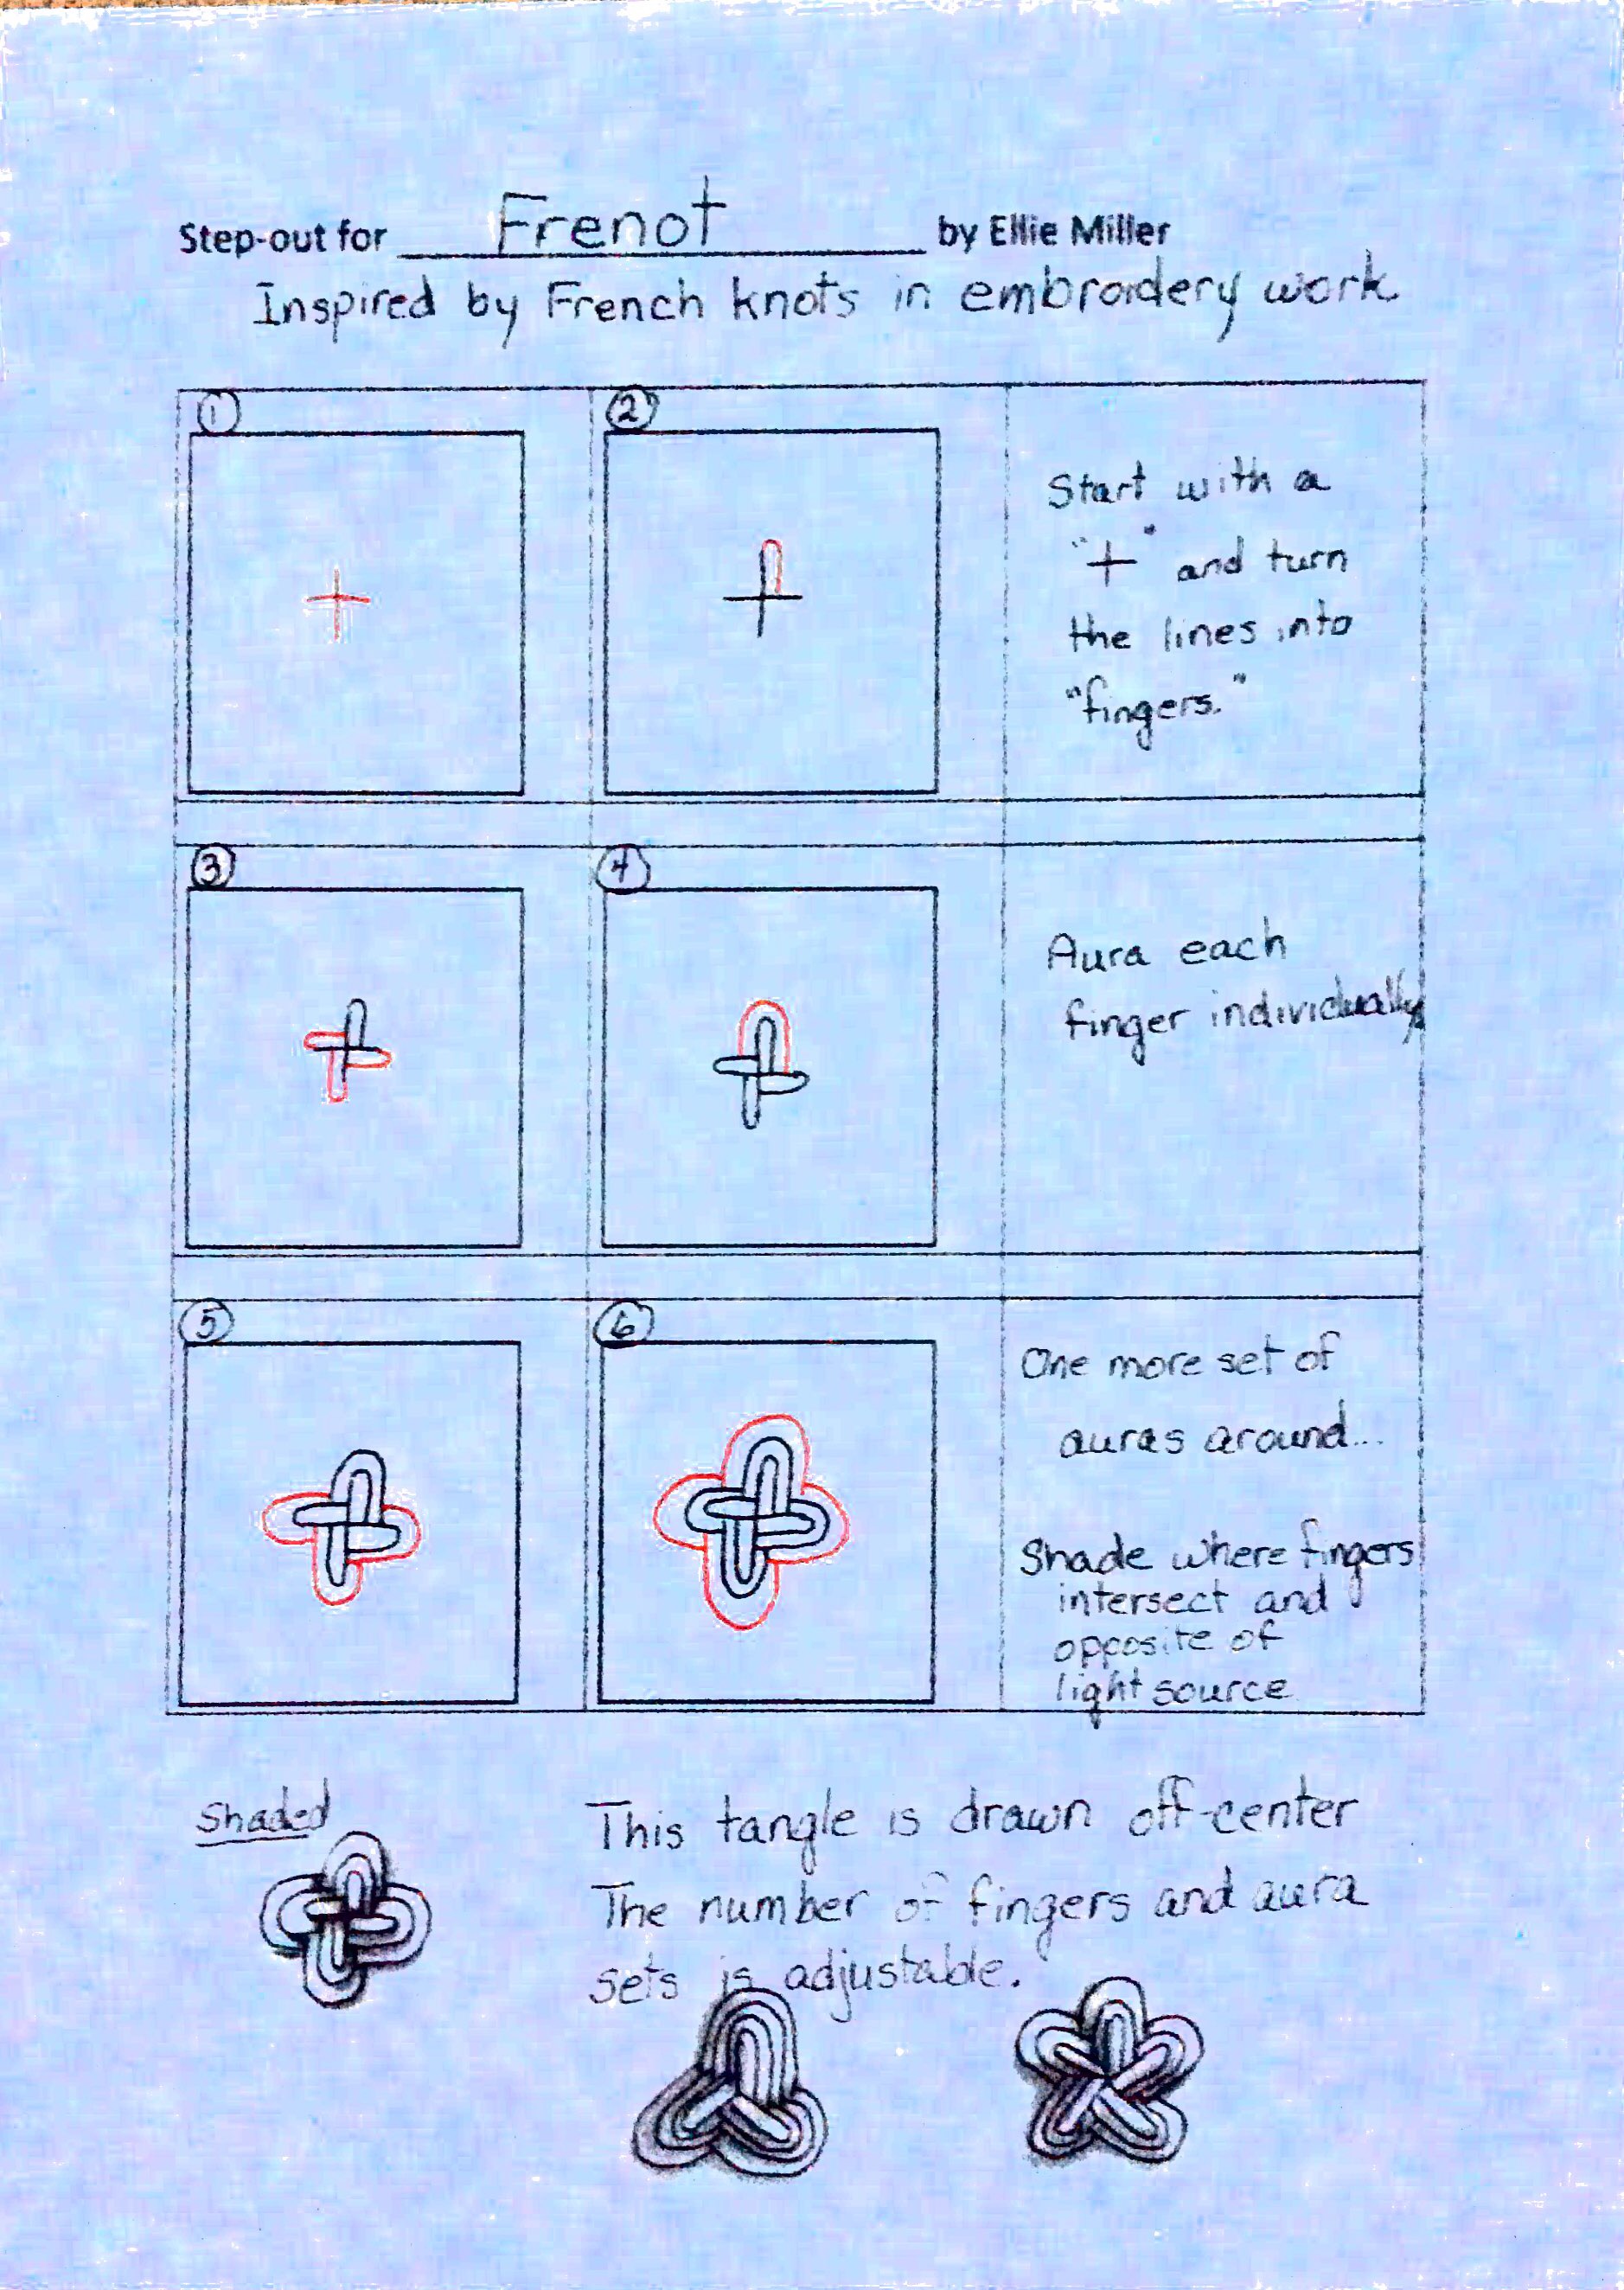
This new tangle is one I have been using for several months, calling it Frenot. I haven’t posted a step-out before, mostly because I was not sure it is unique. Now, I am pretty certain it is something new.
Frenot was inspired by the French knot in embroidery work. While unpacking from our move last year, I came across a tiny piece I started years and years ago but never finished. One stitch that was used in it was the French knot. There was a cluster of French knots, creating a ring of petals or blooms. It inspired me to create a tangled interpretation. Being completely new to Zentangle, I didn’t know that anyone can create and name a tangle. Although I used it in some of my tiles, I was afraid to share those tiles because they contained an “unknown” pattern. It took a while to realize that 1) anyone can create a new pattern; and 2) it is unique, as far as I can tell.
Although I have been tangling for more than ten months now, I have been working pretty much on my own. That’s why I continue to call myself a newbie or beginner. I have learned so much! There is still so much to learn! Recently, however, I have had a lot of Zentangle-related help from several lovely people on the Zentangle Mosaic app (iPhone/iPad and Android formats available). No one has been more of a help and inspiration to me than Jody Genovese, CZT. It is thanks in large part to Jody’s encouragement on my tangling explorations and experiments that I have gained confidence–in my ability to tangle, and in my willingness to share. So I dedicate this new pattern to her.
Here is the step-out for Frenot.
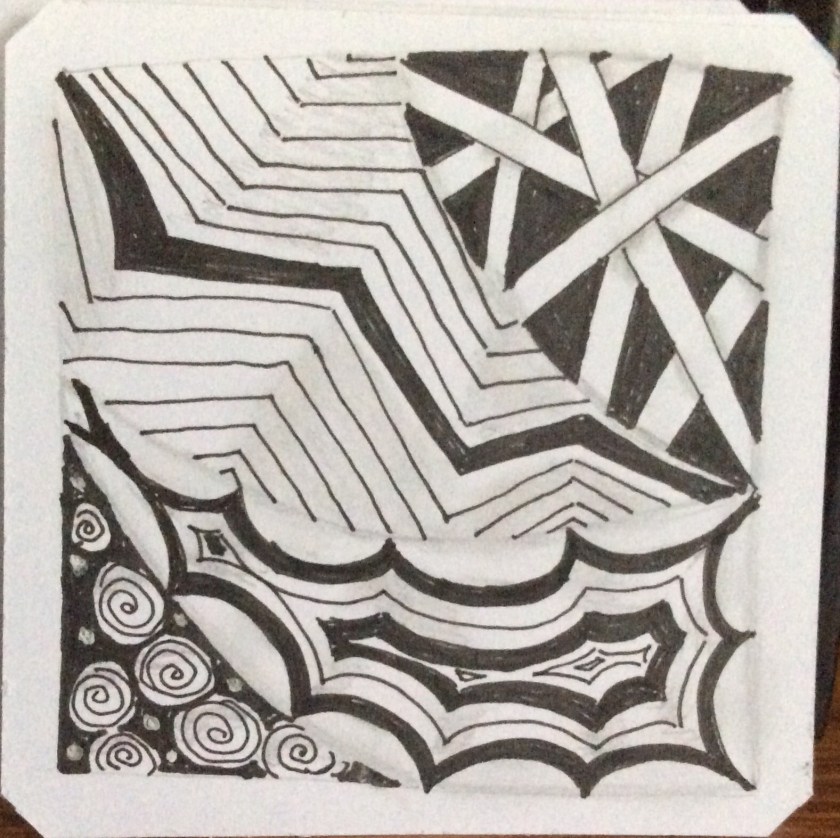
Here are a few tiles on which I used Frenot. Two of them I shared on Mosaic.
If you like Frenot and use it in a tile or other work, please feel free to include a photo or a link in the comments section. I would love to see how you use it!
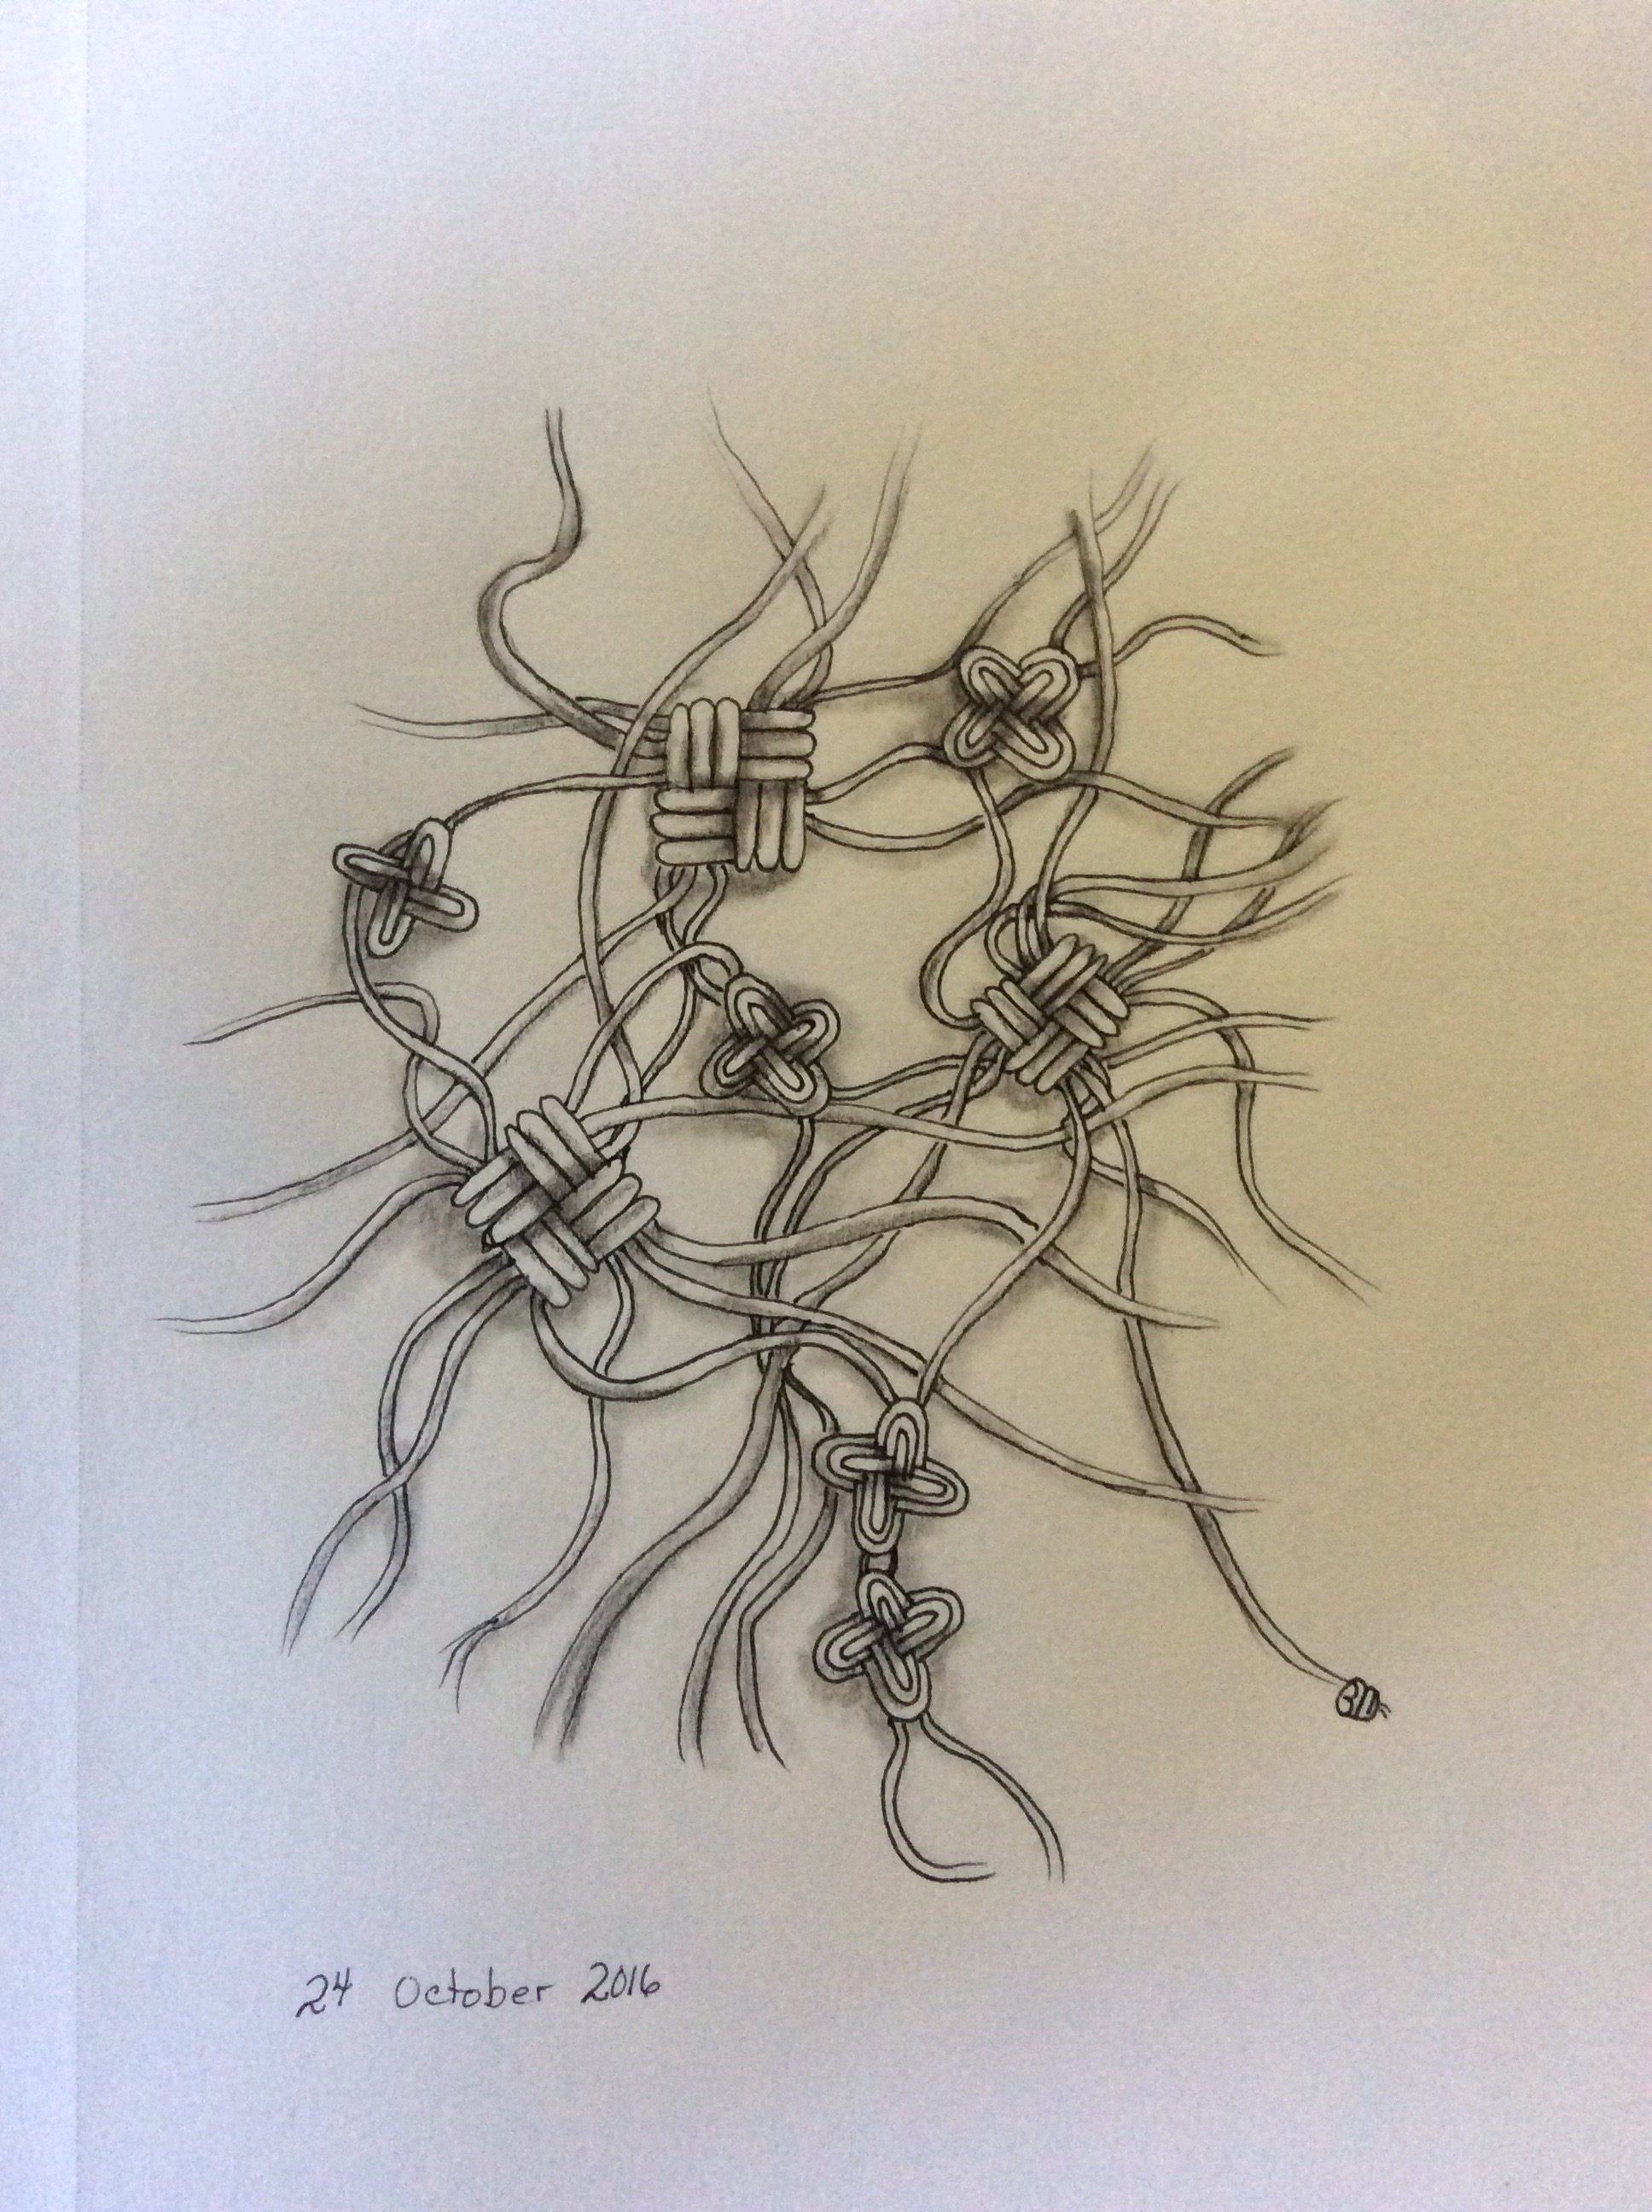
Inspired by Yoga for Your Brain (see earlier post, InTheMail), I created a new tangle. I don’t have a picture of the photo that inspired me, but I found it while looking through a magazine in the doctor’s waiting room. The article and photos dealt with an architectural dig in Central America. I was surprised to find a tangle pattern among the ancient artifacts!
It was two days before I recorded what I saw as a potential Zentangle pattern. To my eye, it functions best as a grid or border tangle.
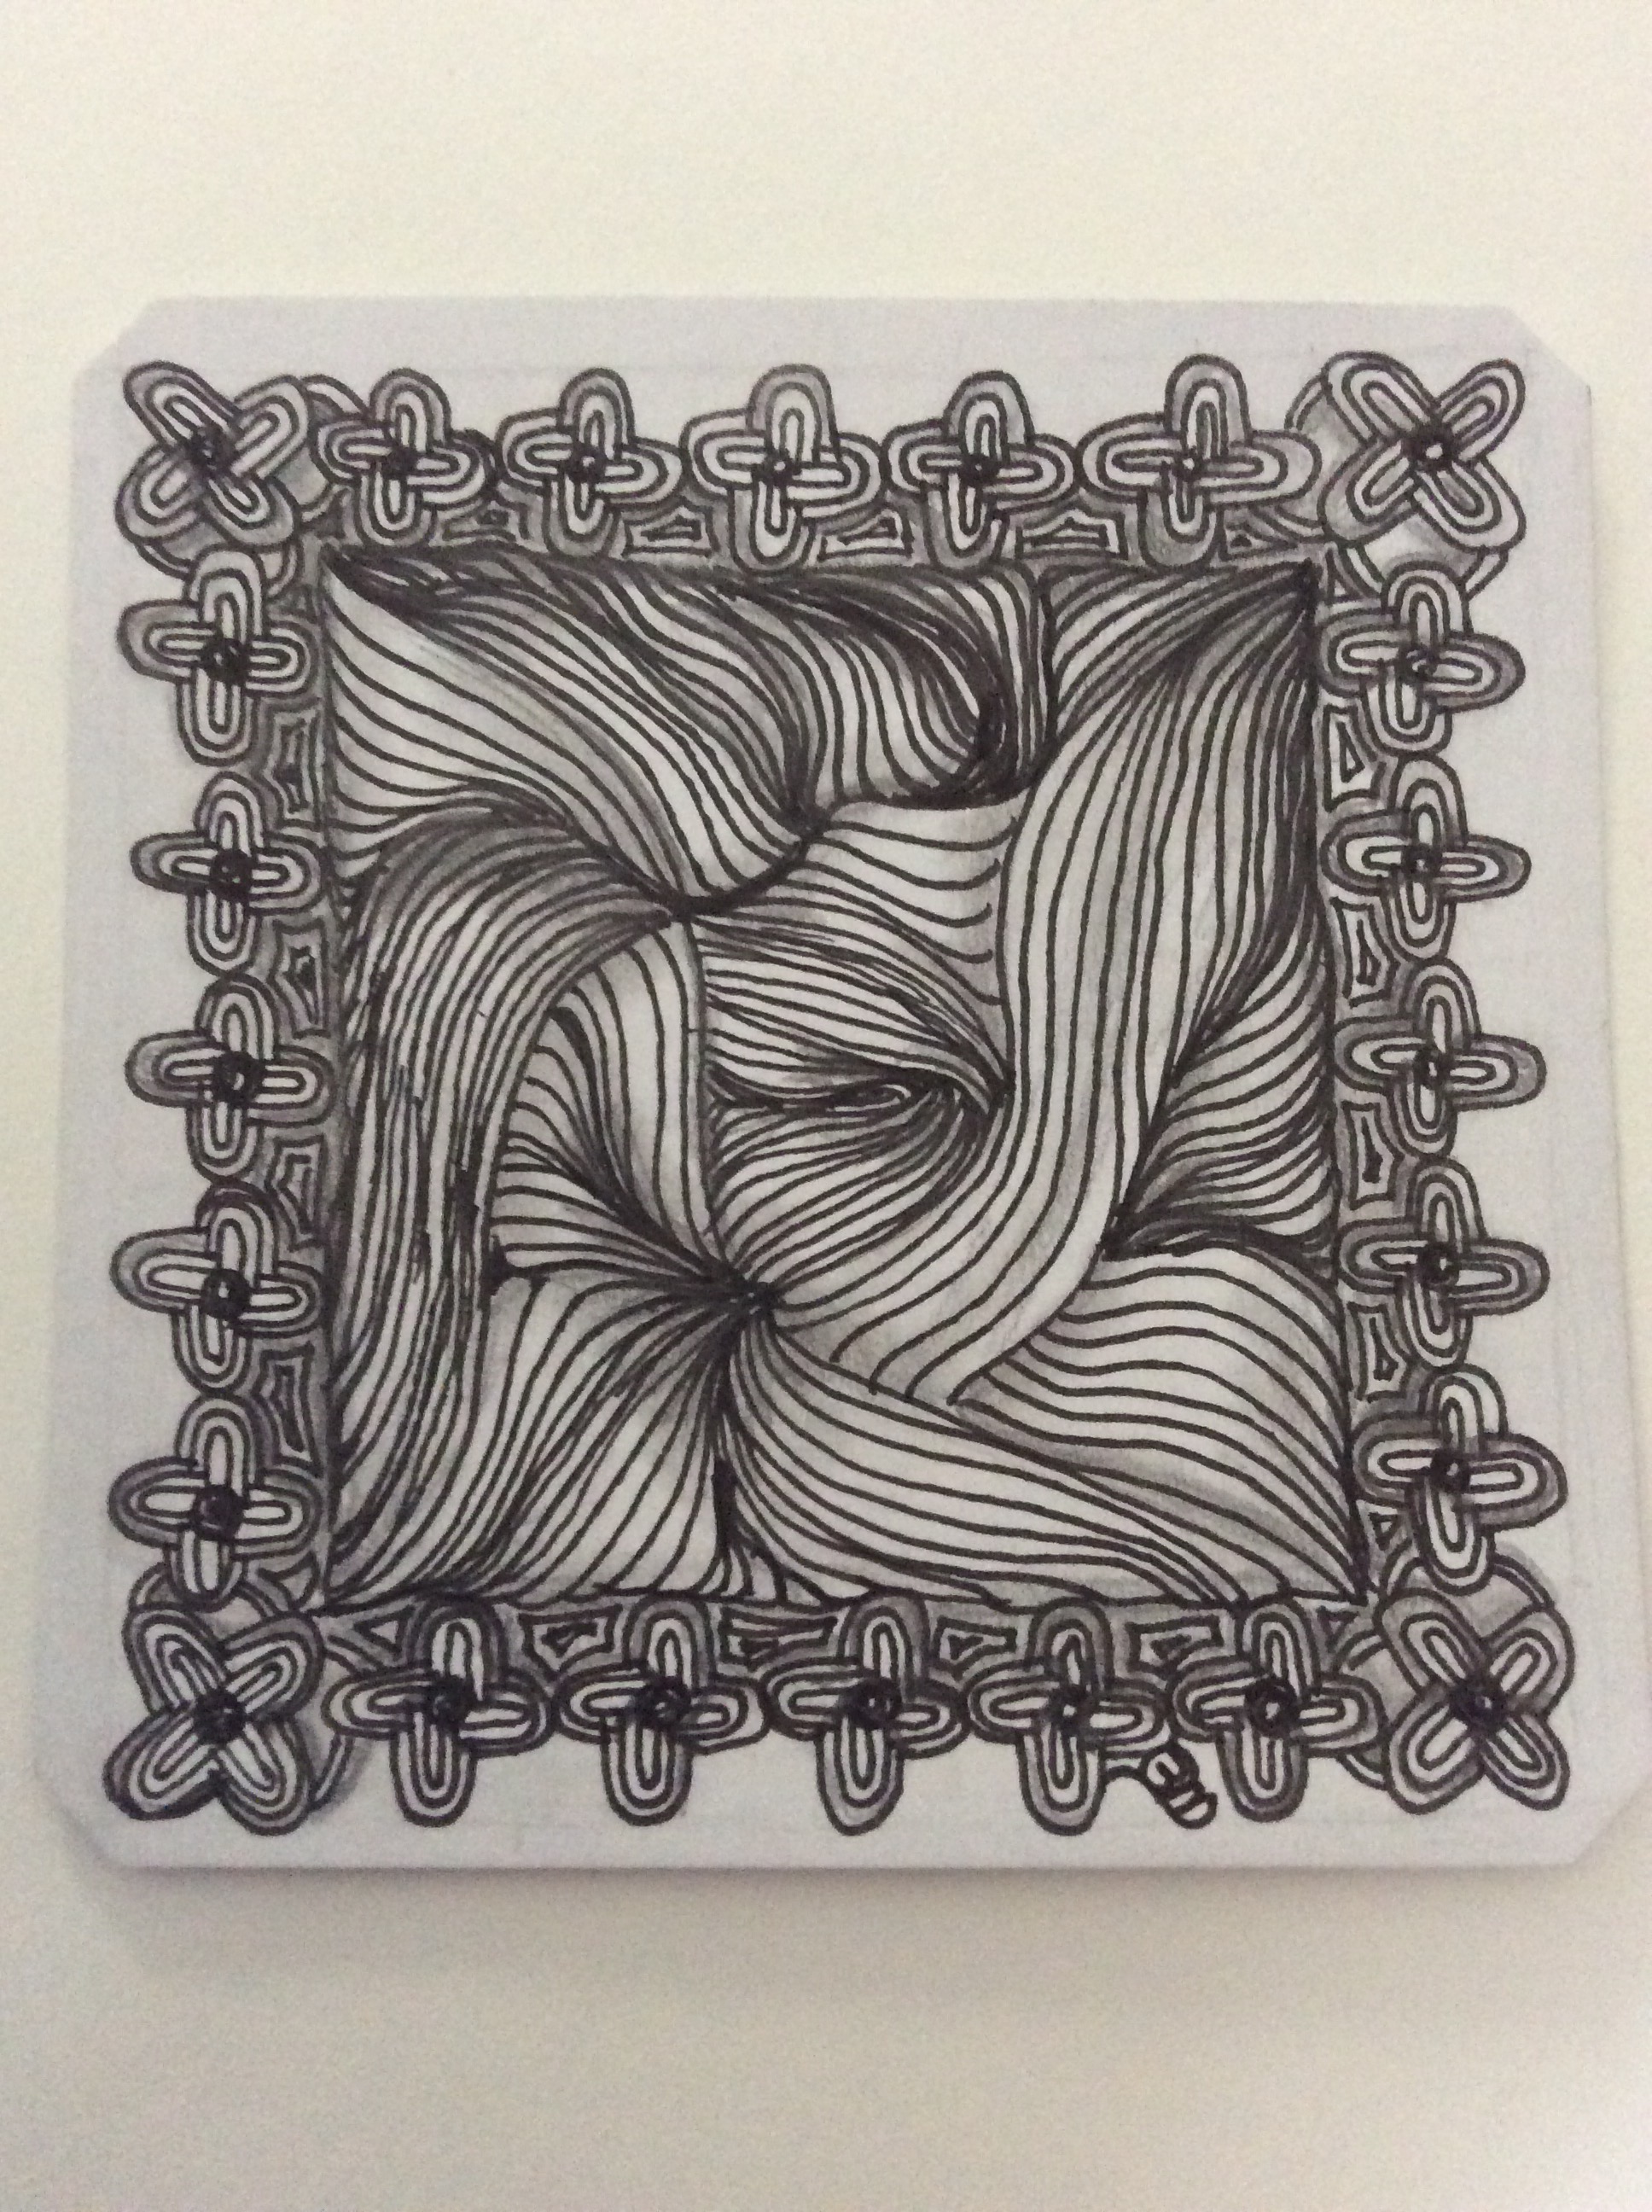
My new pattern, Stonework.
This picture shows a hurriedly drawn grid with a few minor differences in the basic pattern–shading, rounding, rotation. I think it might also work well as a background pattern, but we’ll see what I come up with.
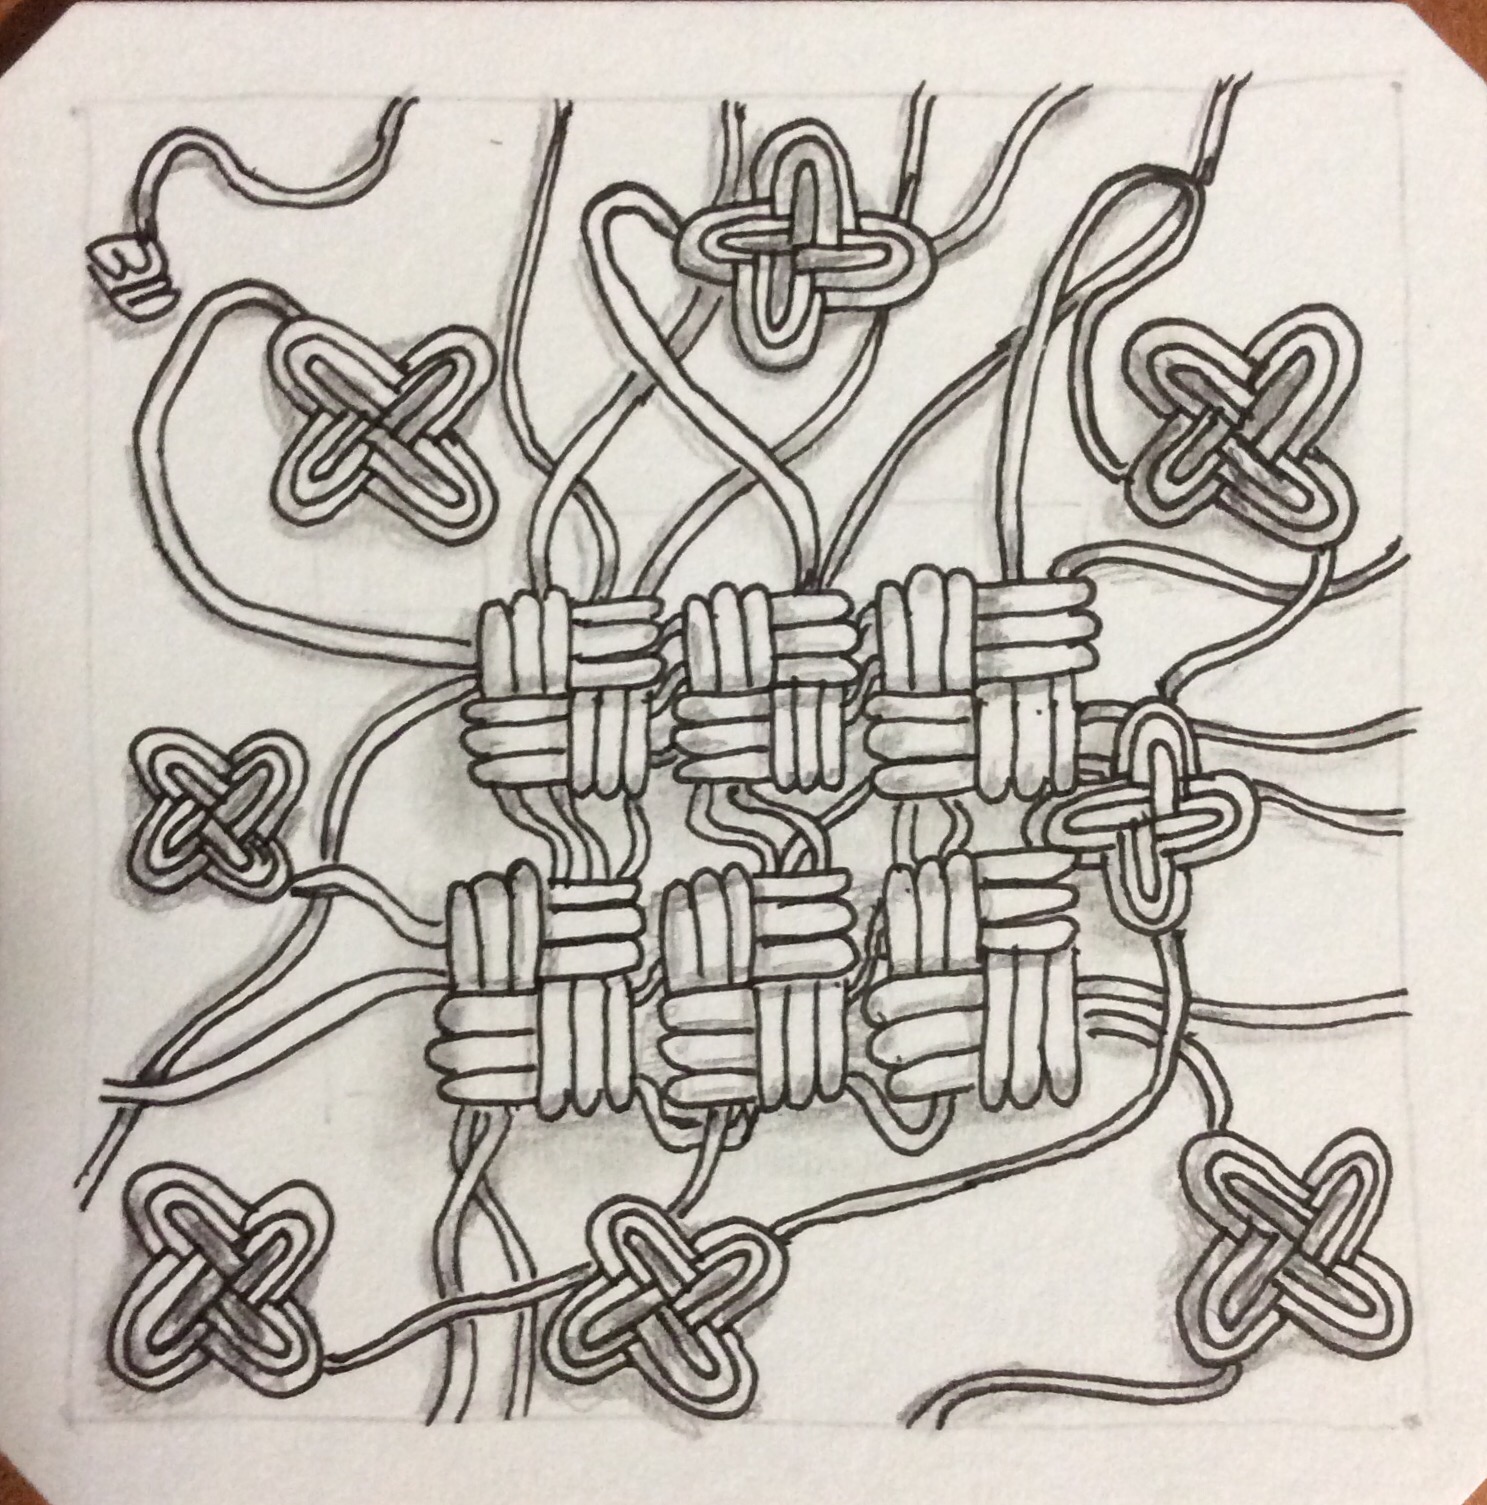
If you want to try it, here is the step-out.
For me, I start diagonal ovals and rounded strokes with rounding off the corners. Part of the reason is that my astigmatism causes distortion of lines for me. It is easier to connect two points than to try to figure out where to start curving–I am almost always wrong when I try to guesstimate. In drawing the smaller oblongs, I start with the longest, basically doing the same thing as for the diagonal with the rounded ends. The rest of the row is just elongated C’s, followed by a circle. Finally, I either round (fill in) around the ends or shade.
When the pattern is used in a grid with rotated diagonals, the effect can be flower-like. As a border, the patterns can all go in the same direction, or the direction can be rotated. In corners, the pattern can be “mitered,” especially if the horizontals and verticals are drawn in different rotations.
Before creating the step-out and naming the pattern, I checked through all the patterns in TanglePatterns.com’s latest e-book catalog (2017) called Presenting … The Tangles. To the best of my ability to discriminate, this tangle is unique. Two or three patterns might be roughly similar, but none share more than one characteristic with Stonework. One pattern has stacked oblongs, but they are all the same size. Another pattern has a diagonal oblong, but no vertical or horizontal ones. That’s as close as other patterns came to this one.
Please let me know if Stonework is the same as another pattern. Zentangle is an international community, and not all countries share tangles. I have seen tangles on various web sites online that are identical but share several different names. At the very least, I would like to share the names of the patterns for cross-reference.
If you use this pattern, please leave a comment and a picture or link to where it is posted. Thanks!
It’s the last day to submit to the Diva Challenge #304. The tangle is Way Bop. So many tanglers contribute beautiful serious works that are rich in textures, patterns, and movement. I decided to submit my fun and fanciful Carnival Dancer 💃 because this tangle was so much fun to do. I had been experimenting with contrast for shading, which didn’t quite work out the way I had thought it would. That the dancer emerged was a bonus to my fun, though.
Yesterday I posted the official public step-out for the Zentangle® called Way Bop. I included a few of my first attempts. Today I am posting photos of two more I tangled today
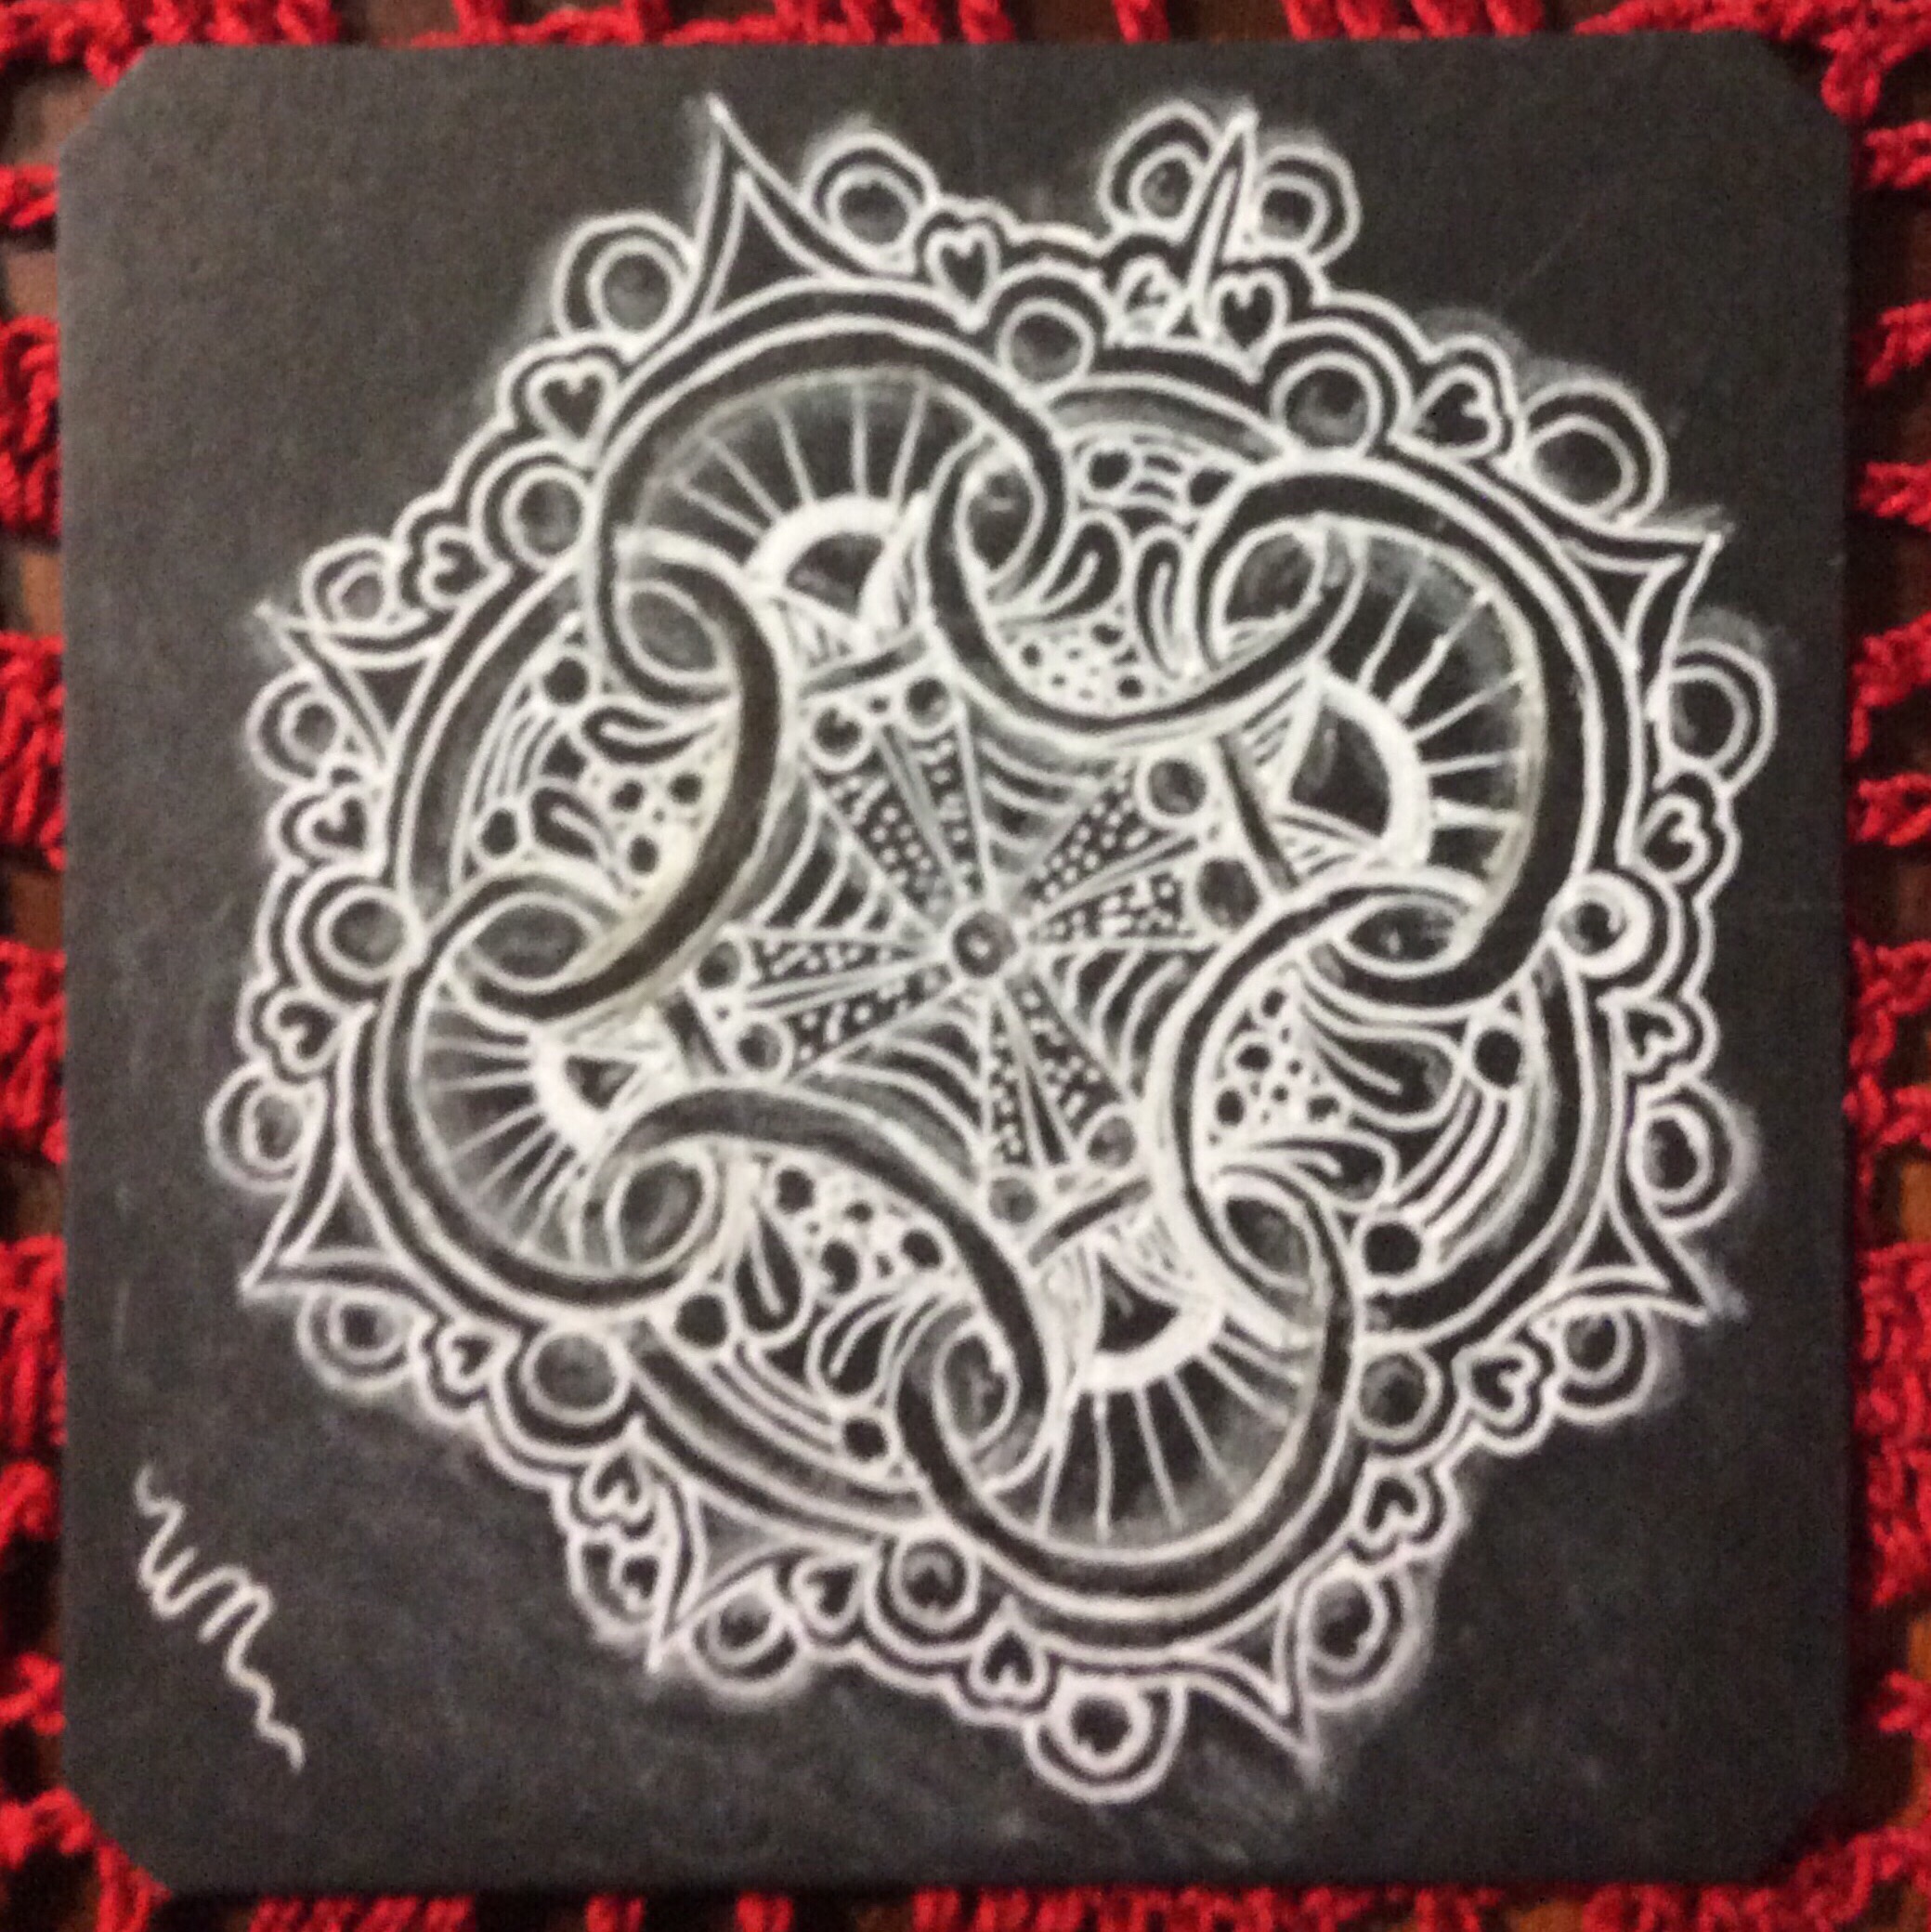
The first one is drawn on a black square tile, using a white Gelly Roll™ pen for the design and General’s Charcoal White™ pencil for shading.
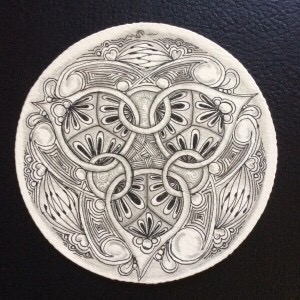
The second tile is a “pre-strung” Zendala® tile. That means it comes with strings already on the tile. The string breaks the tile up into smaller drawing/coloring areas. For the basic structure of the Way Bop, I “jumped the fence” (ignored the lines) a lot. Then I jumped a lot more fences to fill in with other Zentangle designs.
Imagine what you can do!
Remember: Anything is possible one stroke at a time! ®
Instead of “what is Zentangle? Part4,” today I am posting a Zentangle tile I am submitting to a weekly challenge from “I Am the Diva,” a Zentangle blog on Blogspot.
For this challenge, each tile was to use two tangles–Paradox and Diva Dance– in an almost interwoven fashion as demonstrated by Zentangle founders Rick Roberts and Maria Thomas in a new YouTube video.
I am posting my submission to the challenge here so you can see that, for Zentangling, you really don’t need to be artistically inclined. Enjoy!
One note about the video below. Some of the Zentangle videos are available only to users of the Zentangle Mosaic app or Certified Zentangle Teachers (CZTs). If this video doesn’t work for you, there are plenty of instructional Zentangle videos from the founders and many CZTs. Hope this helps!
A couple of days ago, I posted an “about Zentangle” here. Well, I thought it was here. Turns out, it posted to my writing blog. Rather than try to figure out how to copy it here, please visit the post through the link. Thanks!


