As you can probably guess, a high focus tangle is a pattern that requires more than just half of your attention. In fact, if you let your focus drift too much on a high focus pattern, chances are high that you will utter “Oops!” followed by the Zentangle mantra, “There are no mistakes in Zentangle.” You might even add that an “oops” is an opportunity to do something different or try something new.
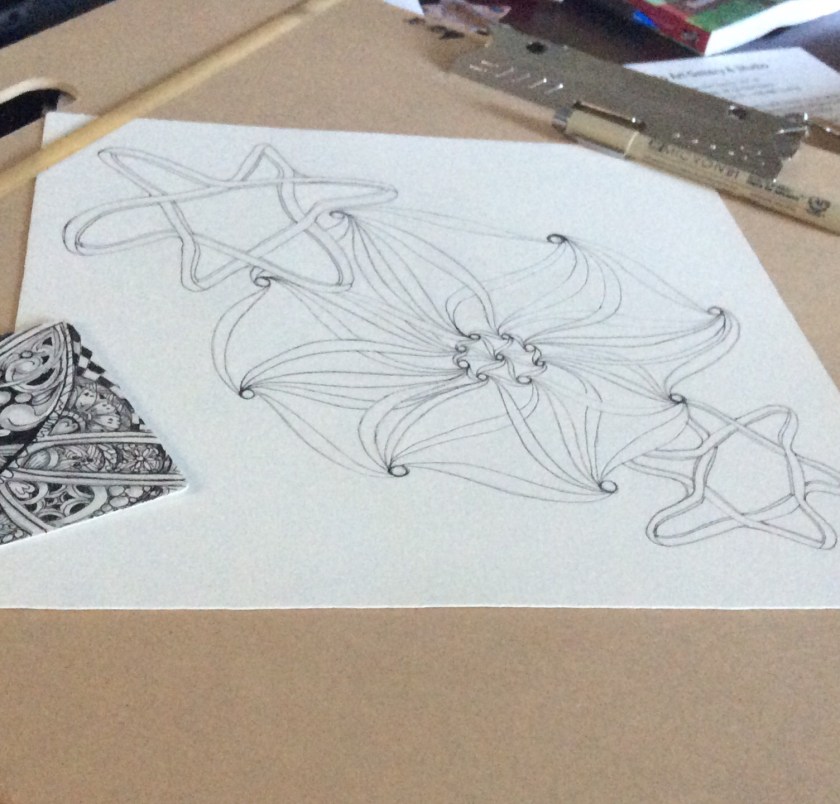
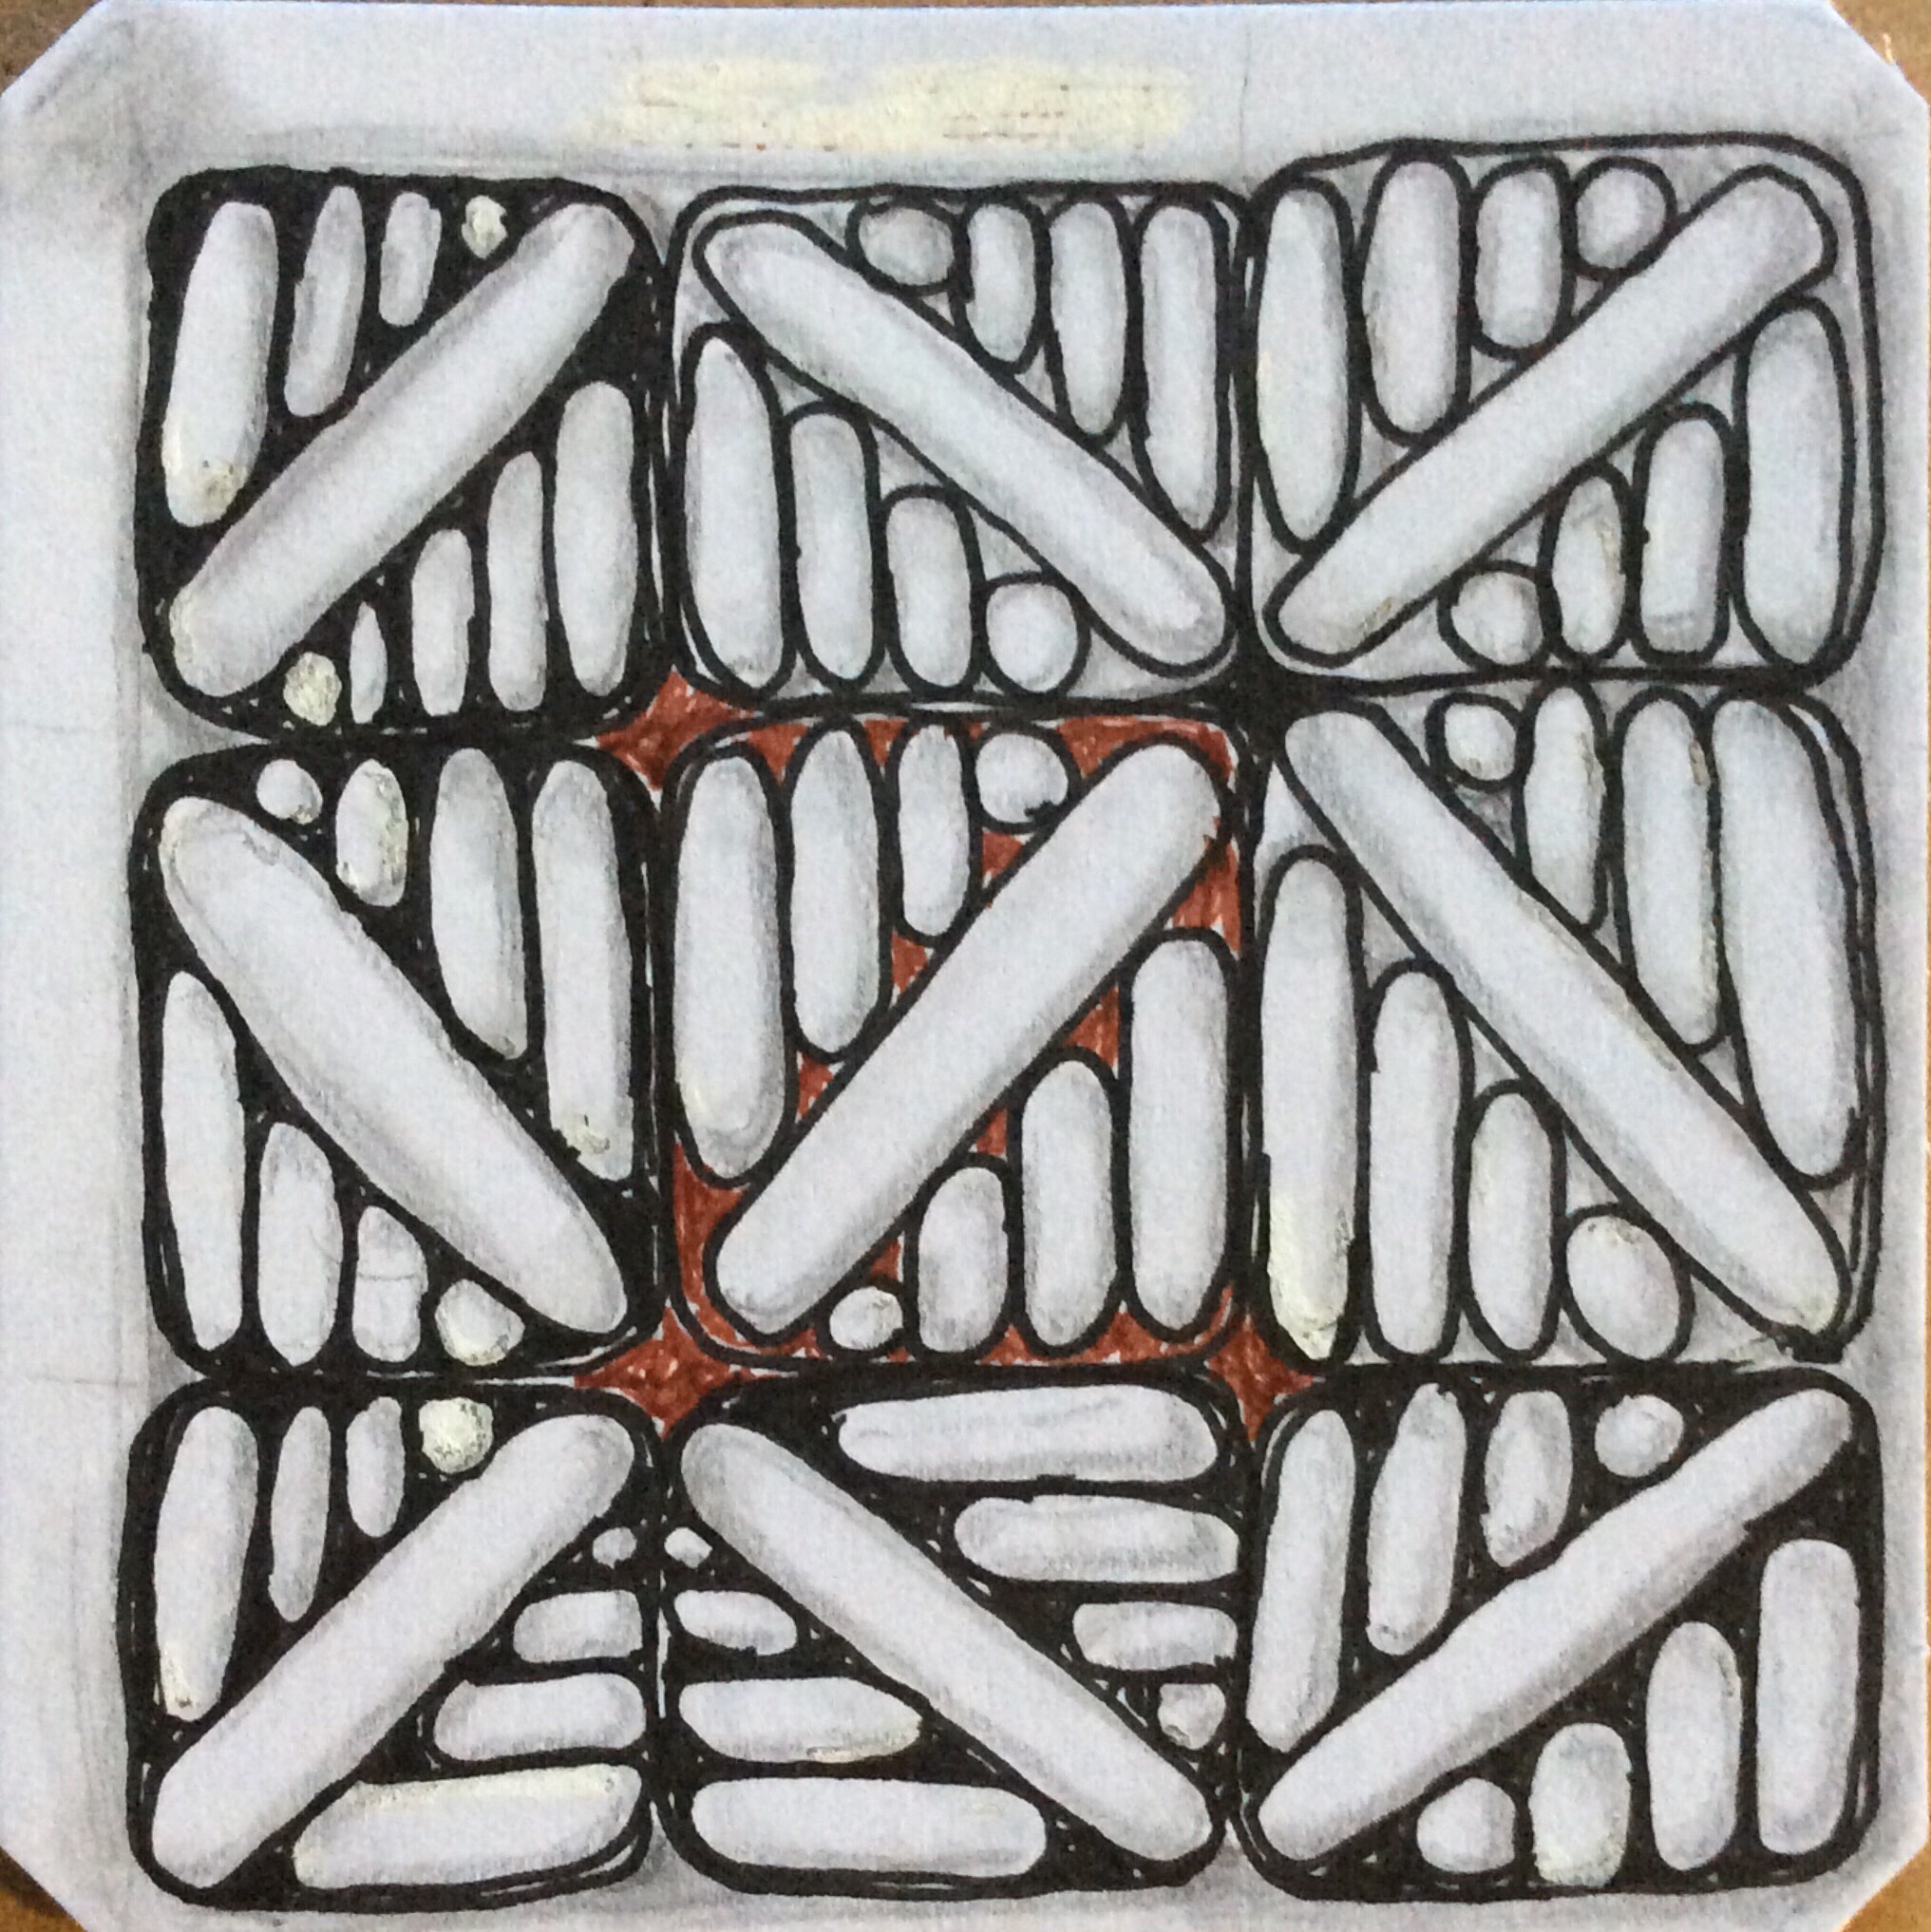
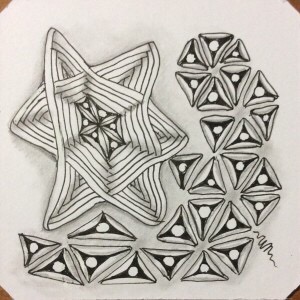
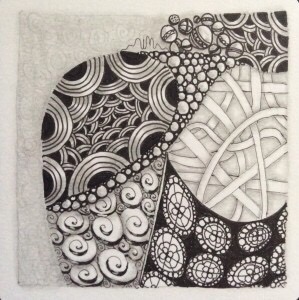
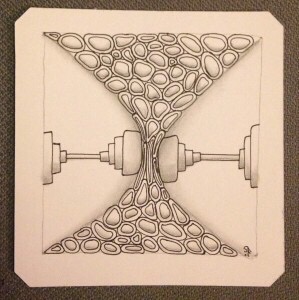
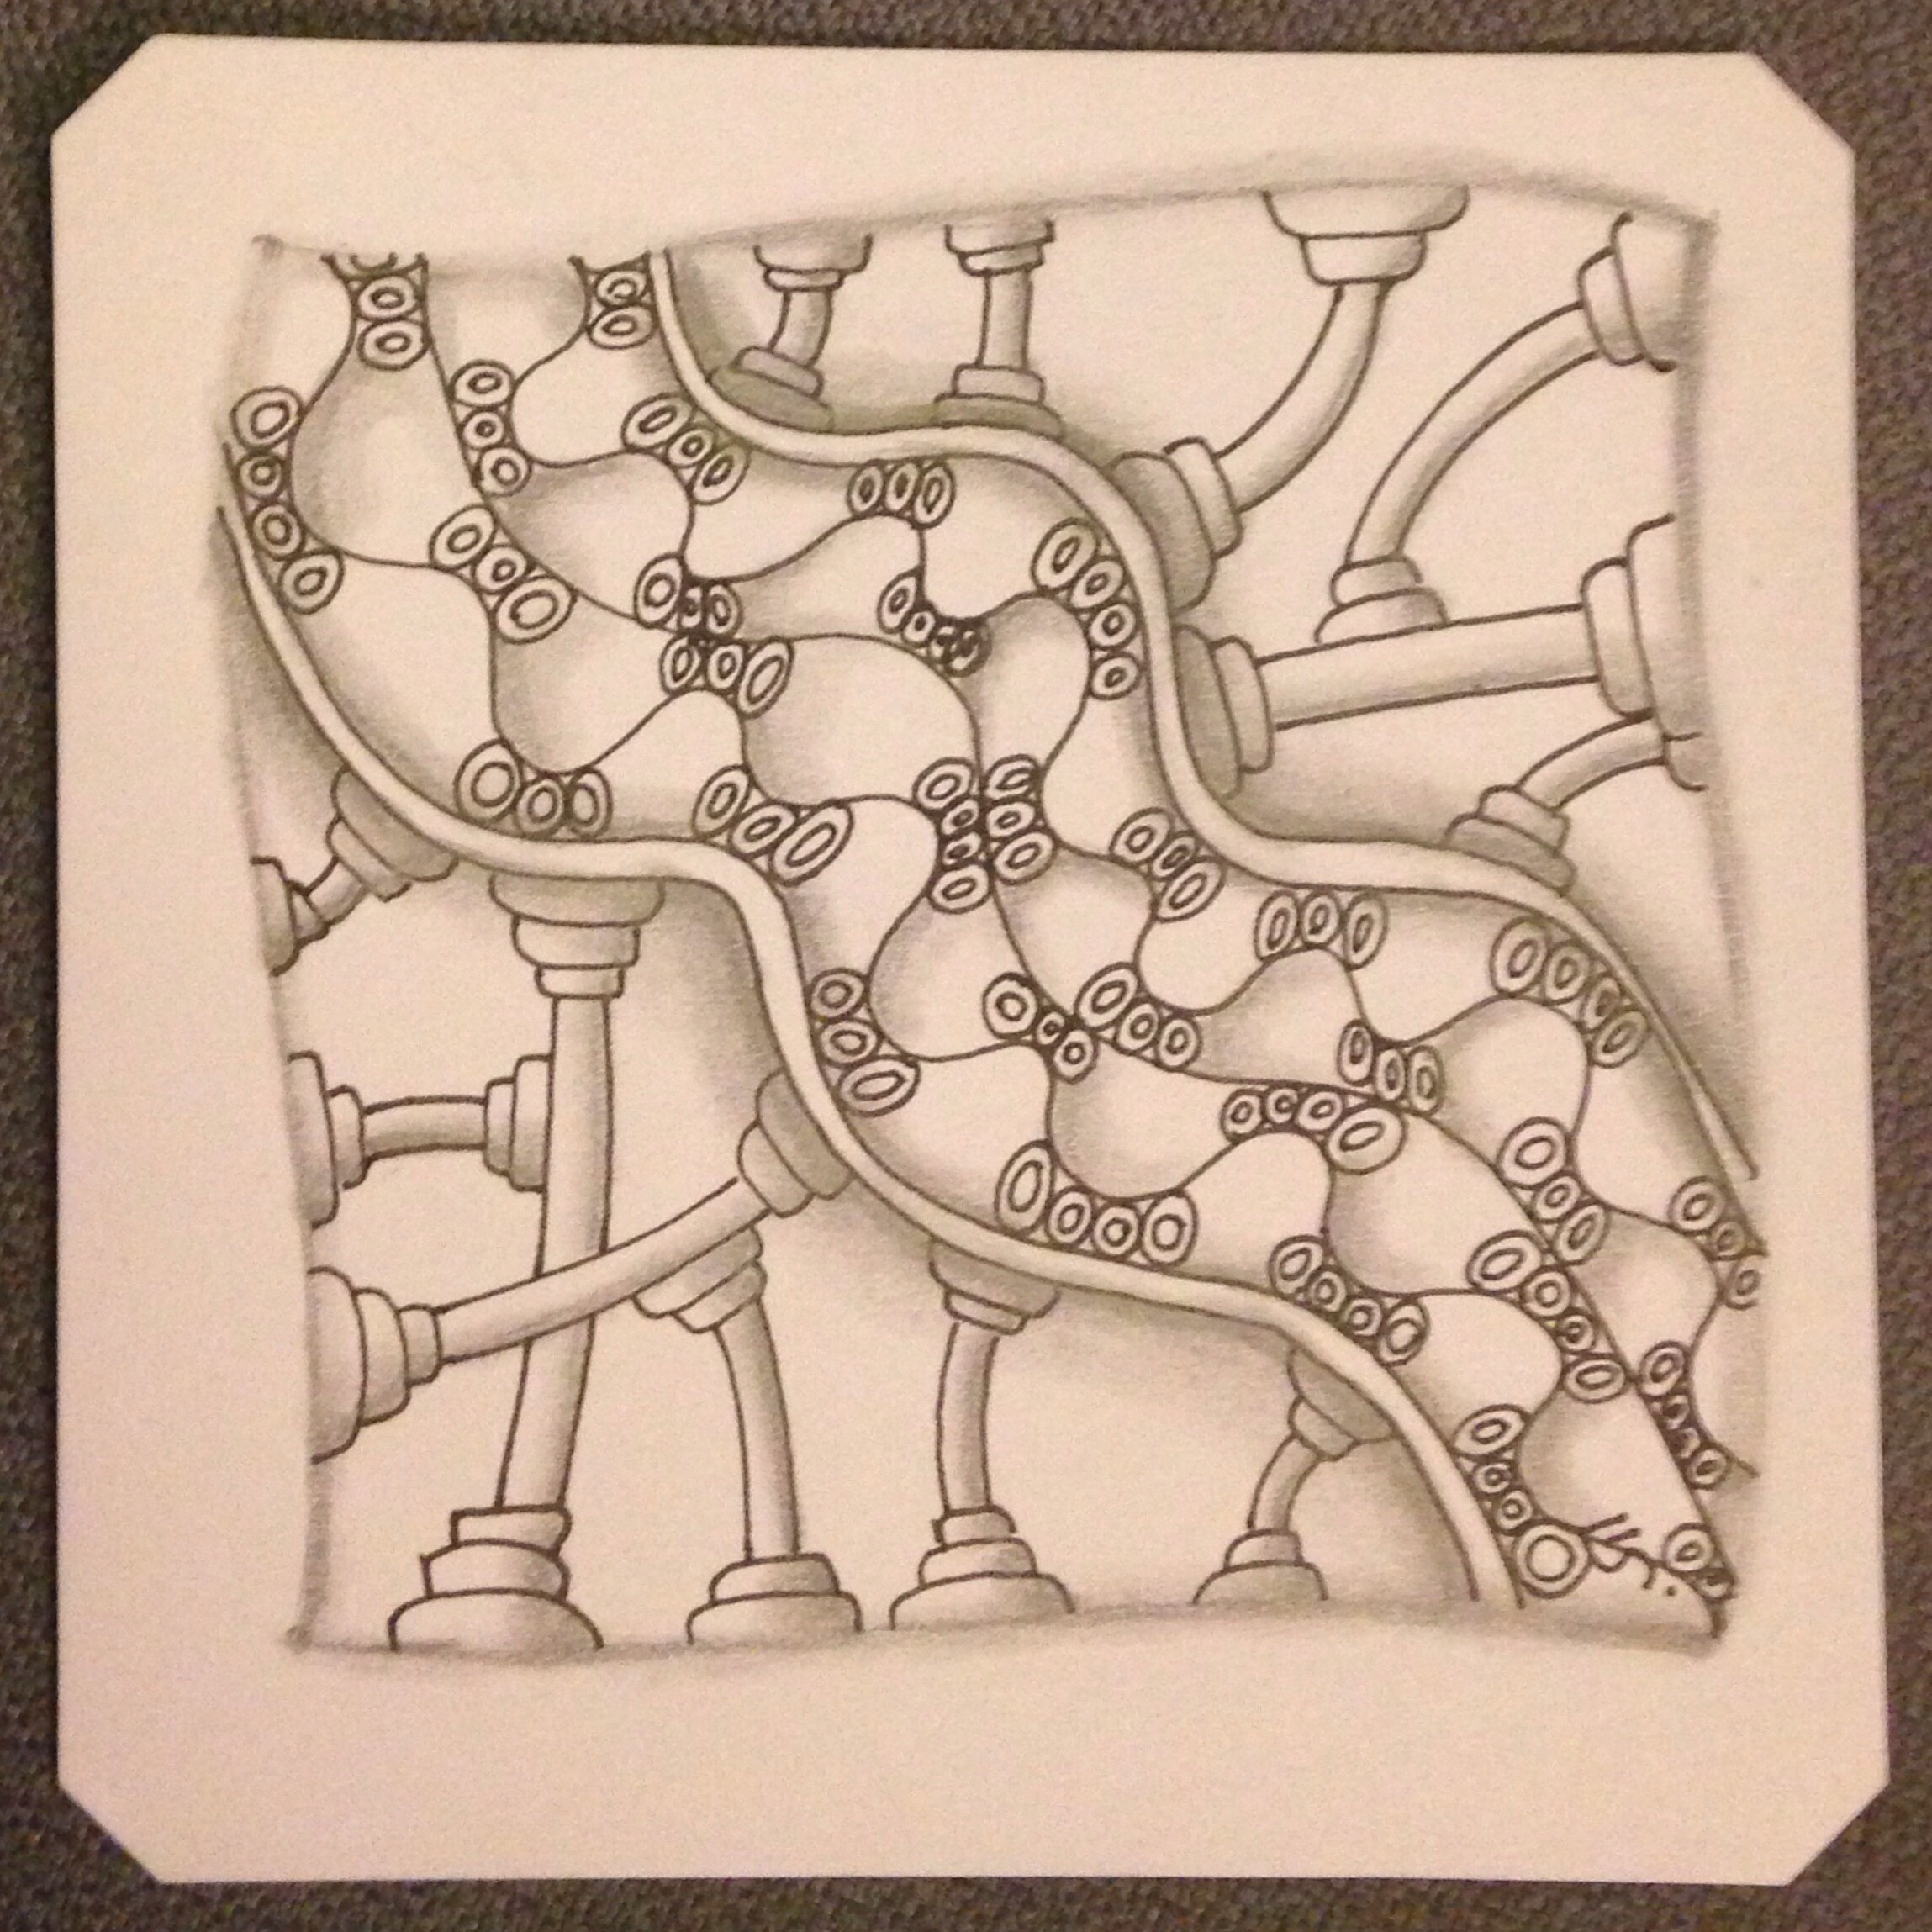
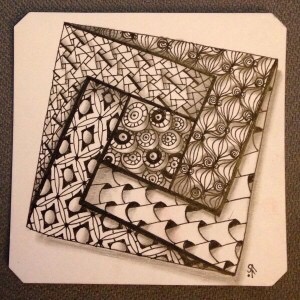
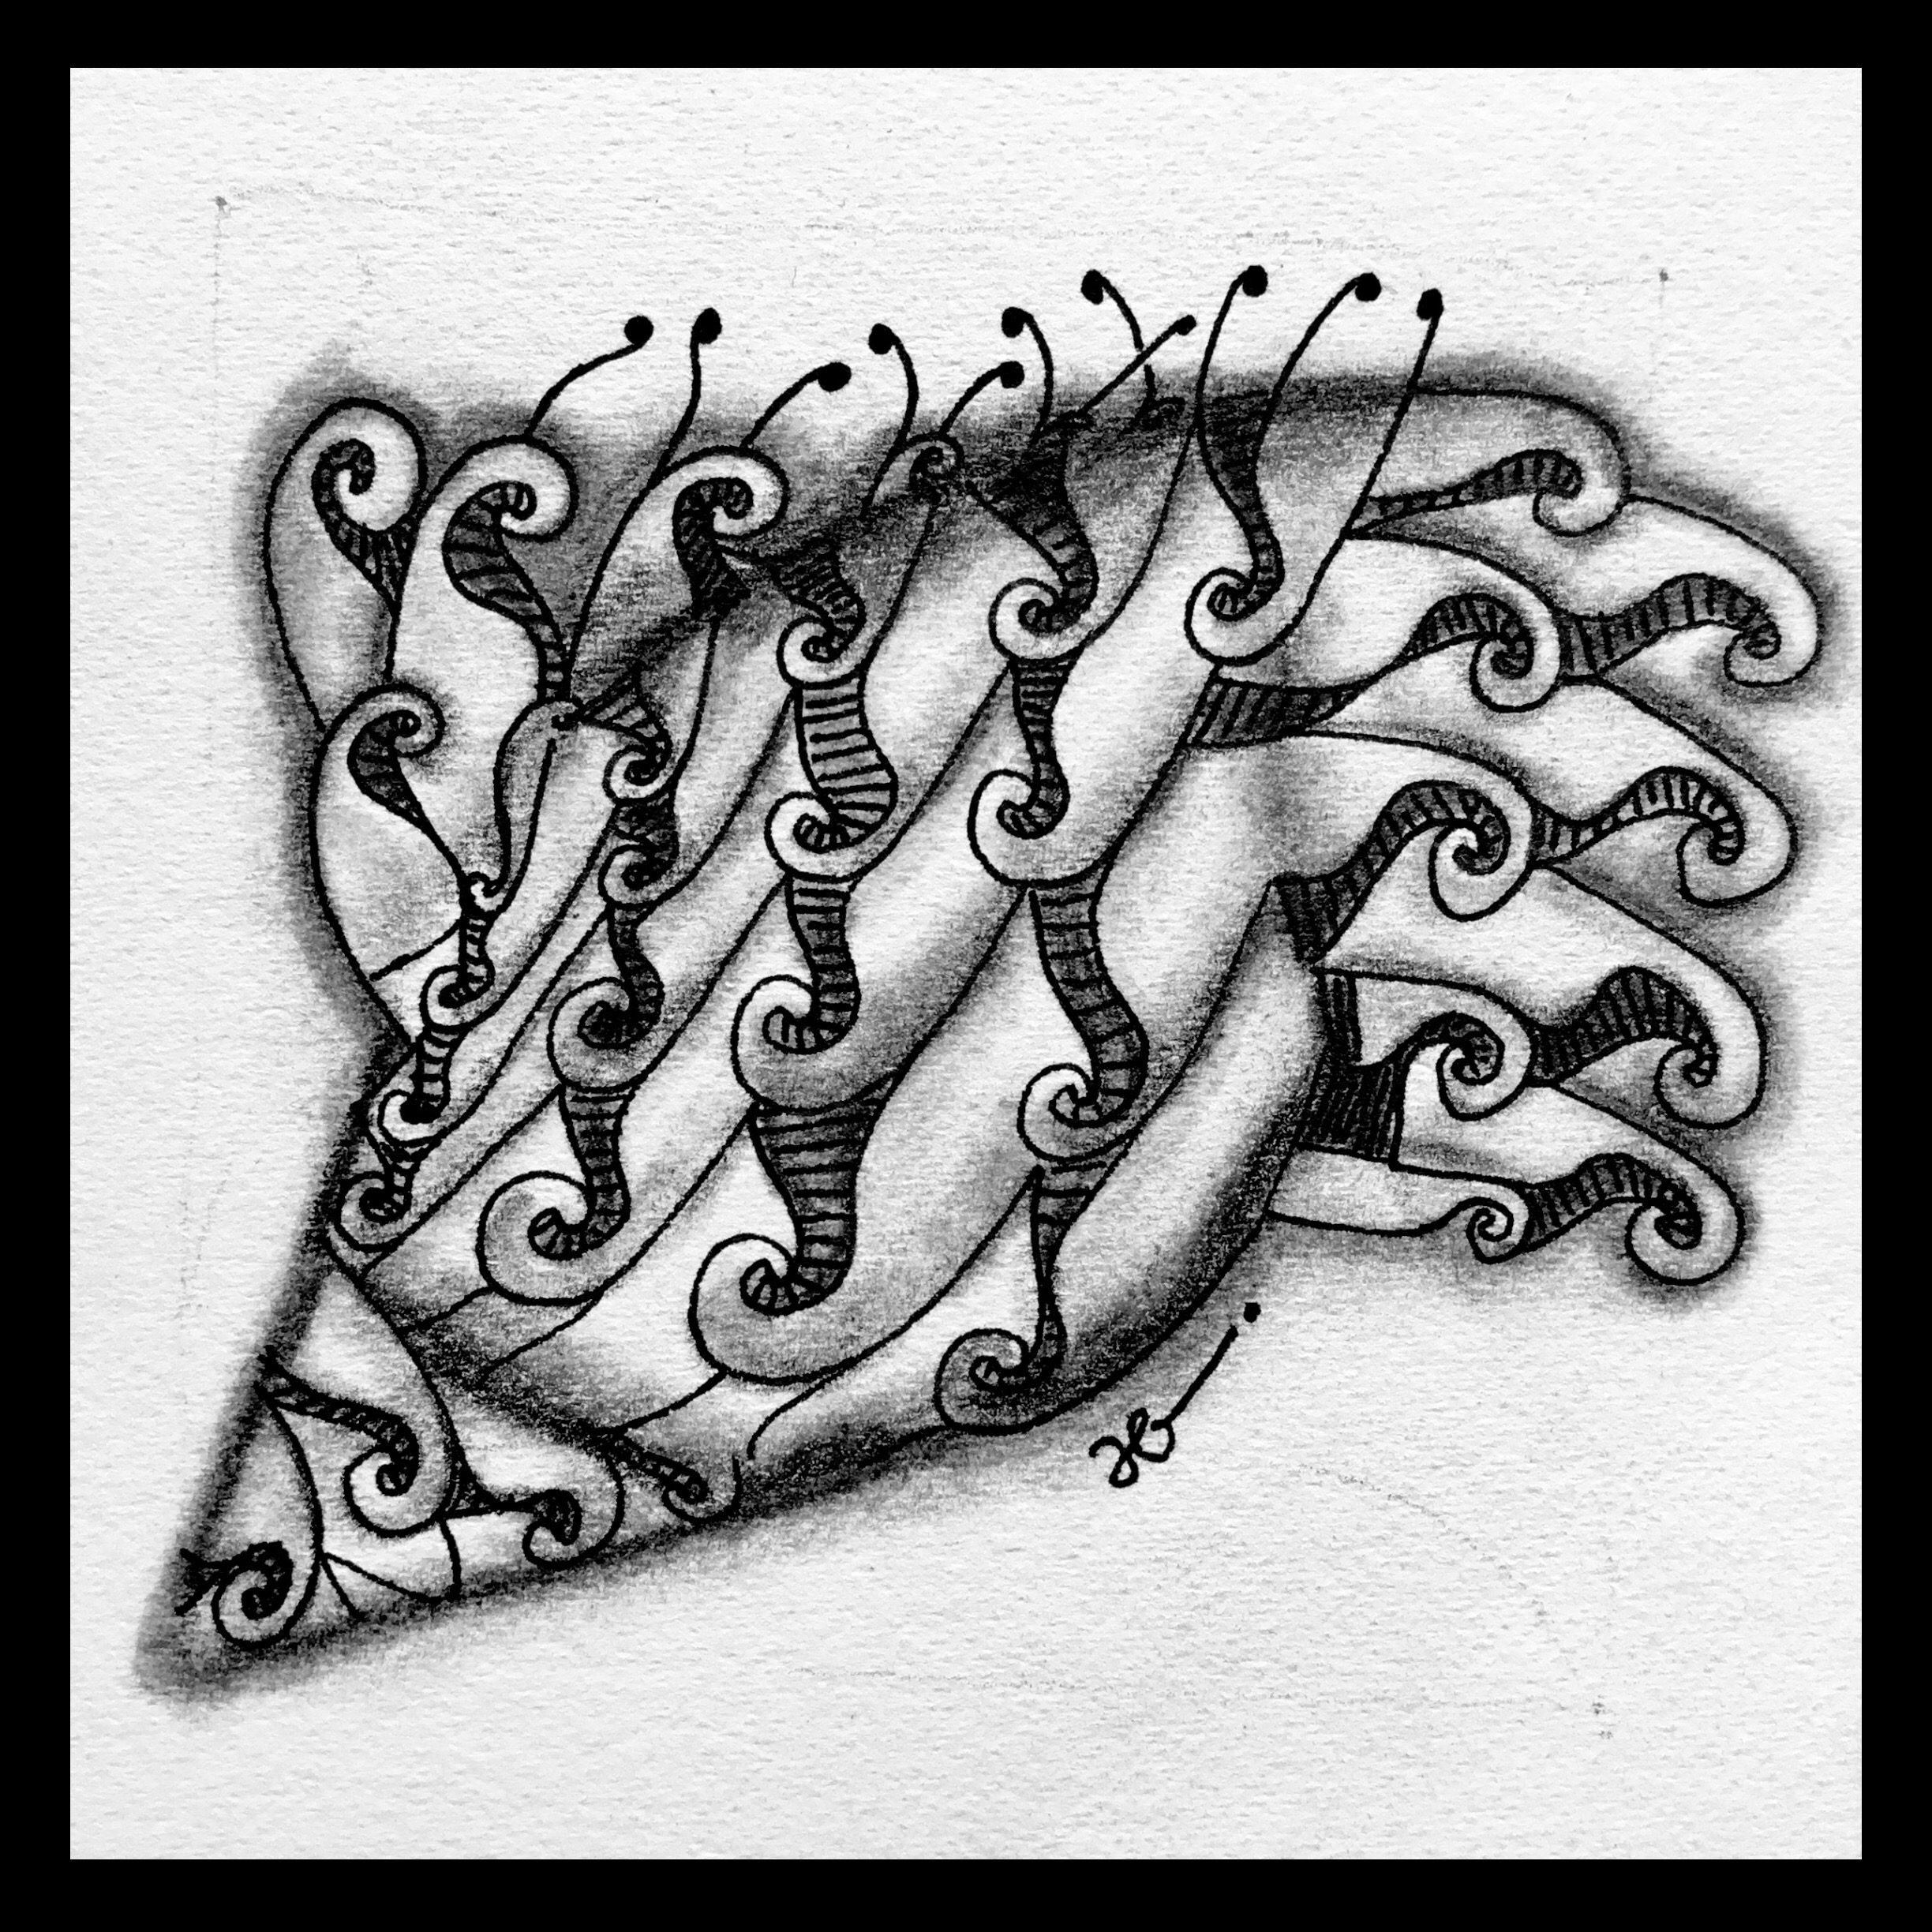
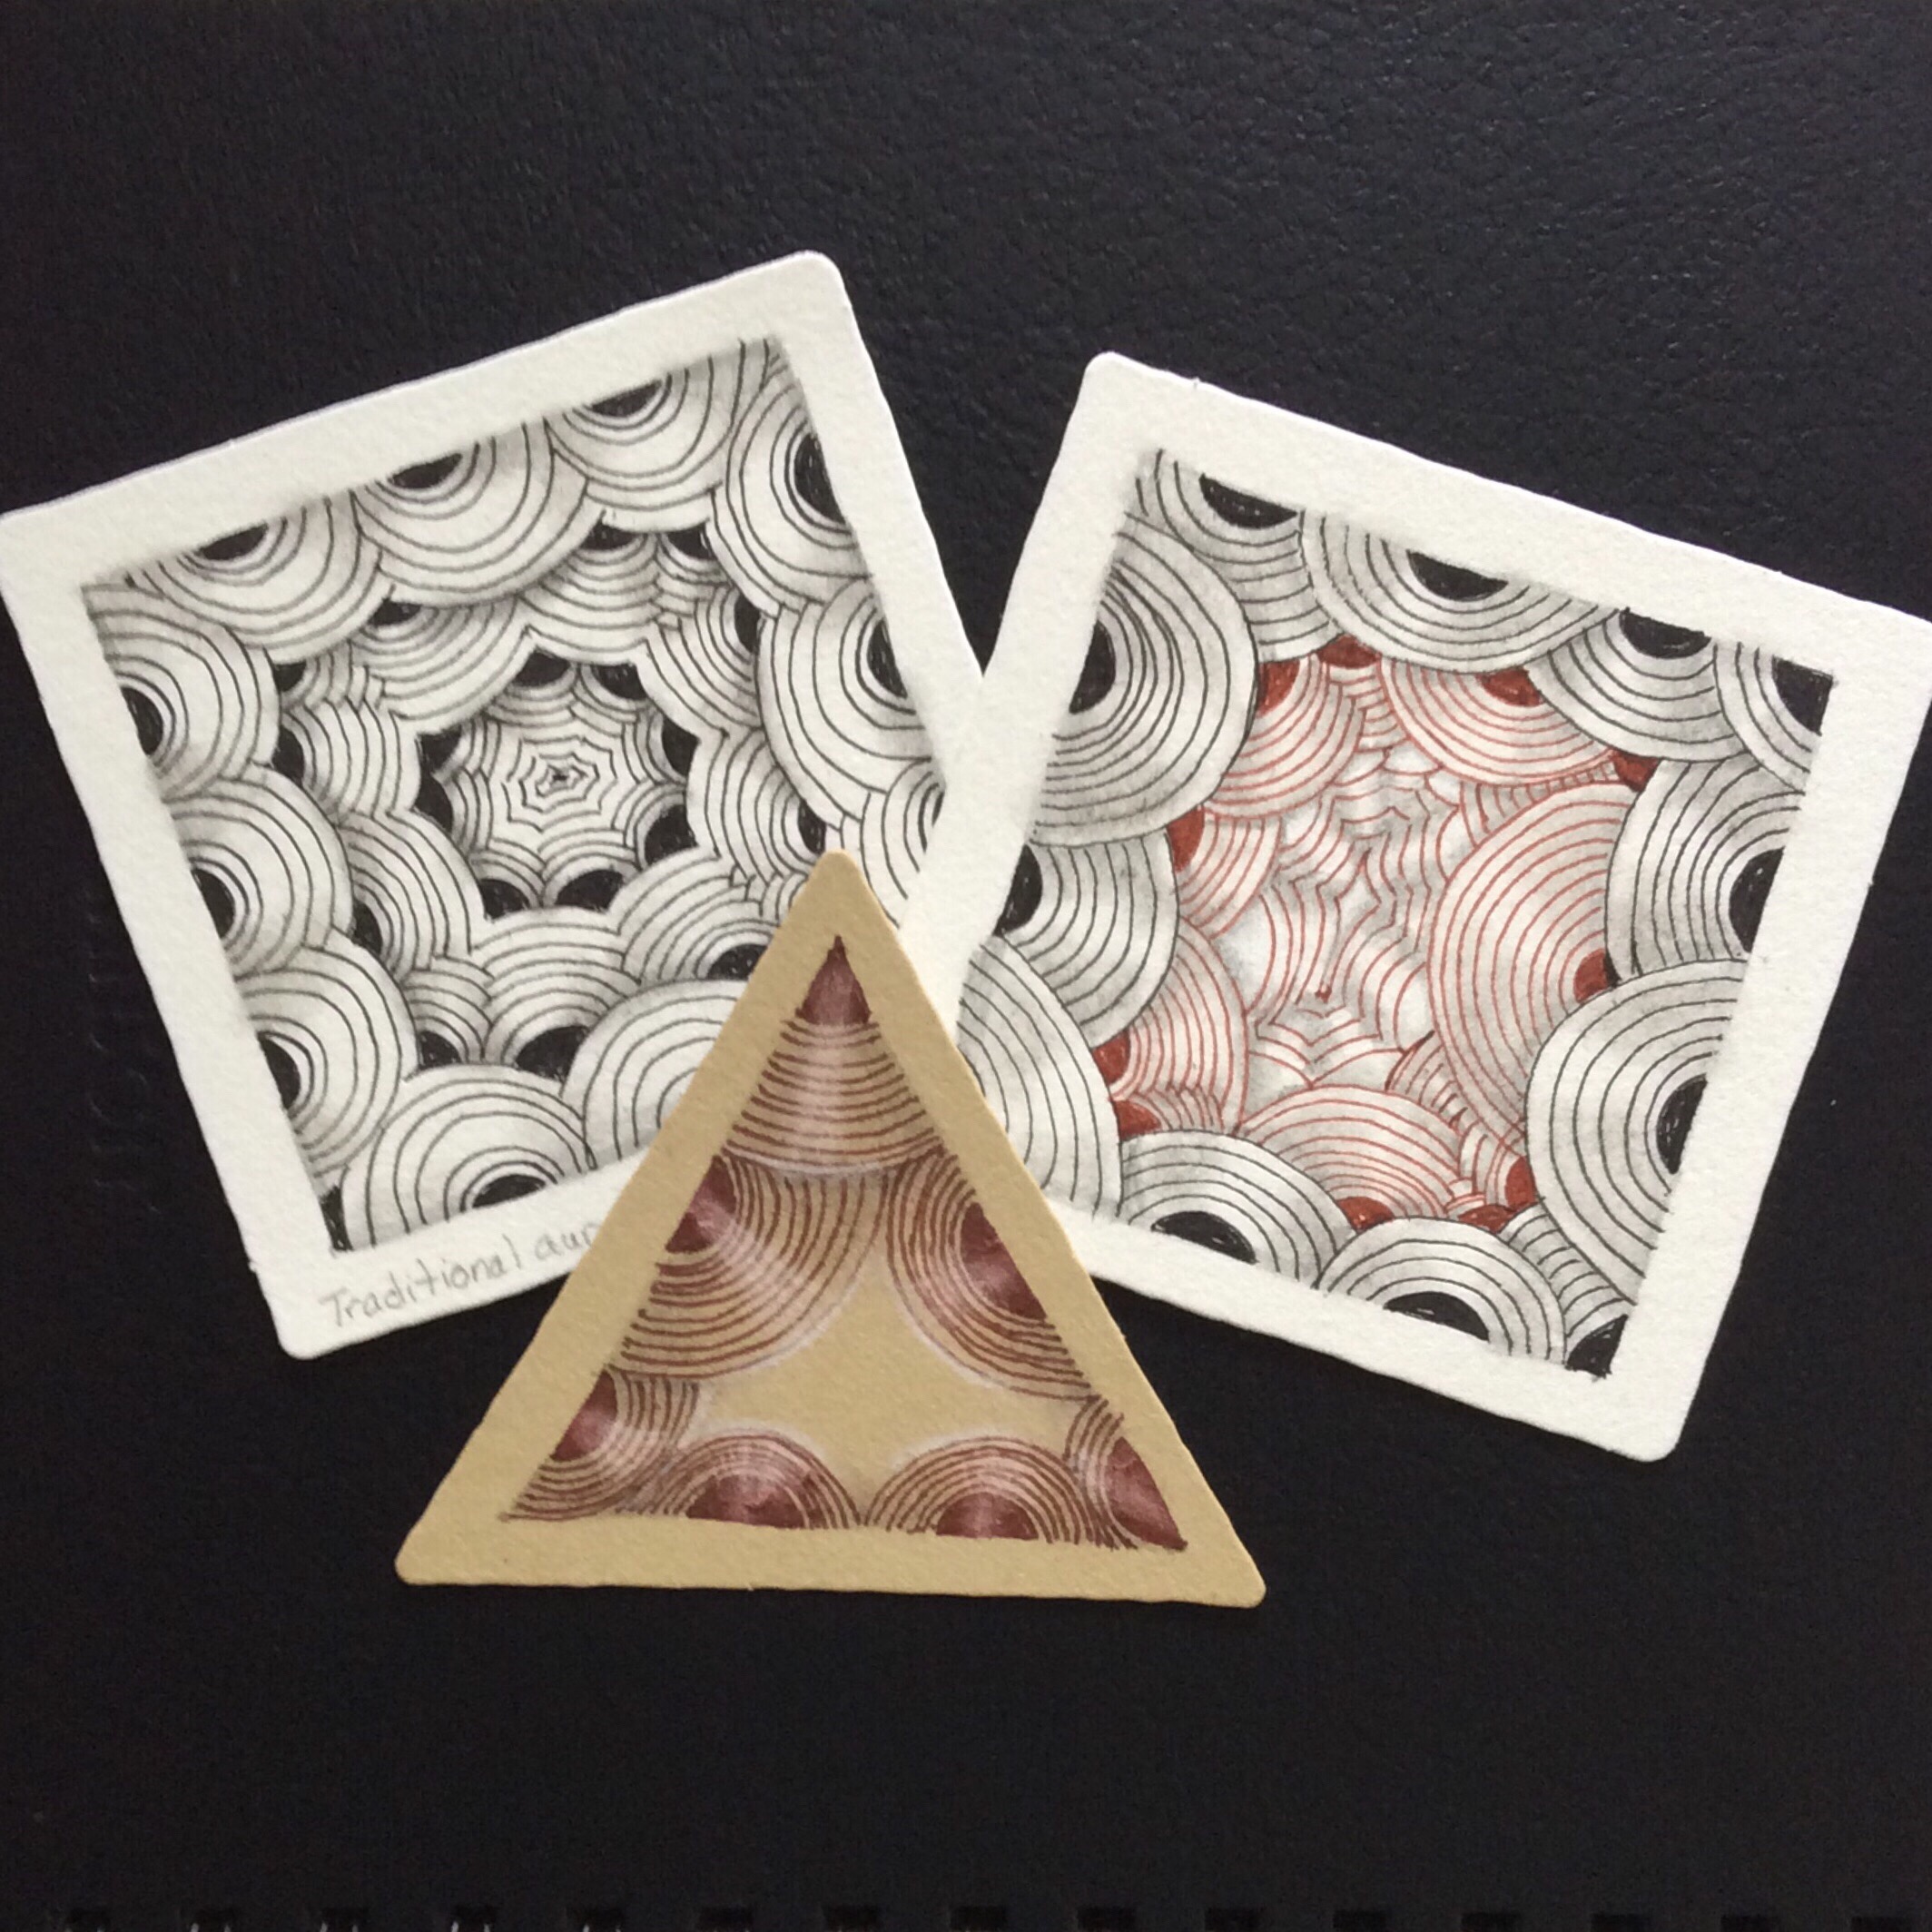
The starts of two high focus patterns, Rumpus in the center flanked by Arukas, are pictured above. These are difficult on a traditional 3.5 inch square tile (shown on the left for comparison), but become ultra high focus when done on a Zentangle Opus tile. The Opus tile measures three regular tiles across by three down, or 10.5 inches square. Sometimes, when enlarging a pattern in a sketchbook or on an Opus tile, the challenge is to keep in mind exactly where the pen is to end up, as the destination is often covered or obscured by the very hand that is doing the drawing.
For example, just to get this much of the beginning of my tile onto the Opus tile, I counted seven “Oops!” utterances before I stopped counting–the counting was just too distracting! Since my intent is to end up with a frame-able tile, the No Mistakes mantra is probably embedded into the tile itself.
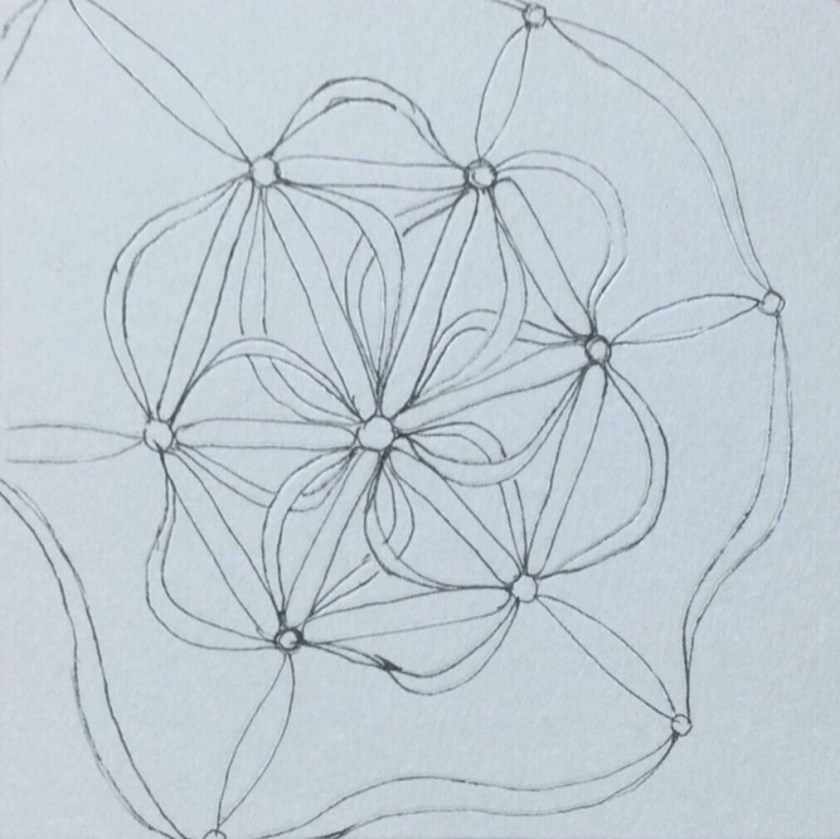
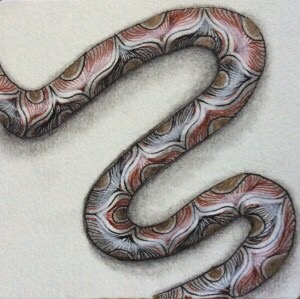
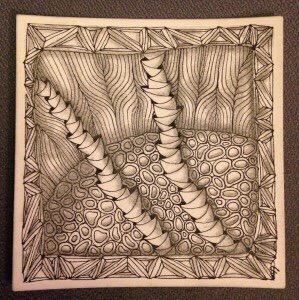
These two tangles are not particularly difficult to master–and I have them down for the traditional tile sizes–but Arukas is primarily inner auras while Rumpus (at least, the way I have drawn it here) is primarily long double Cs or Ss, diverging at the beginning and converging at the end. An easier, and just as pretty, way to draw Rumpus is with doubled lines that are joined with a curve at each end, essentially creating long, thin oblongs; or the doubled line can be connected with points to generate a ribboned effect. Both of these effects can be seen on the new gray traditional sized tile (3.5 inch square) in the basic Rumpus sketch below.
The tangle Rumpus doesn’t end here. As presented in the official step-out for this pattern, it is filled with pearl-like orbs, then richly shaded. If you have the Zentangle Mosaic app on your mobile device, you can see the official step-outs for both Rumpus and Arukas there. If not, here is a Pinterest link for Rumpus that will help: https://pin.it/bz2wa5n6mj5icx ; and one for Arukas: https://pin.it/y6ikp7r6mrlp62 .
Auras are easy, right? You learned about auras with your very first pattern, Crescent Moon. First you created the half-circle and filled it in; next you drew an aura along the curve. You’ve been aura-ing ever since. And so have I, but auras continues to be difficult for me, as I can barely trace well, let alone draw an outline of whatever I just drew. So for me, anything with an aura is a high focus pattern–even Crescent Moon! But that never stops me from taking on even the toughest-looking pattern.
Thankfully, Zentangle is not about the difficulty of the tangle or tile, but about your journey as you learn and conquer more challenging patterns. The step-outs learned during classes and workshops, or online via YouTube or tangle sites, make all the difficult patterns easy to recreate on your own.
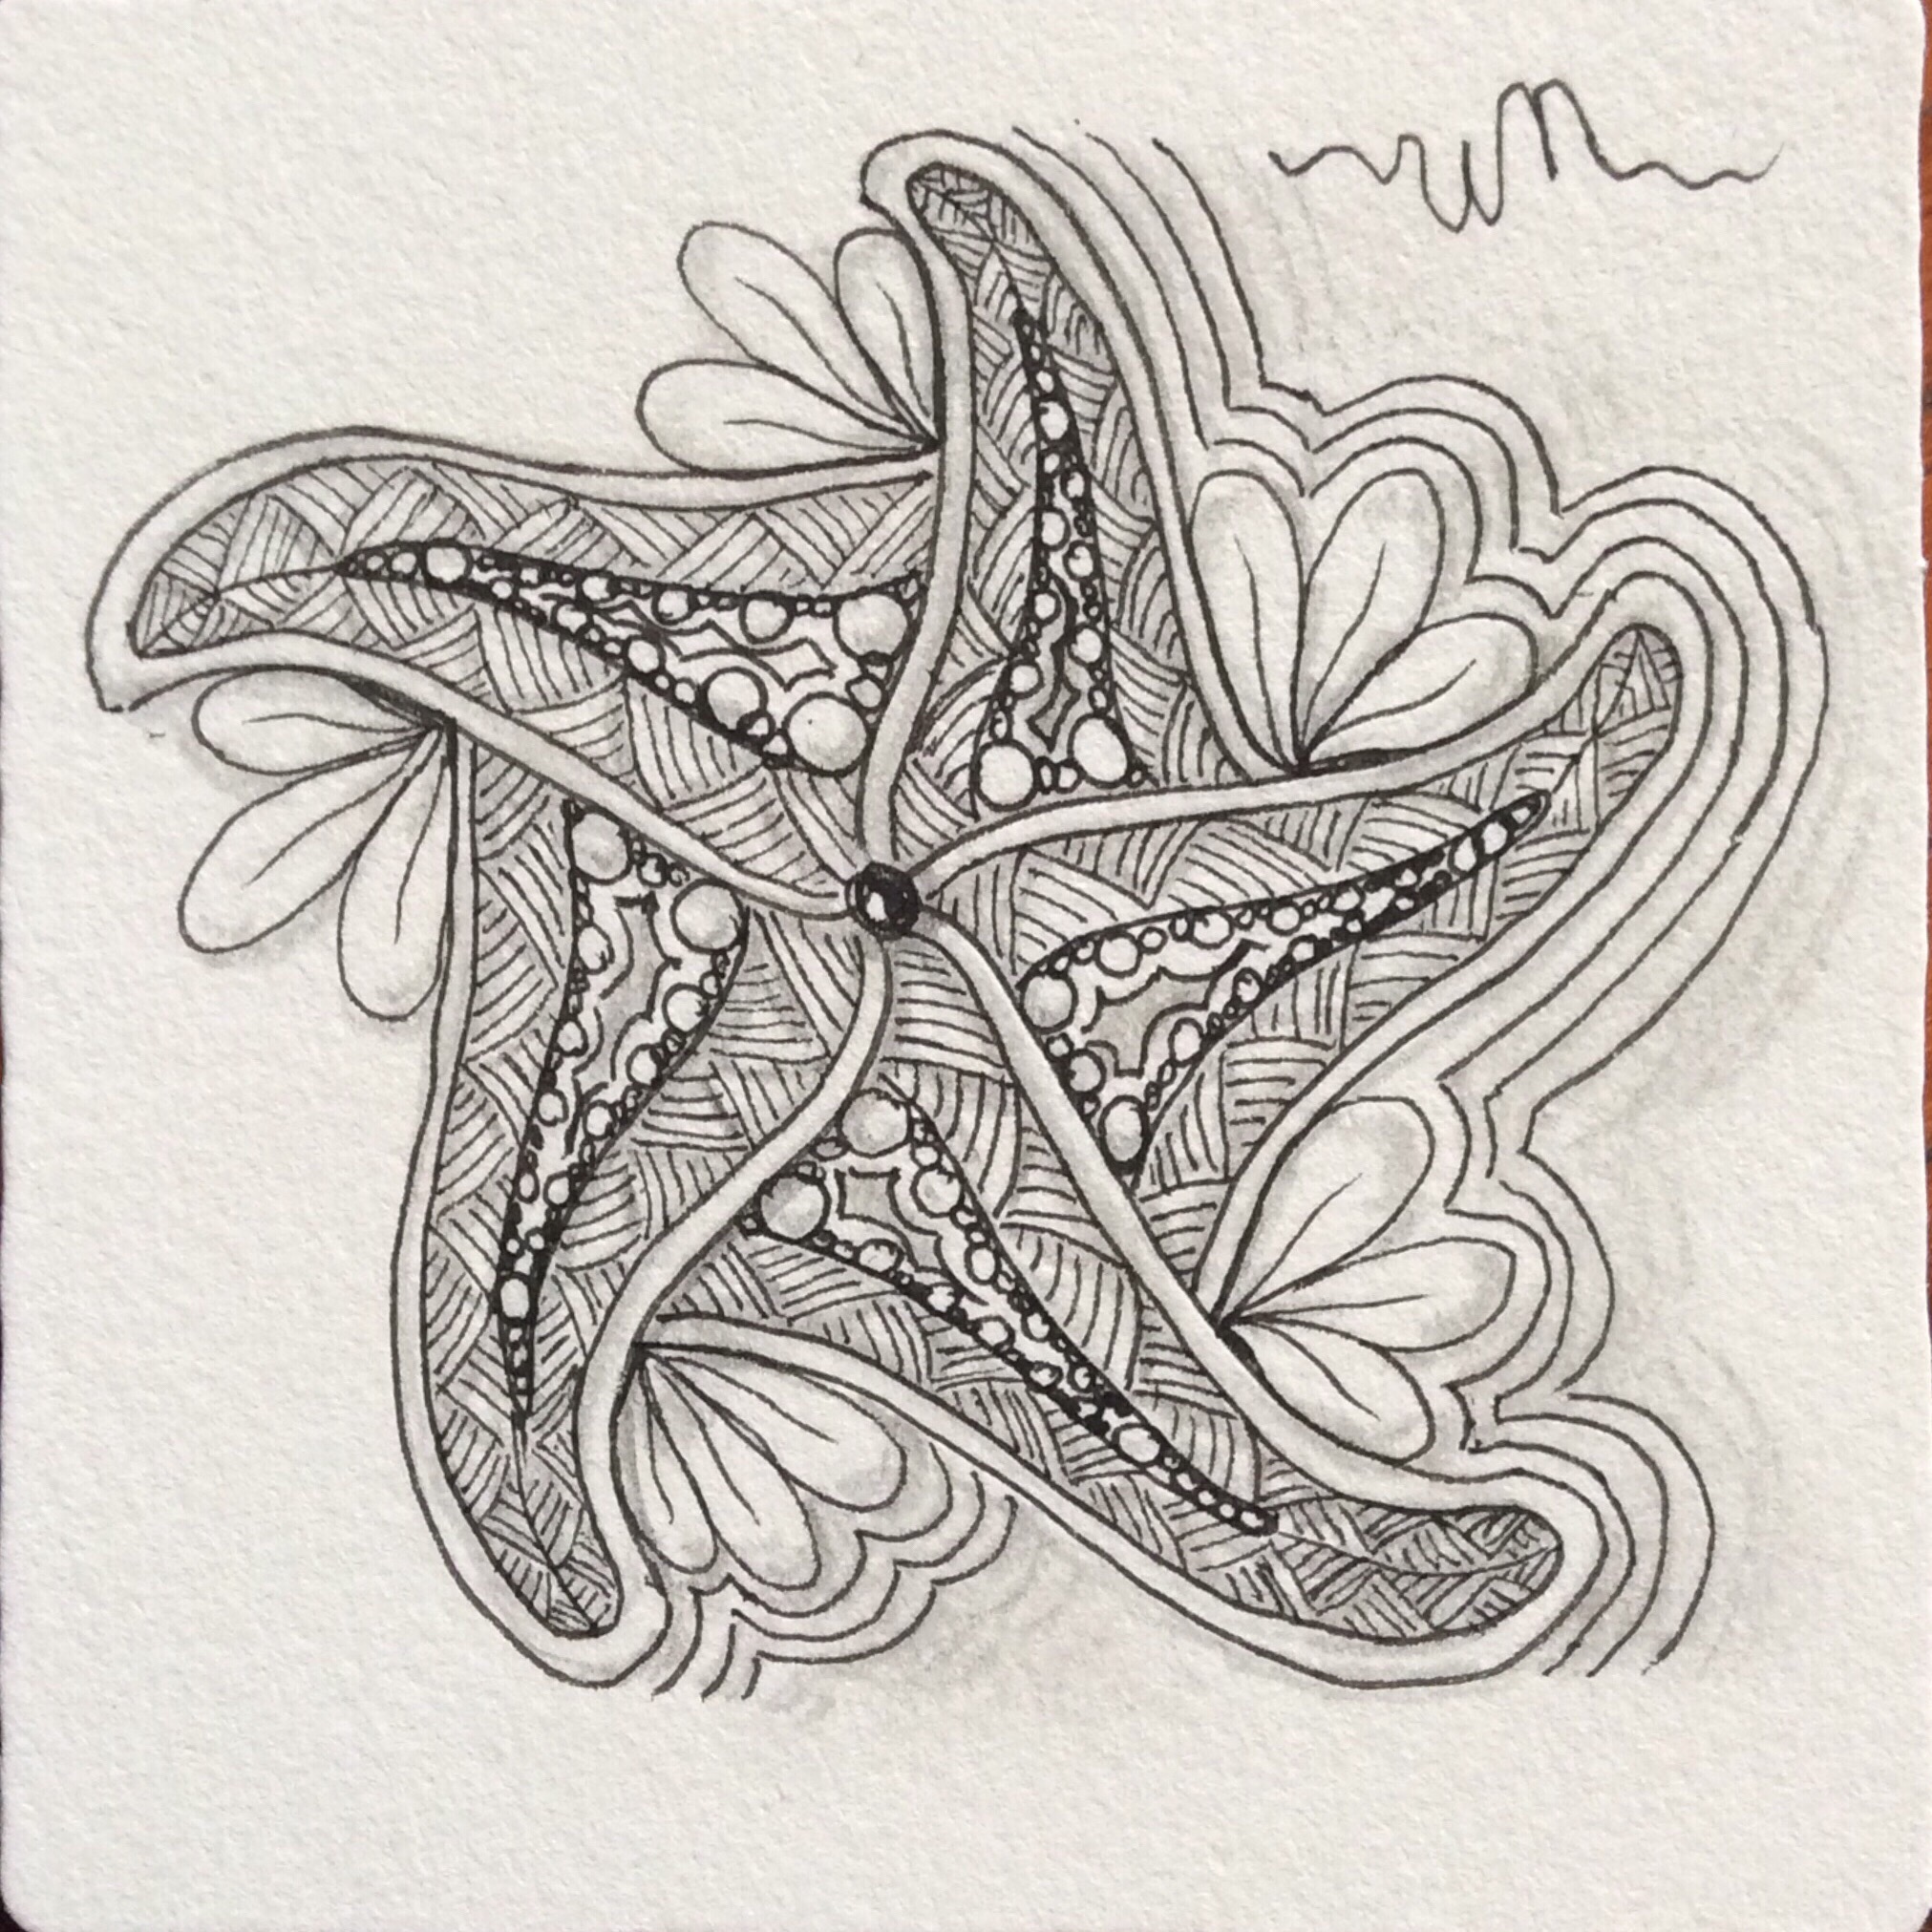
Tripoli may be a place and a fantastic vacation destination, but tripoli is also a Zentangle pattern. If you have the Zentangle® Mosaic app, you probably saw this week’s Kitchen Tabe Tangling (KTT) video on how to draw tripoli and embellish the elements. Although i have been tangling with tripoli for quite a while, the video added some new information about tripoli that I didn’t think about before. The KTT inspired me to both blog about this versatile pattern as well as to try my hand at something more creative than the mundane way in which I’ve been drawing it.
Tripoli is not a single triangle element, but a bunch of elements connecting to form free-flowing paths and groupings of triangular shapes. Typically, the triangles are filled with “fragments,” which are patterns used in part to fill elements of a grid pattern. Below are a few example of simple grid patterns.
Fragments can be used all sorts of ways, including to fill a shape or to embellish a string.
Usually, when tripoli is tangled, each triangle is filled with a fragment. In the examples shown below, you can see how the tripoli elements build from each other. The next triangle builds from a line that auras one side of the previous triangle.
In these tangles, grouped triangles are about the same size and contain the same fragment pattern. However, there is no hard and fast rule; consecutive triangles can grow or shrink, and fragments can change from one element to the next.
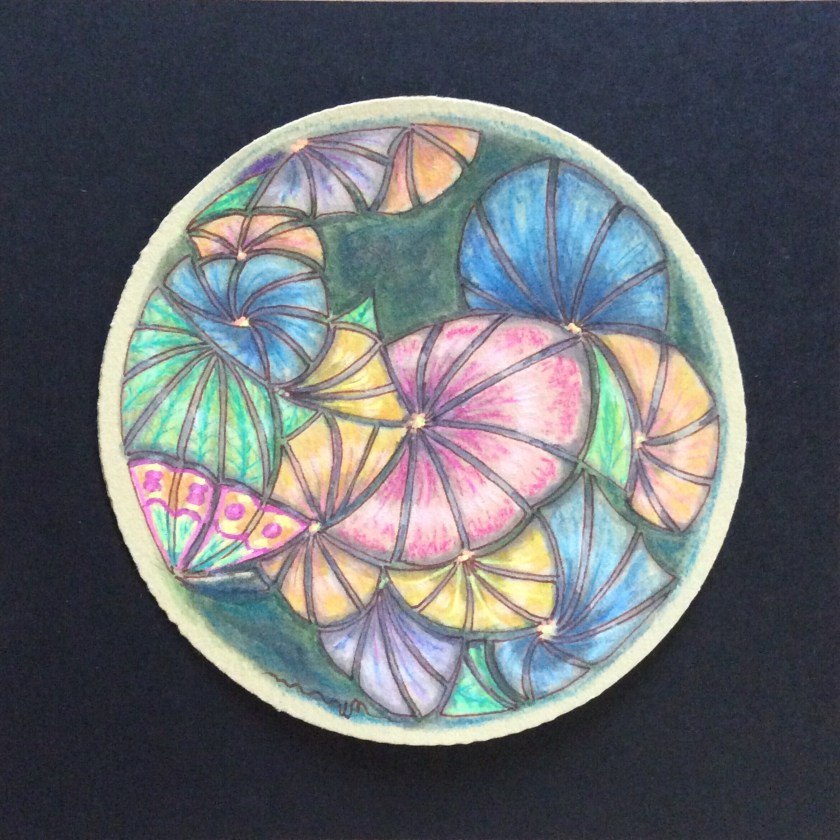
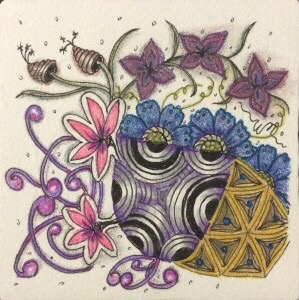
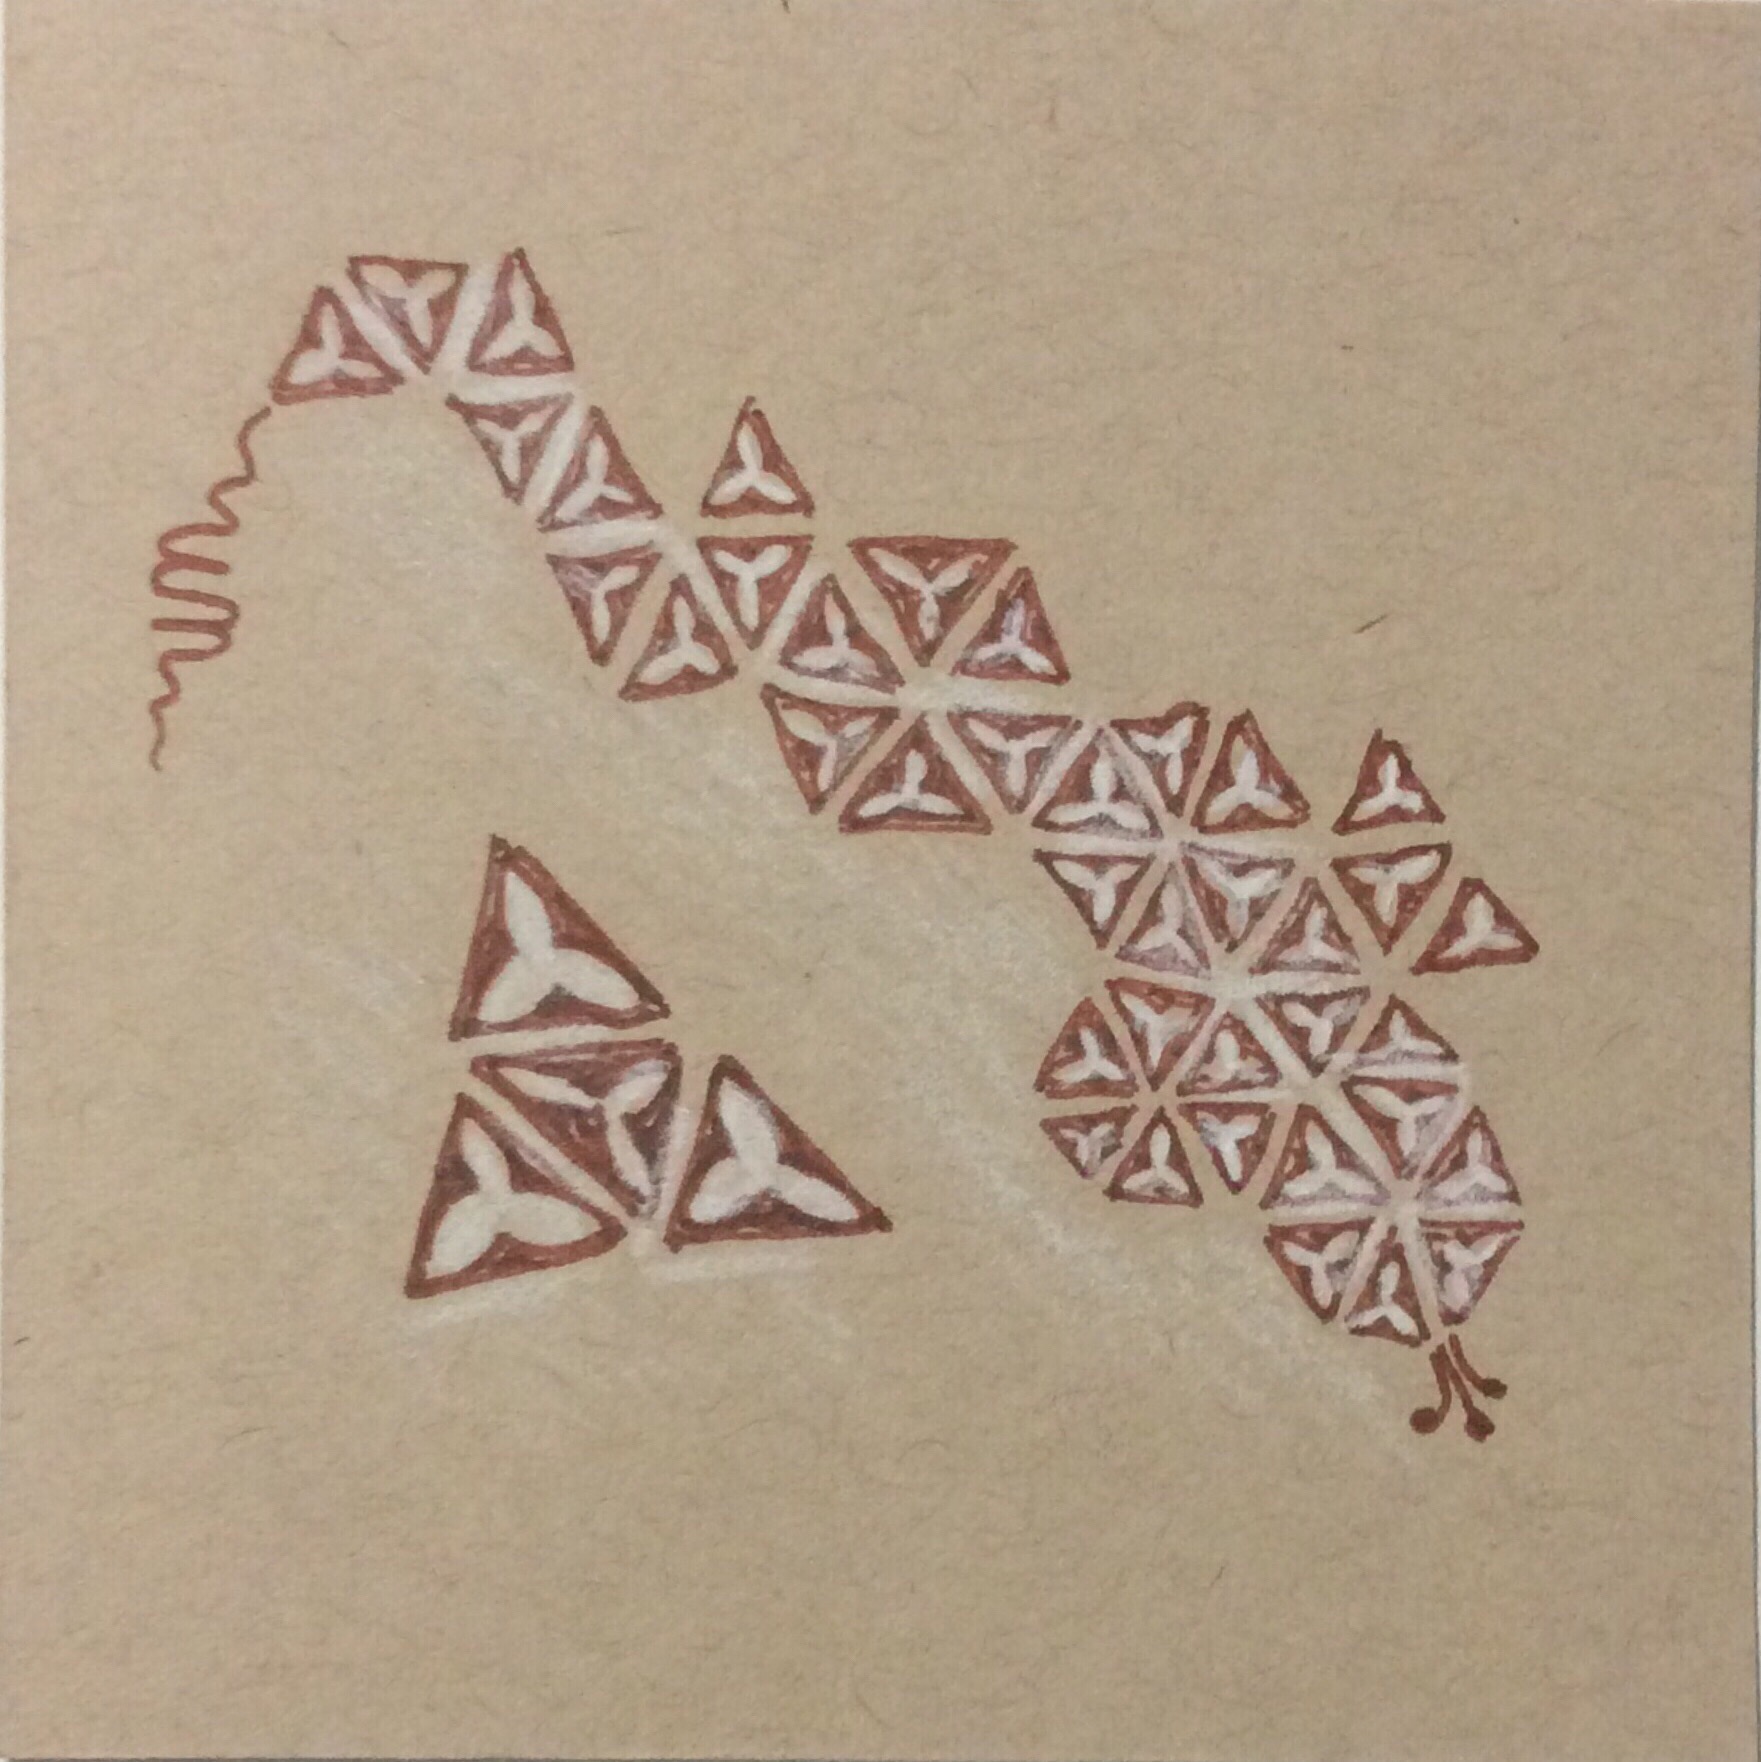
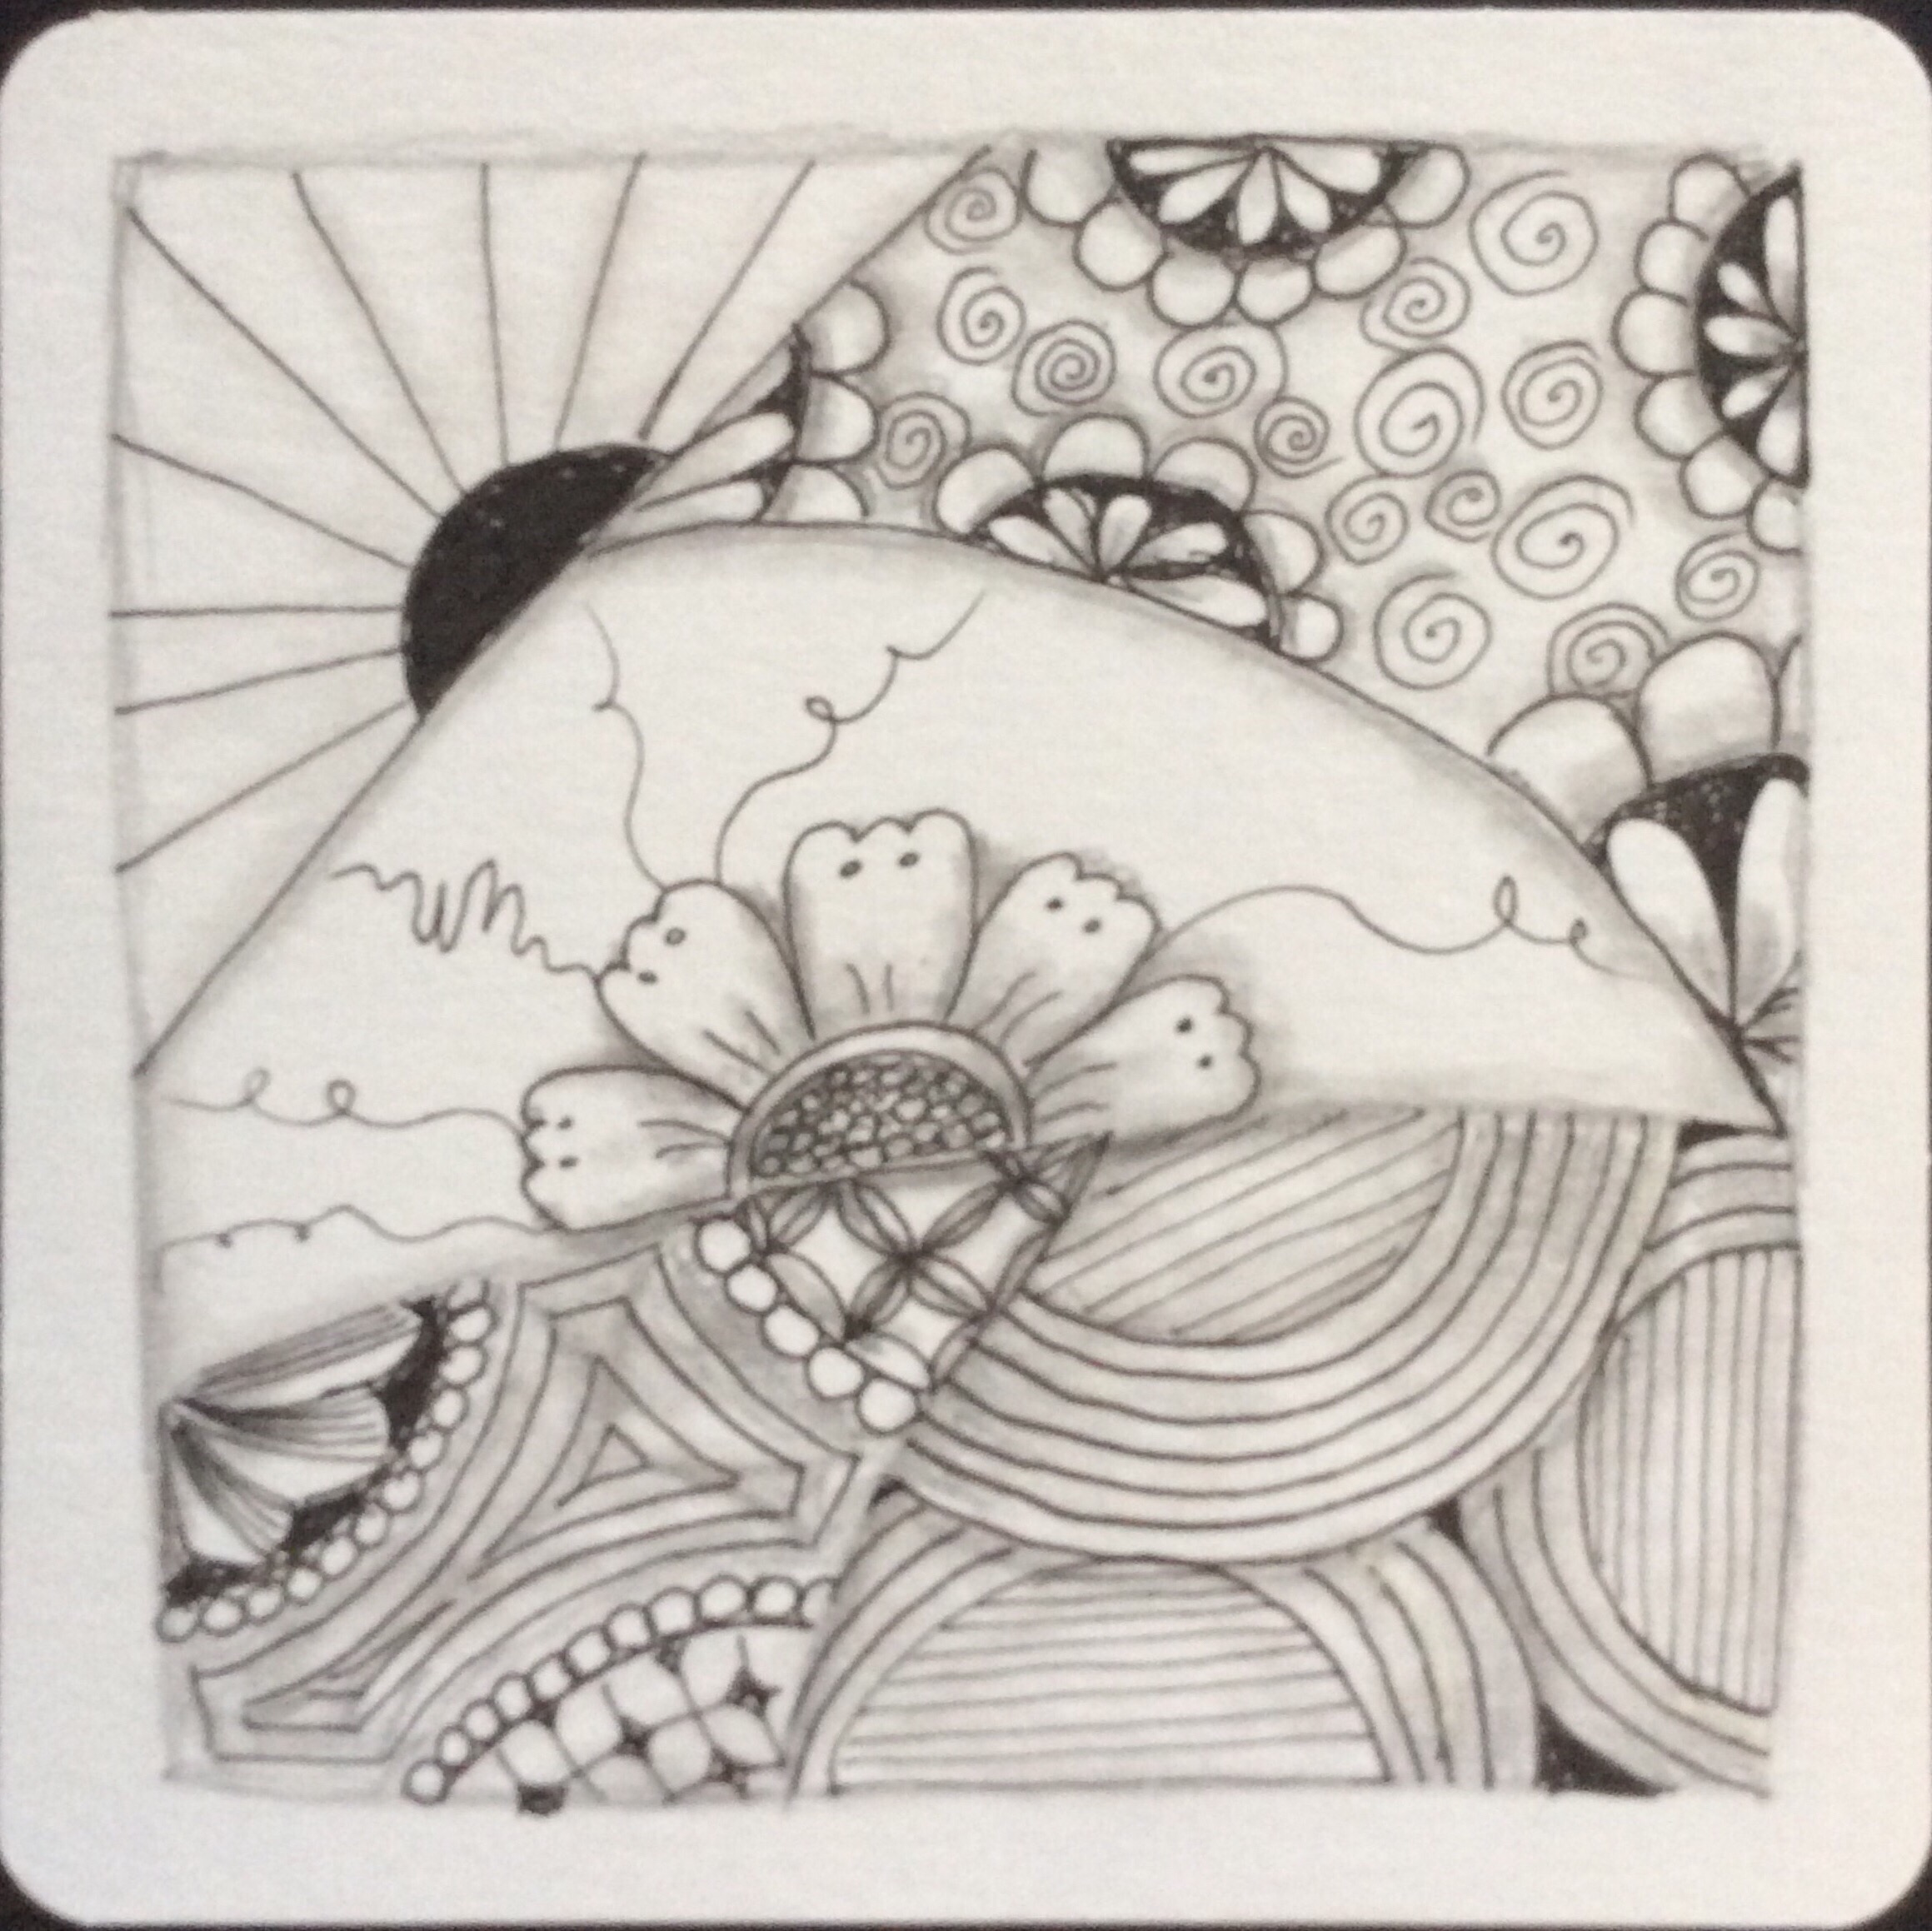
The wonderful thing about tripoli is that the elements don’t need to be filled at all. The individual triangles can be filled with anything that seems to fit the path or grouping as well. In the example below, the paths and groupings reminded me of a bunch of flowers in a garden. So I filled the triangle elements to reflect that. Shading and color smoothed the edges and points to look more like something Nature would do.
Each “petal” and “leaf” is a pointed triangle, and most of the sides of the triangles are slightly curved–mostly because I prefer a bit of curve over straight lines. Each triangle began with an aura of one side of the previous triangle. The aura became the first side of the next triangle. It is even OK to slightly “hook” the aura if you are going for a rounded grouping–or just because. In this example, although some triangles were later filled with a pattern that resembles the veins found on a leaf, the rest were simply filled with color and texture to resemble petals. Even the butterfly body started out as a triangle which was subsequently filled with color.
Tripoli is one of the most versatile Zentangle patterns. It can become a lizzard or a flower and many things in between. The flow of the path or the grouping your pen creates as you tangle suggests an object or design. You fill the triangles with patterns or color or texture to produce beautiful effects.
Remember: Anything is possible one stroke at a time.®
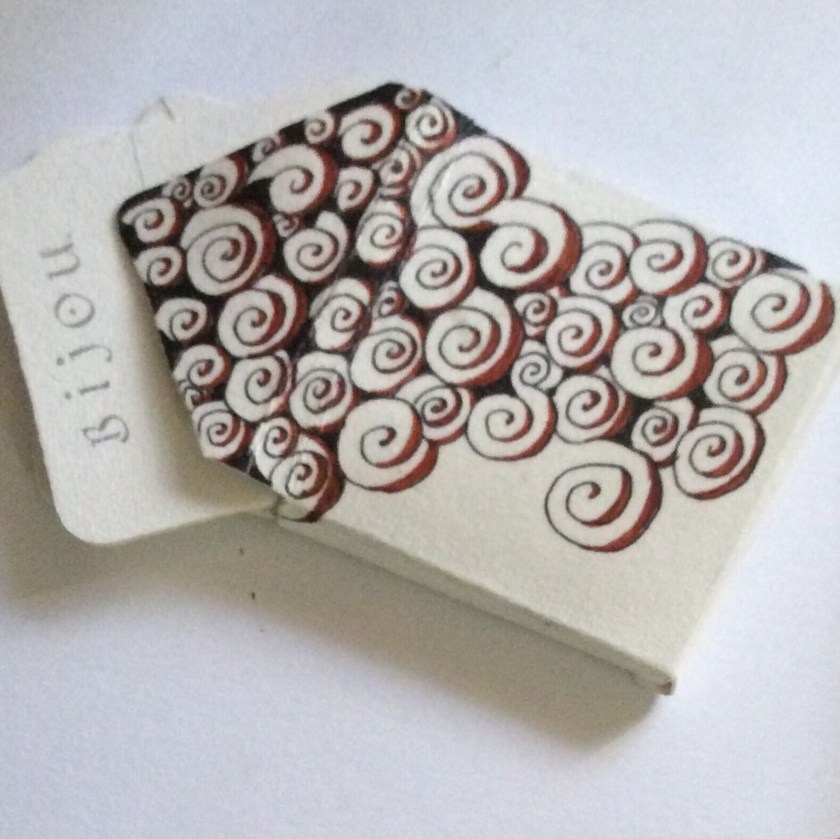
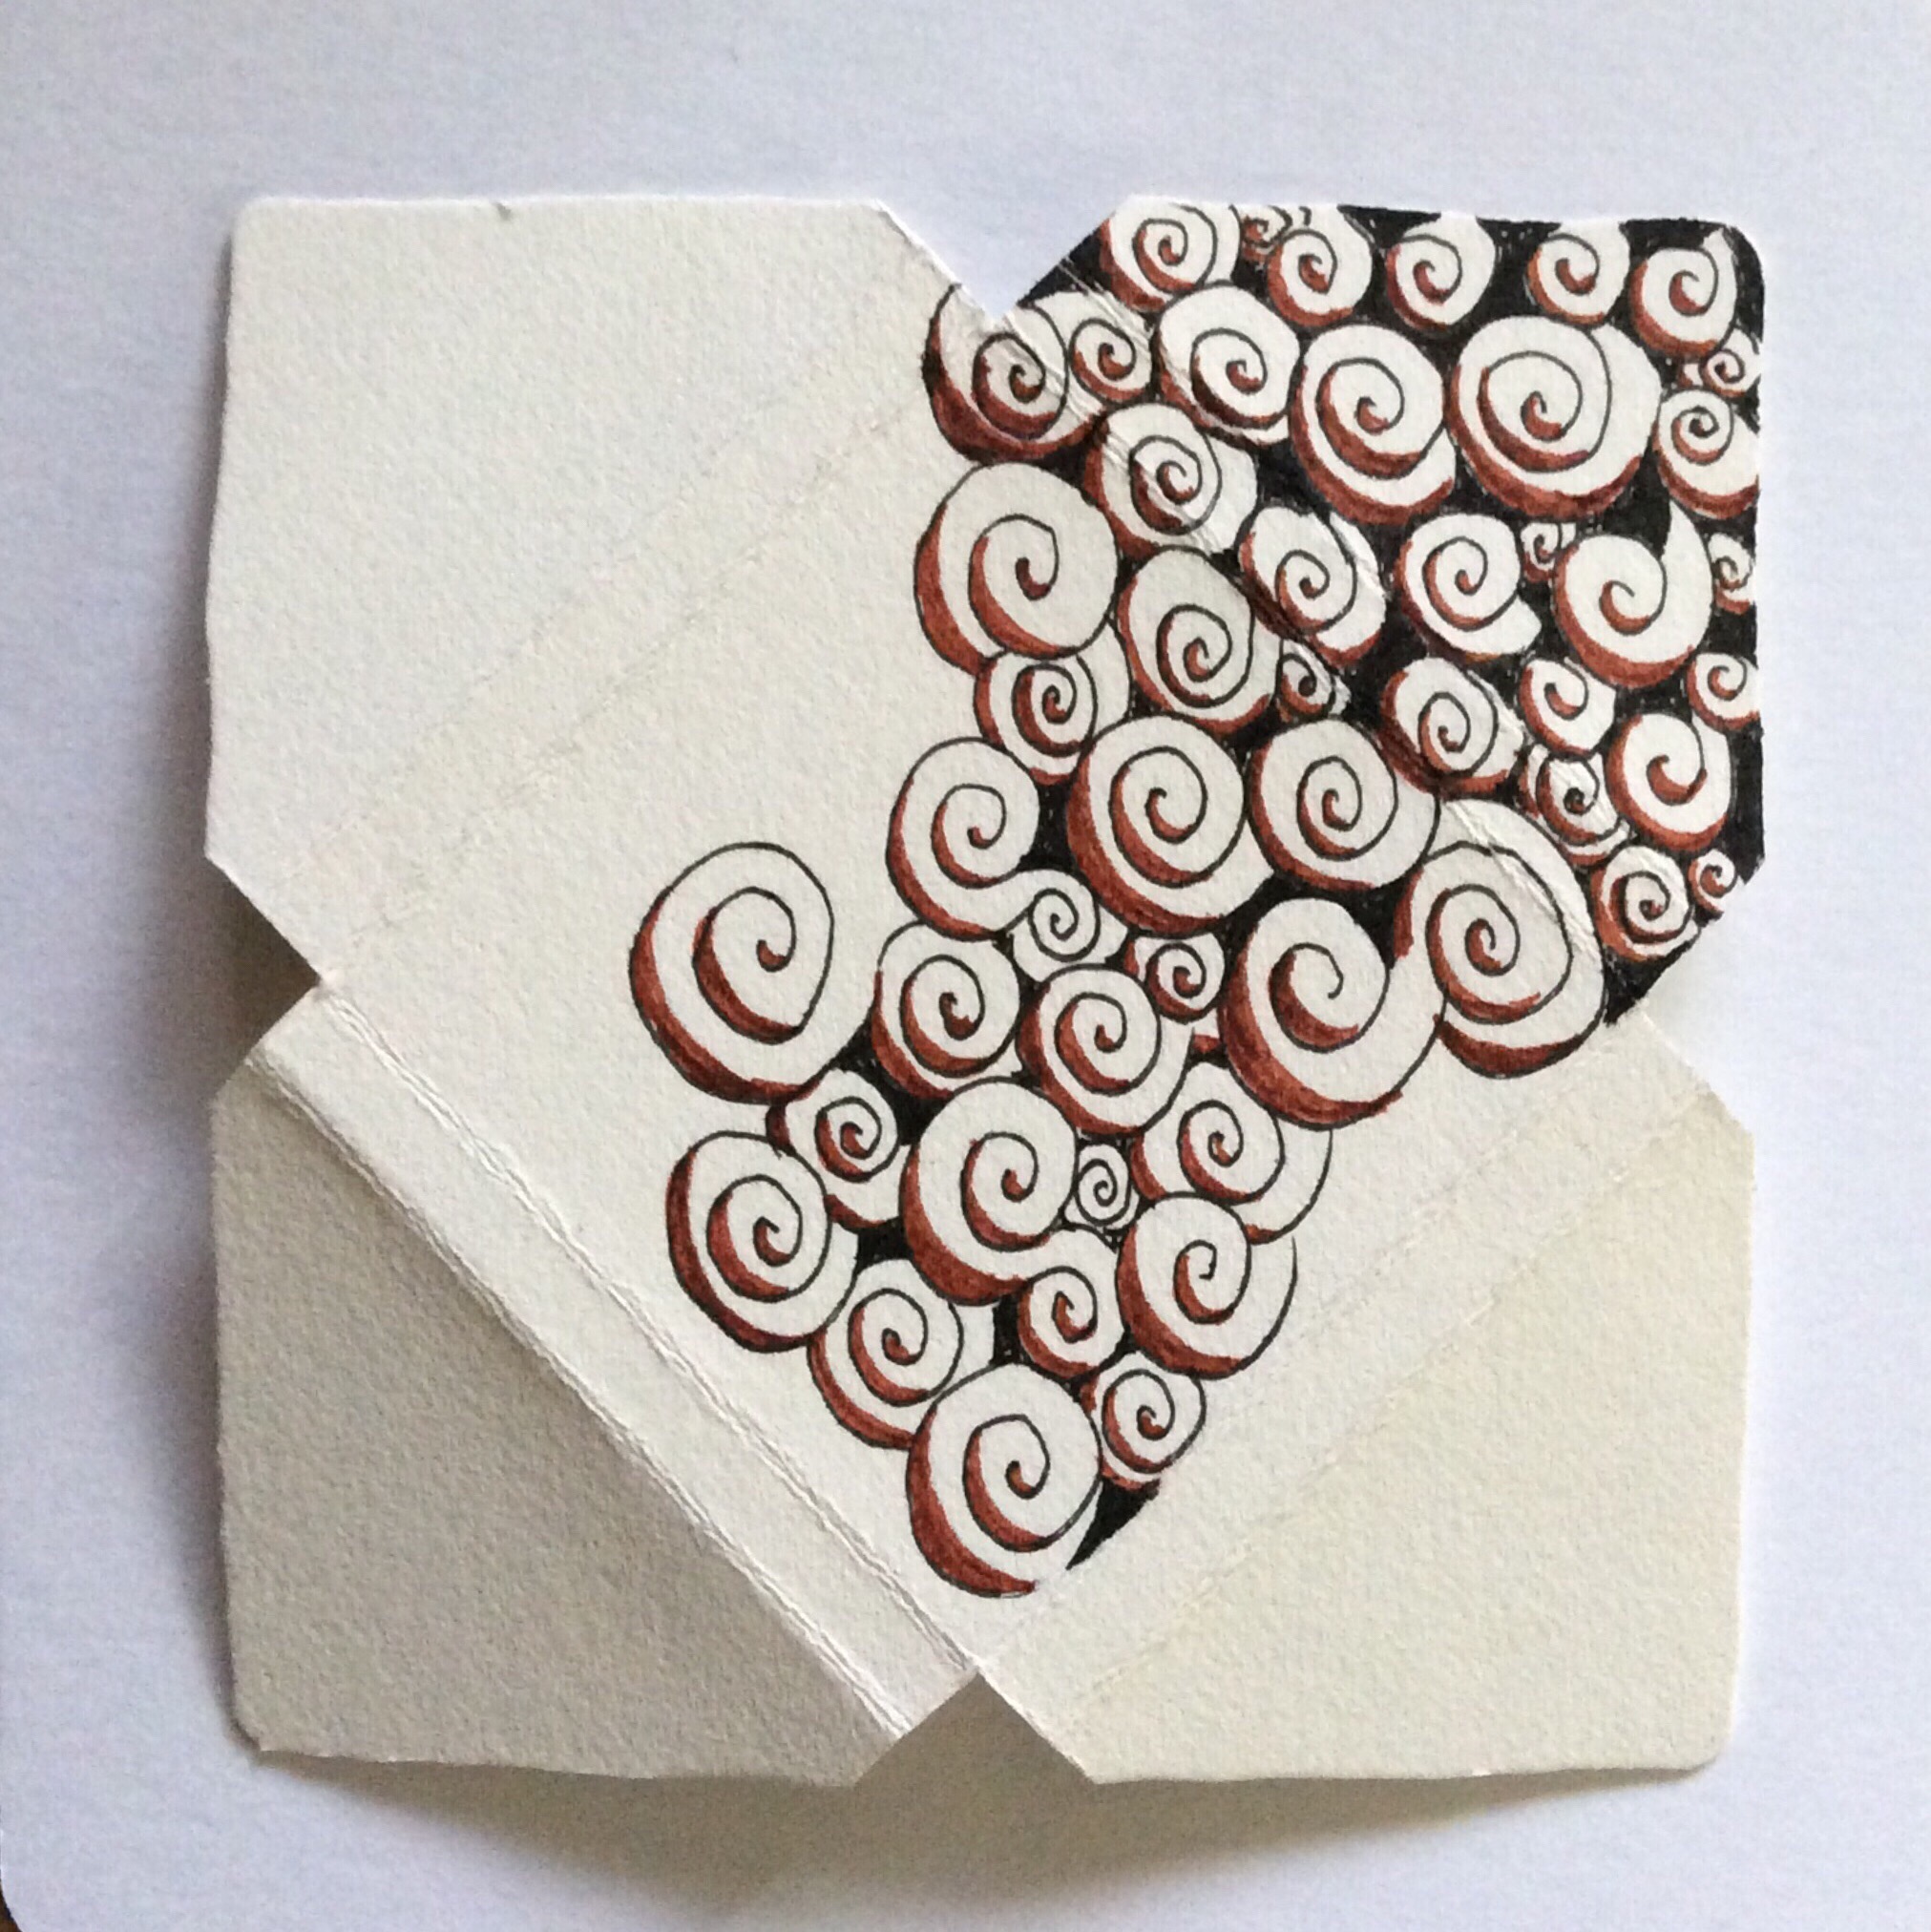
Earlier this week, I posted a picture on the Zentangle Mosaic® app of a holder I made out of an Apprentice tile (4.5 inches square) to keep my brand new 2.5-inch square business cards from VistaPrint®.
This post caused several people to ask how I made the holder, and I promised to post directions here on my blog.
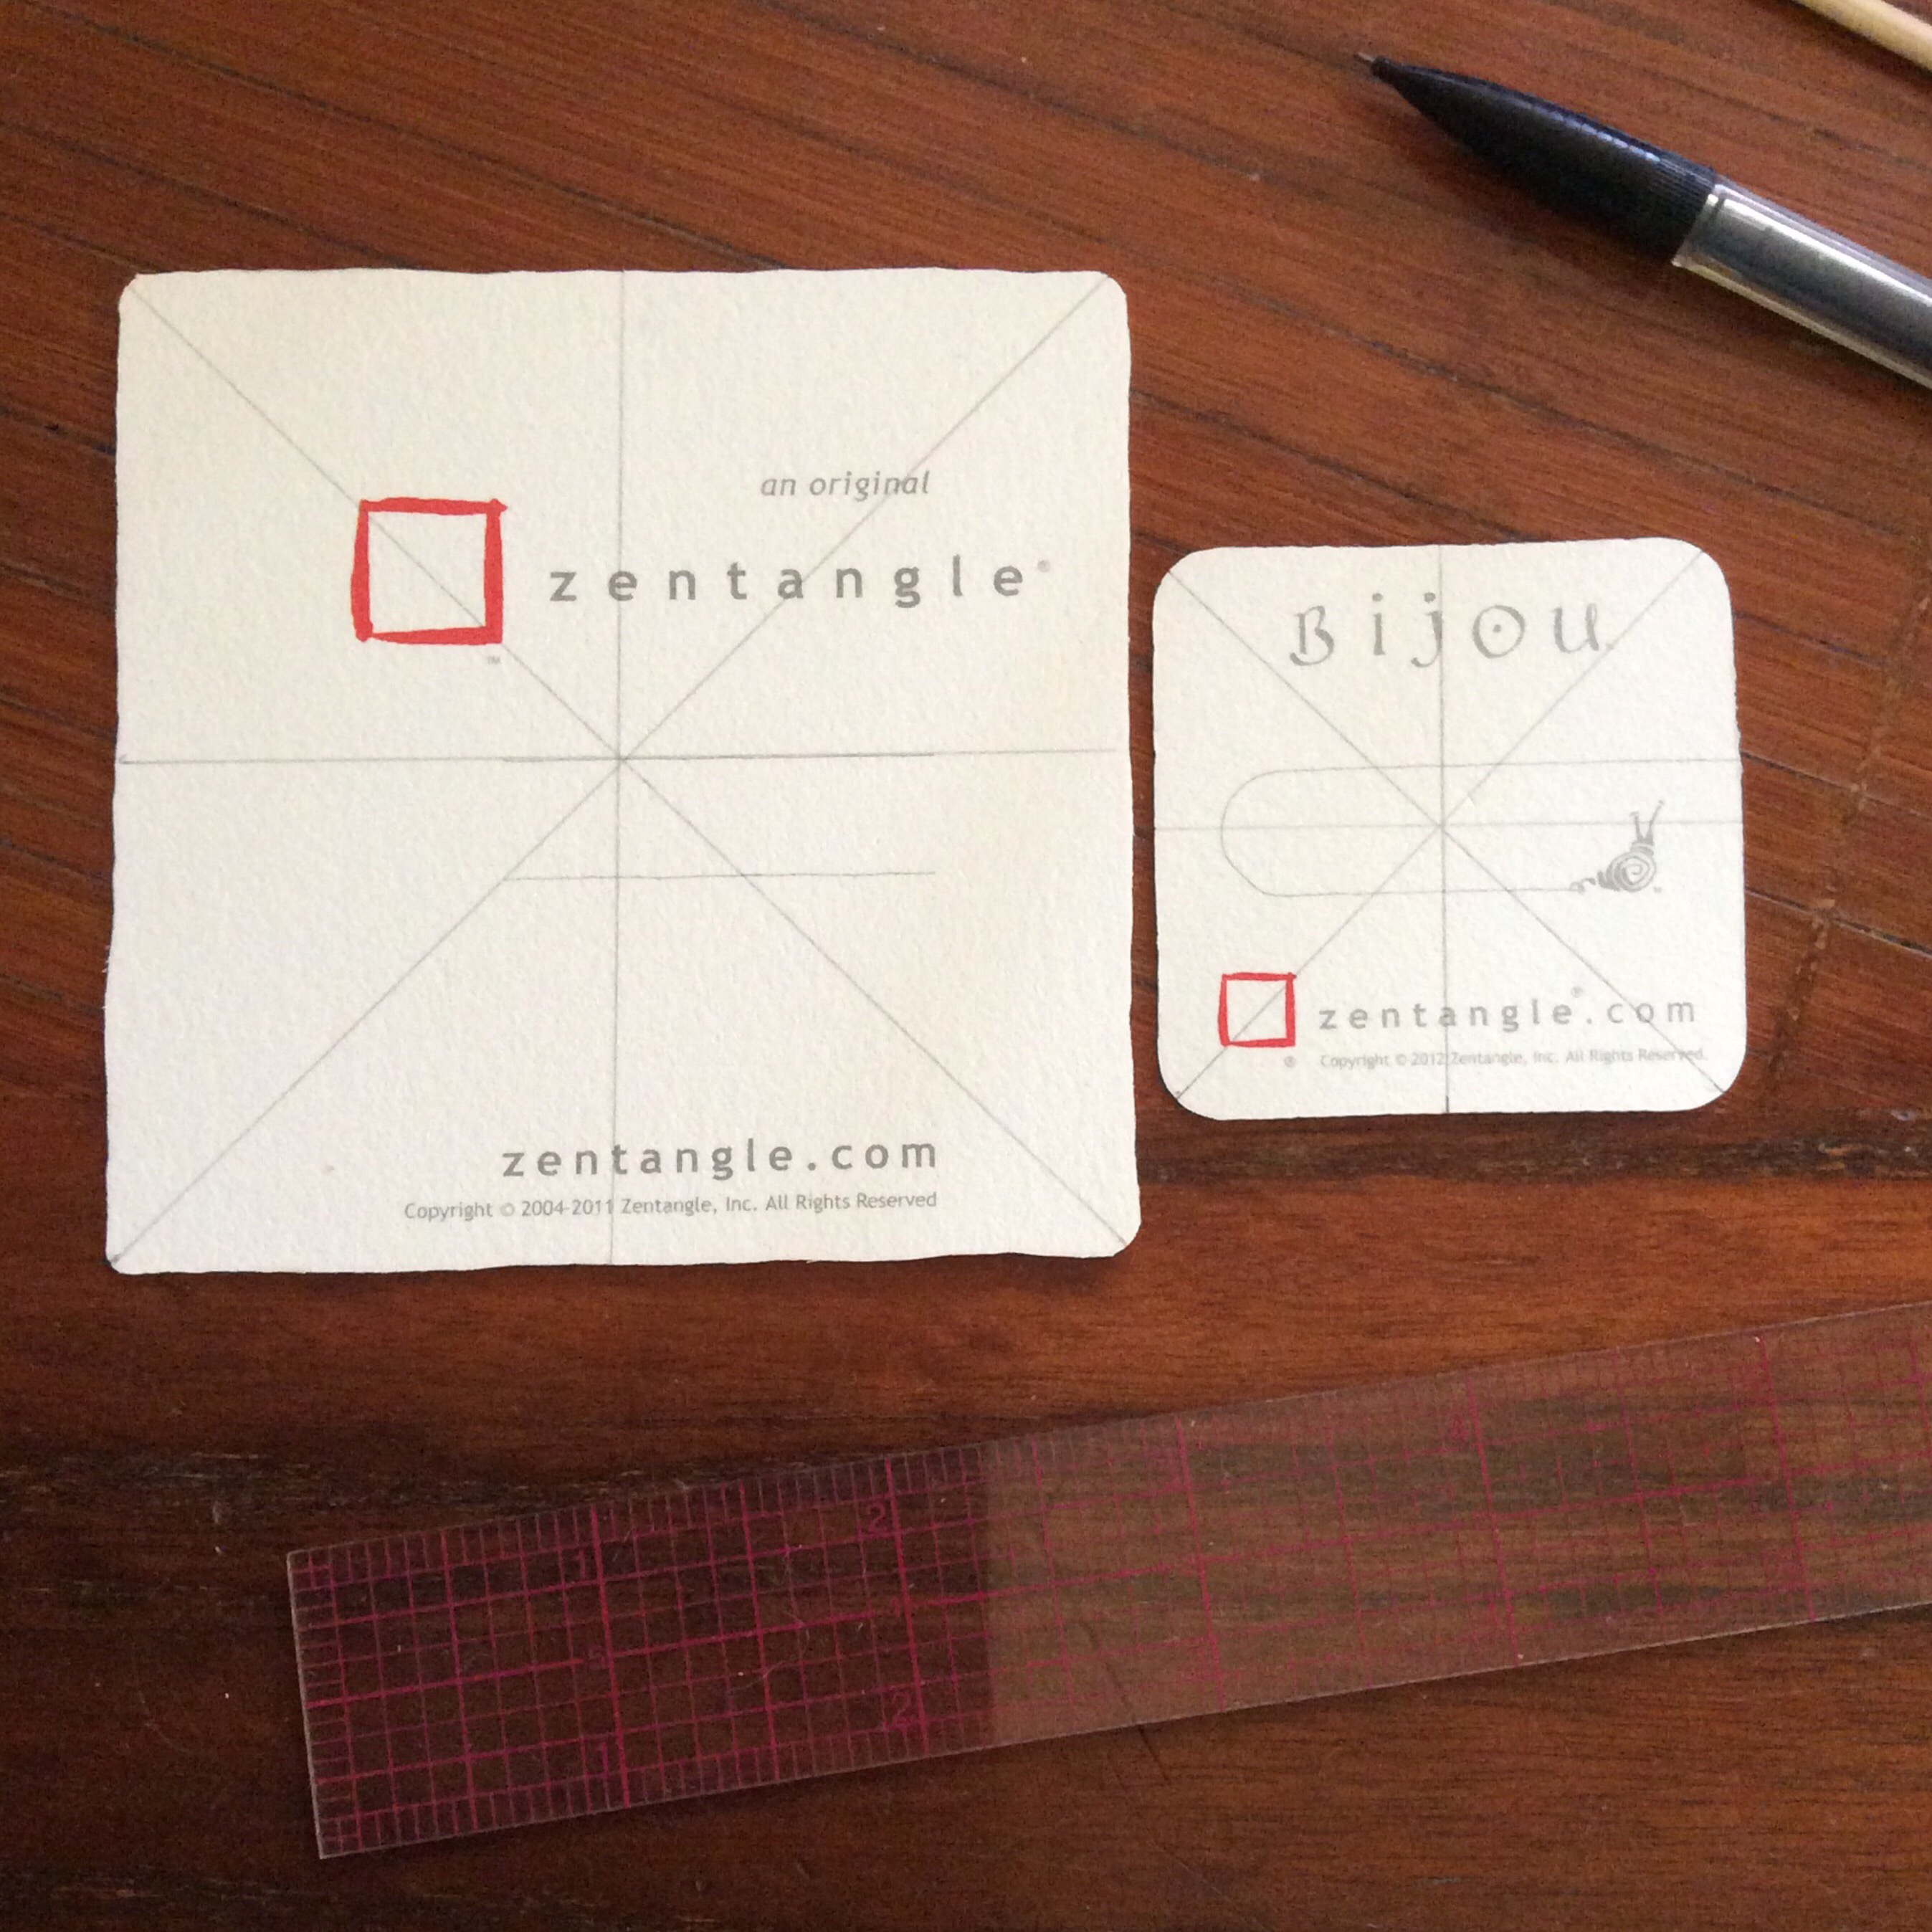
Thinking back to a four-piece bijou puzzle I tangled for Valentangle2017 on Facebook, I thought it might be better to create a bijou-sized holder instead of the business card holder. Where the business cards are 2.5 inches square and need the larger Apprentice tile, bijou tiles are only 2 inches square, so a standard 3.5 inch square tile is plenty large to make a holder. No matter what size holder you need, the procedure is the same.
Step 1: Mark the center and diagonal lines.
Mark centers and diagonals.
With a pencil, find and draw the diagonals and centers on the backs of both your “final size” tile and the tile from which you will make the holder. Measure for accuracy. Your tile will resemble a squared round pizza.
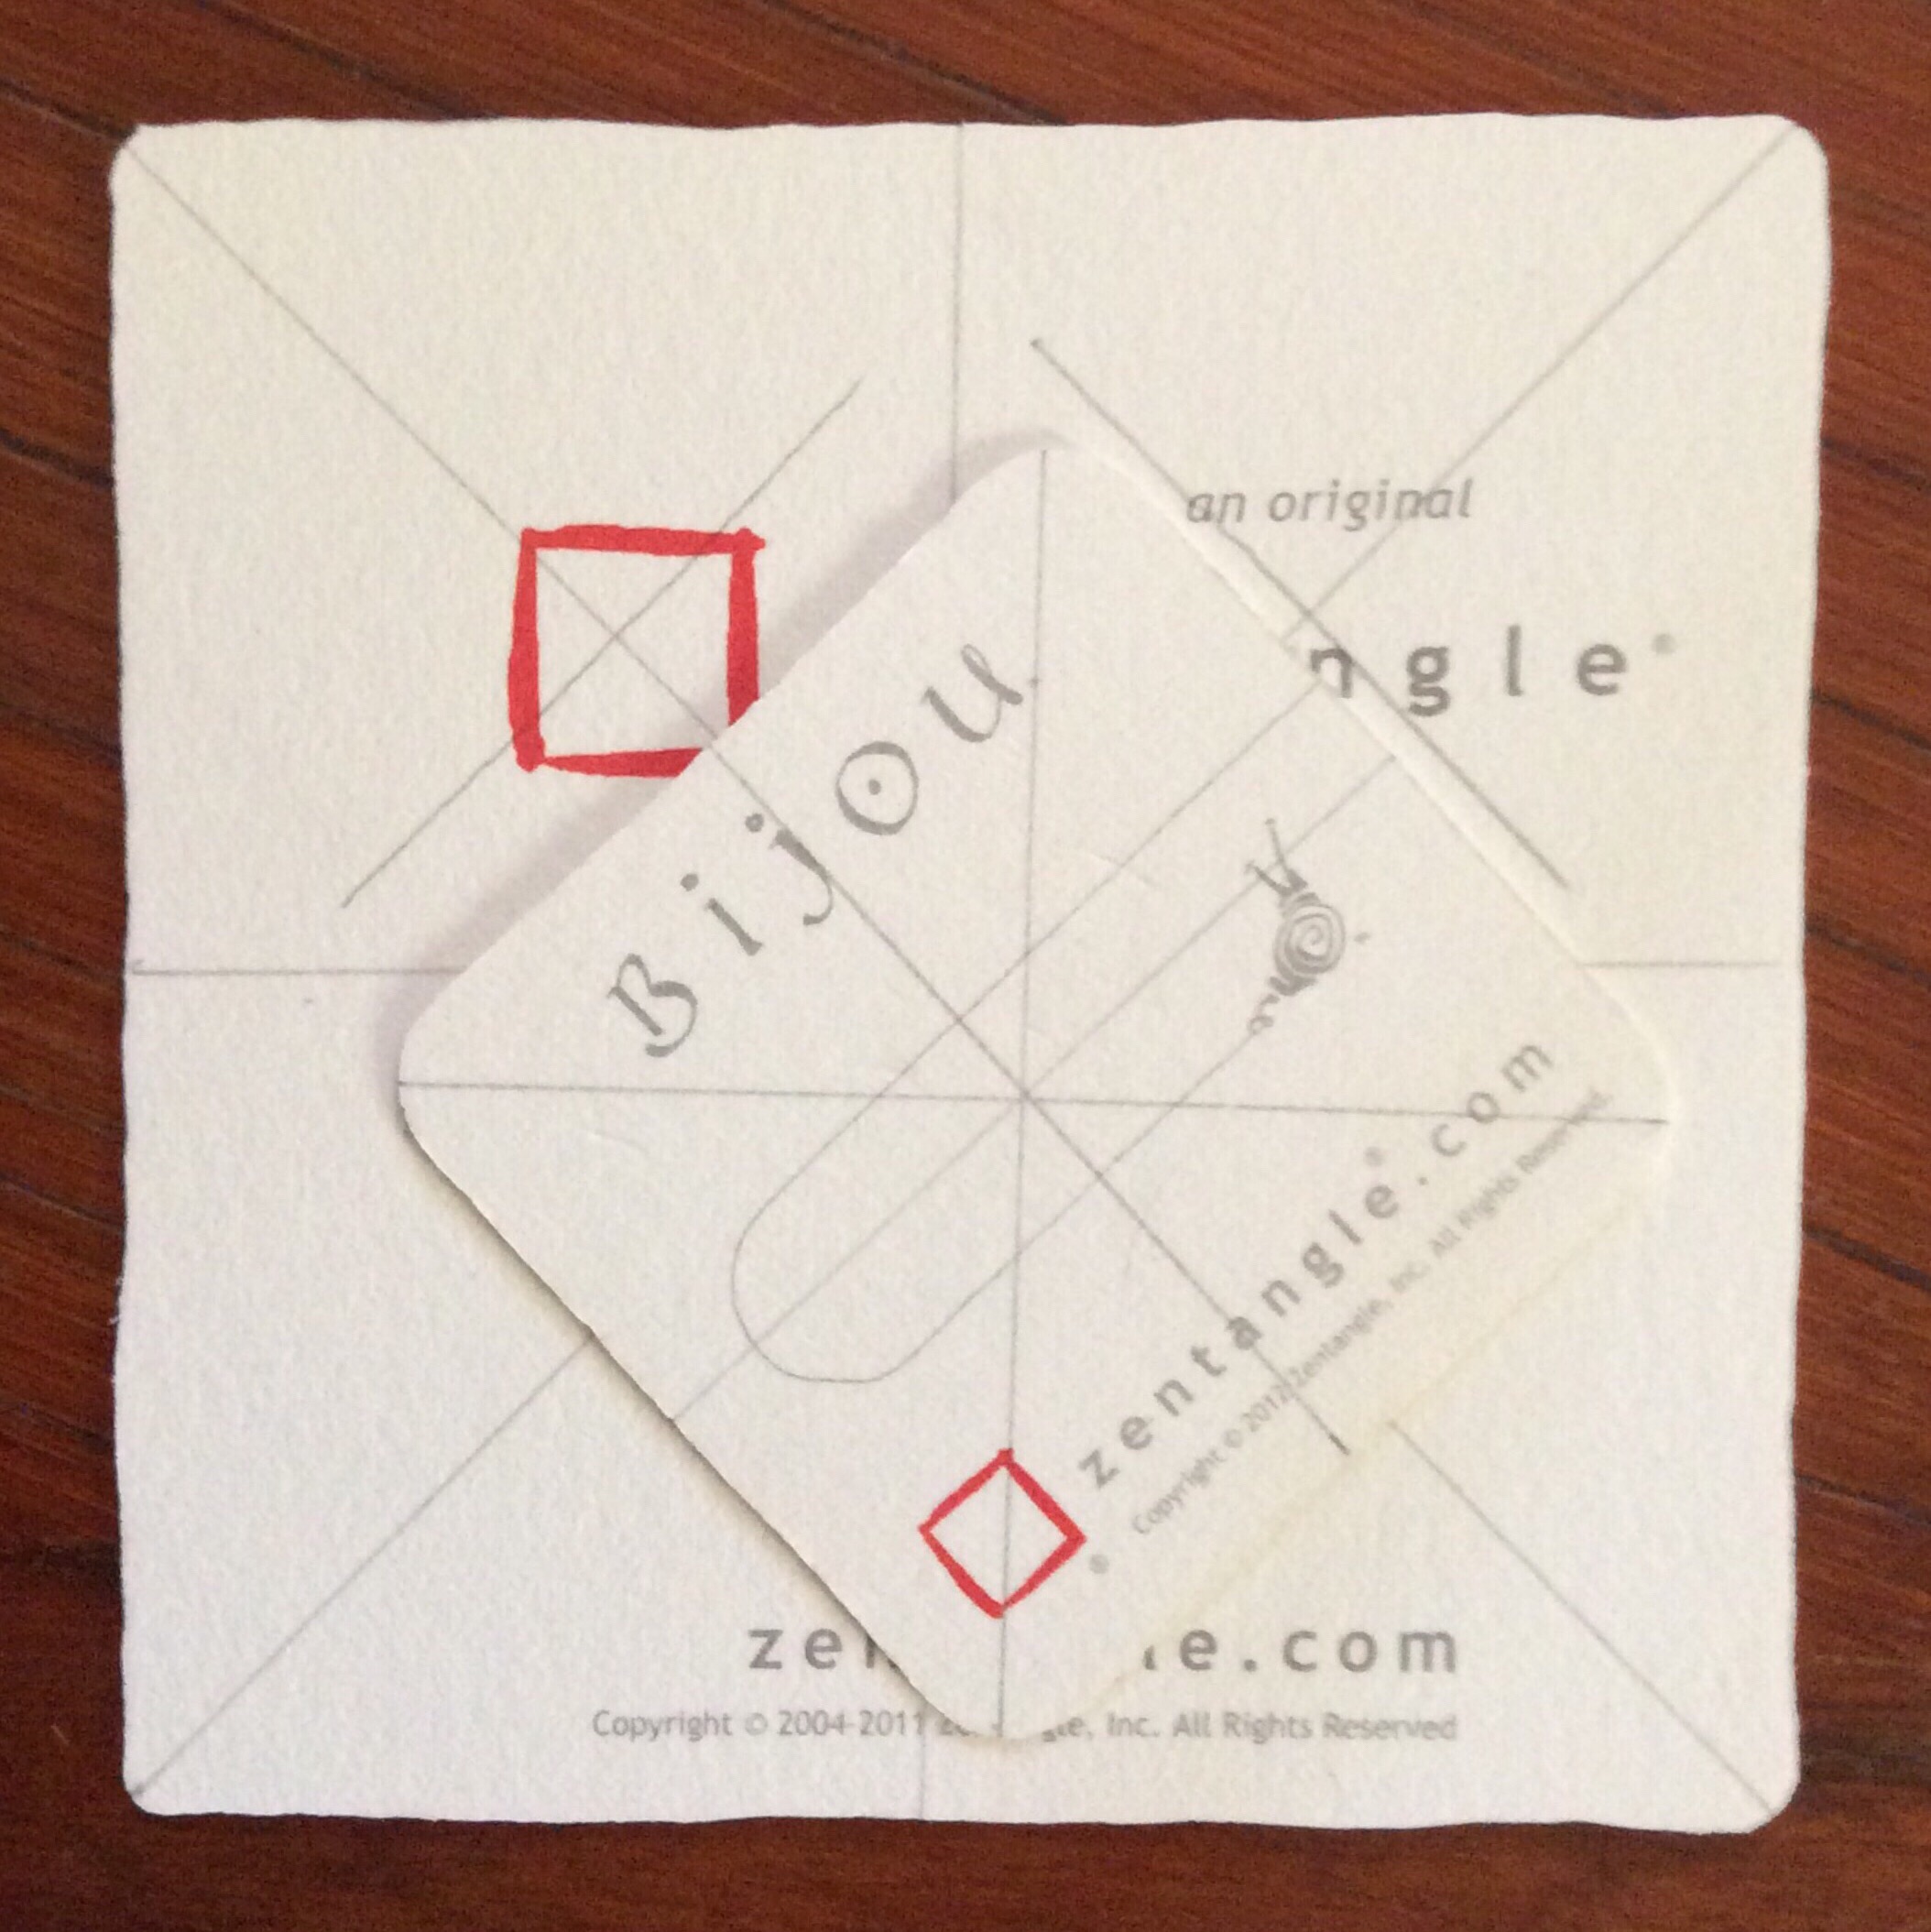
Step 2: Line up the two square tiles, then trace.
Align diagonals with center lines as shown; trace bijou.
Turn your bijou 45 degrees, and match up the bijou’s diagonal lines to the standard tile’s center lines, and the bijou’s center lines to the larger tile’s diagonals. It may not be a perfect match, but match as closely as possible. Once the lines are matched, trace the bijou onto the larger tile.
Step 3: Re-draw 3/16-ths of an inch away.
Draw a 3/16-inch frame around the bijou tracing.
Aura the bijou outline 3/16-ths of an inch away from the center on all sides.
Step 4: Score for folding.
Score just outside pencil lines.
Line up a ruler or other straight edge tool with the drawn lines. With your favorite paper scoring tool (I use a bamboo skewer), score just outside the pencil lines, going from one edge of the larger tile to the other. Do this for the bijou tracing and for its frame.
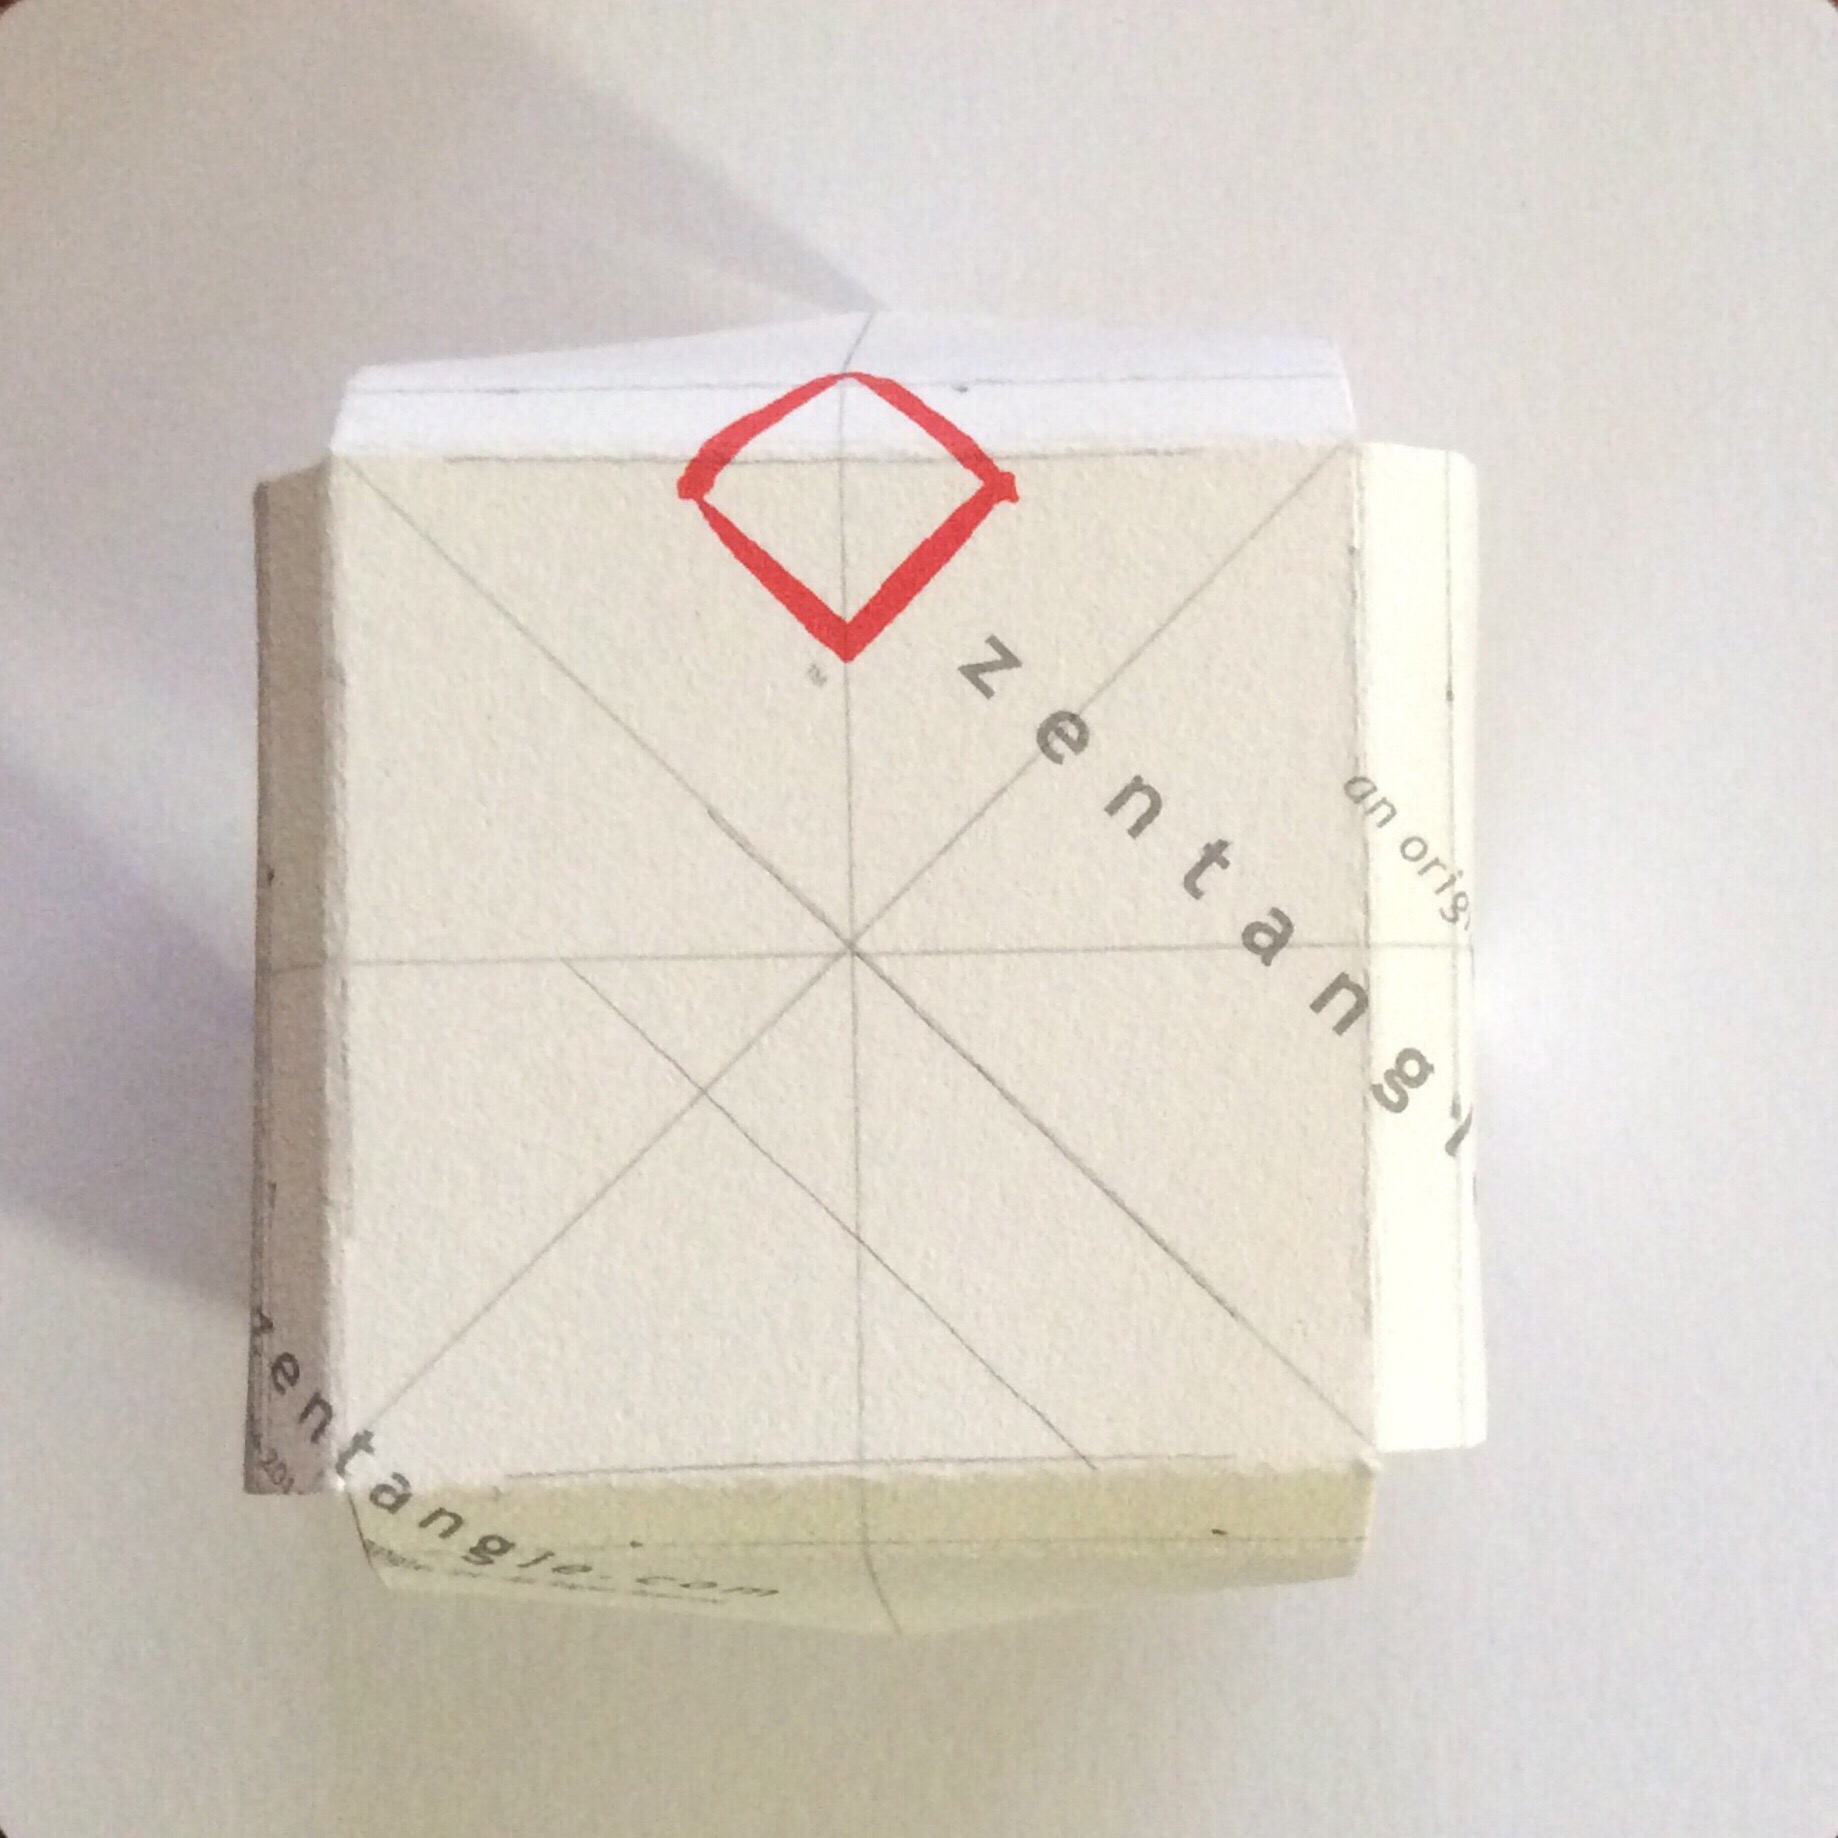
Step 5: Fold along scored lines.
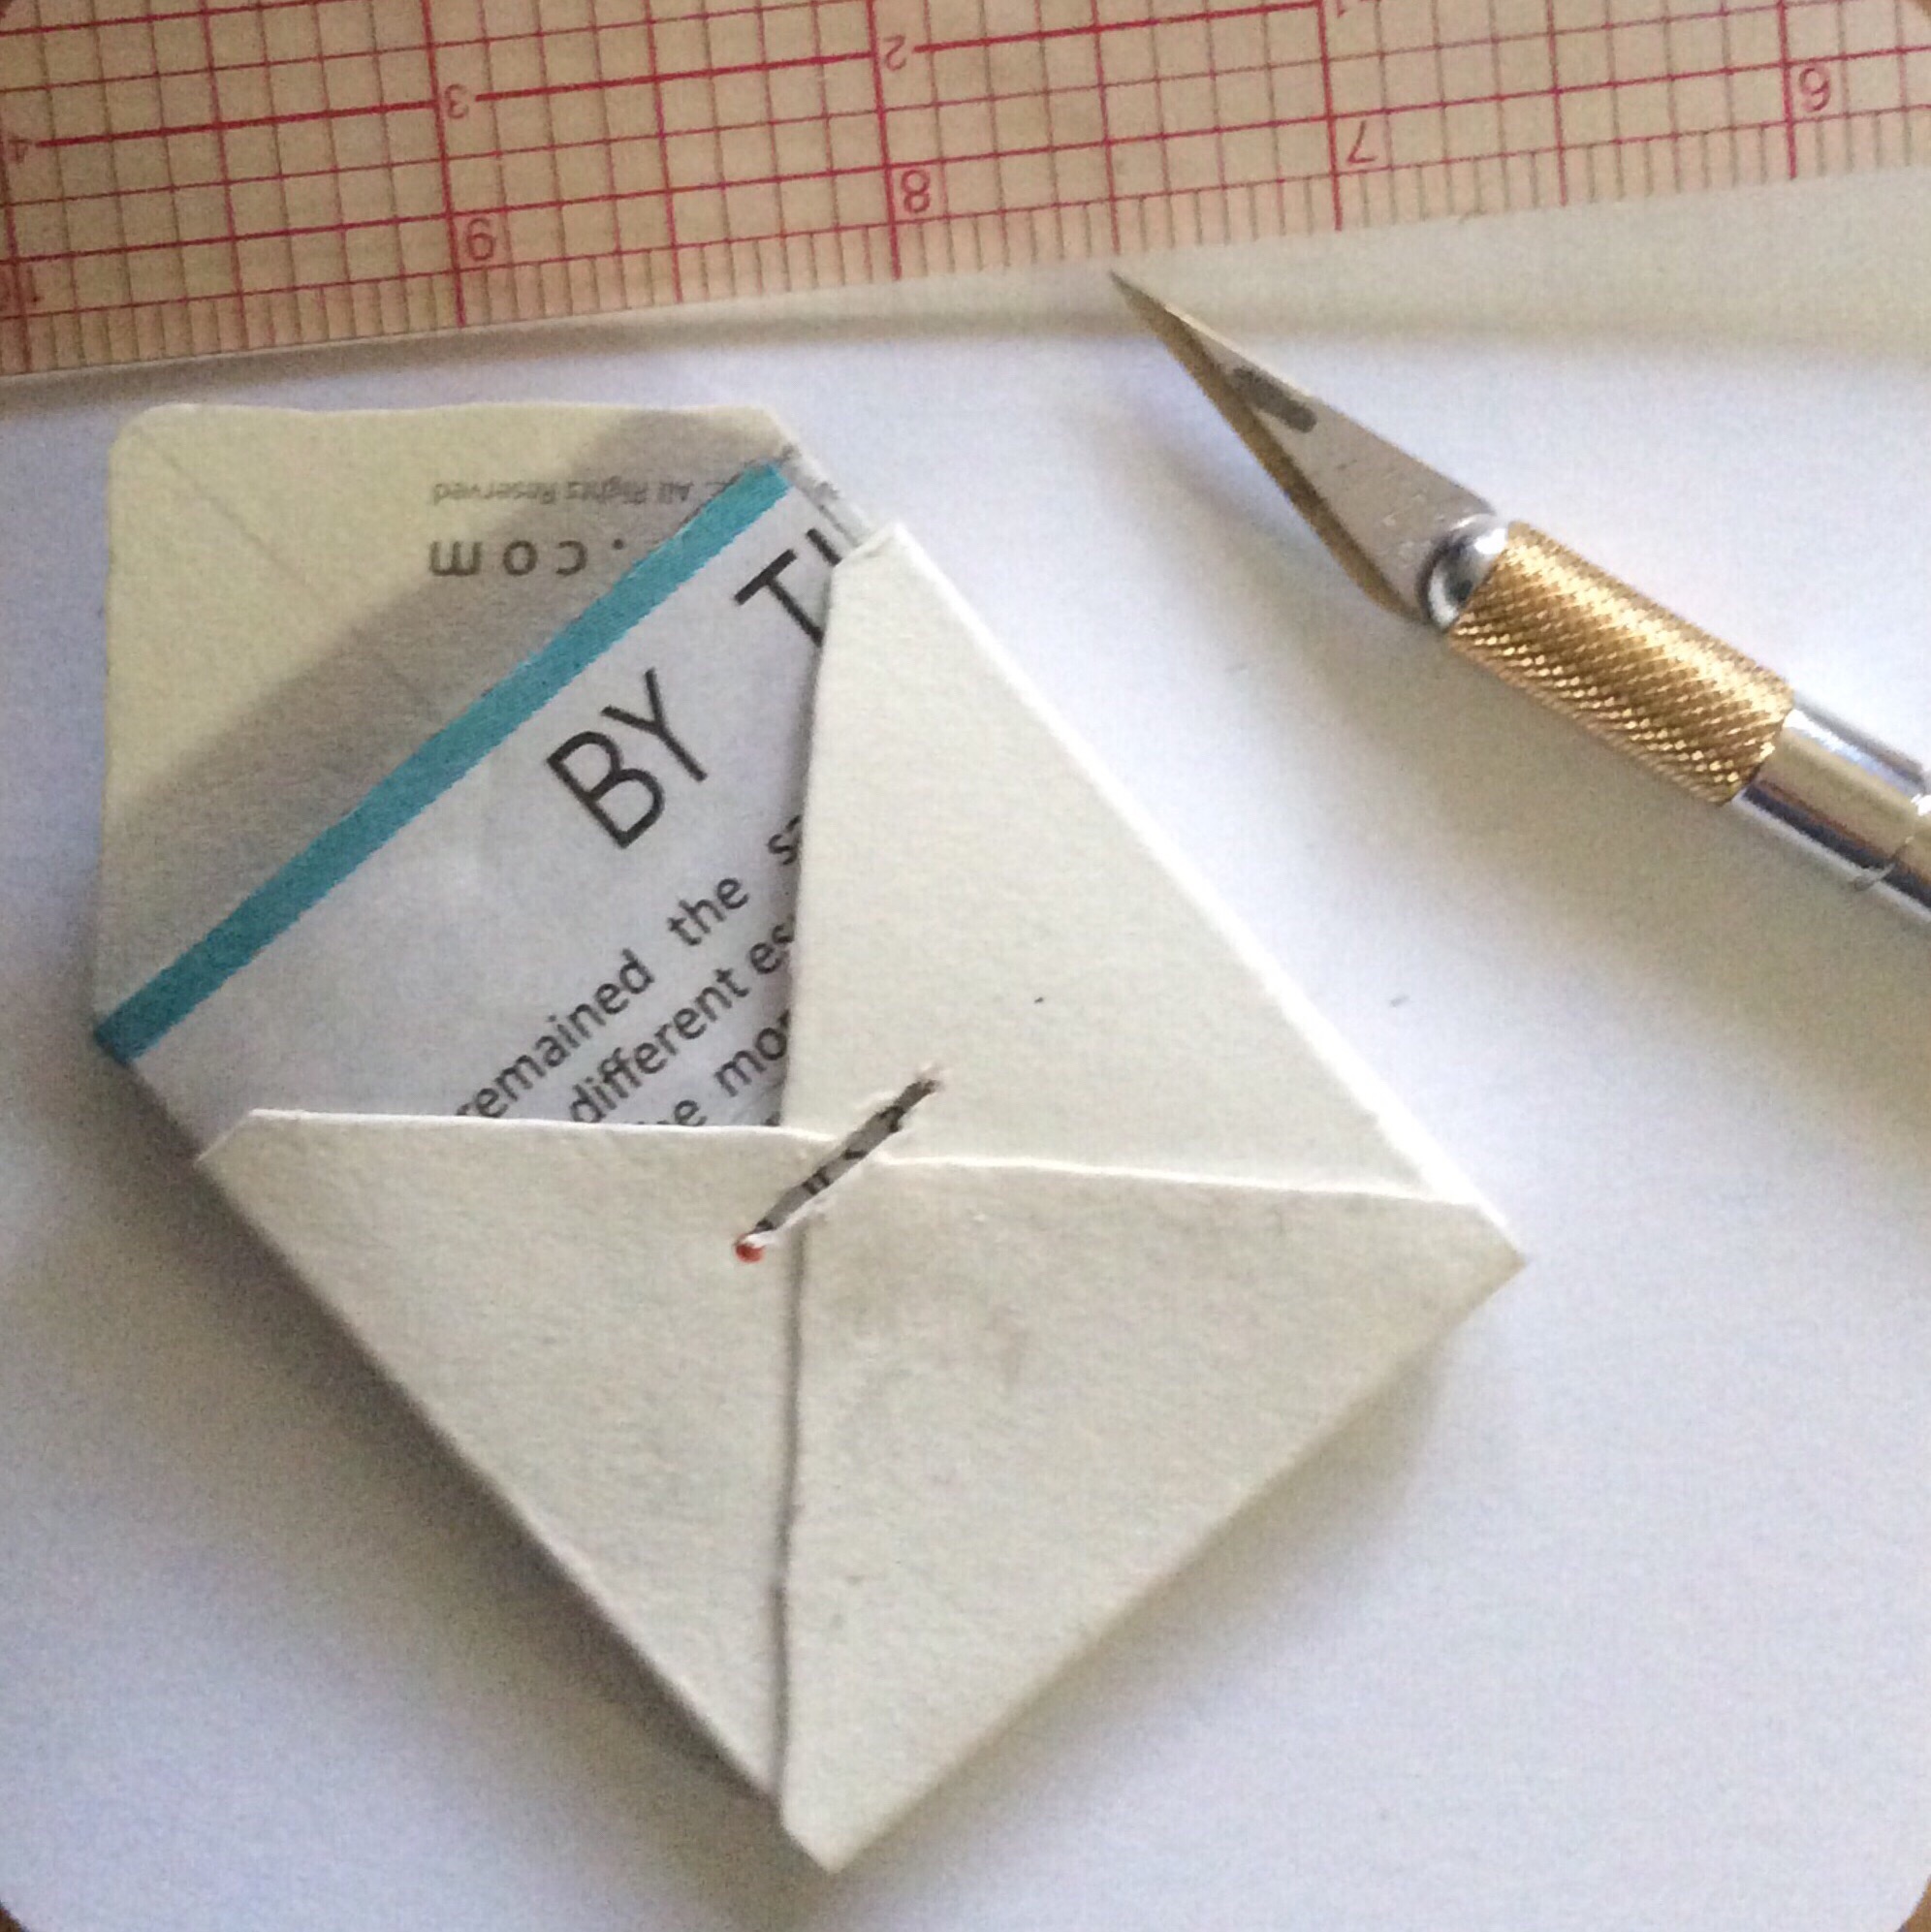
Fold along the scored lines. Trim away corner pieces.Fold along all of the scored lines. At the corners, there will be extra paper. Trim away this extra space with two inward snips along the main fold lines. Cut no further than the inside folds.
Step 6:
Sharpen creases.
Re-fold the tile so the clean side is to the outside. Sharpen the fold lines by pressing on them again with your fingers or with a smooth hard object for a sharper crease.
Step 7: Tangle.
Fold out tile and tangle as desired.
Unfold the box and tangle it any way you like. Remember that three flaps will fold over each other in the box to contain the bijou tiles. You may want to wait until the holder is glued together before tangling the back.
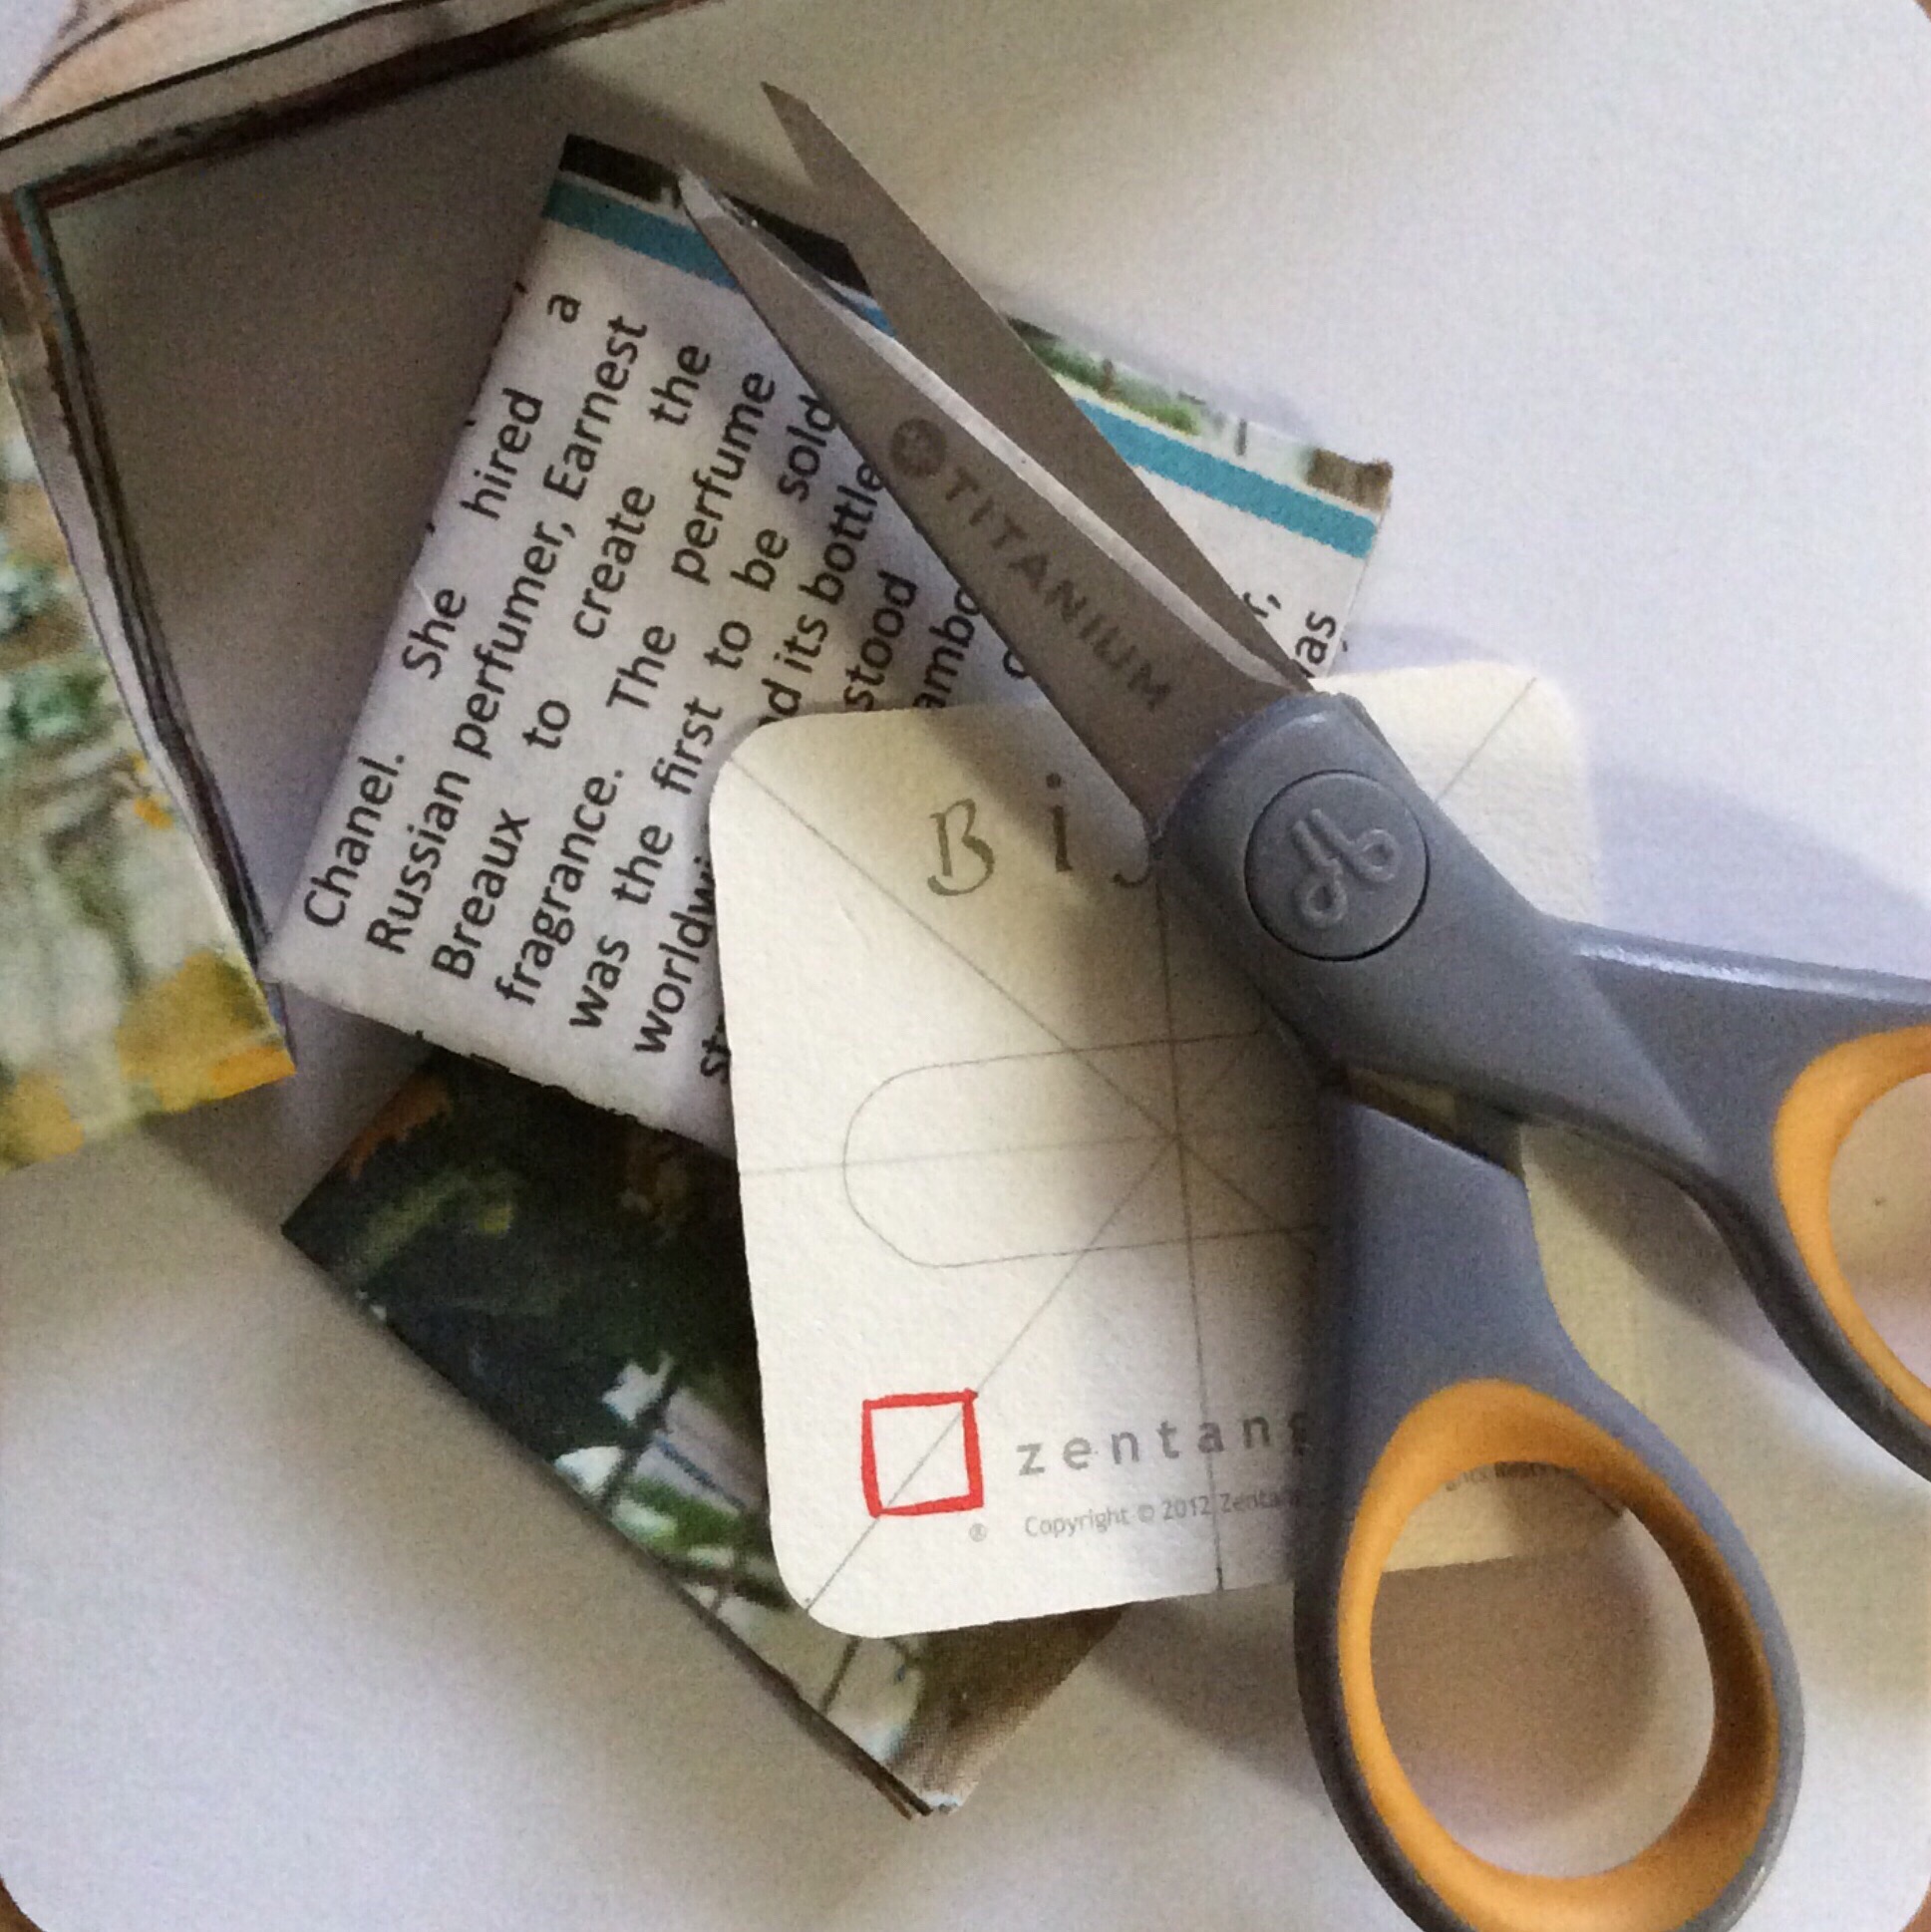
Step 8: Cut some filler.
Cut some filler to make gluing, tangling on the back, and closure cutting easier.
Before going further, take some time to cut some bijou-sized filler for your holder. I generally fold a newspaper page several times and cut out a section the same size as what I plan to fill with–such as bijou tiles or business cards. While you are at it, cut a piece of waxed paper or baking parchment to the same size. Slide this between your filler and the flaps. The filler makes it easier to glue the flaps together and later tangle the box, as well as provide a surface to cut into if you plan to make a flap tuck for your holder. The square of waxed paper or parchment keeps the filler from being accidentally glued inside the flaps when the glue spreads out inside.
Sometimes, I just carefully wrap bijou tiles or cards in waxed paper and slip them into the holder before gluing. This works best if I use tiny wafer-thin magnets as a closure. The waxed paper does nothing to prevent the X-acto knife from cutting into a good tile or business card!
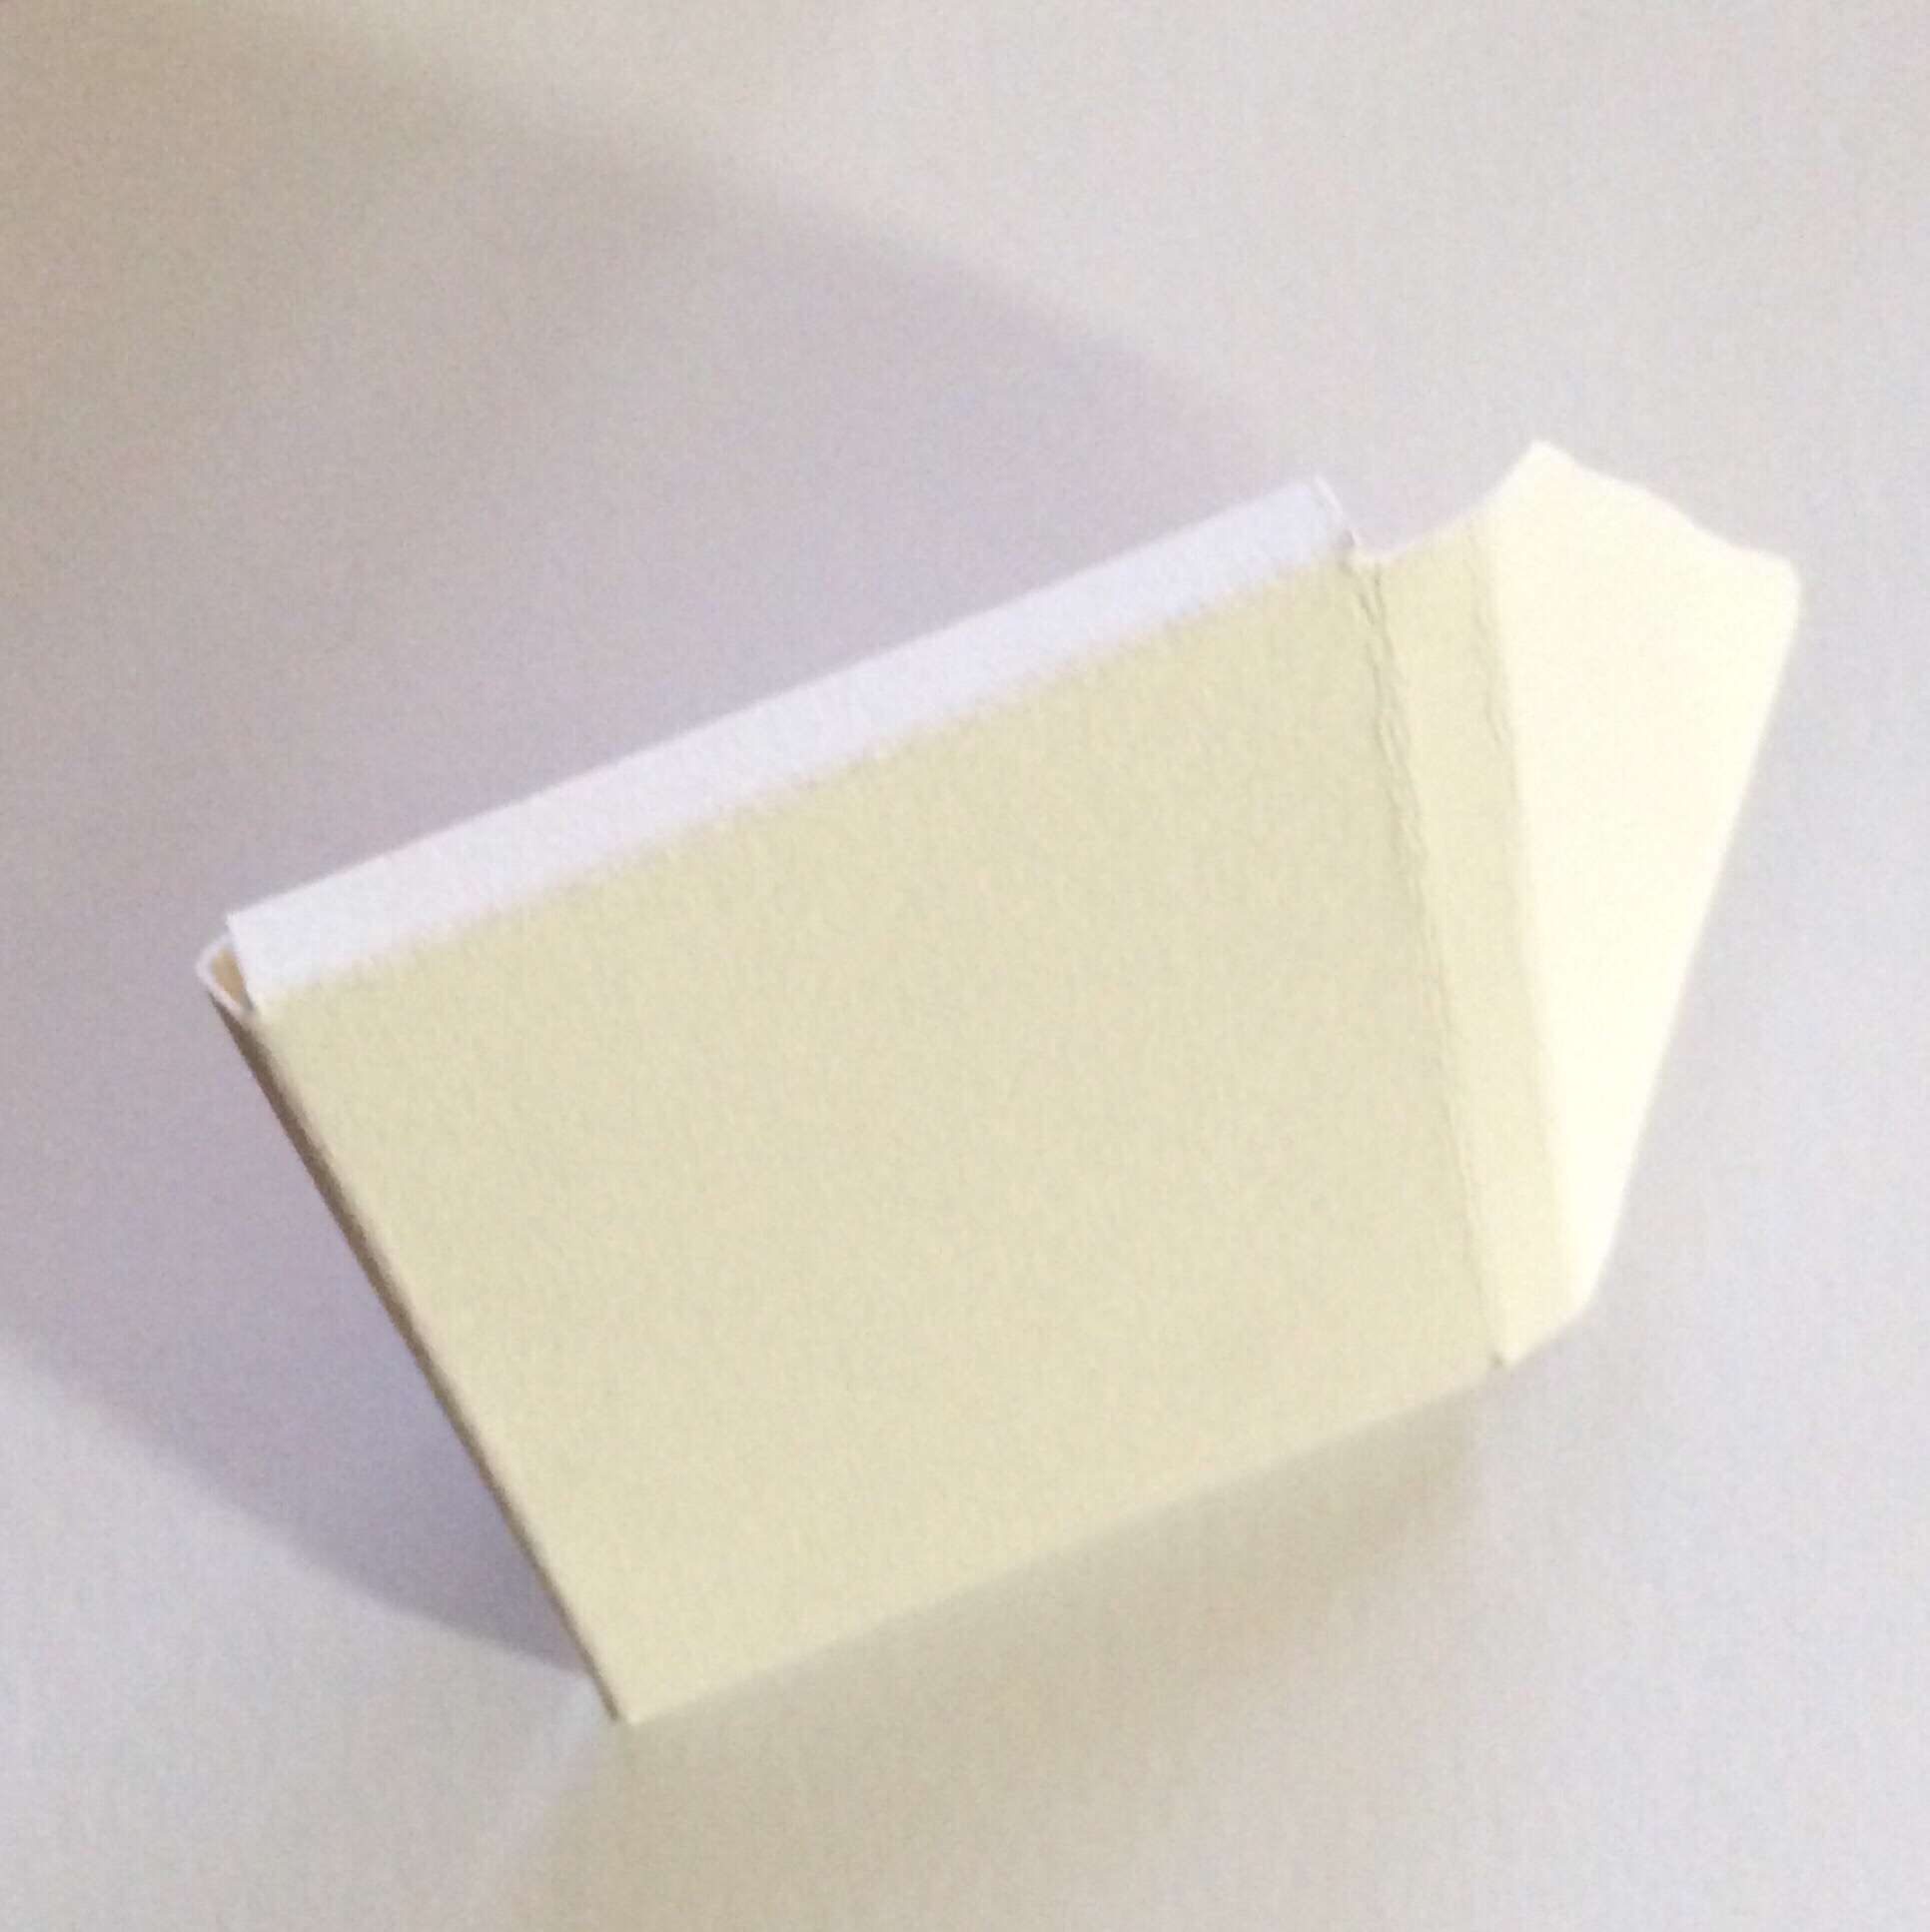
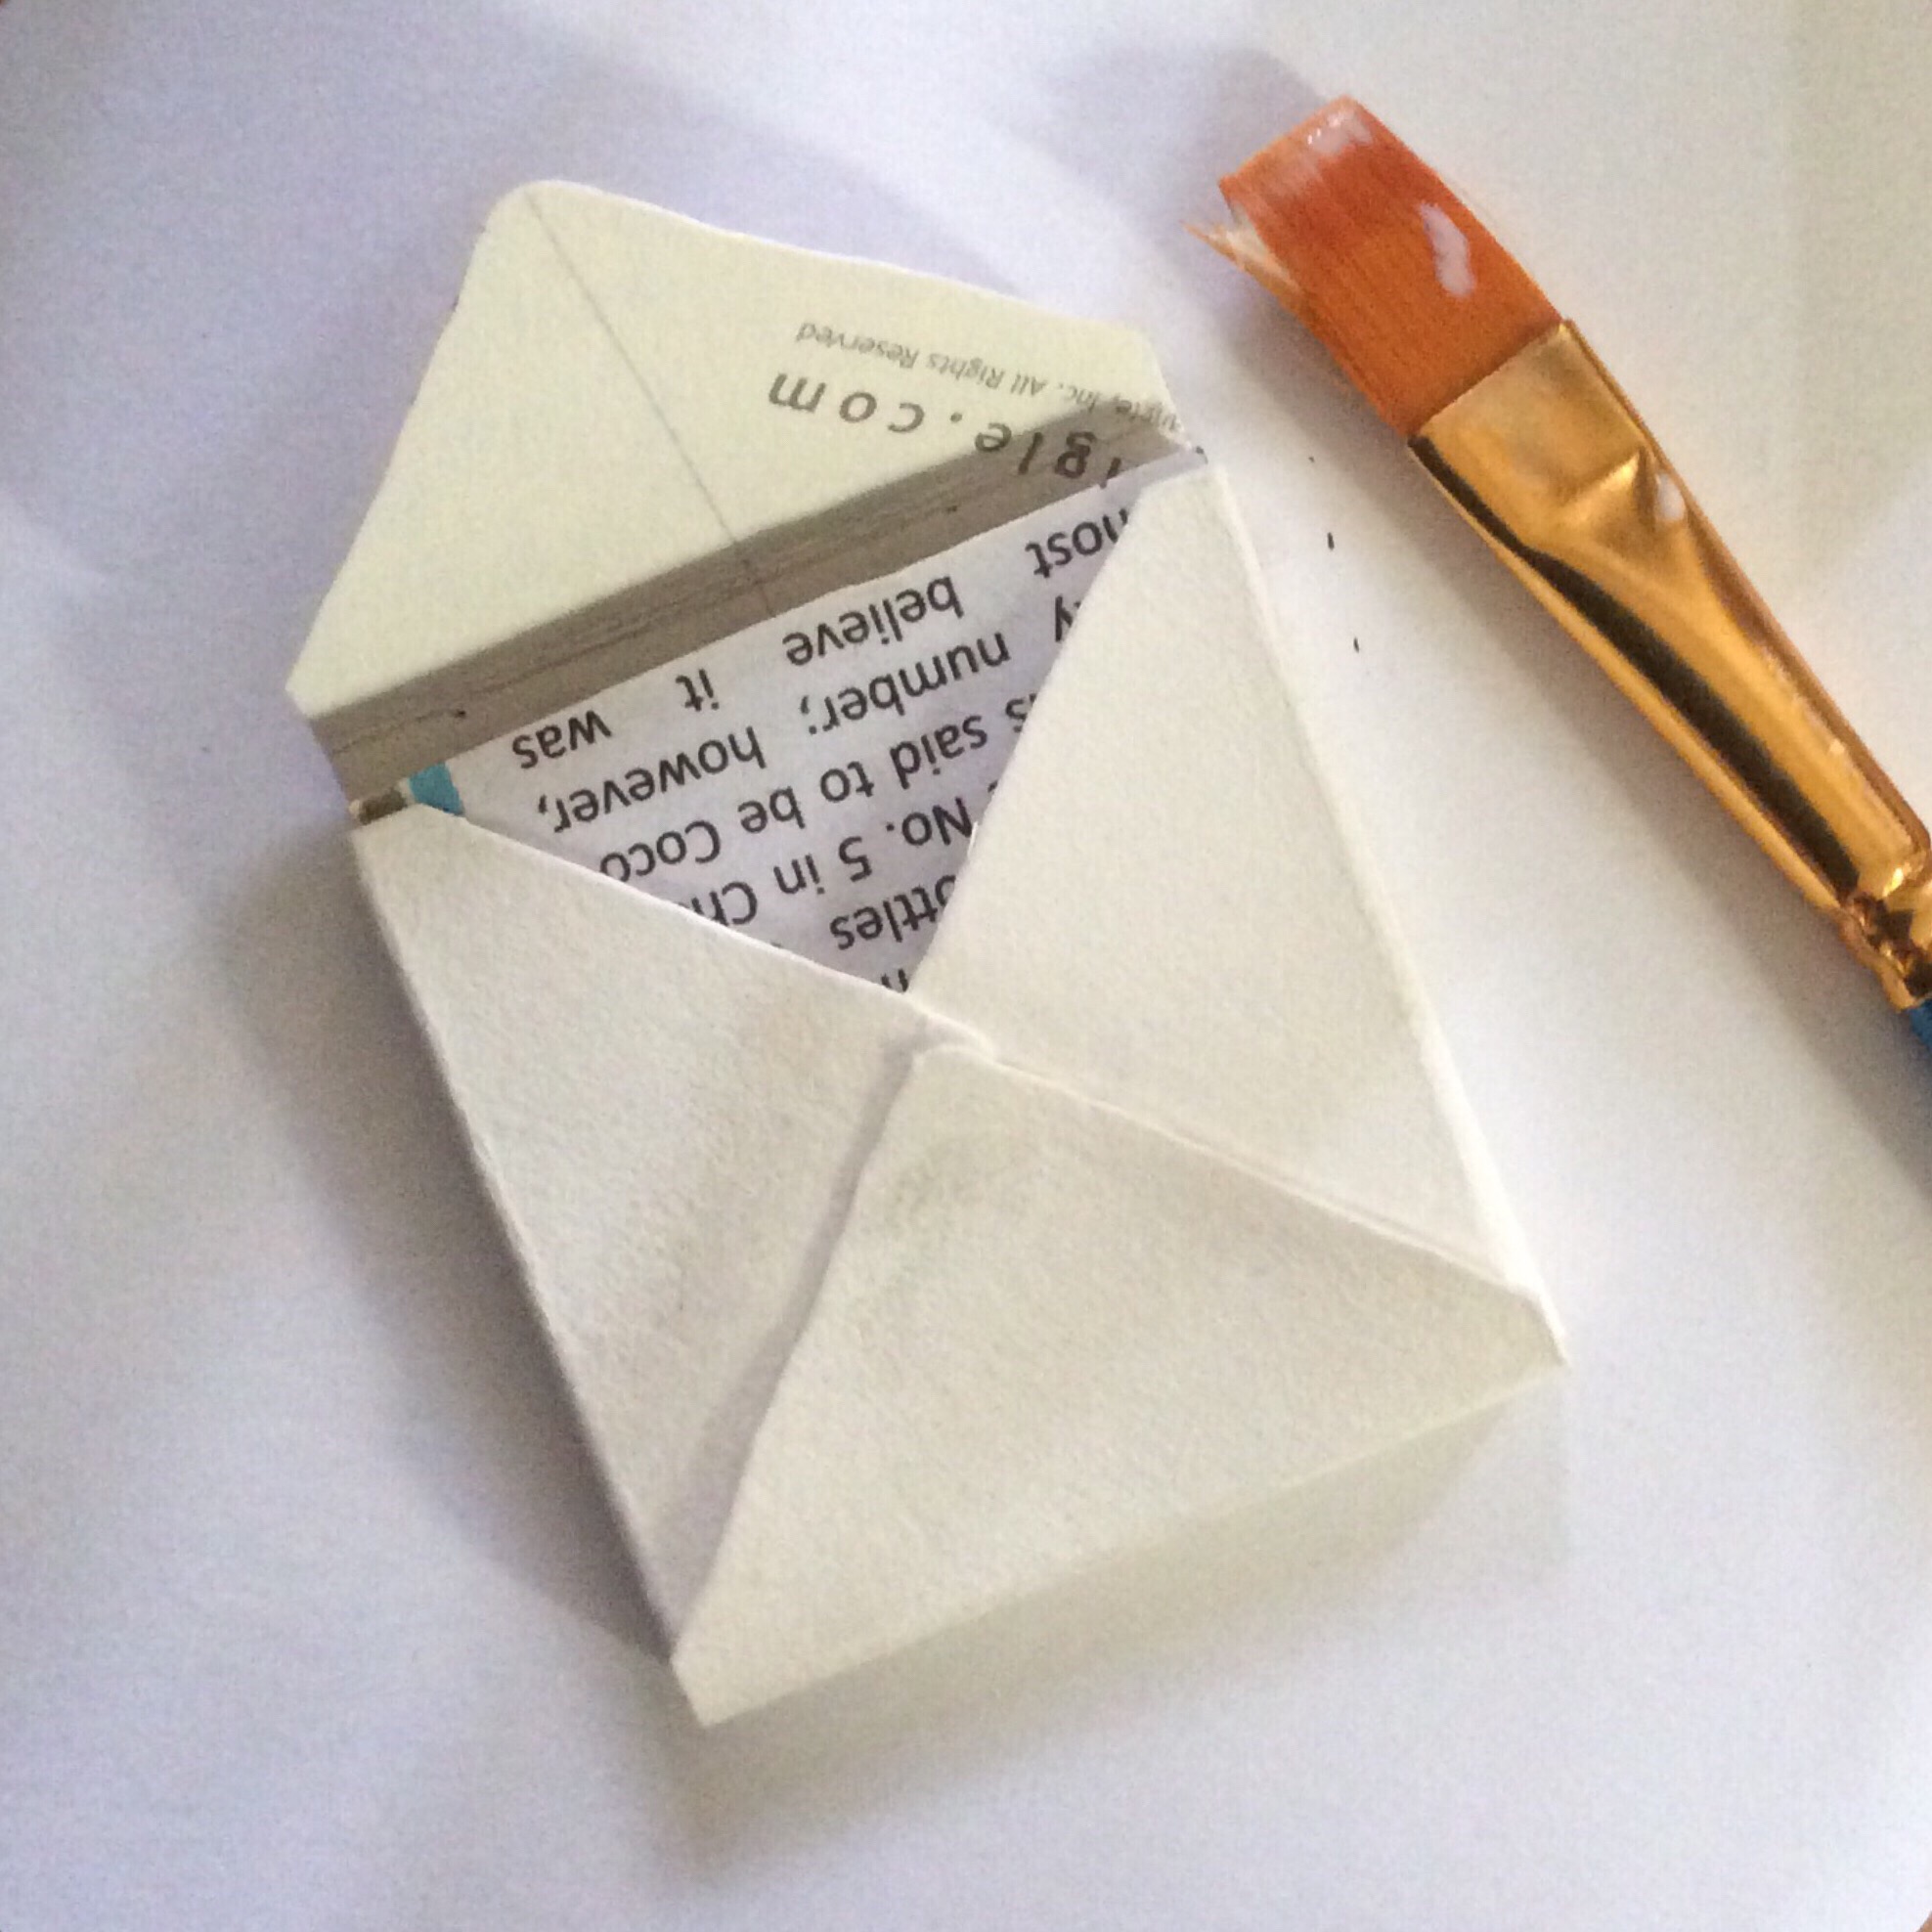
Step 9: Glue flaps together.
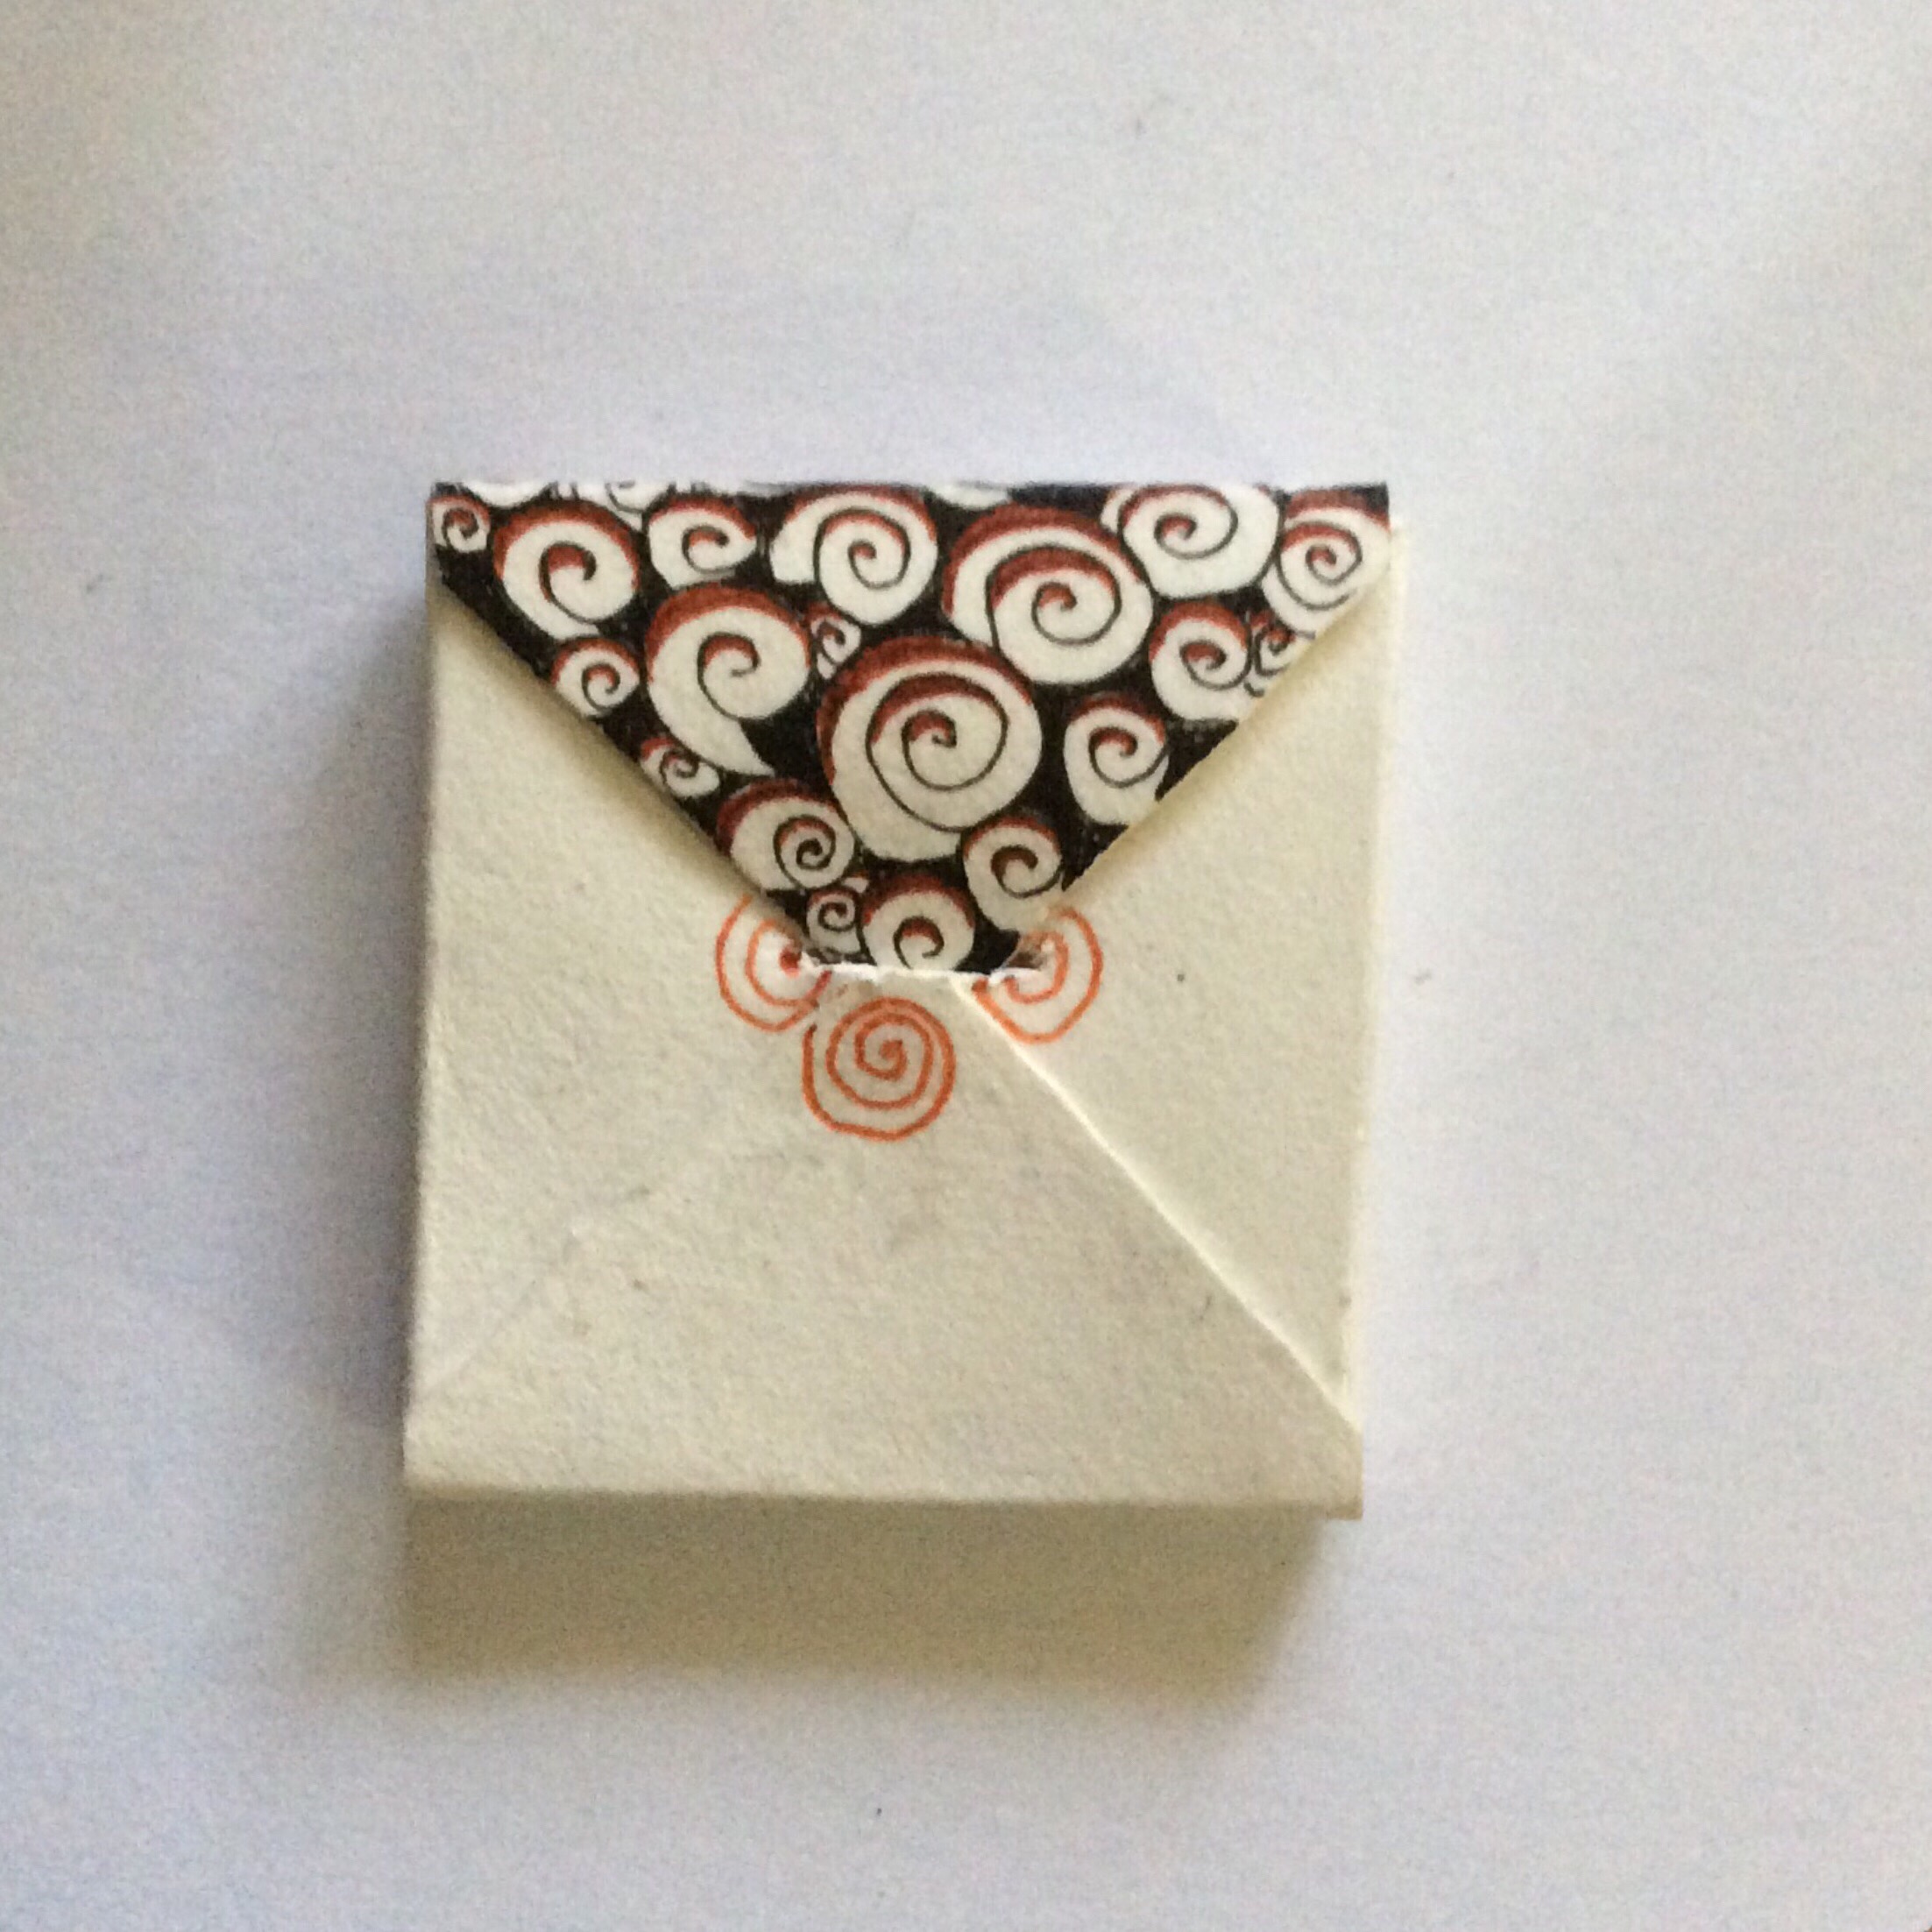
Glue three flaps together, envelope-style.
Overlap the two side flaps and glue them together. Next, bring up the bottom flap and glue it in place so the section resembles an envelope. This is far easier to do and let dry with filler inside.
For gluing, I use the same thing I use to seal my artwork–Mod Podge® Matte water-based sealer, glue, and finish. It works great as a glue and as a sealant to protect the paper from wearing too quickly, and to keep my artwork looking fresh longer.
Once the glue is dry, you may want to tangled the back. You can wait until after you have sealed your holder, but you will need to seal the work again, as even Micron® ink can smear when used over the Mod Podge.
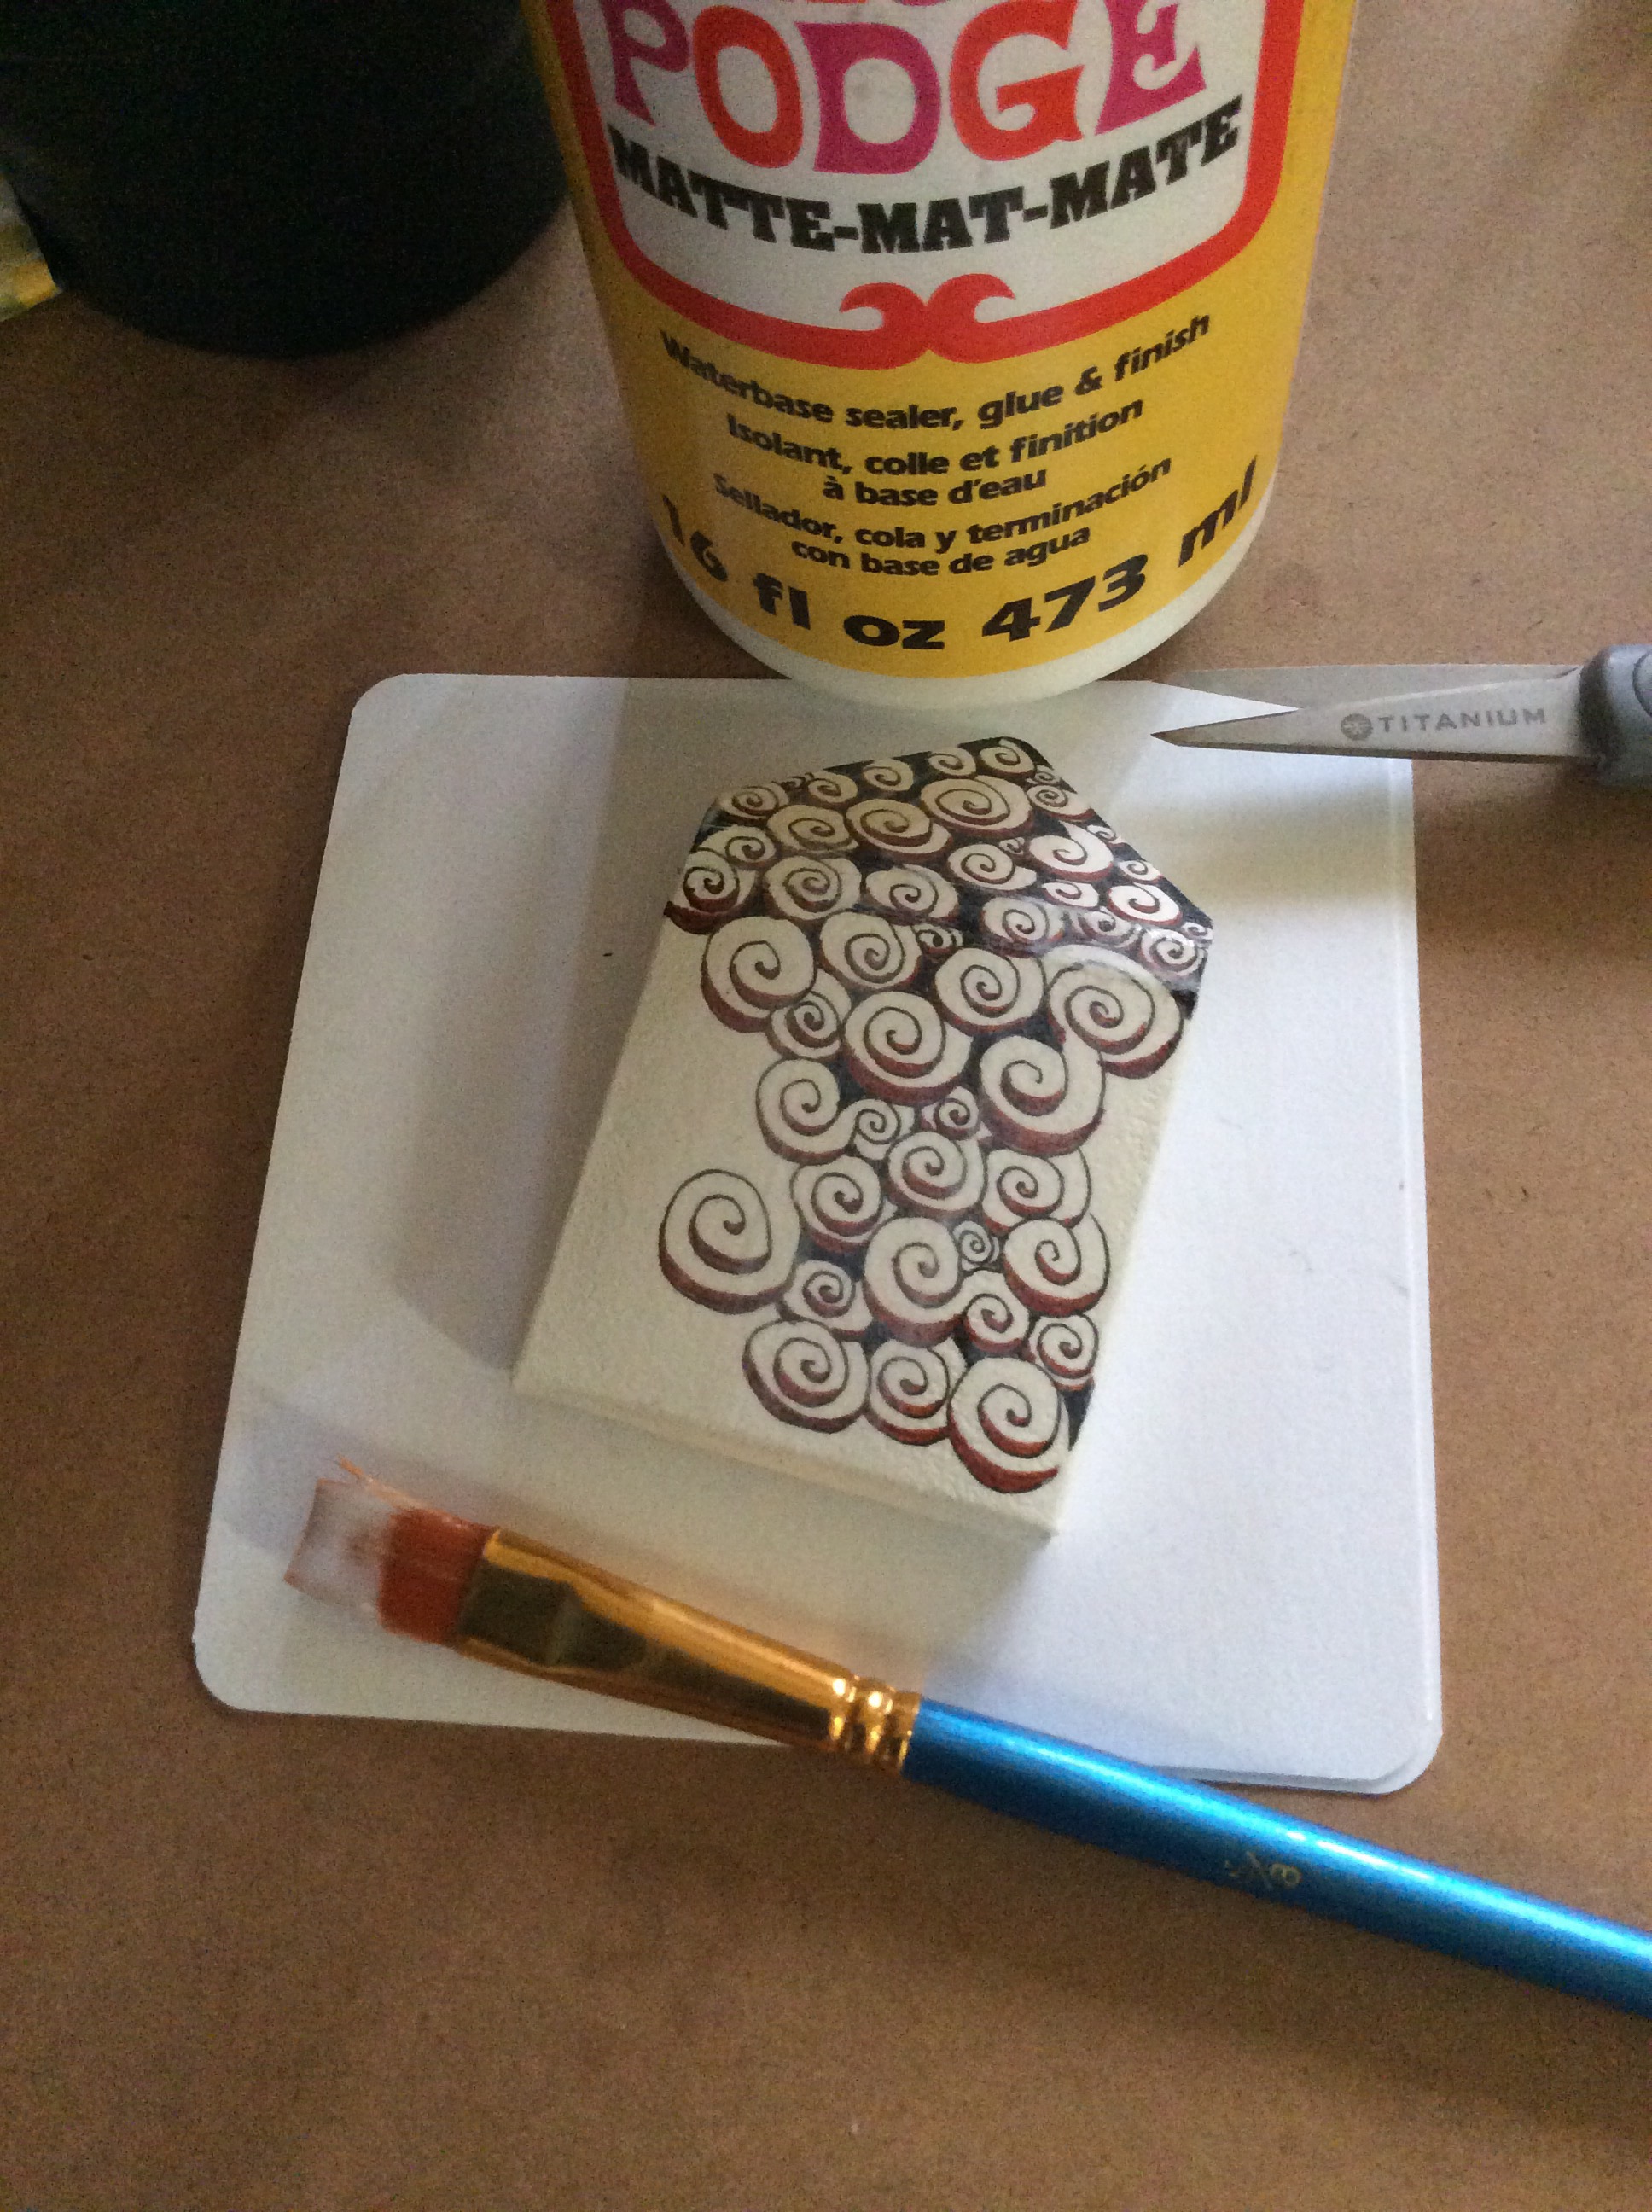
Step 10: Seal your work.
Seal the paper.
To protect your artwork and to extend the life of your holder, seal the entire surface–front, back, sides–with a protective sealer such as Mod Podge Matte or Mod Podge Glossy. Using an inexpensive art brush, cover the front and sides with the sealer, wipe away excess at the edges with a damp cloth, and allow to dry completely.
When dry, flip the holder over and brush the back with sealer. Wipe away any excess, as with the front. If you like, erase any pencil marks from the inside of the loose top flap piece, and seal it, too.
Give the holder time to dry completely before continuing. Mod Podge is dry to the touch in minutes, but could take half an hour or longer to dry through layers.
Step 11: Flap closures.
Cut out flap tuck, if desired.
Once everything is completely dry, fold the top flap over, and make marks to either side of where you want to cut a flap tuck. Using a straight edge and an X-acto knife, cut two parallel lines close together through all thicknesses.
I didn’t wait long enough, and the damp glue not only got all over the knife edge, but also created some problems for cutting through damp paper fibers. The result is a slit that is more ragged than it would have been if I were a little more patient.
If you prefer to use magnets or Velcro as fastenings, this would be a good step to apply those closures.
Step 12: Decorate back, if not done earlier.
Decorate back, if not already done.
All I wanted to do was add a bit of printemps around the flap tuck. You may choose to tangle the whole back, if you haven’t done so in an earlier step. I was going to leave the back untangled, except for the flap which I tangled with the front. However, I got finger smudges along the flap tuck because I cut too soon. I wanted to cover them up a bit.
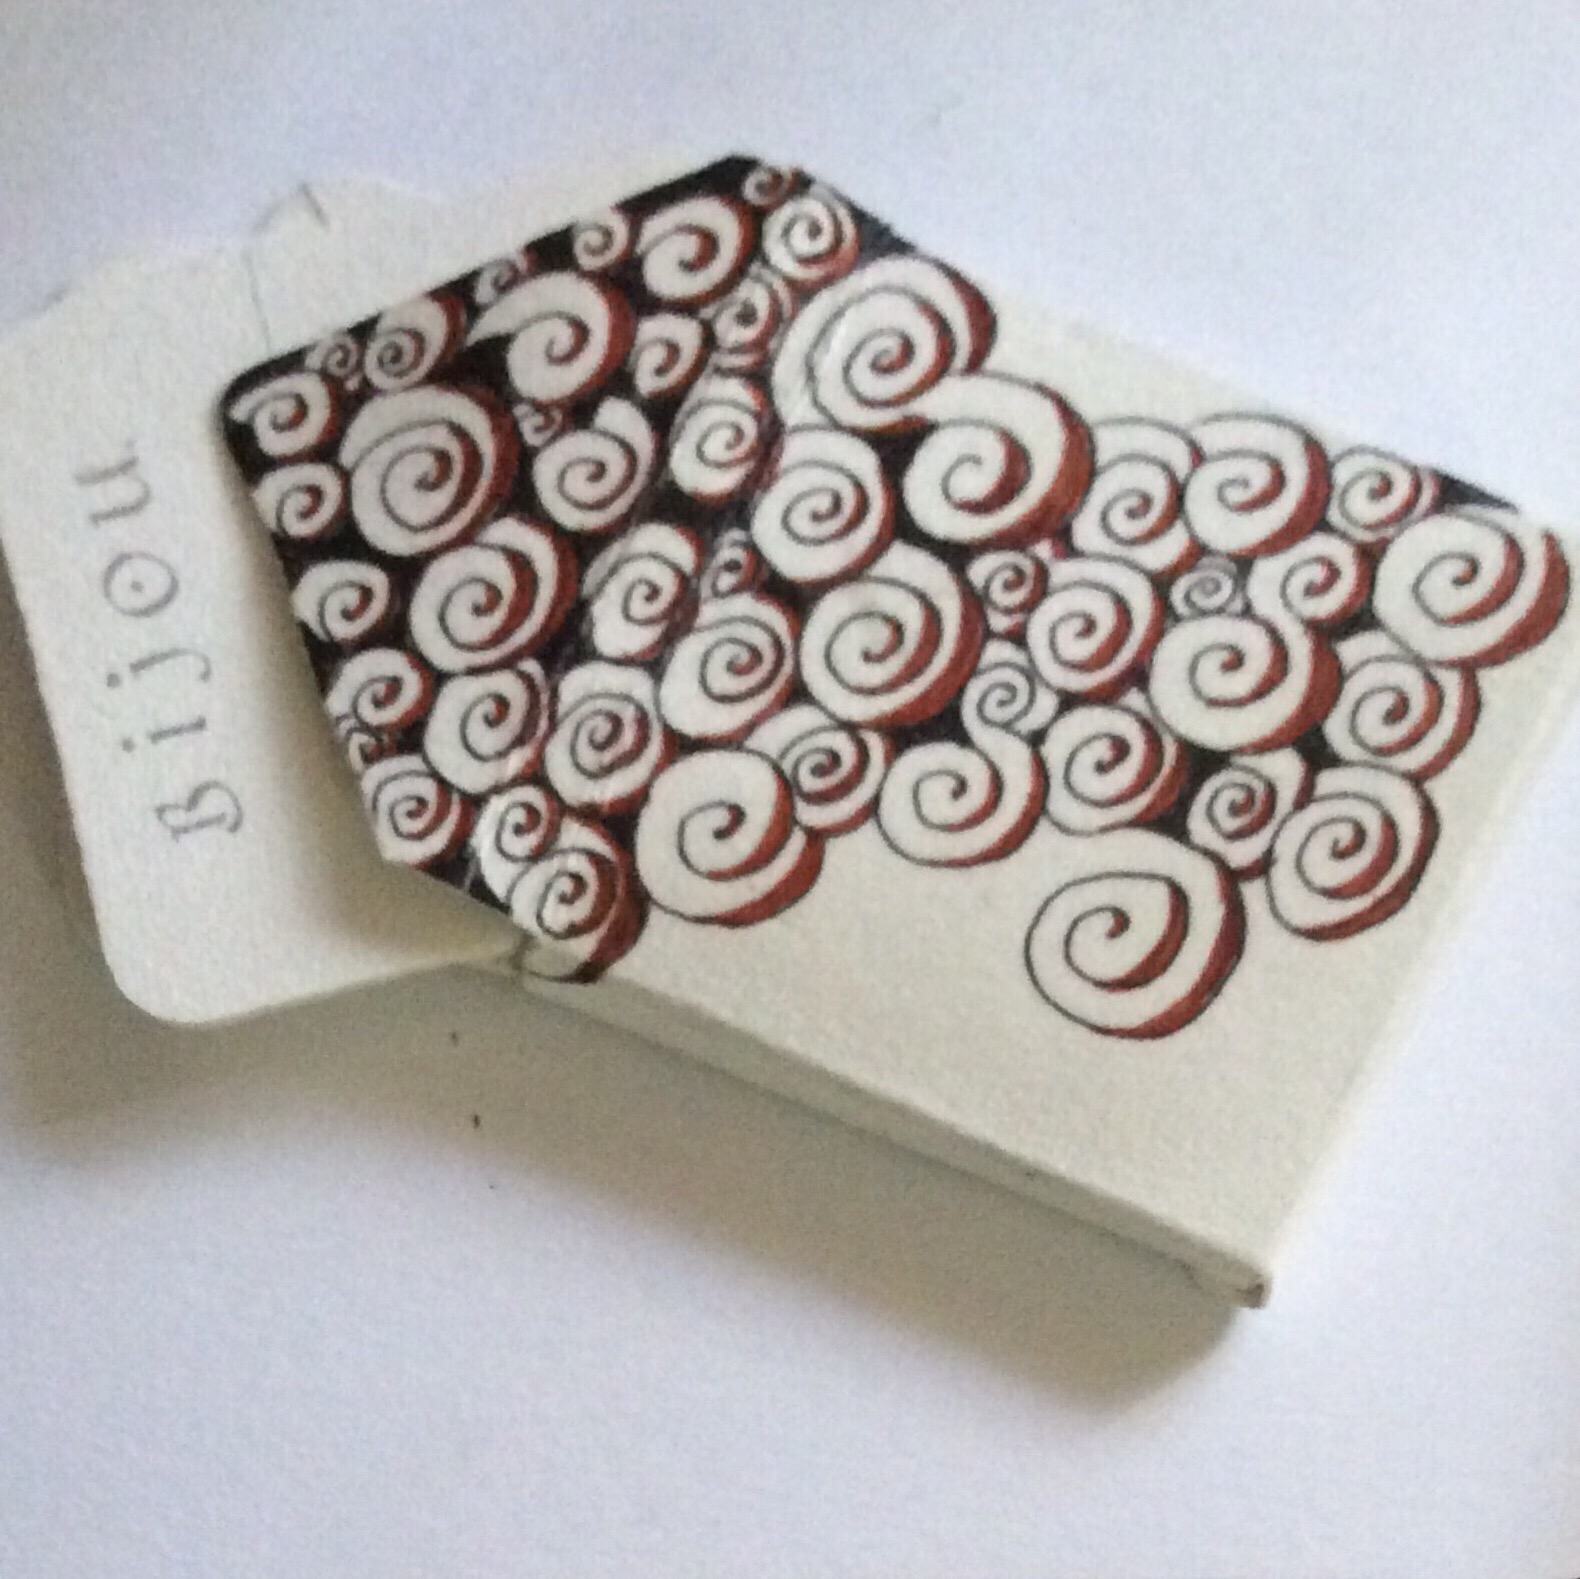
And the holder is done!
Completed bijou tile holder
Hope this gives you some ideas about what can be done with tiles, other than draw on them. There are so many beautiful, creative art works by tanglers all over the Internet. Maybe you will add to them to inspire others!
Lately, instead of blogging, I have been tangling away for a “first workshop.” The Zentangle Method® workshop is being conducted for students and faculty of a local medical school. This may be a “one shot” as the group is very busy with classes and studies. So I need to present as many workable tangles as possible into a 2-hour workshop. It’s not for another six weeks or so, but I want to give participants an idea of what can be done with just six or seven basic tangles.
The purpose of the workshop is to help students to learn an active meditation technique. Tangling can help them relax, relieve anxiety especially before exams, and learn focus and concentration tools that can be applied to studying. The purpose of the examples is to help them see the versatility of using only a few patterns to get them started.
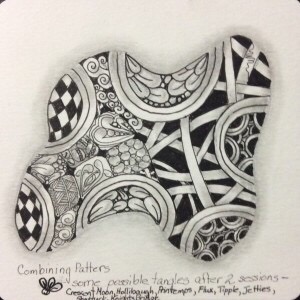
These are the first tiles I have tangled with just the first six (or seven) patterns I will be teaching during that workshop. I plan to teach both Tipple and Jetties together, because I kind of think of them as the same basic tangle–a basic version and a version with attitude. The other tangles will include Crescent Moon, Hollibaugh, Florz, Printemps, and Shattuck. And Bales, if there is time. These should provide an idea of the versatility of learning and tangling with such a limited number of patterns.
In addition, I am working up tiles that would include tangles from a second session. That session would include Bales (if not covered in the first session), Knight’s Bridge, Flux (both versions), Mooka, Poke Root and Poke Leaf. So much more versatility with only five more patterns!
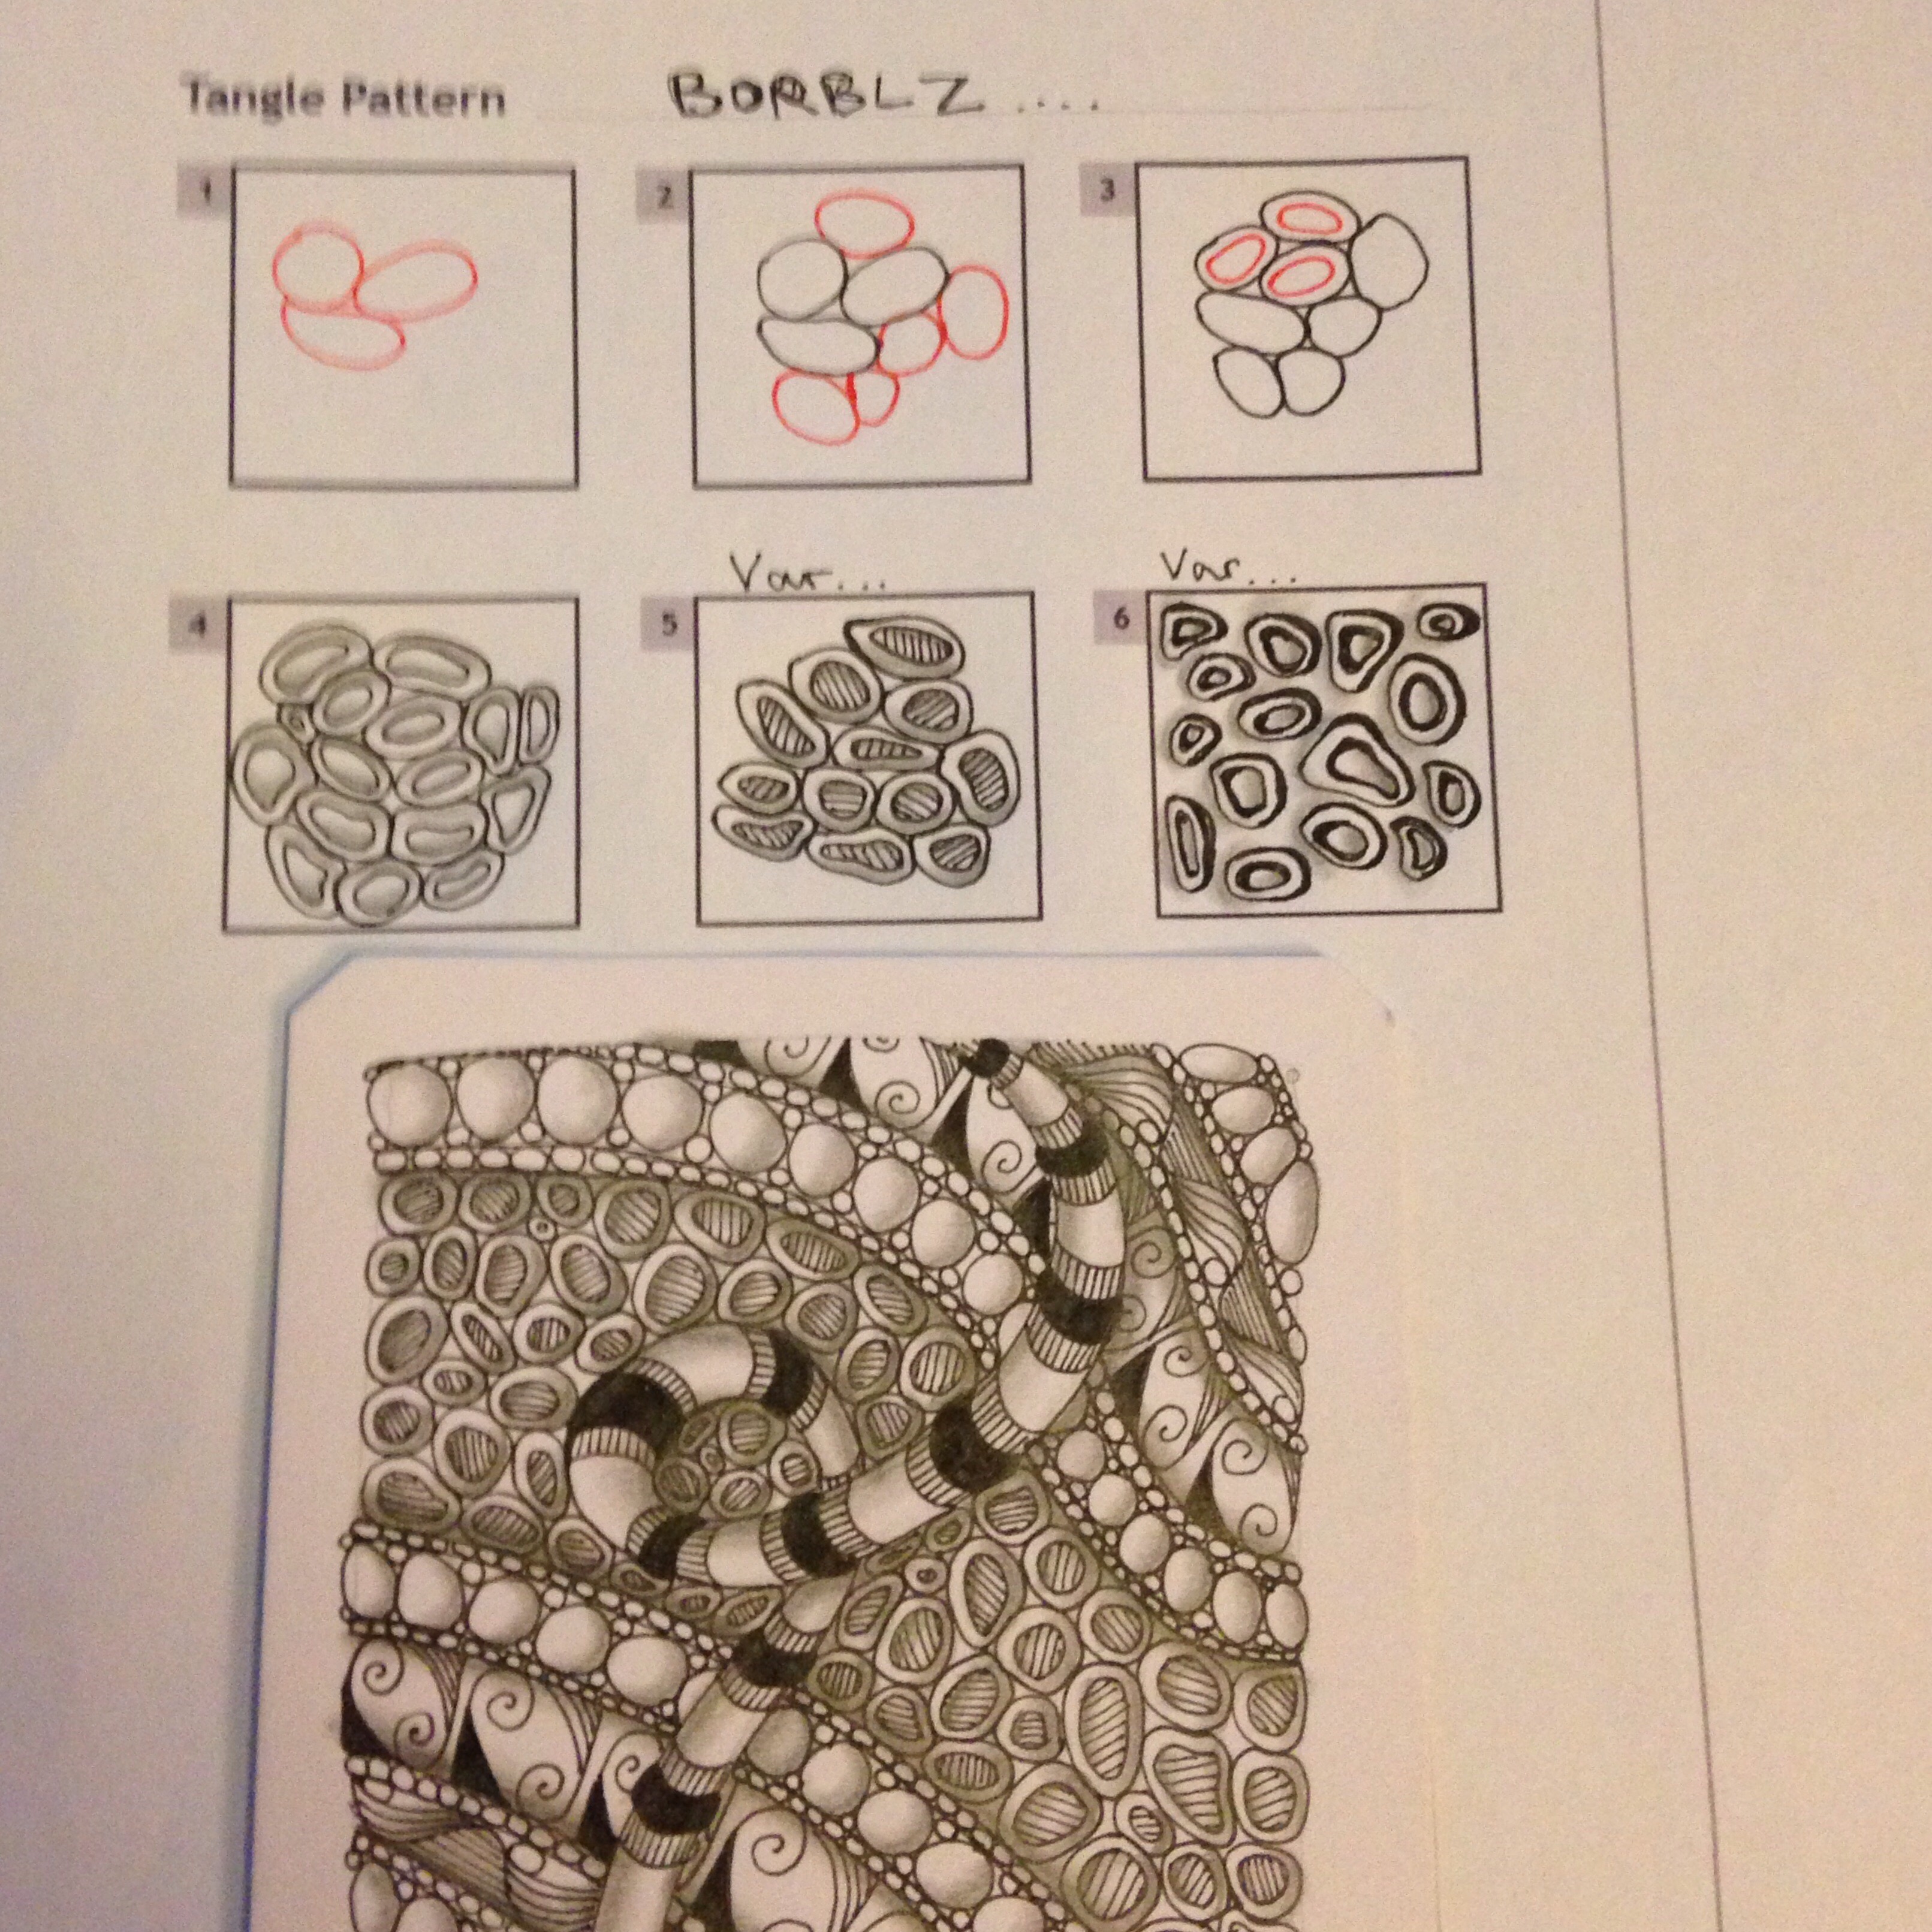
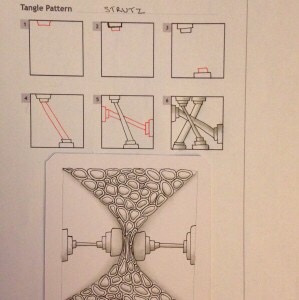
Patterns: Strutz and Borblz, by Sarah Fowler; and original Zentangle patterns Flux, Fescue, Mooka, Paradox, and Printemps; and Baecube by Barbara Steyer
Today’s new tangle patterns come to us from Sarah Fowler, from the United Kingdom. Sarah has been using these tangles for some time, and has recently shared the step-outs on the Zentangle Mosaic app. Recently, Strutz was featured in the TanglePatterns.com newsletter.
Here are the step-outs for Strutz and Borblz, followed by some of Sarah’s tiles that feature these patterns.
Hoping you find these patterns as fun to draw as I do, I wish you Happy Tangling!
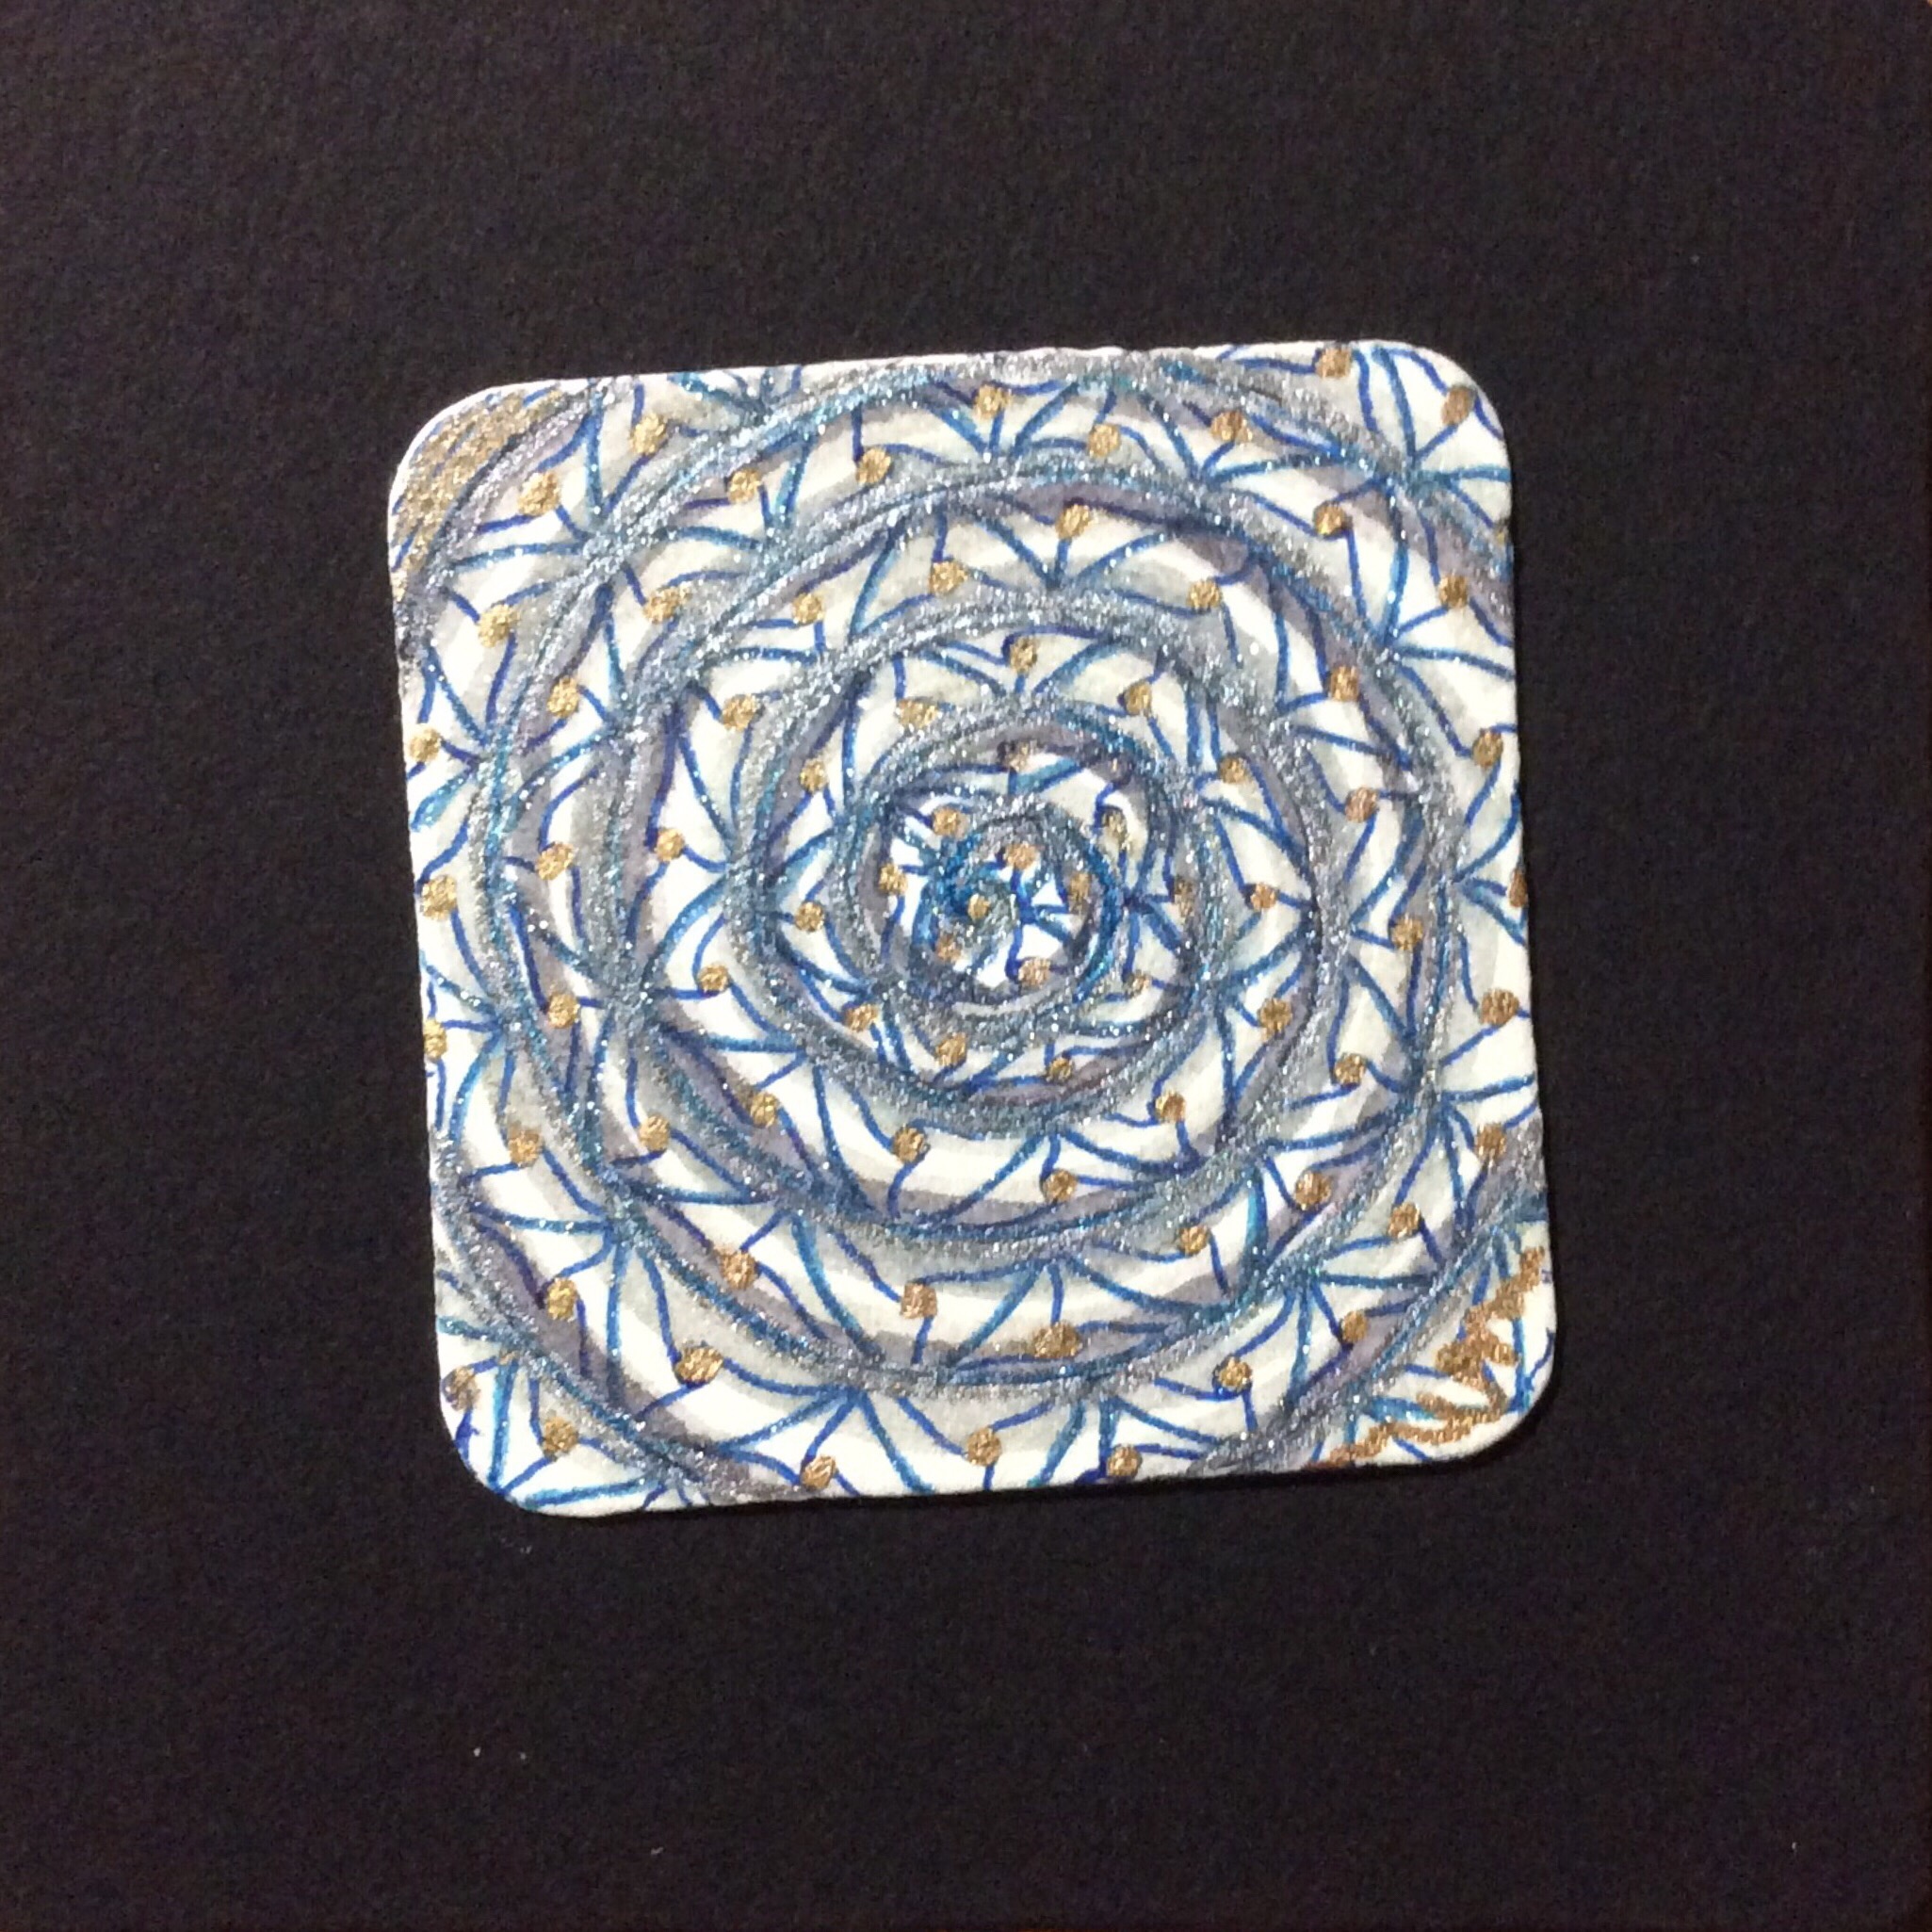
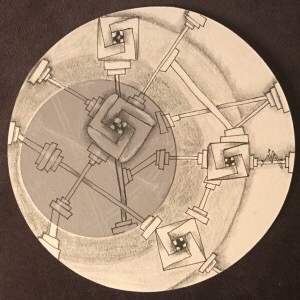
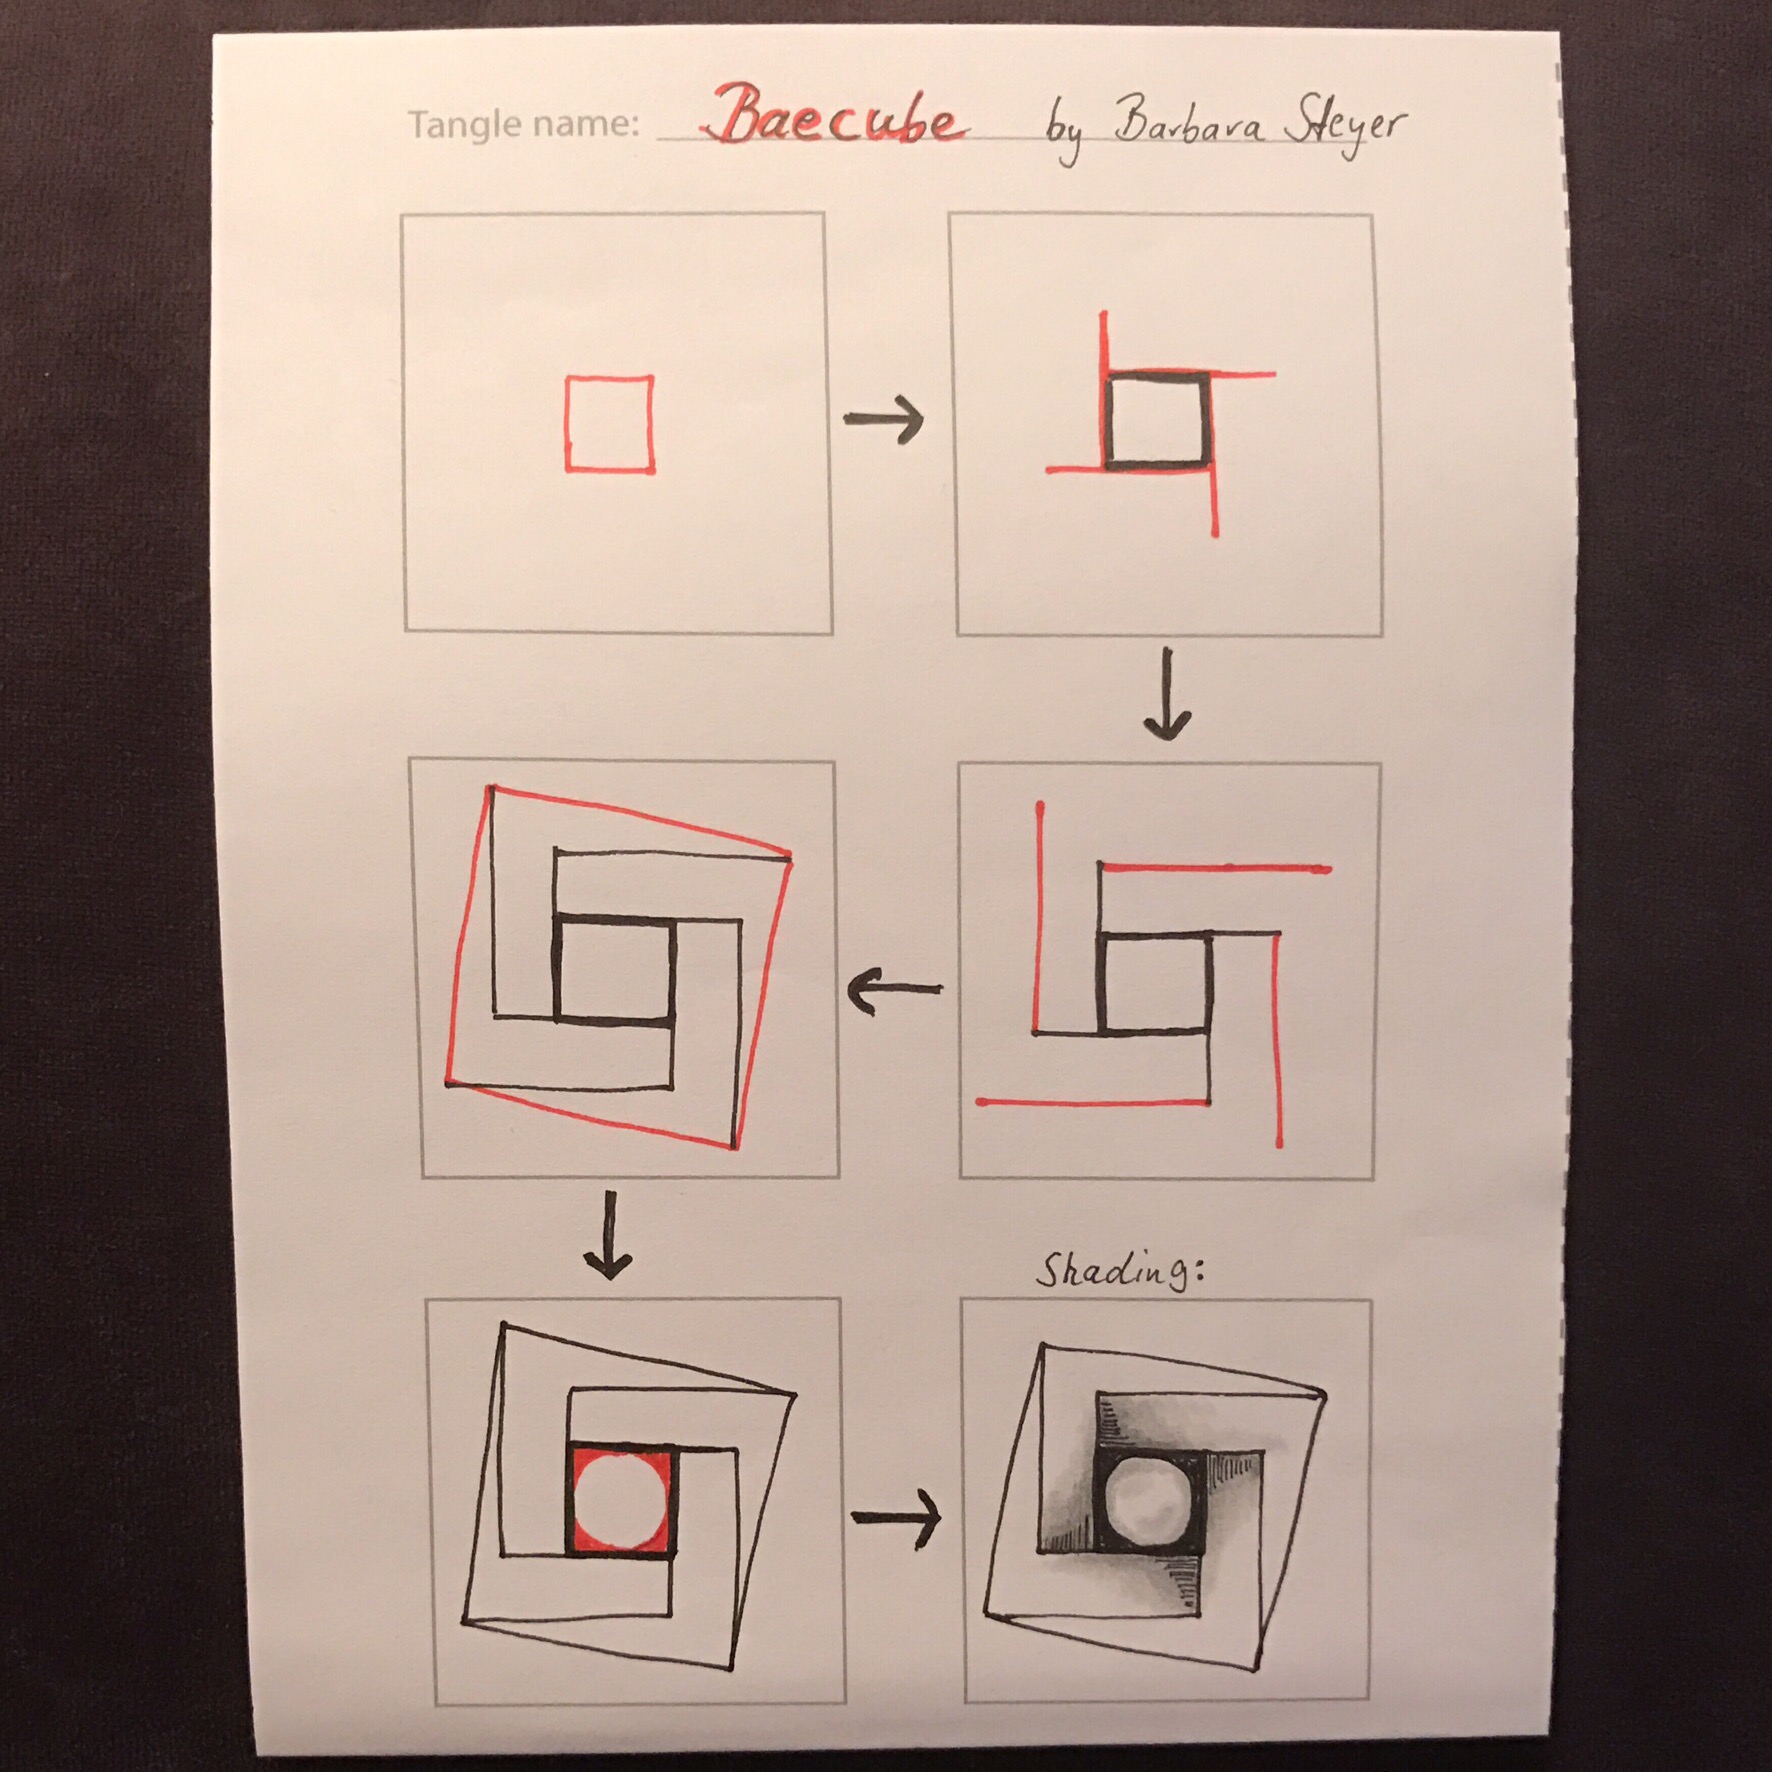
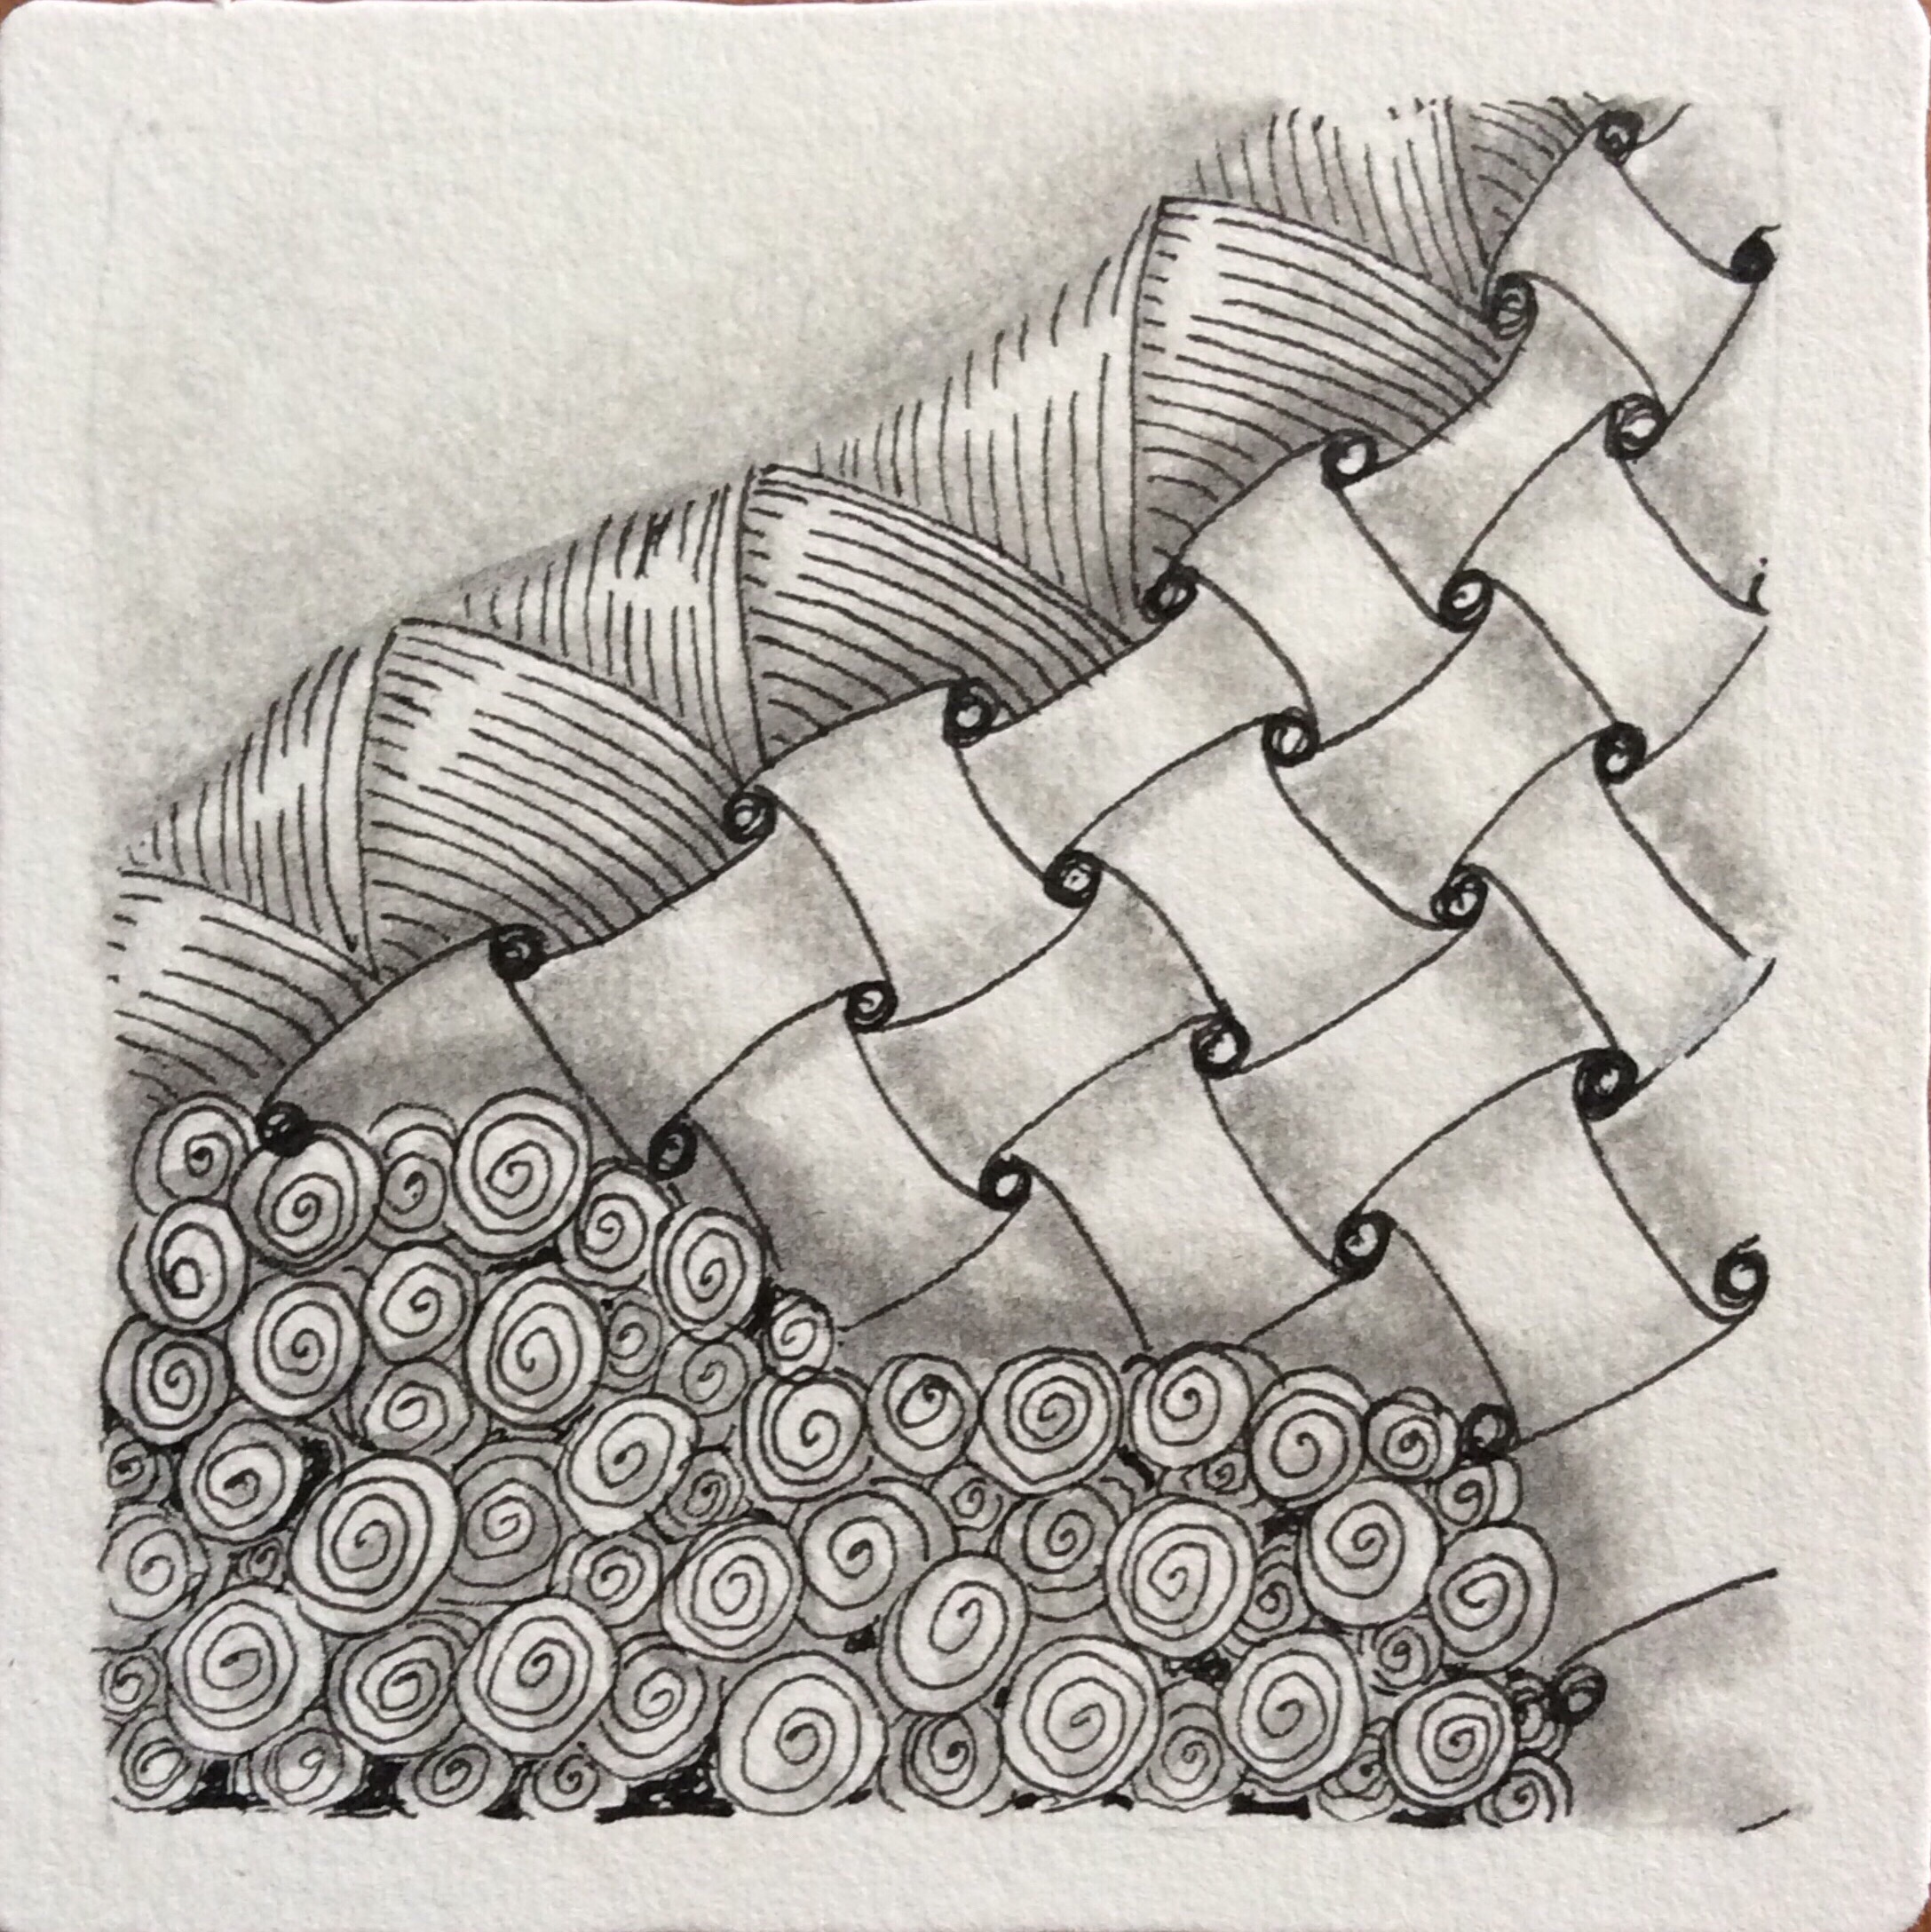
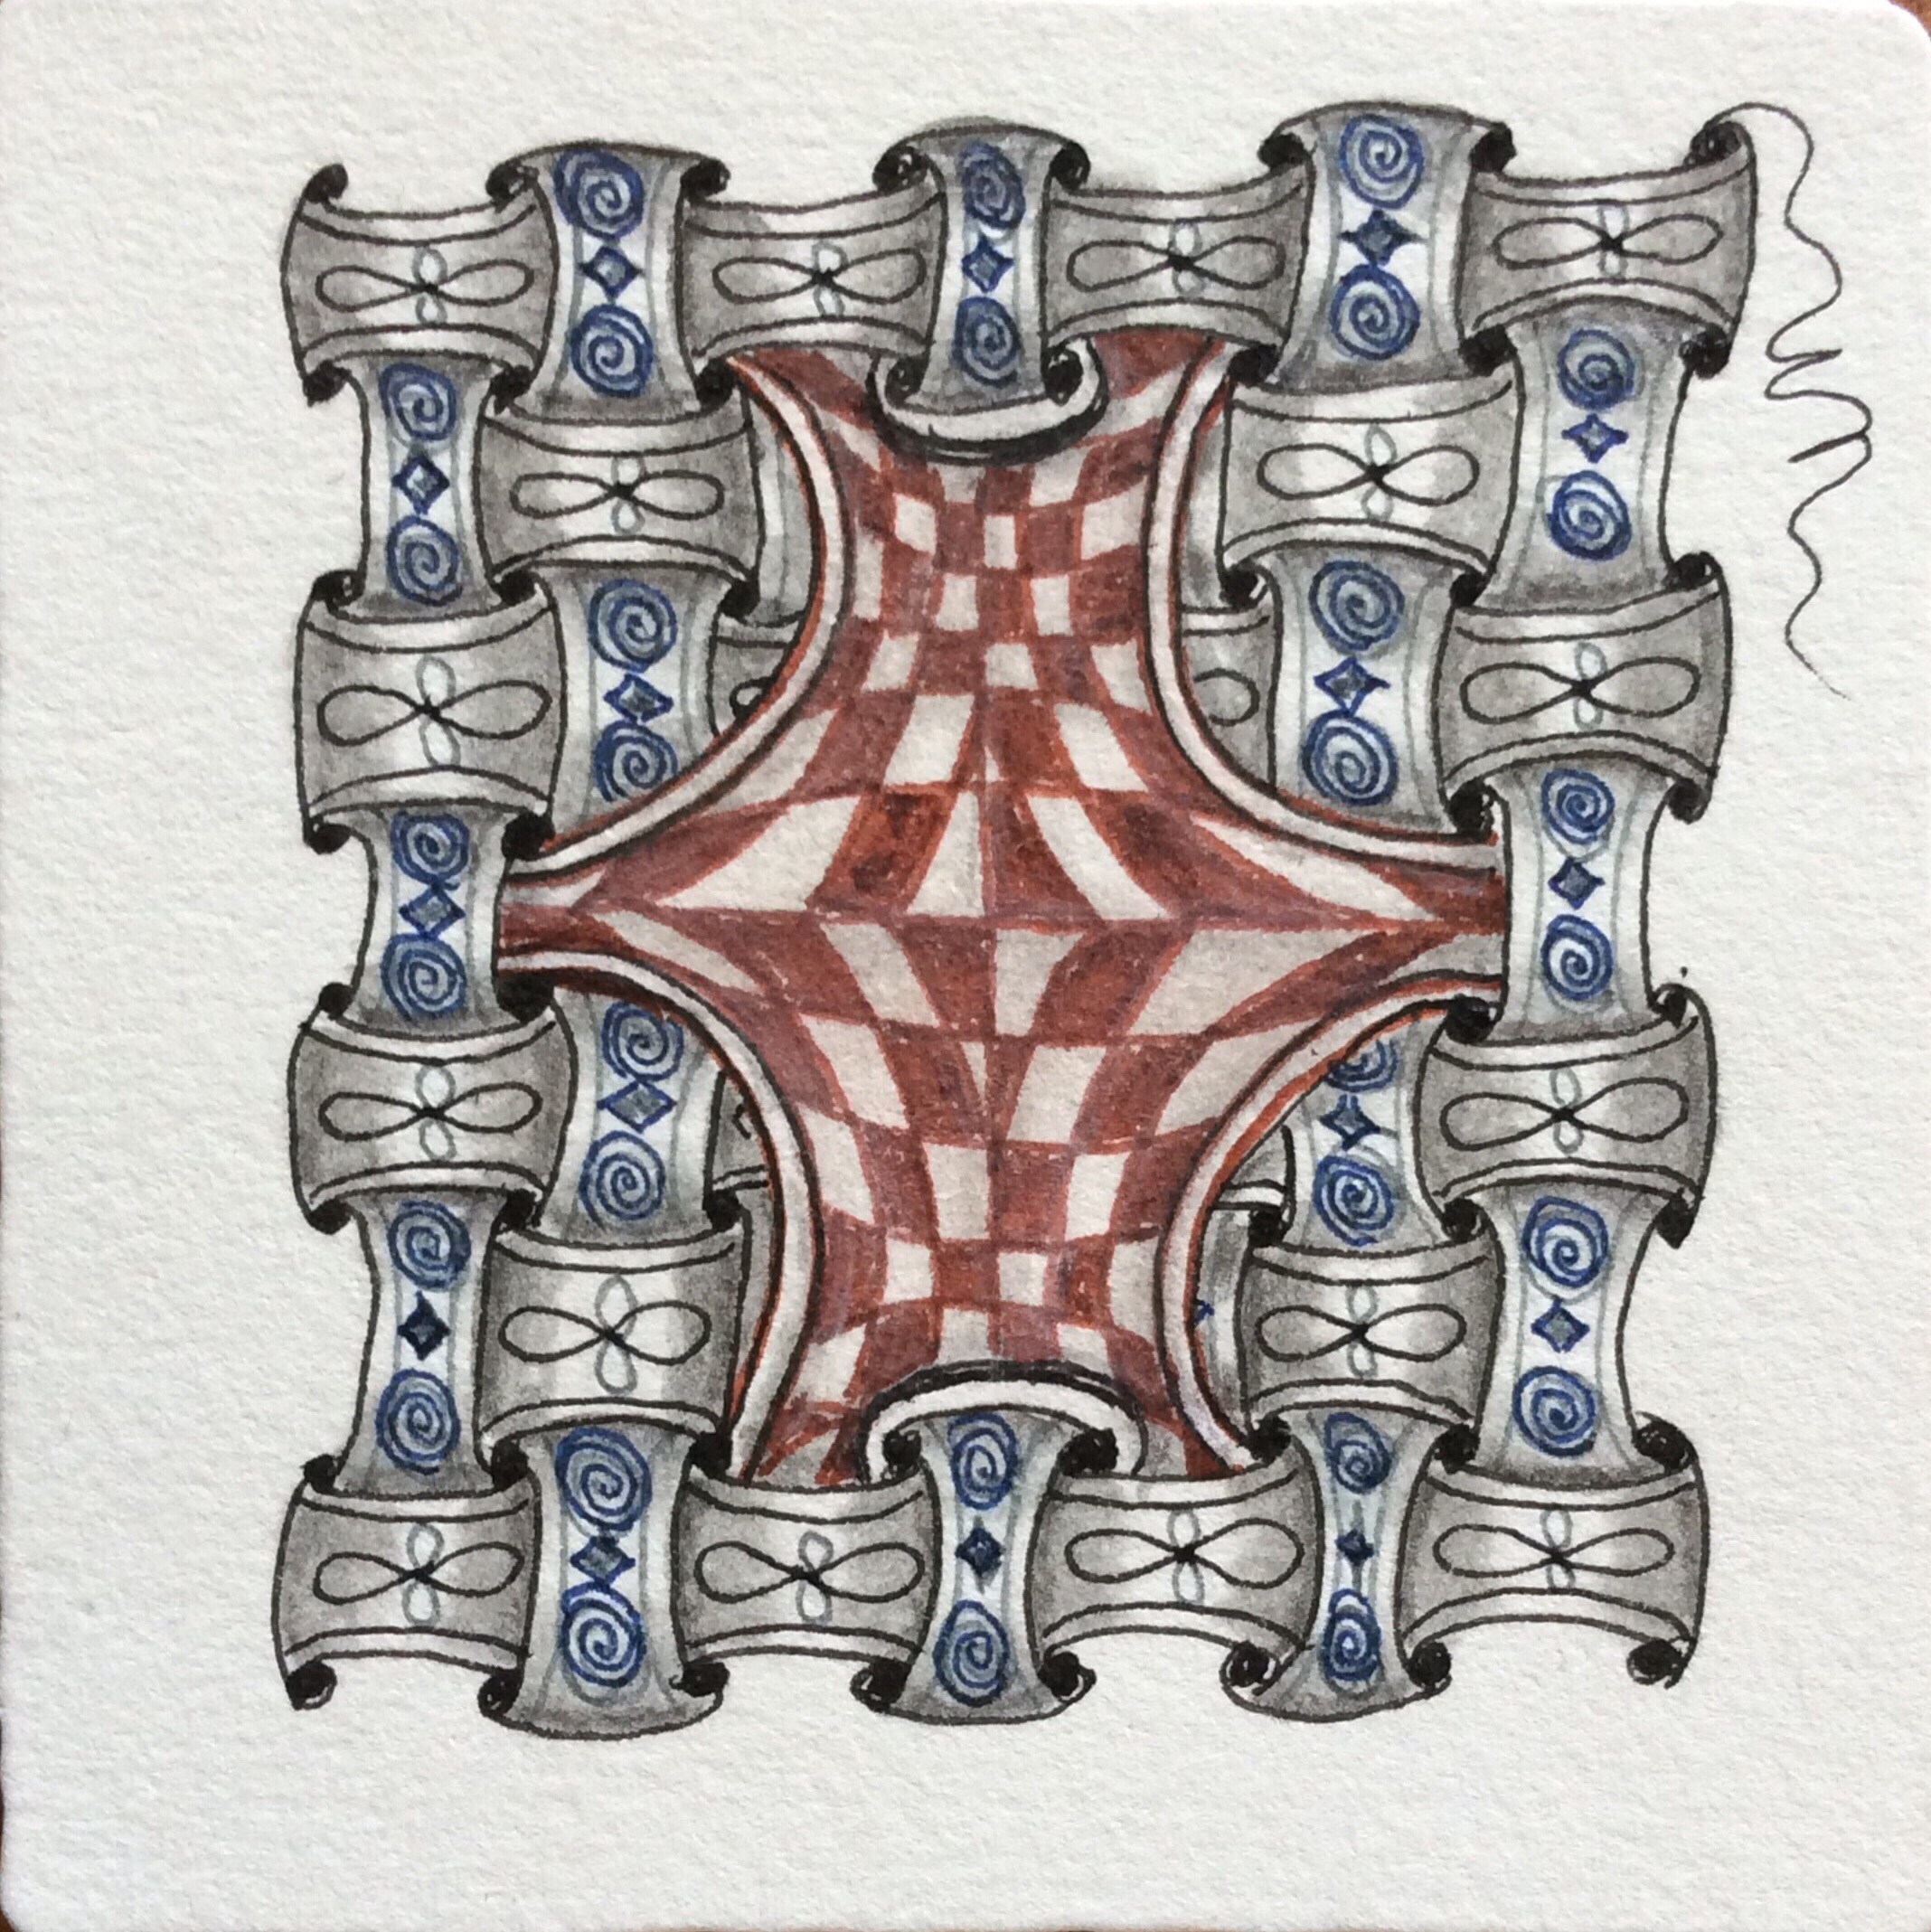
For those of us who enjoy drawing geometric patterns, German tangler Barbara Steyer has created a wonderful design! She calls it Baecube. I love Baecube because it creates a wonderful 3-dimensional weave effect.
Below is the step-out that is also posted in the Zentangle Mosaic app.
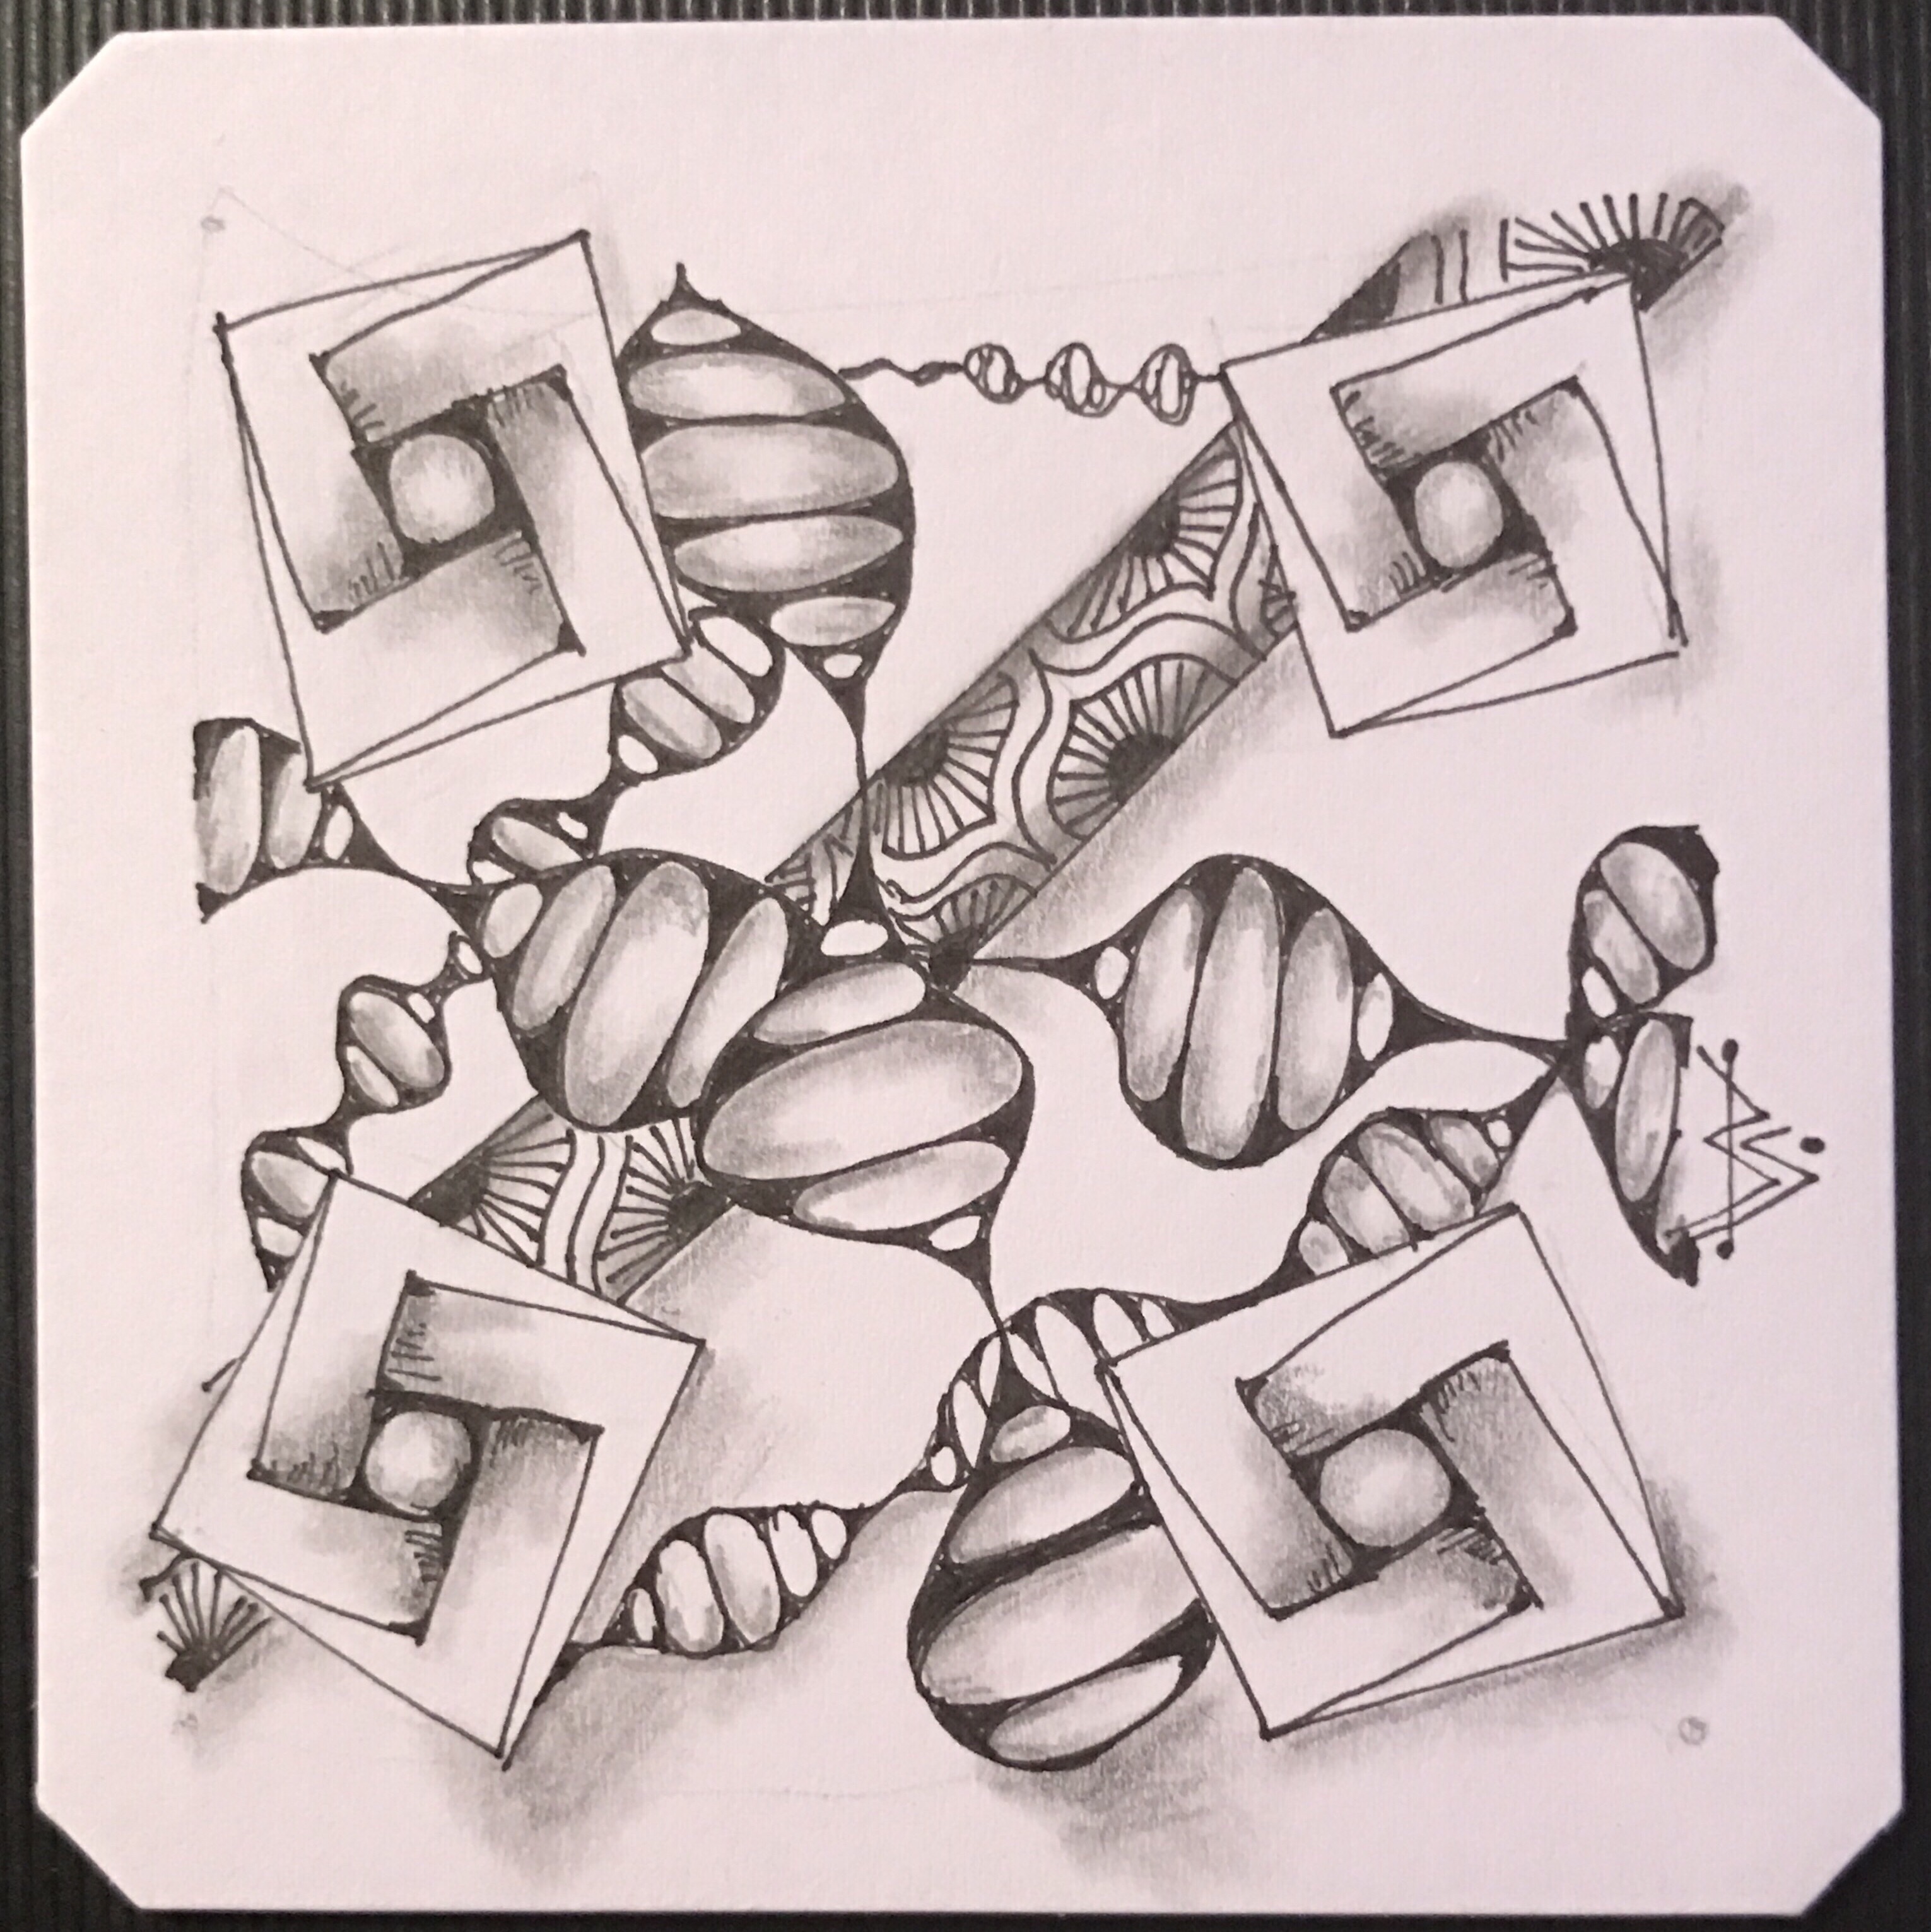
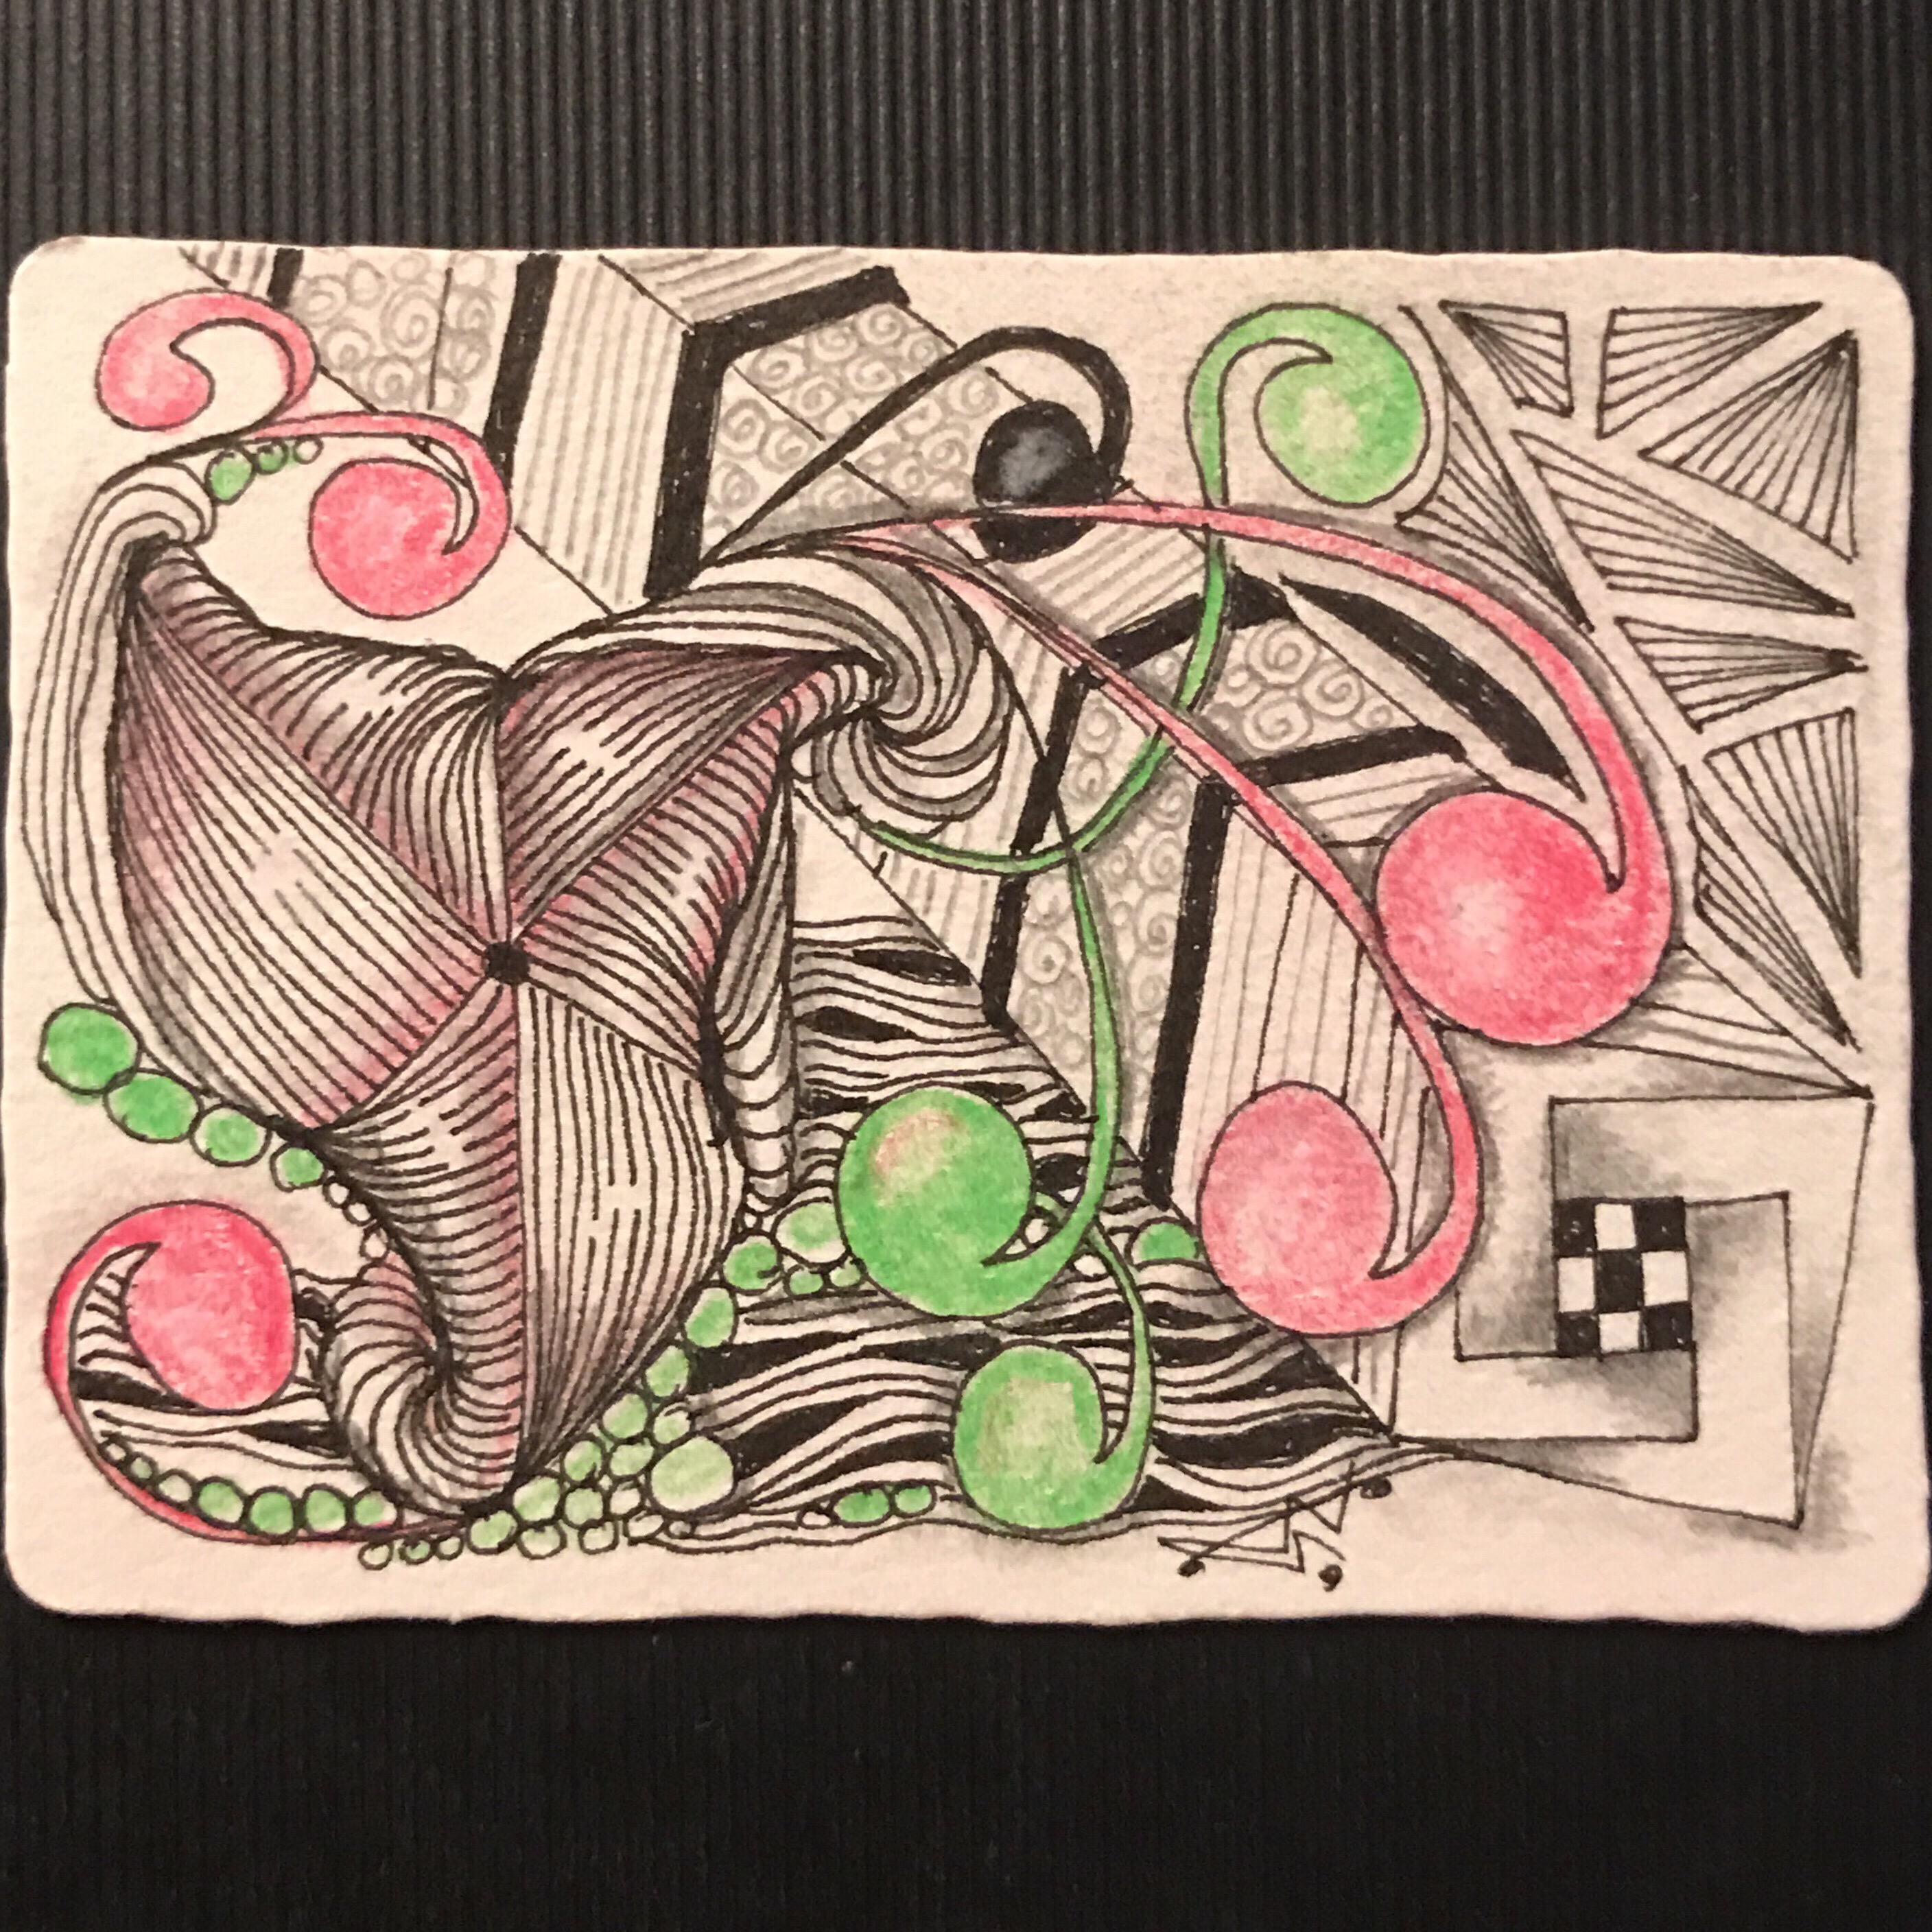
Here are a few tiles Barbara tangled using Baecube.
In her Zendala, Barbara enhances her tile with a pattern called Strutz and created by Sarah Fowler. Strutz will be featured in the next blog post. However, I wanted to include some tiles using Baecube that Sarah tangled.
By the way, if you use the Mosaic app, Barbara is @Baeste. Find many of her wonderful tiles there!
My next post will include patterns Strutz and Borblz, both created by Sarah of the United Kingdom.
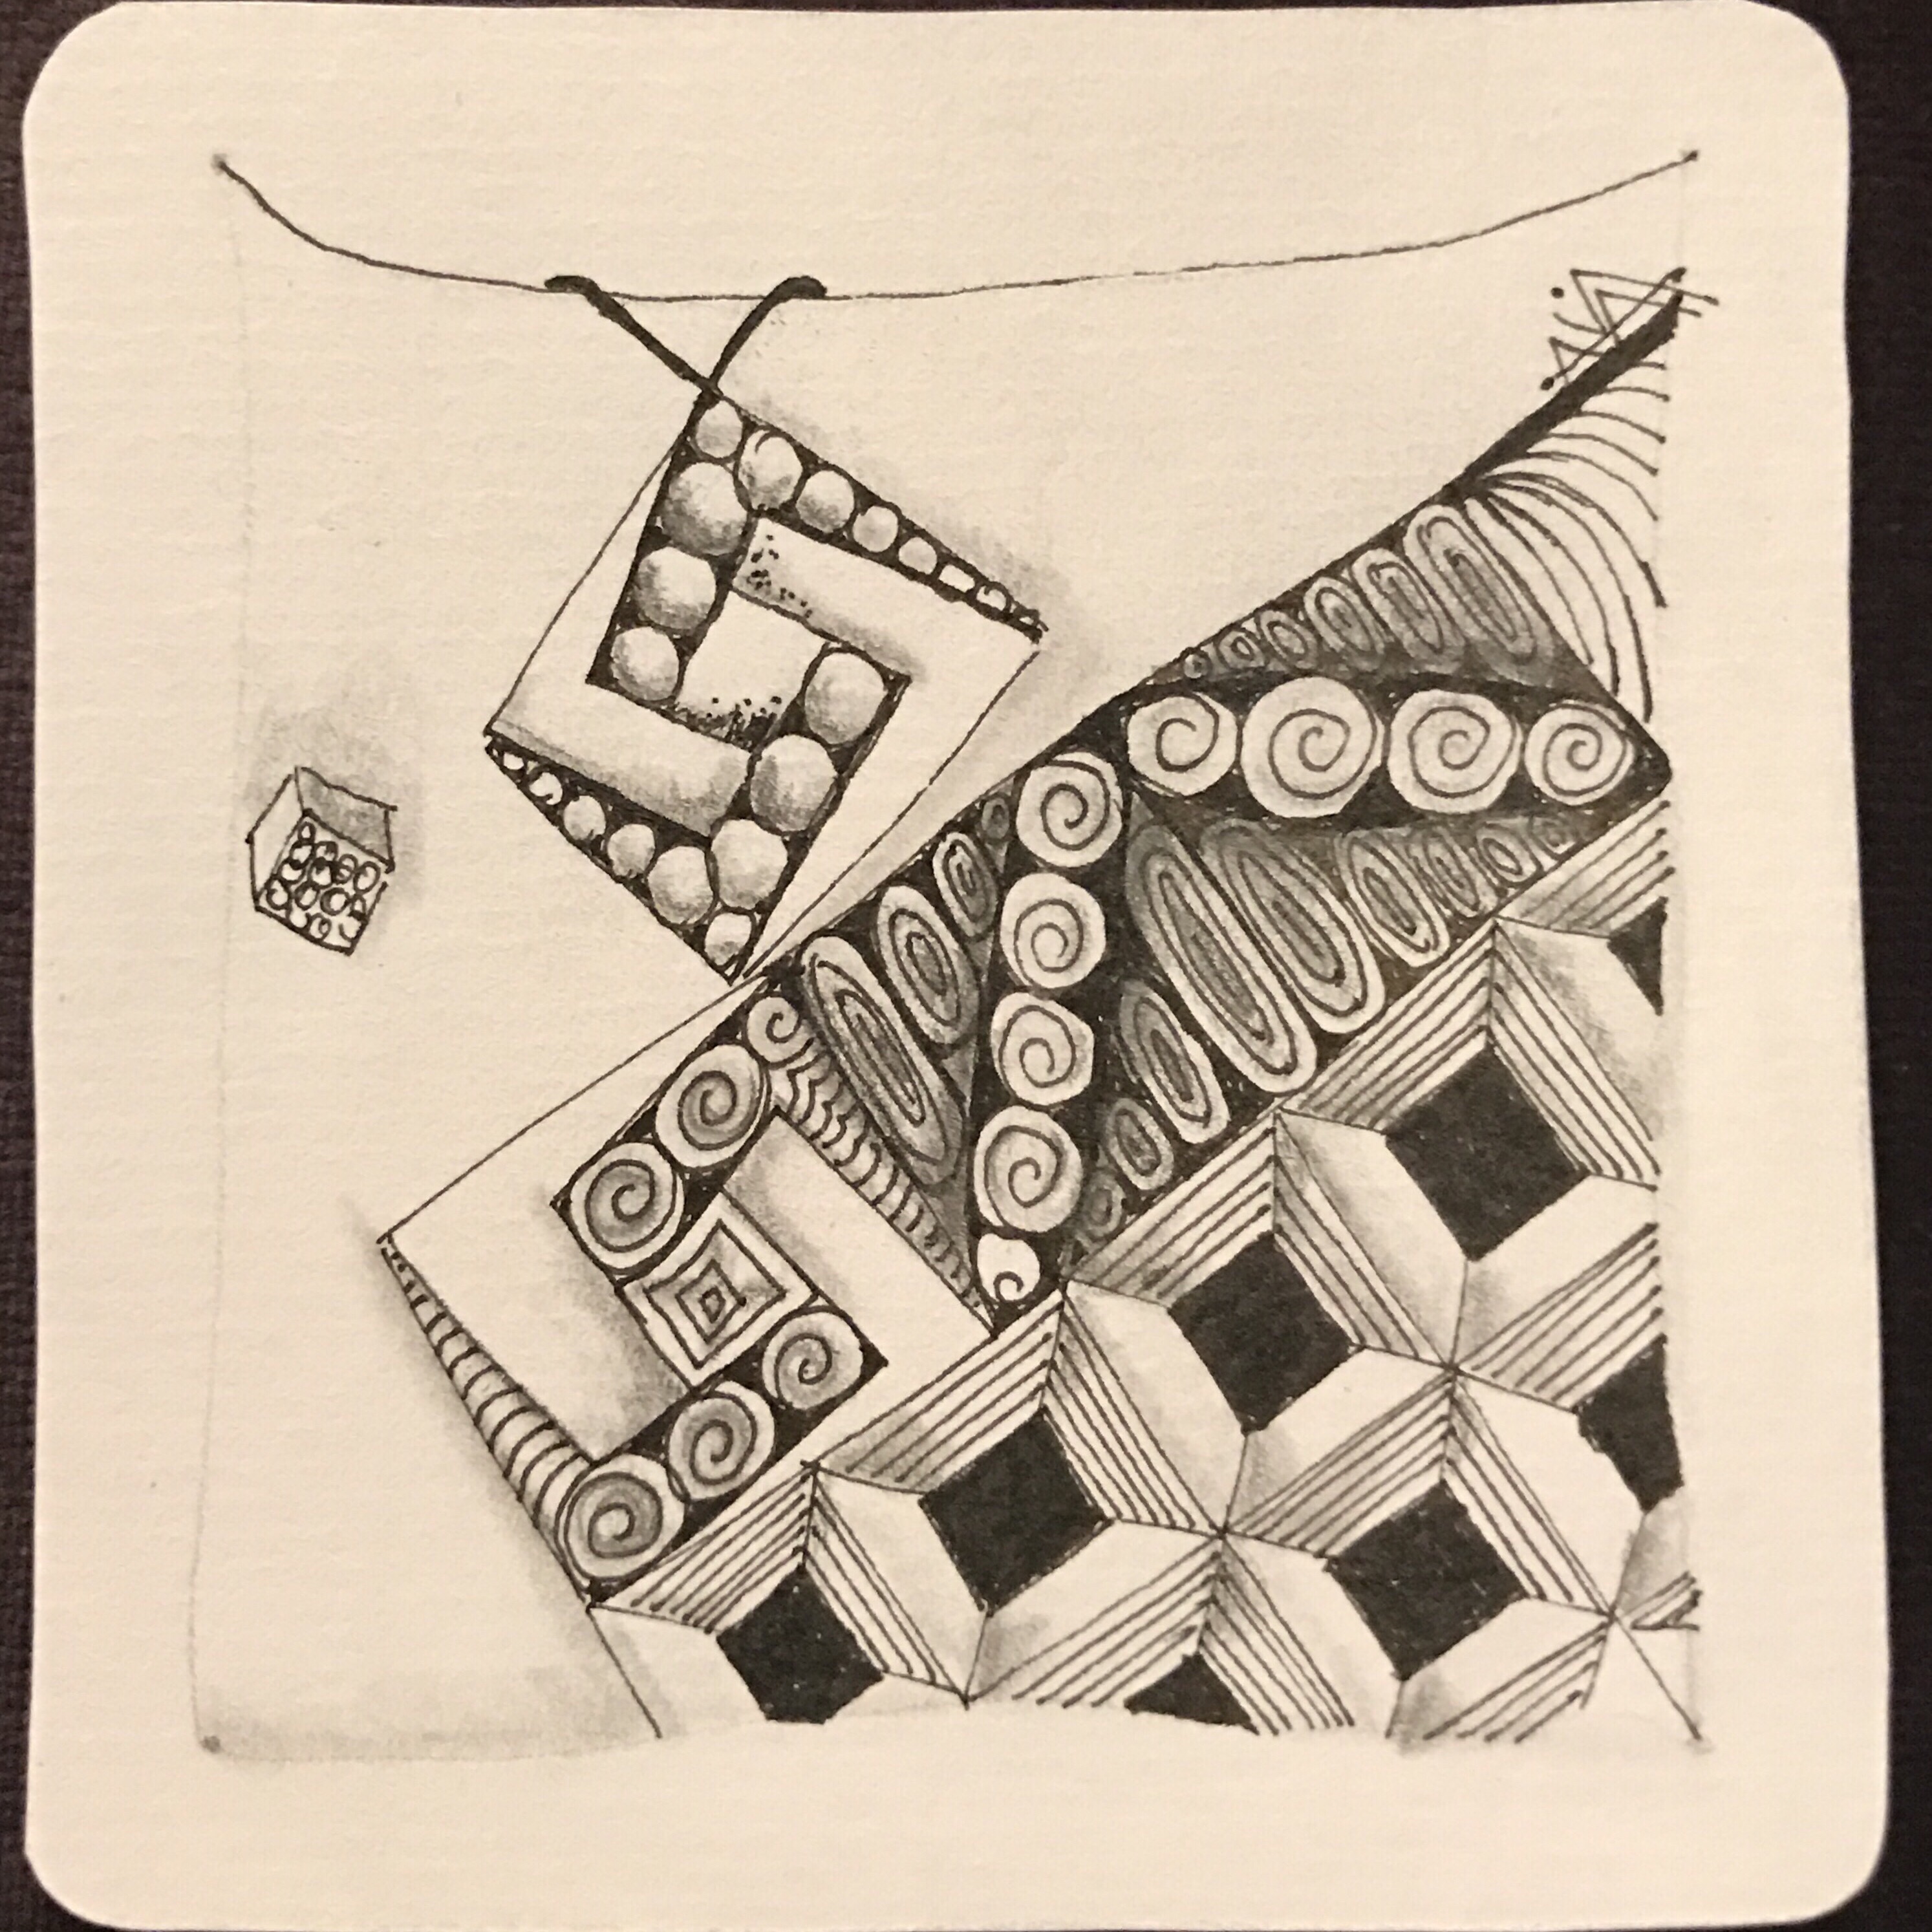
For the past couple of weeks, I have been sticking to my Back to Basics approach to tangling, partly to escape the feeling of being overwhelmed by so many new patterns emerging, partly to remind myself of the patterns I learned almost a year ago when I first started tangling. Using the Zentangle Primer, Volume 1, by Zentangle founders Maria Thomas and Rick Roberts, I started again from the beginning of the book, re-doing all the exercises with fresh eyes as well as accumulated experience.
The very simplicity of the way I tangled through the first six lessons helped me touch base with the reasons I started tangling to begin with–to relax and re-center my mind, to let go for a few moments of the demands of the world around me, to remind myself that I can still learn new things and create. And so I kept things simple–nothing fancy or extravagant; just the original tangles presented in the Primer, without embellishment except as the exercises required.
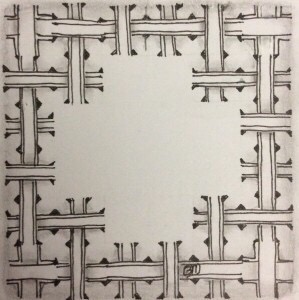
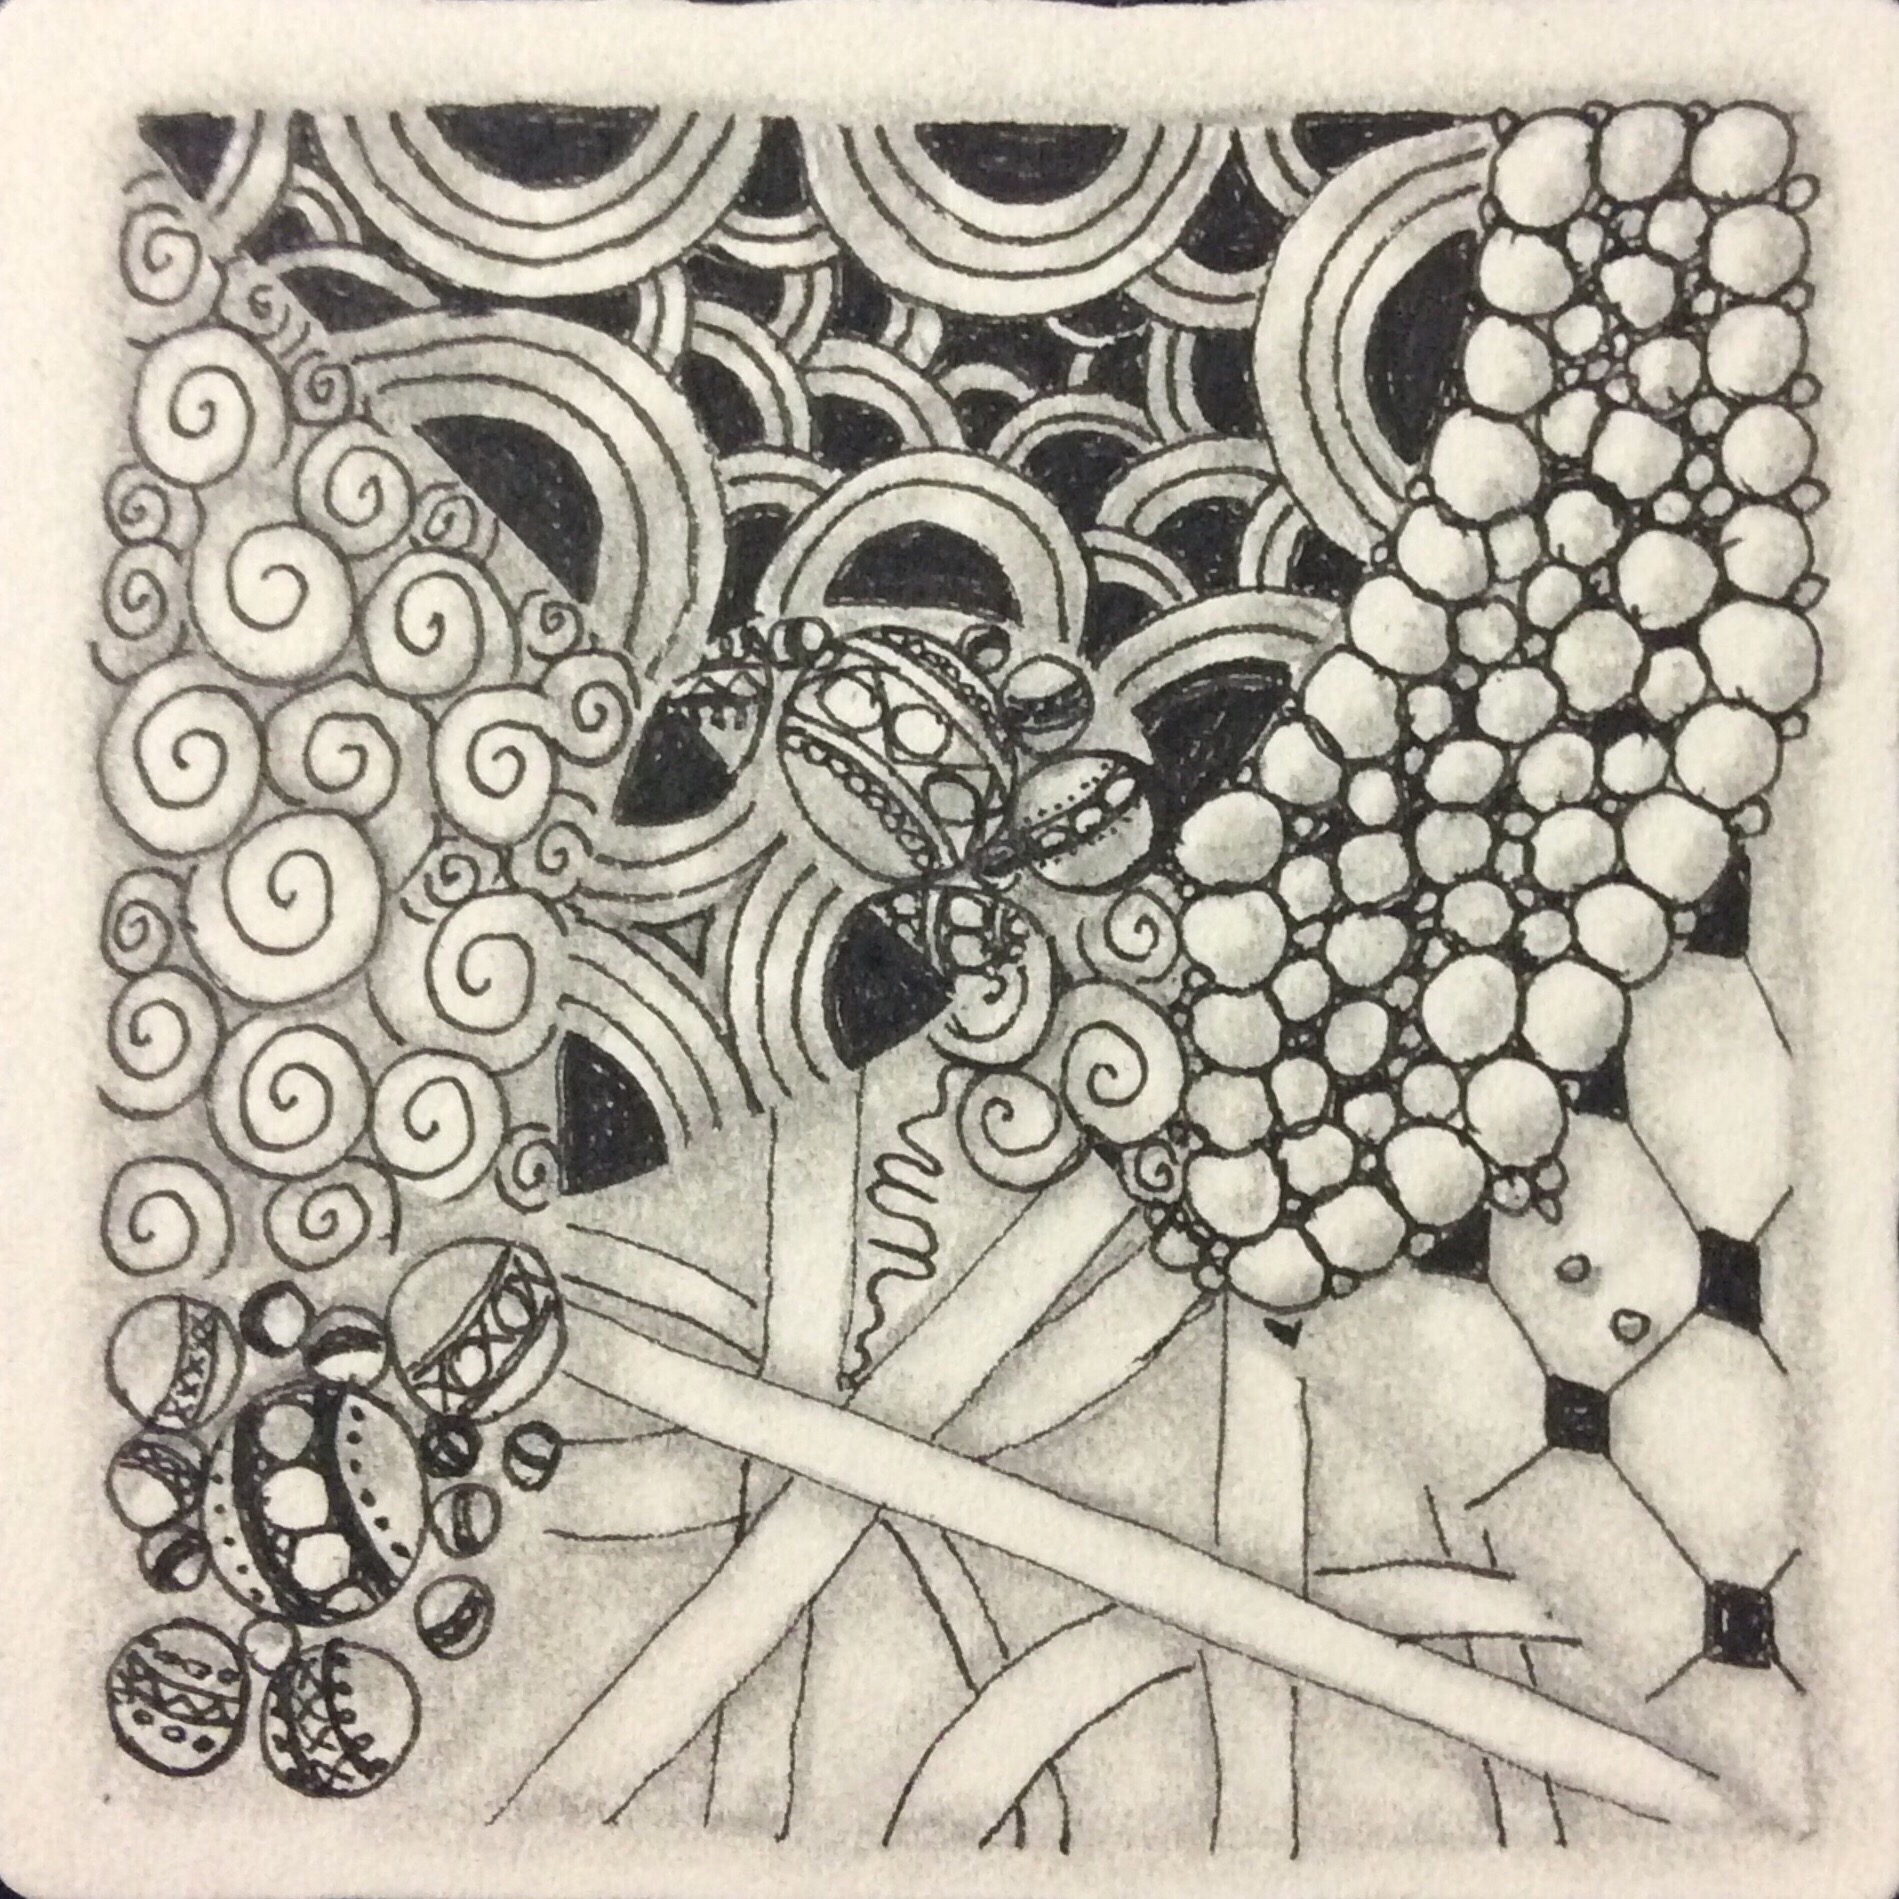
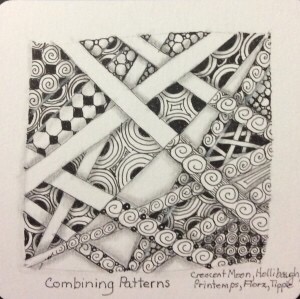
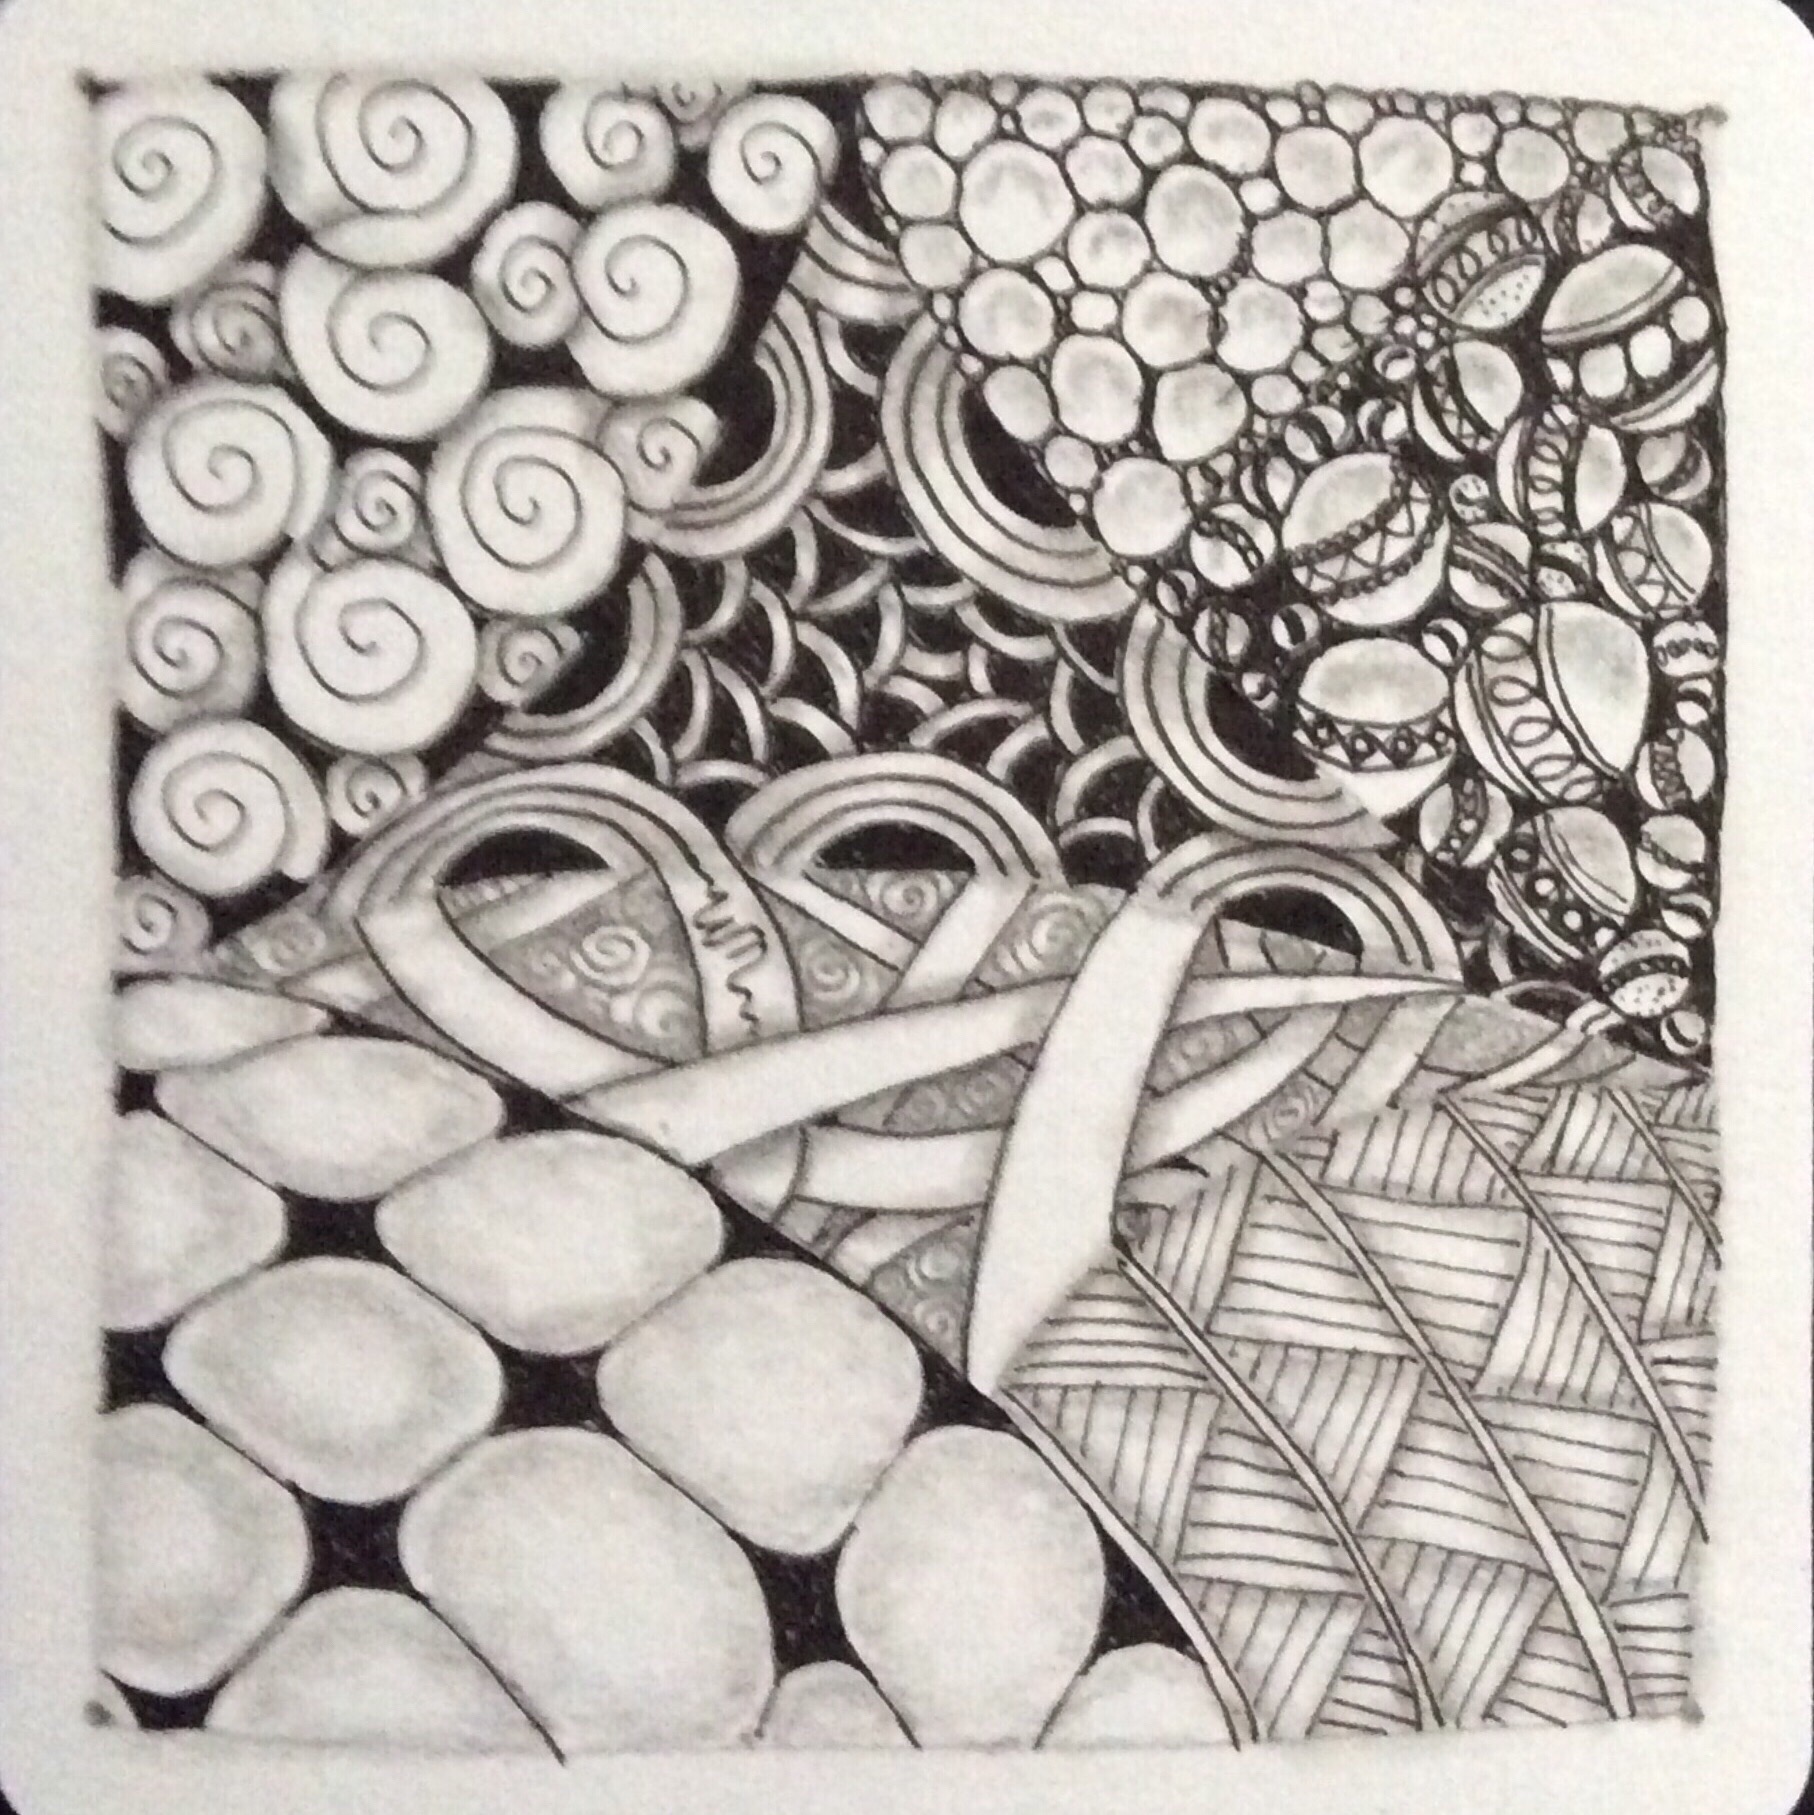
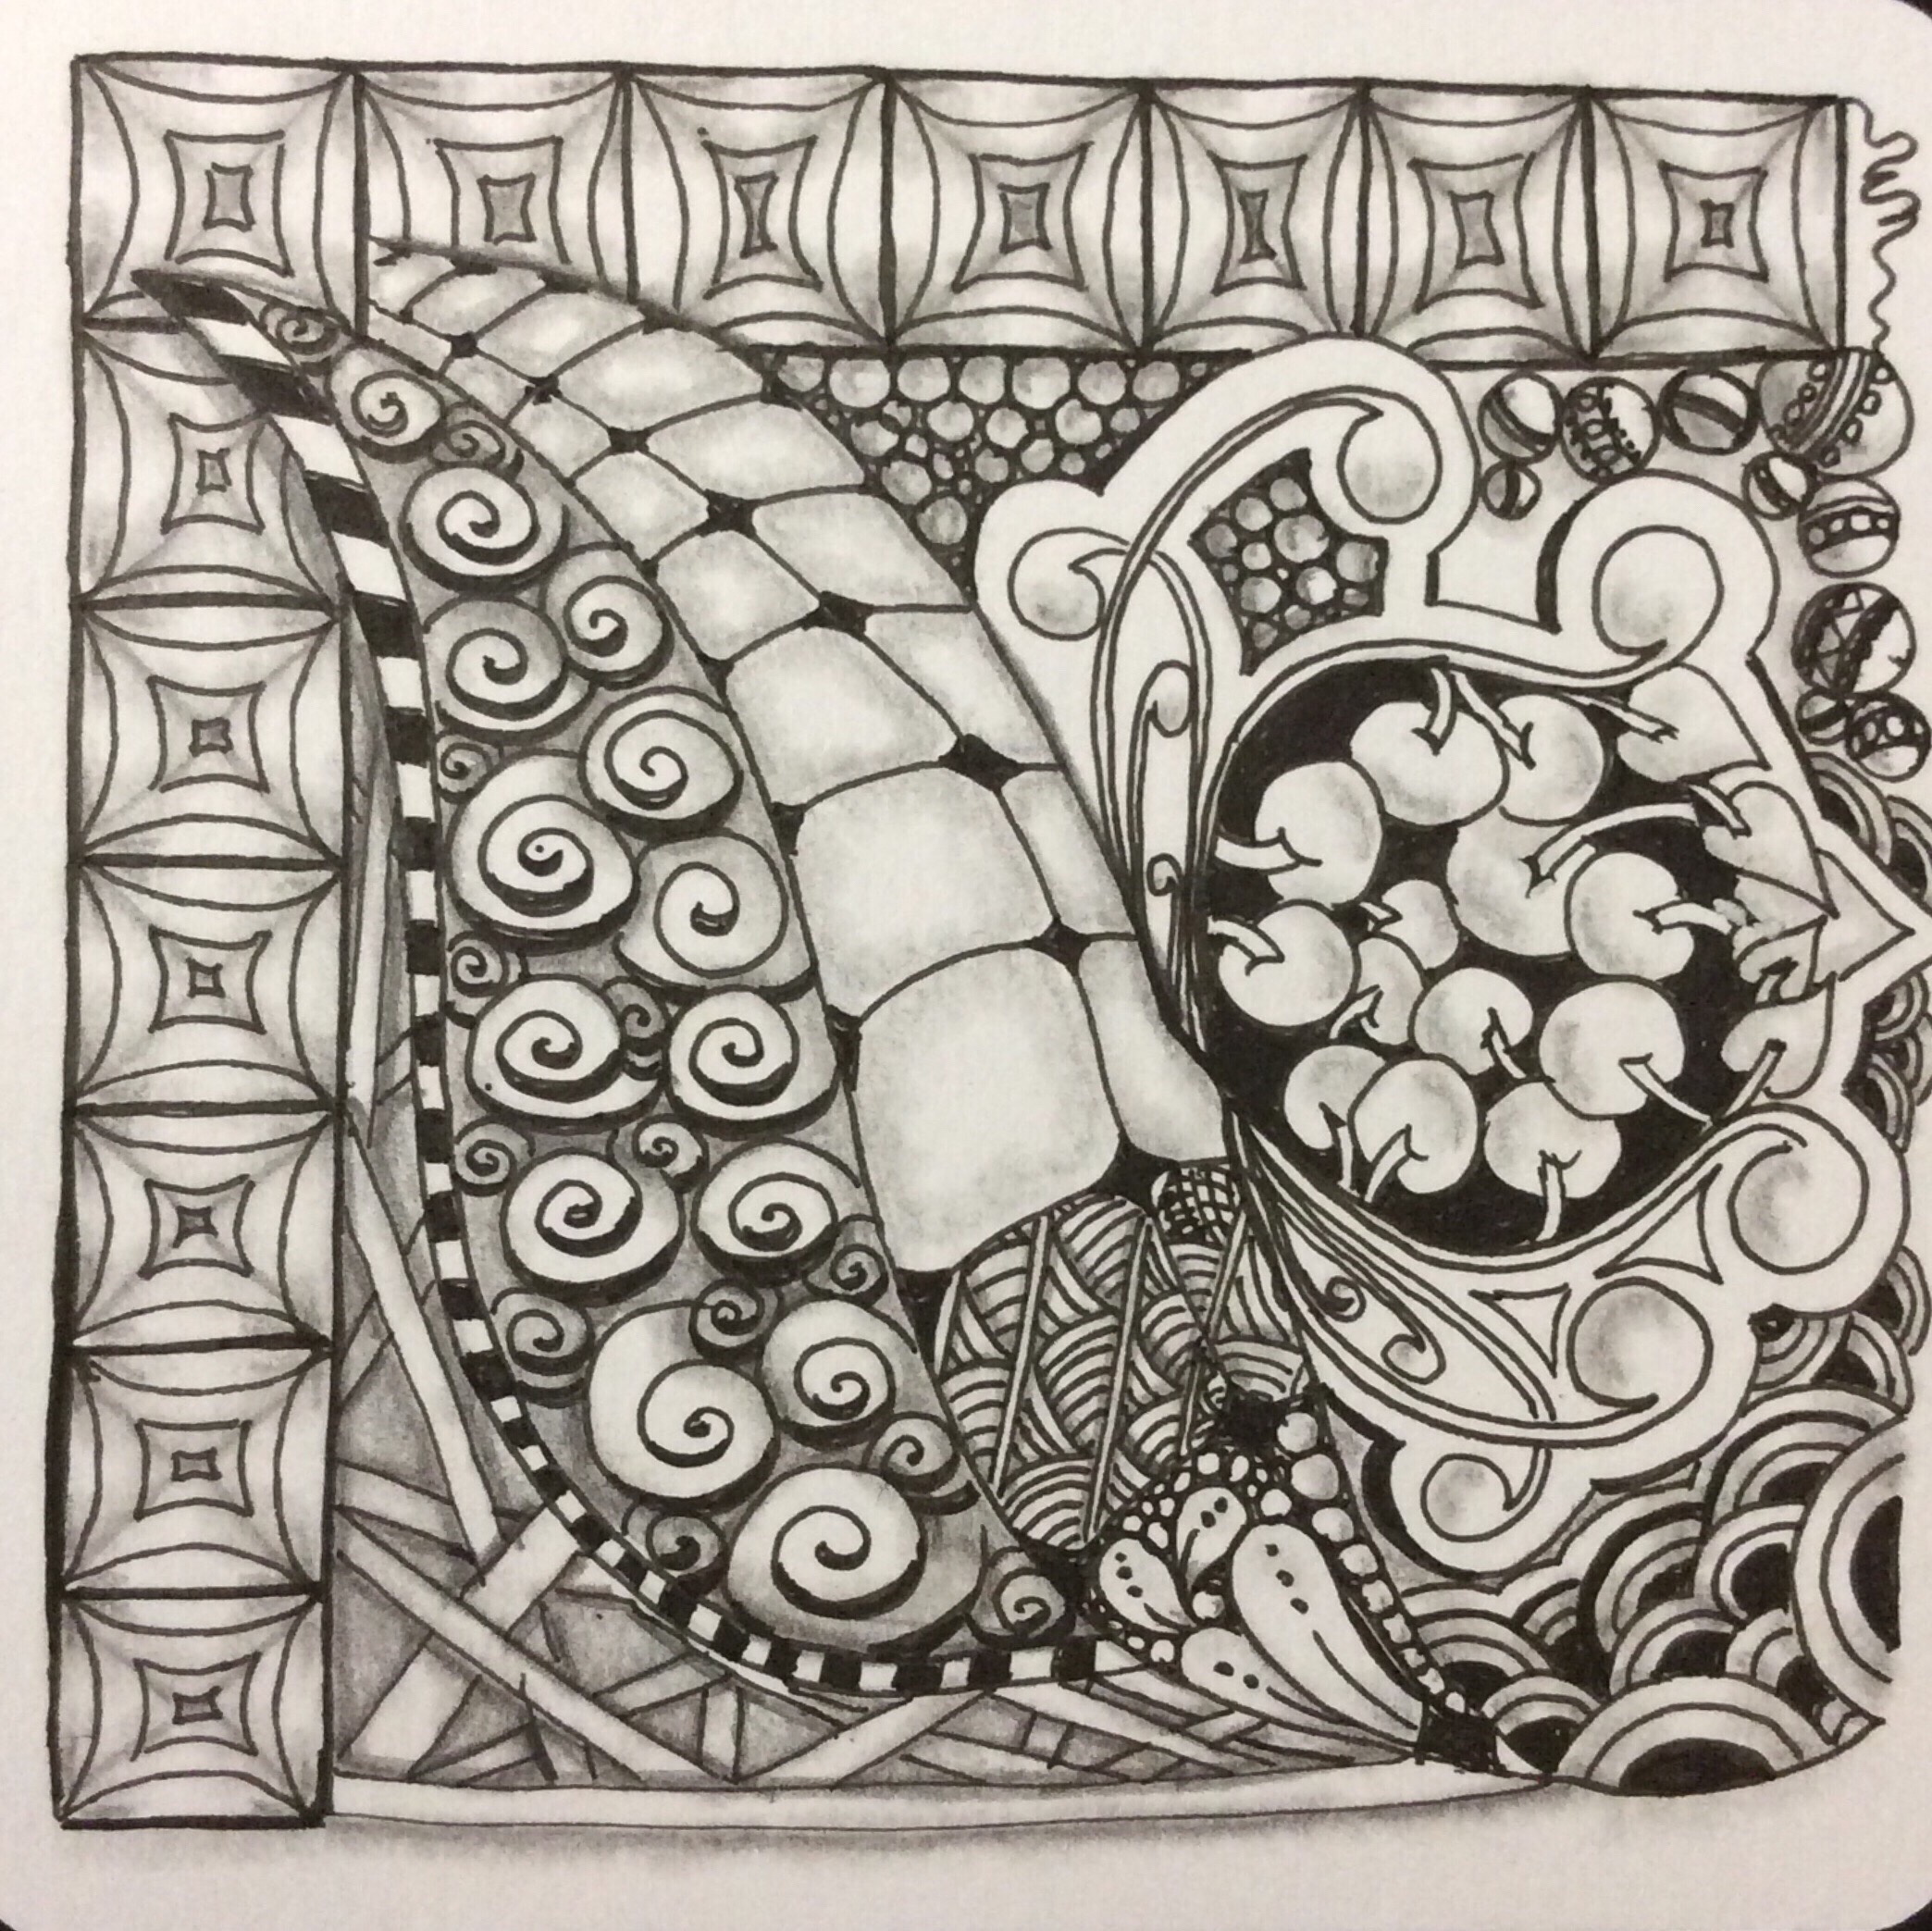
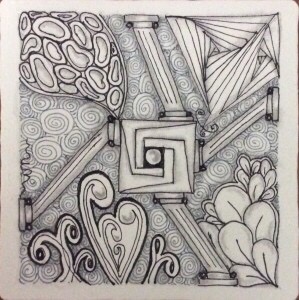
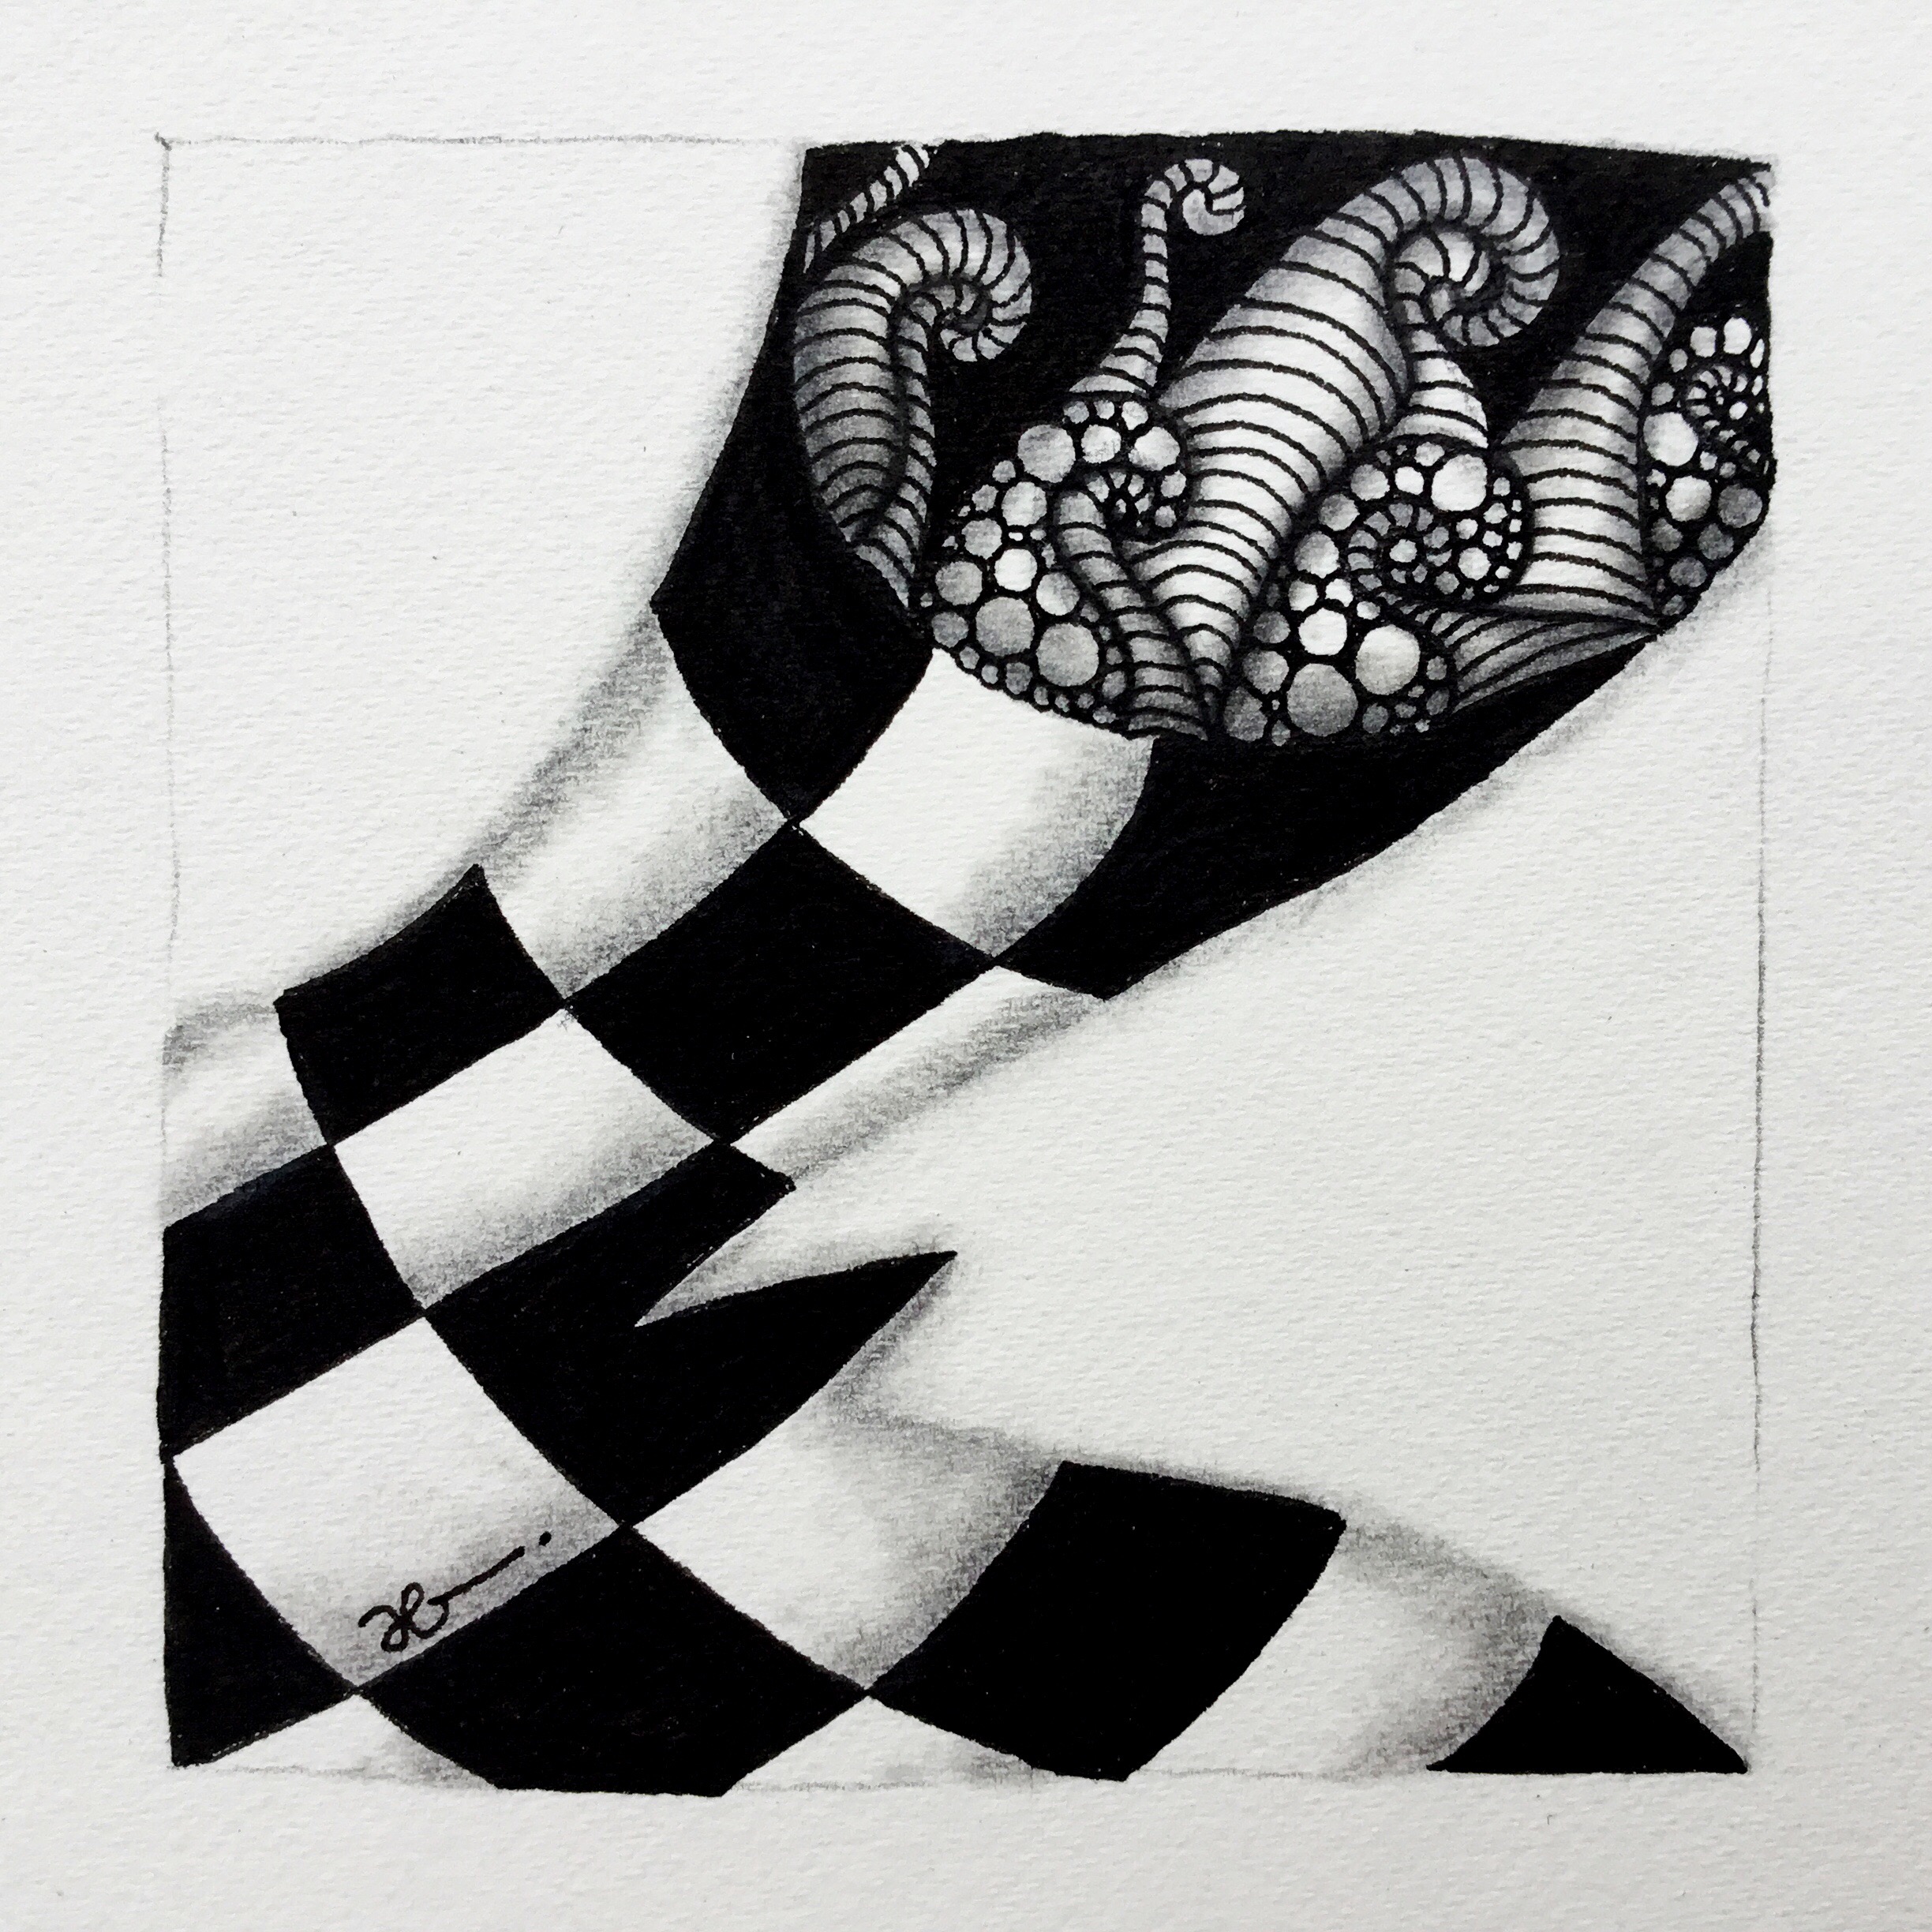
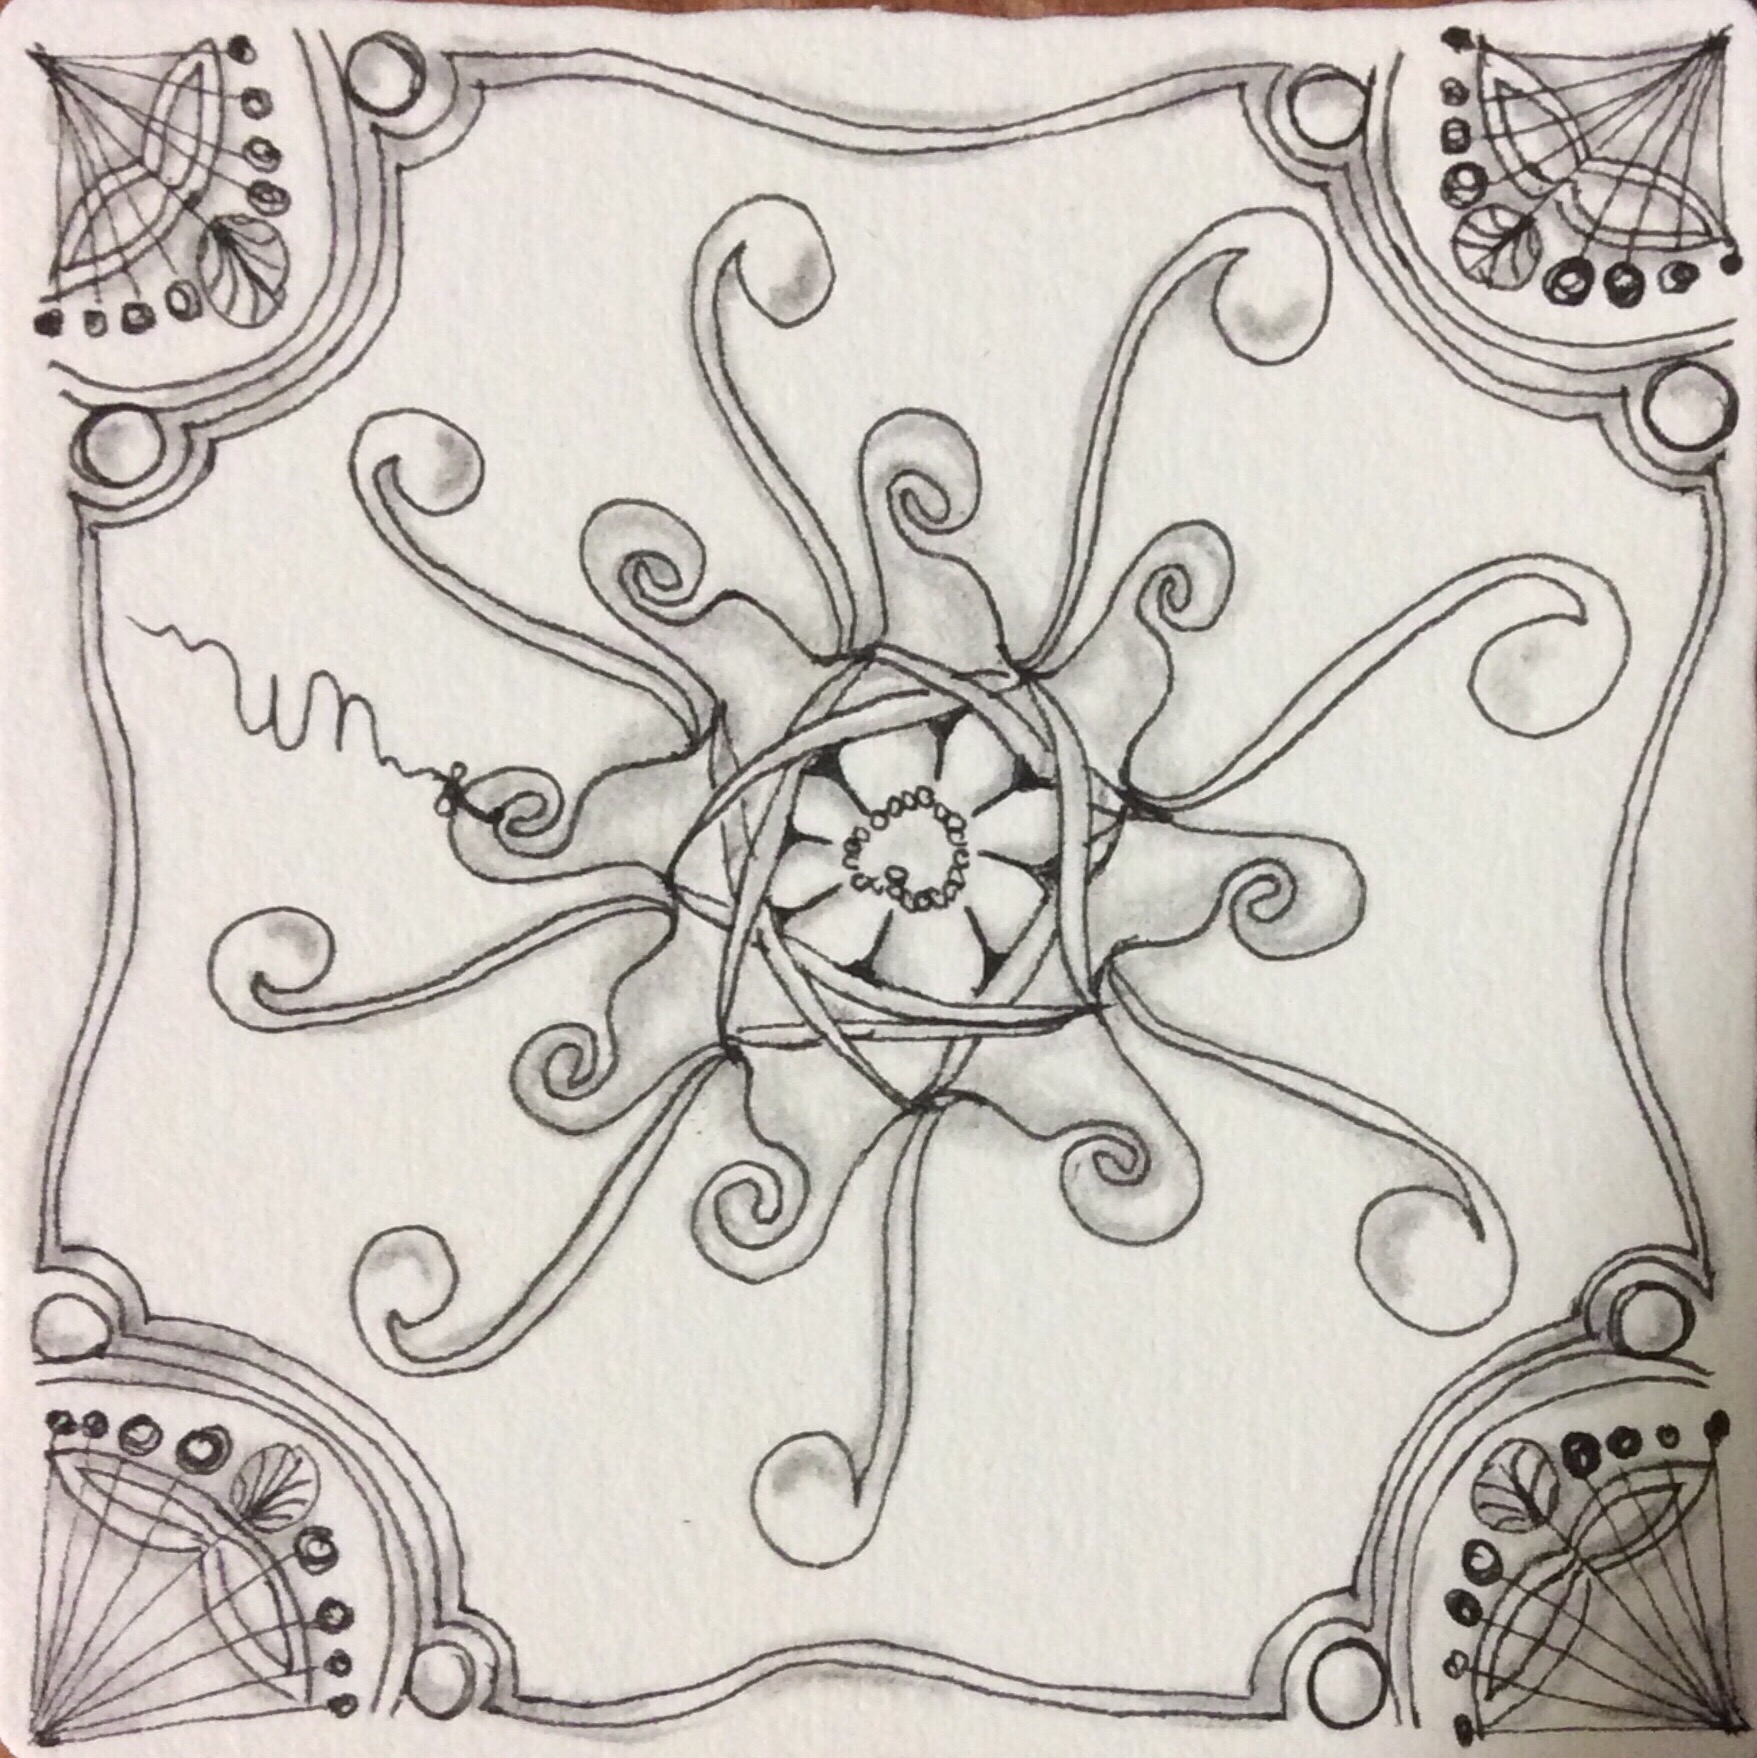
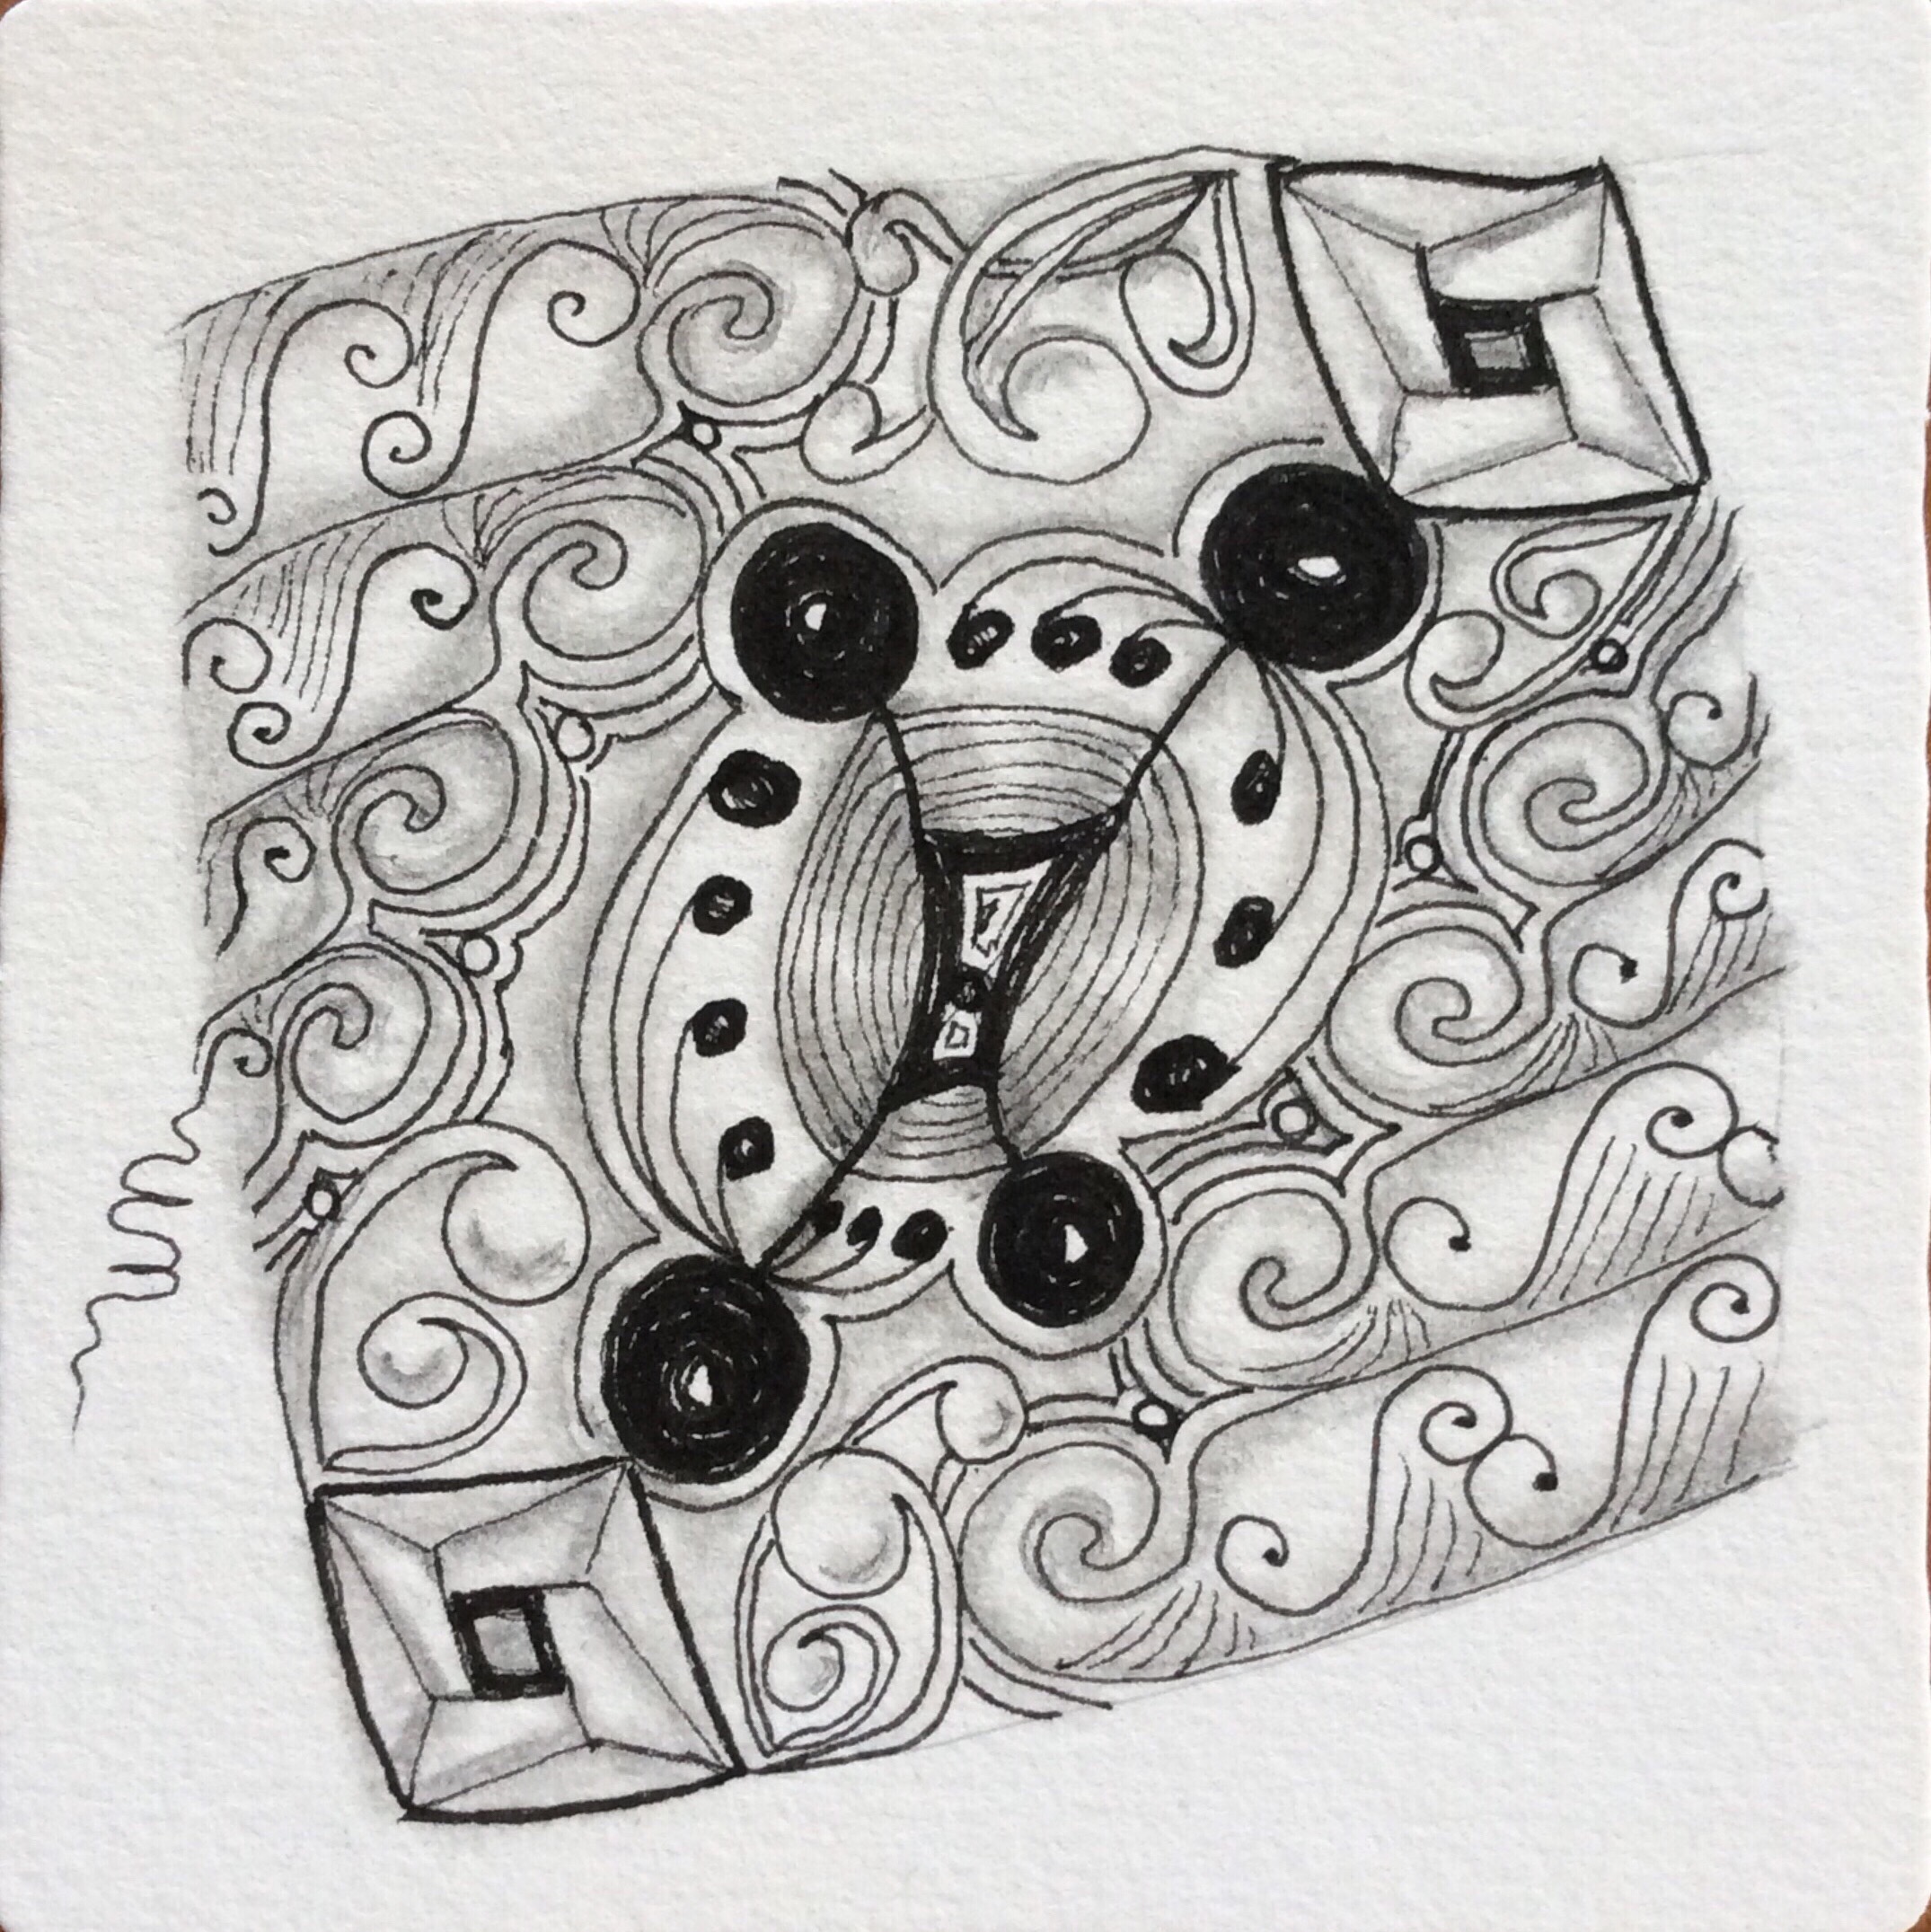
The tiles and tangles below are studies based on some of the Lesson 6 featured patterns and related exercises.
Only seven of the basic twenty-one tangles introduced in the first six chapters were used to create these four tangled tiles. One tangle–the checkerboard-like Knights Bridge–is used so often that I forgot that it wasn’t introduced in the Primer at all! It was introduced very early in One Zentangle a Day, by Beckah Krahula, the book that introduced me to Zentangle. (Incidentally, Ms. Krahula’s book was published in 2012–four years before the Zentangle Primer, Vol. 1 came out.)
Each time I work through these first chapters I try to vary the patterns I use, especially for the string and shading exercises in Chapters 4 and 5. Applying the exercises and techniques to newer or simply different patterns enhances the way I draw and use the patterns. This emboldens me to try new things with strings and with patterns new to me. Therefore, each pass through Primer provides not only new ideas for tangling, but serves as a reminder of classic drawing techniques and patterns and techniques that I forgot about as I picked up and used more and more patterns and as I developed my own style. This time through, I limited my tangling to only these first 23 patterns, concentrating on the first seven.
(Note: The tiles above are from Chapter 6, which introduces the additional 14 or 15 patterns. As the newer patterns were presented, I concentrated on the single pattern–or combined a few consecutive patterns–presented in order up to that point. Exercises at the end of the chapter allowed more flexibility than I imposed on myself.)
There is always the tendency to use the newest patterns as one tangles, so that “older” and classic patterns kind of fall out of memory for a while. Working through the Primer again–or just using it for inspiration or a reminder of a technique–reminds me of what has become part of my style as well as of the roots of my tangling. Mostly, it reminds me why I began to tangle and why I continue to tangle, even if I temporarily become overwhelmed with possibilities and the idea of meditation seems to fly out the window.
Next week I will concentrate on one of my favorite Back to Basics chapters in the Primer–reticula and fragments.
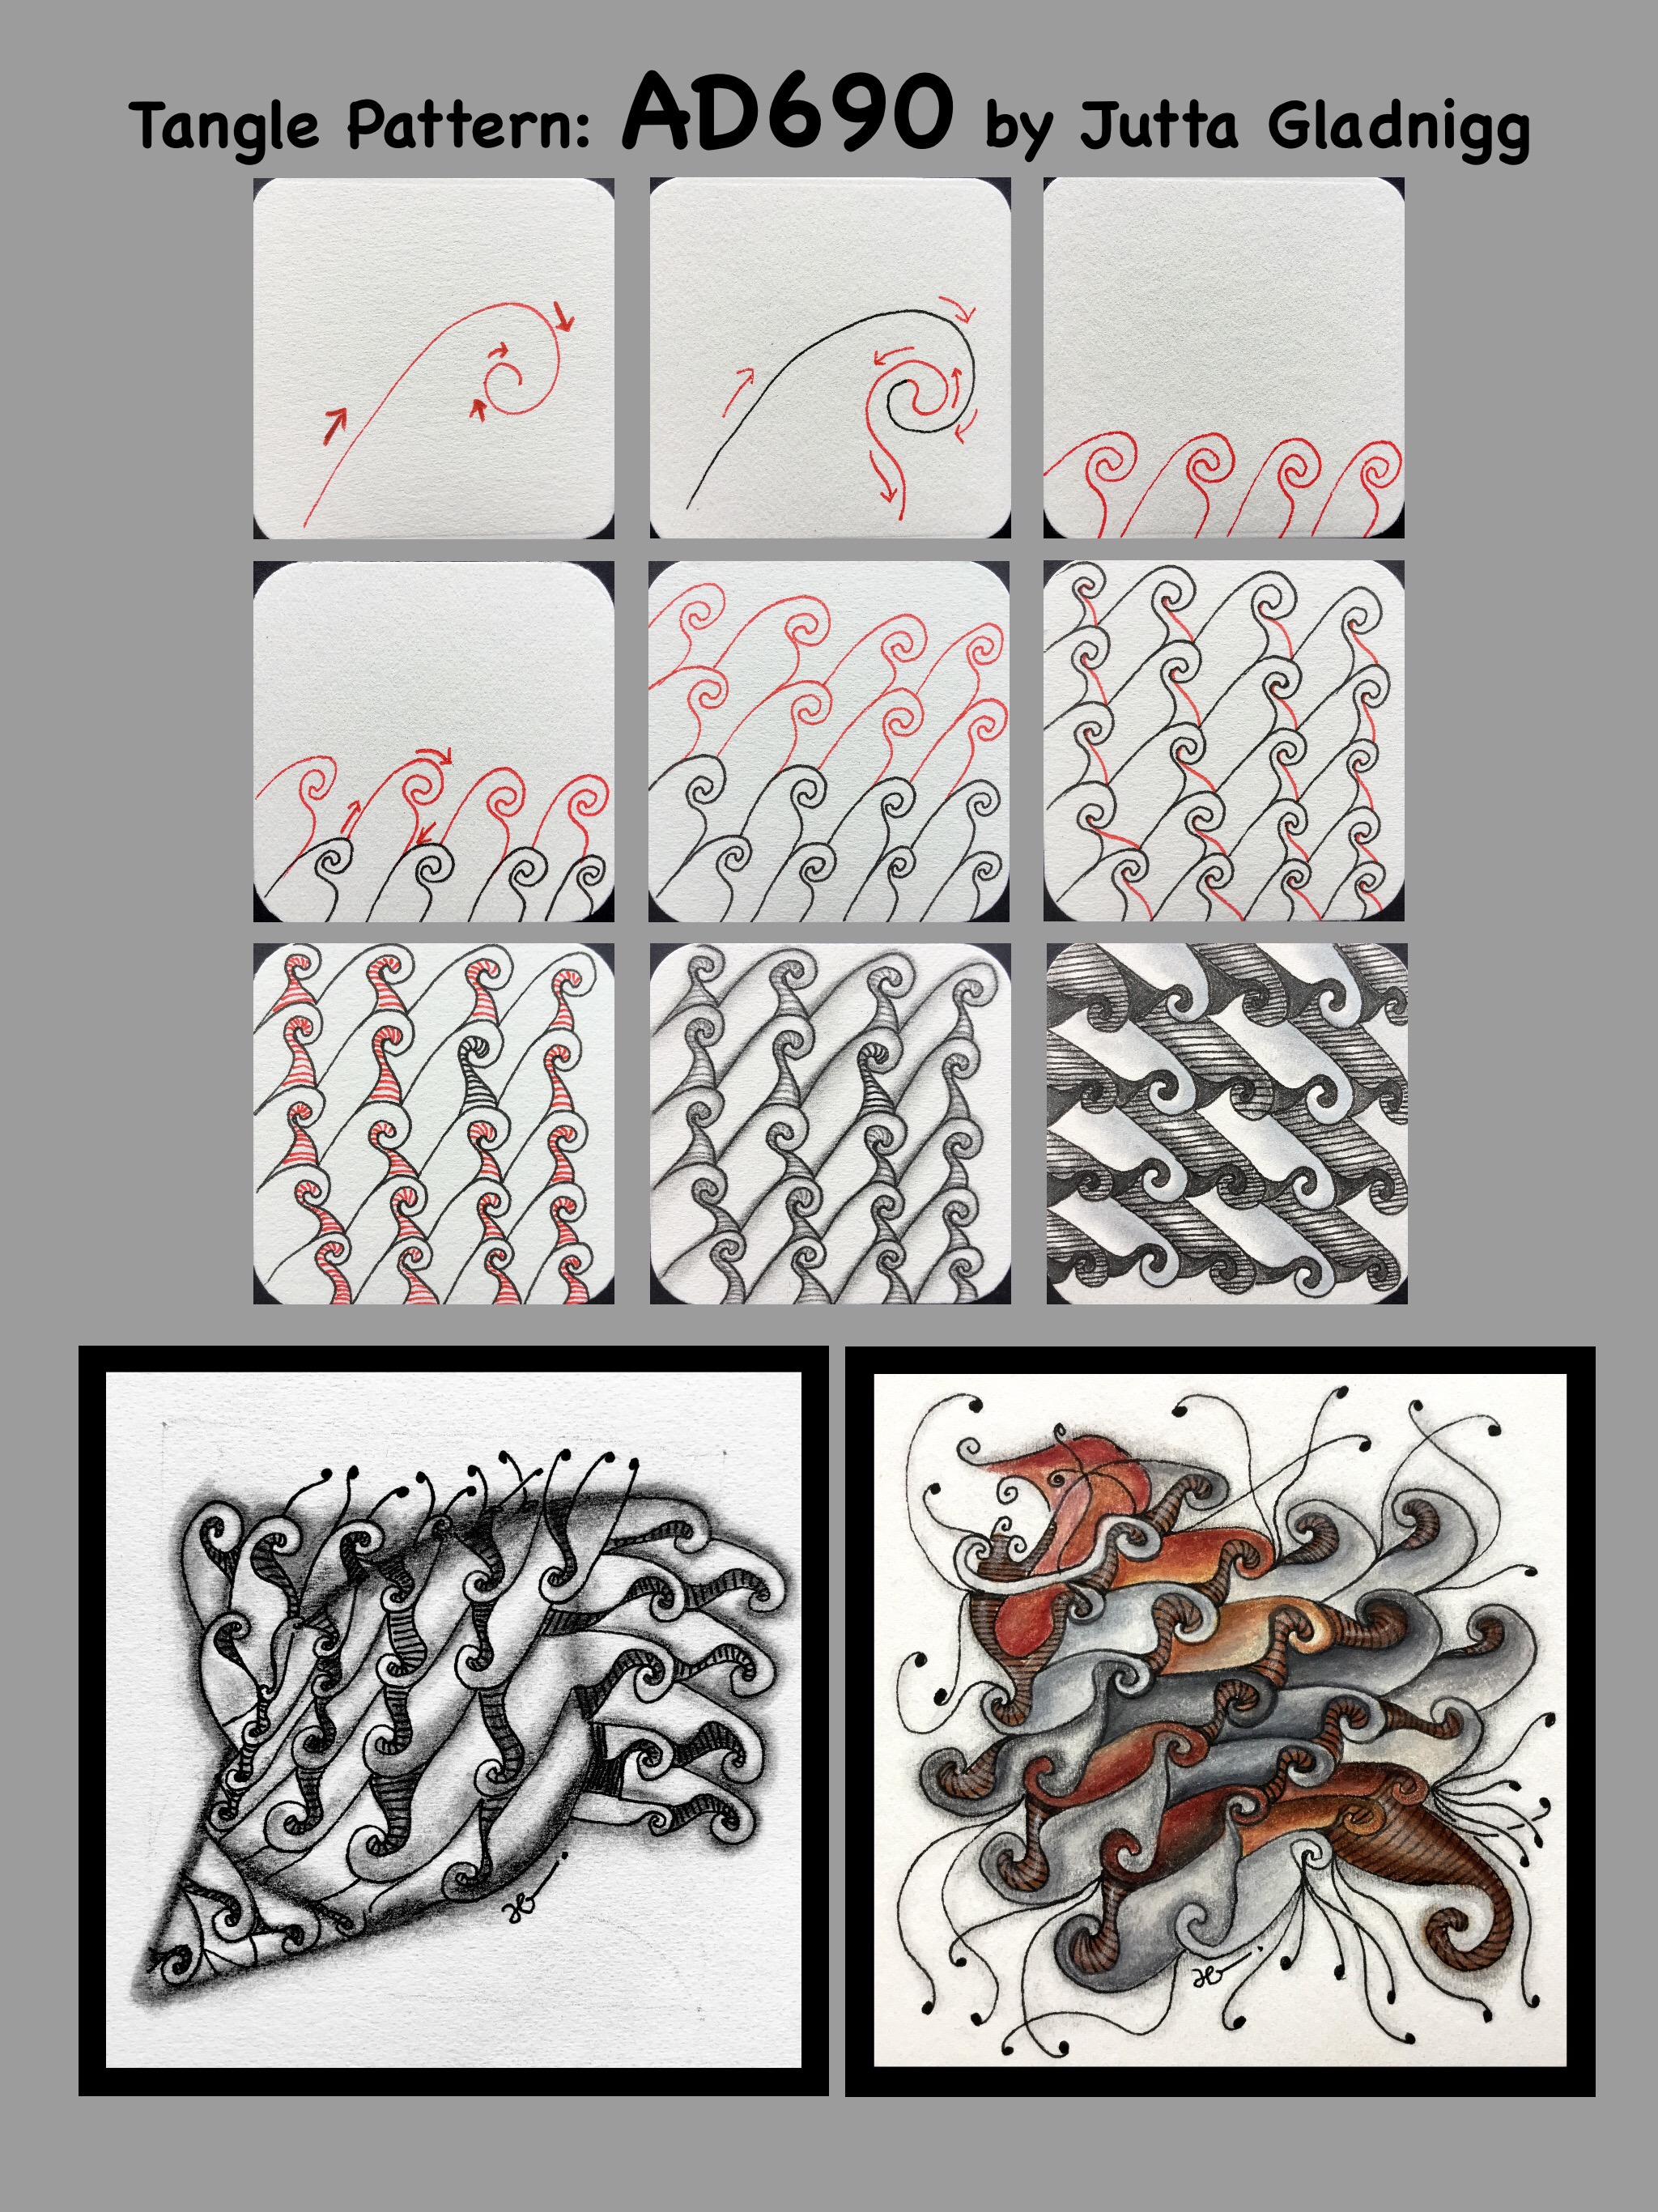
Tangler, Artist, and CZT Jutta Gladnigg has created a wonderful new pattern called AD 690. It is a great pattern that reminds me of a crochet hook, but has a story behind it of a period of gladiators and romance. According to Jutta, the pattern first appeared in the year AD 690. It is found in the Gospels of St. Willibrord of Luxembourg, and is associated with Evangelist St. Mark. Clearly, Jutta has done her research!
Jutta Gladnigg is active in the creation of new tangle patterns. AD690 is only the latest in a series of lovely designs. More of her work can be seen on the Zentangle Mosaic app, to which she is a frequent contributor. Jutta is one of the most supportive of and helpful CZT on Mosaic to newbie and experienced tanglers alike. I have learned much from Jutta.
It is with great honor that I present to you, with Jutta’s permission, the step-out for AD690.
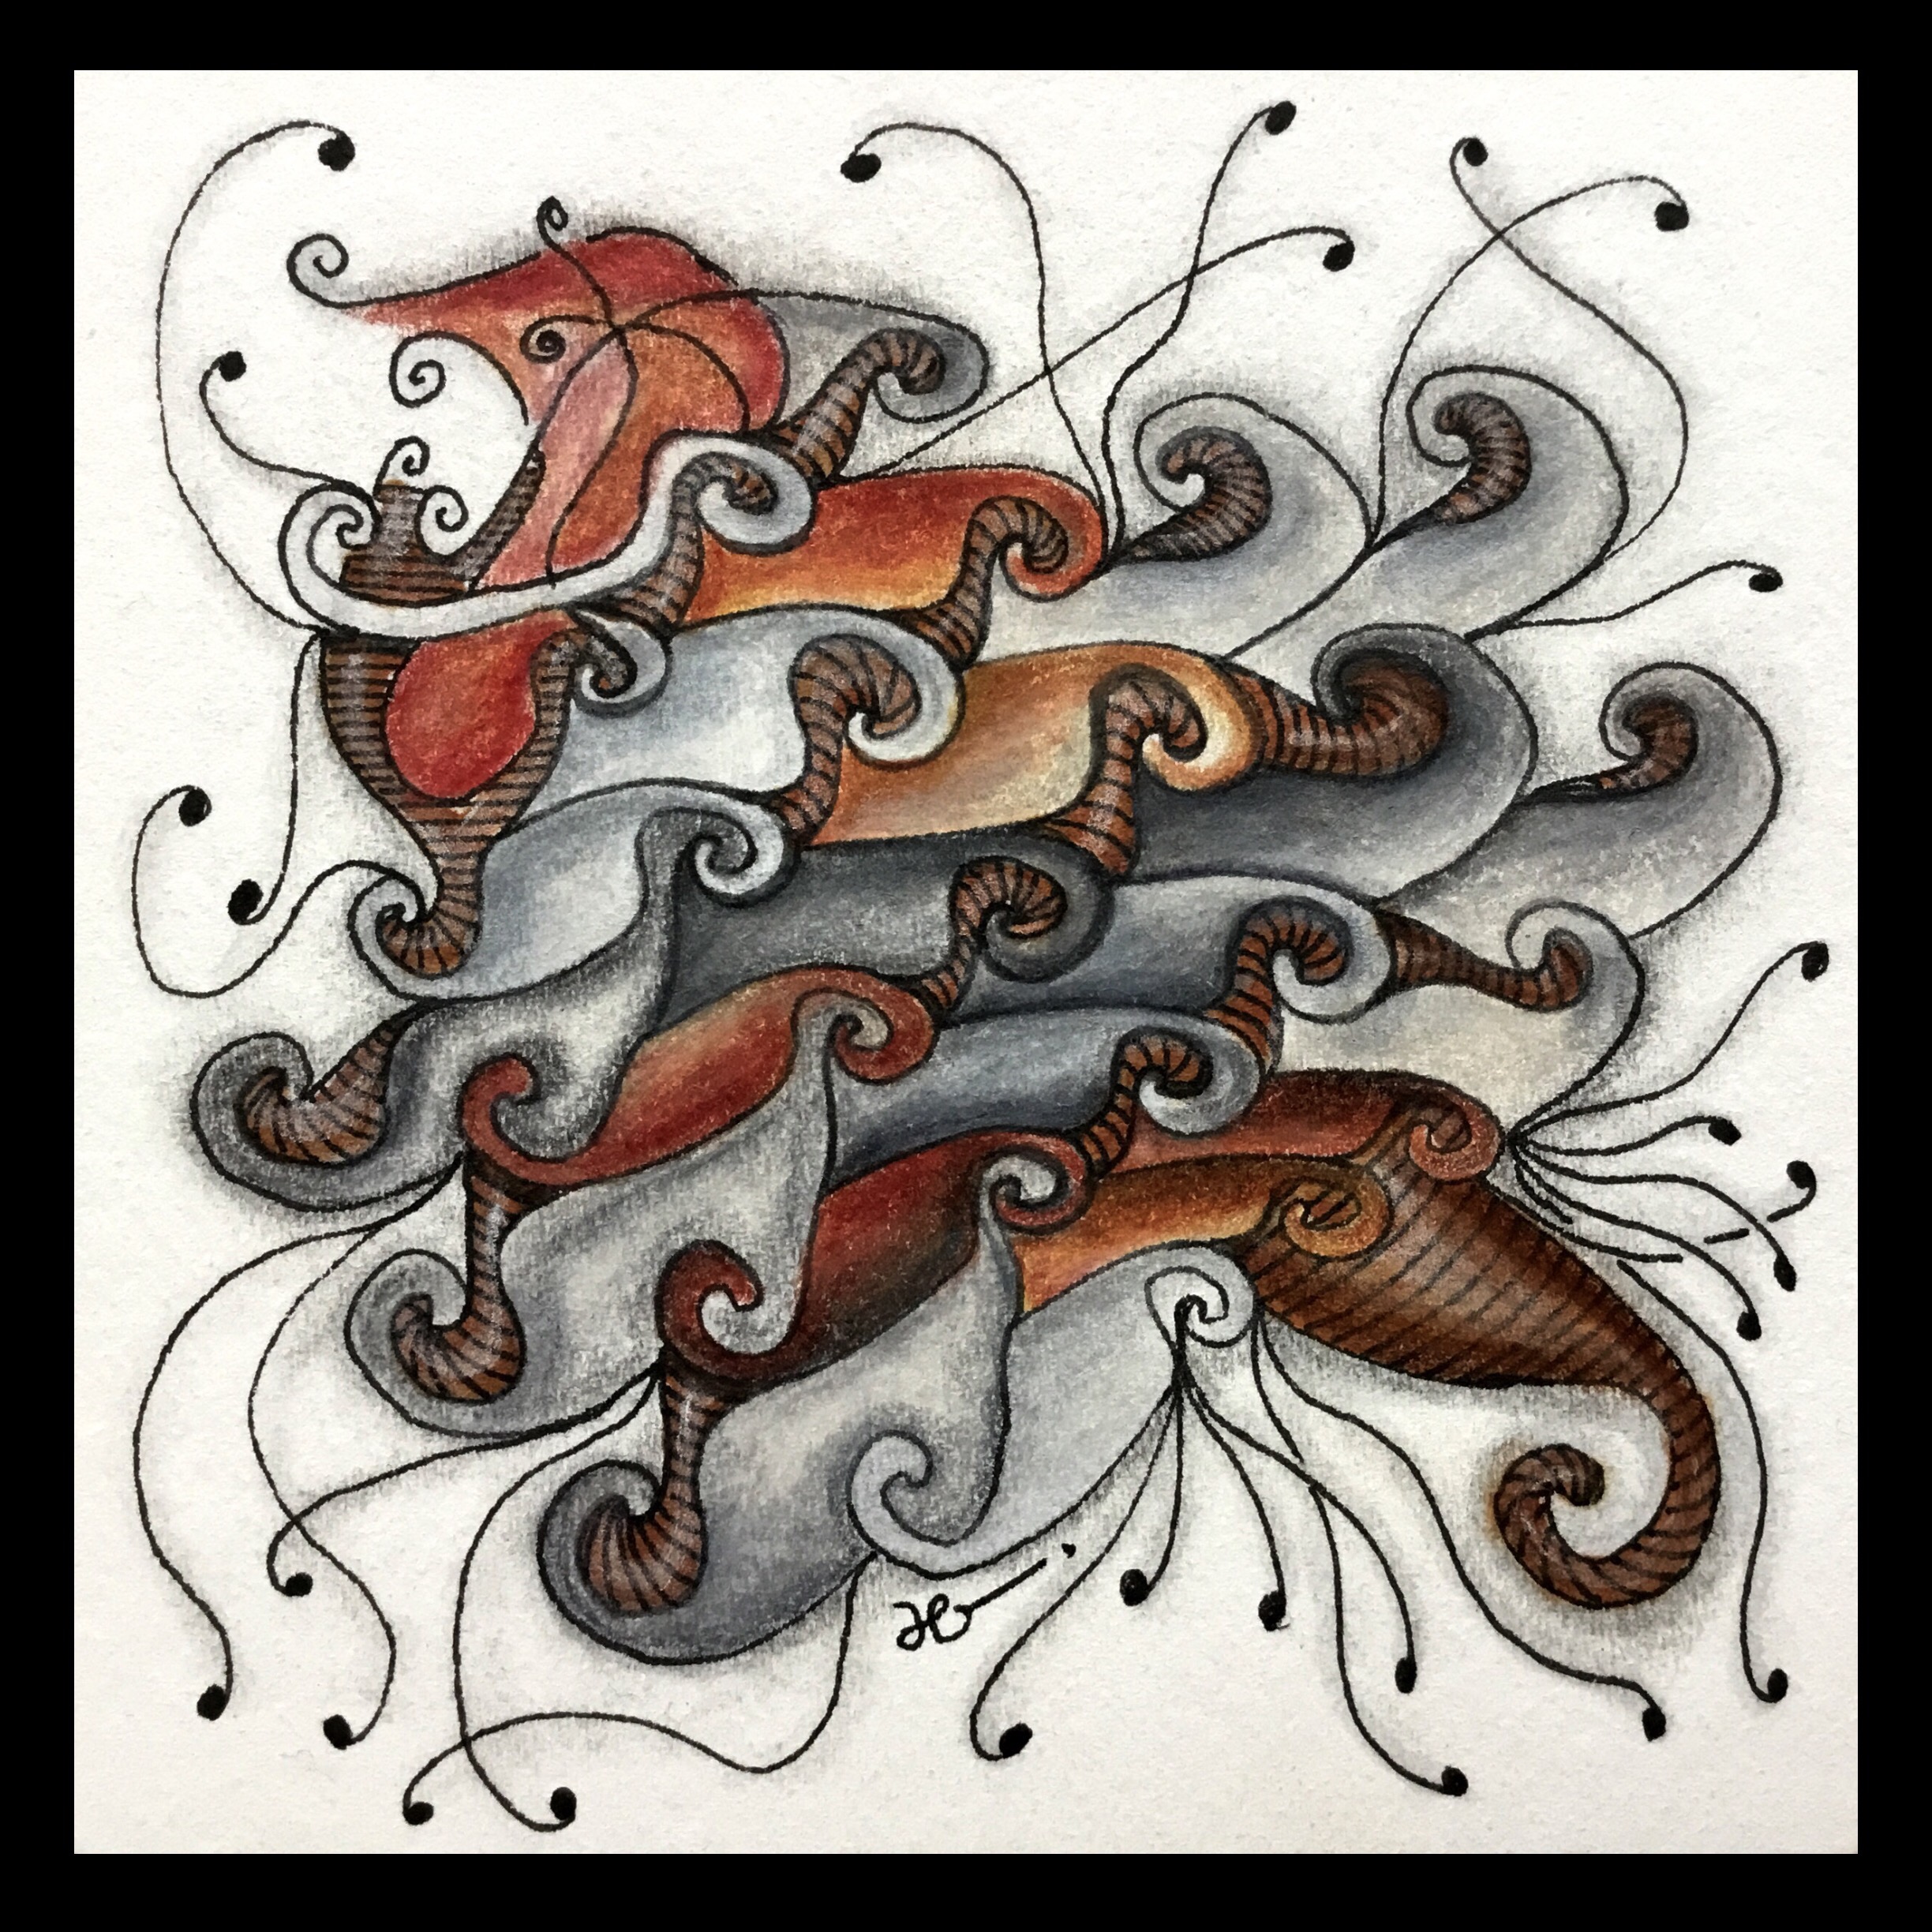
Larger versions of Jutta’s inset tiles follow.
And…
Here is yet another of Jutta’s pattern, drawn with the checkerboard tangle called Knights Bridge.
Although I have a long way to go before I can do AD690 nearly as well, here are some tiles in which I used this pattern for the first time (not counting the practice in my sketchbook, that is).
Recently, CZT Jody Genovese created a pattern called Patience, which was featured in this week’s newsletter from TanglePatterns.com. Jody is celebrating the arrival of Spring with this pattern based on the lovely impatiens she grows. She graciously allowed me to share her step-out for this wonderful floral pattern.
Thank you, Jody, for giving us this magnificent new tangle!
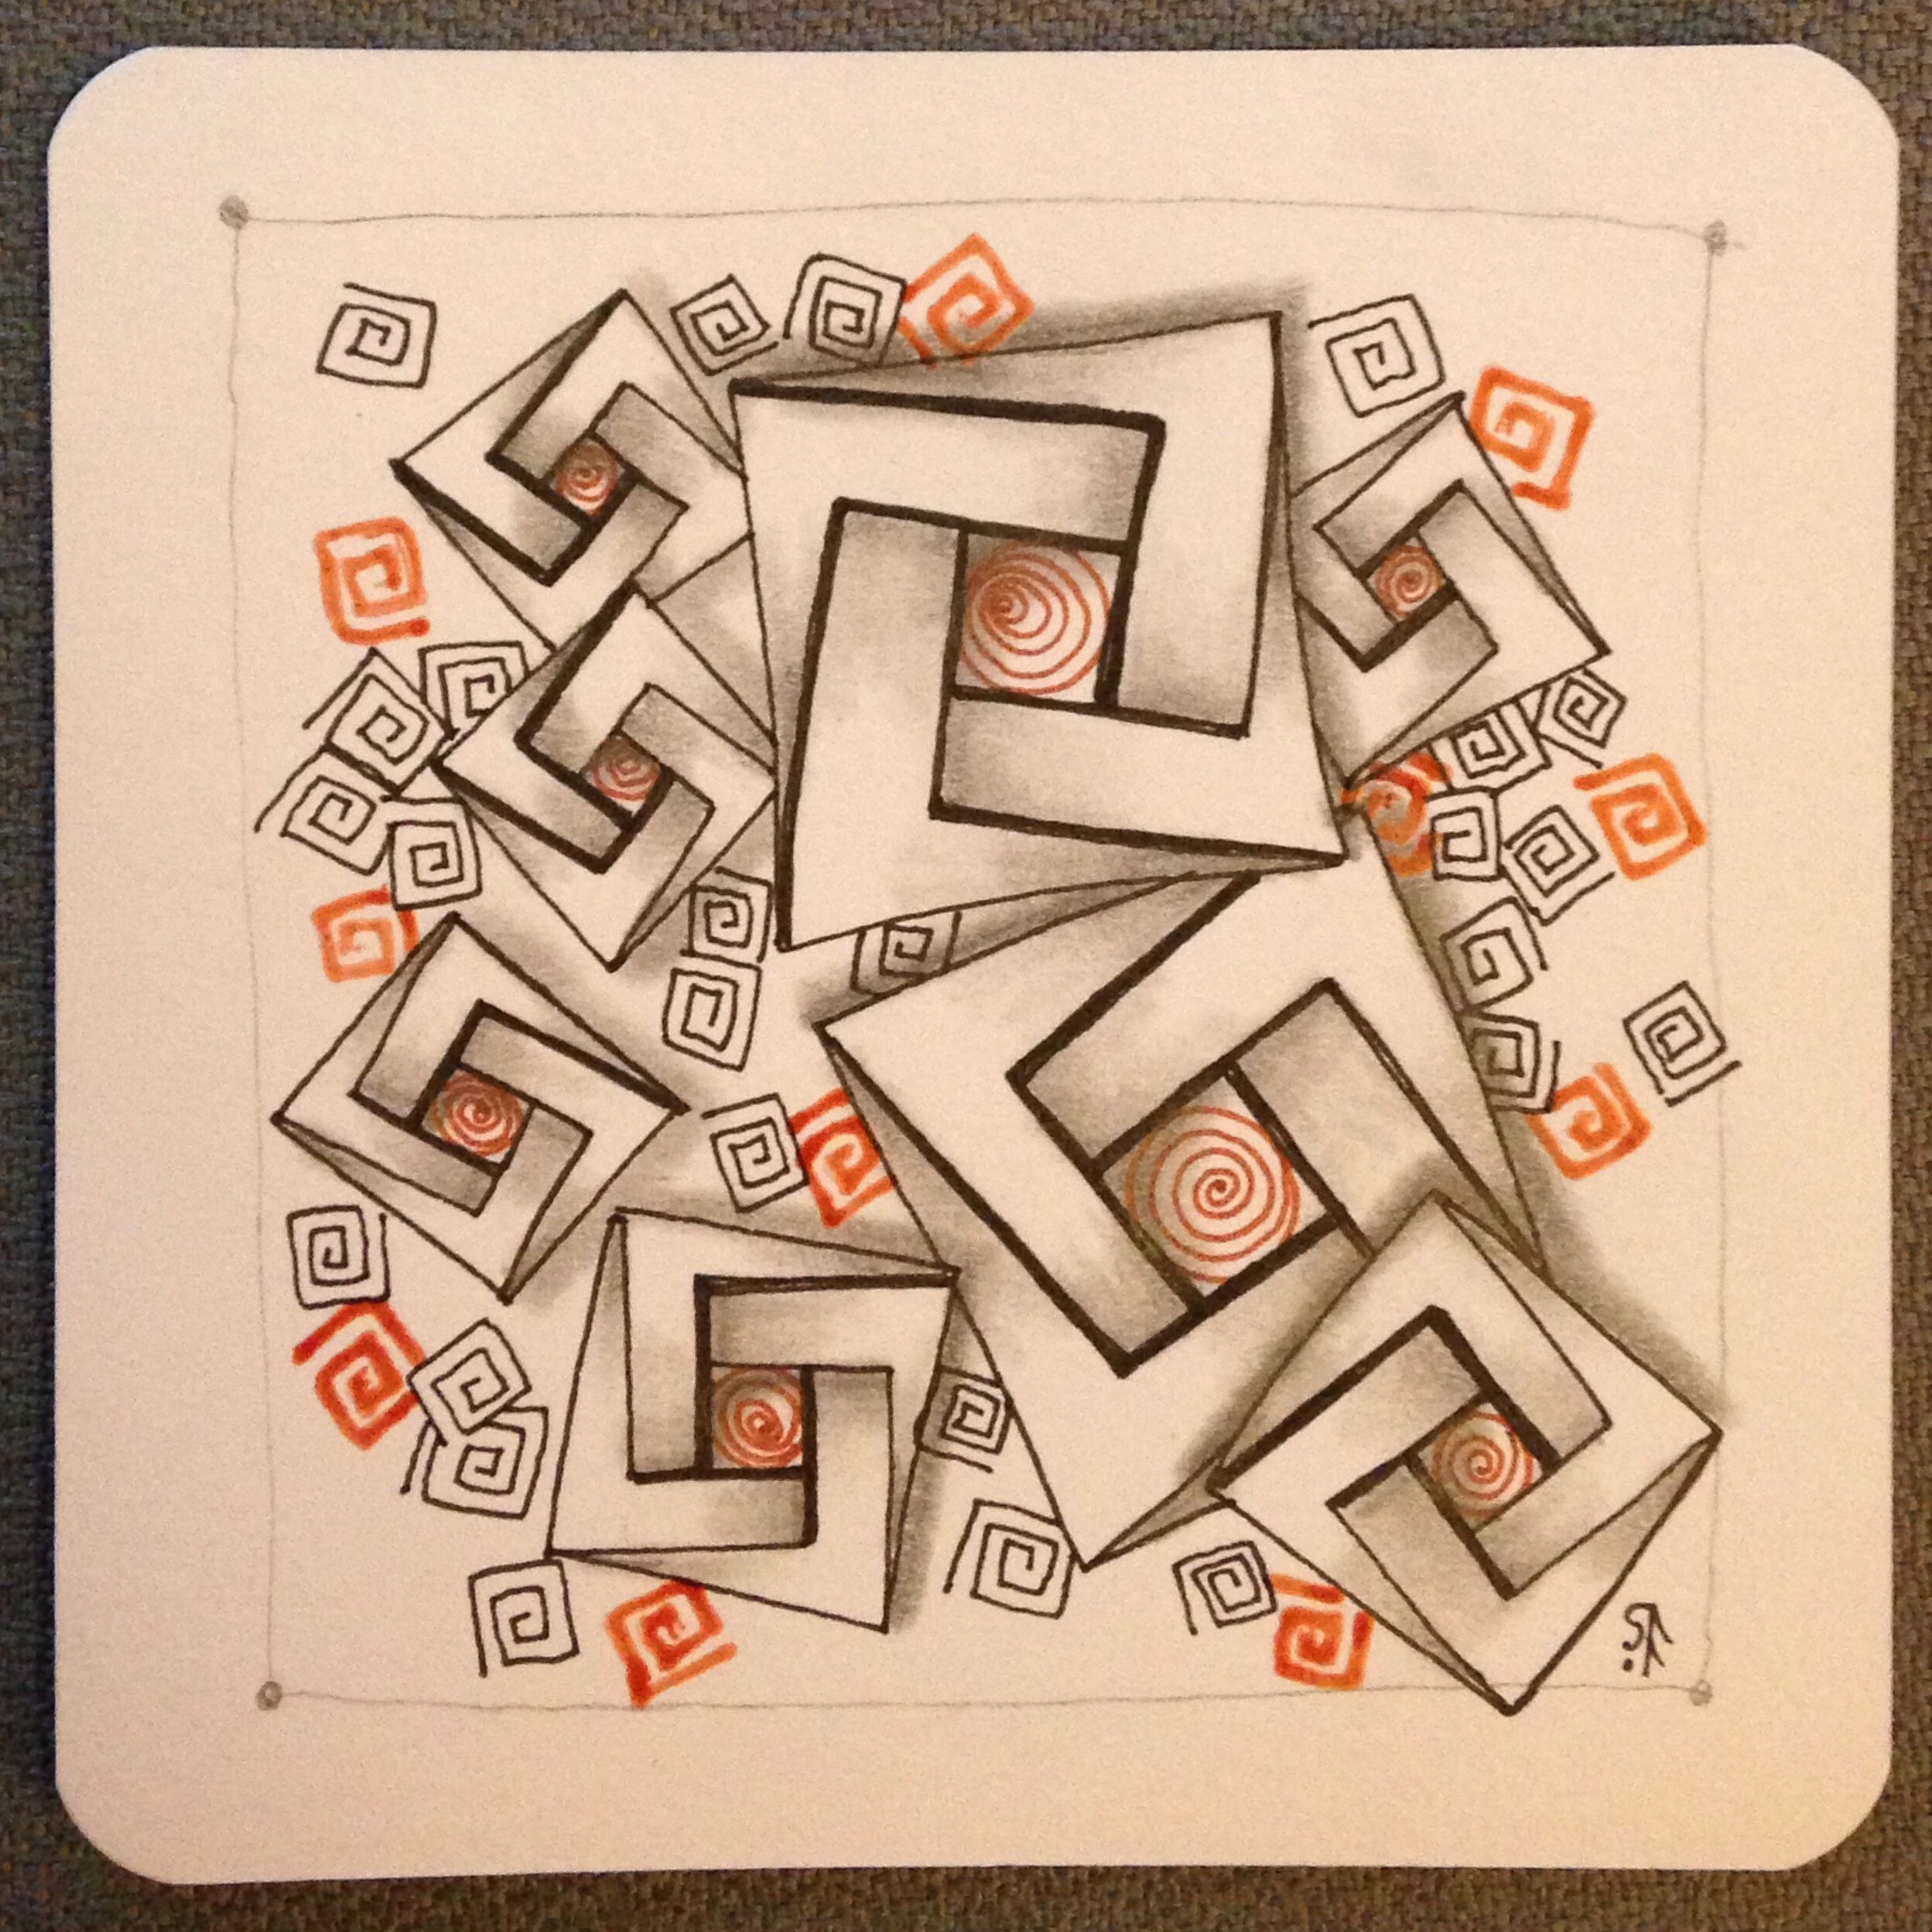
One simple pattern can create a small masterpiece with Zentangle. You don’t even need to plan out a drawing strategy. Just let your creativity flow.
One of the things that drew me to the art form of Zentangle is that it is art that is supposed to be unplanned. That is, there is no preconception of what the result will be. Instead of a rough draft of s subject, the starting place for a tangle is most often the string. The string itself is a random line or sets of lines that create spaces to be filled with patterns.
With most art forms, a sketch of the subject is often drawn on the surface. For oil and acrylic painting, it is often a charcoal sketch on canvas. A light sketch often gets drawn on watercolor paper before paint is applied. For drawing, a rough graphite silhouette of the subject is sketched onto paper in such a way that the graphite can be blended into the finished design. But in Zentangle, only the drawing spaces are delimited lightly in graphite, and these boundaries are blended into the shading of the contained tangles, if the lines have not disappeared entirely into the designs.
At first, new tanglers learn a few patterns at a time. The first pattern taught in the Zentangle Primer and in most workshops is Crescent Moon. It is a simple pattern consisting of an inked in half circle and half halos, or auras. Auras are added individually until no more can be added to one of the half rounds. Then a sort of “collective aura” continues the effect.
Without shading, Crescent Moon doesn’t seem to have much to recommend it. Even with shading, it may not look like much. So why is it the usual “first pattern” taught? For several reasons. First, it introduces drawing within a small space. It is a pattern that can be easily drawn all along a boundary. The ladybug shape is small enough for easy inking in. Because of the shape, if the ink fill goes beyond the outline, the shape can be made a little bigger to accommodate the slip of the pen, especially if the shape is filled in before an aura is added.
Second, adding one aura gives the individual pattern a bit more flair. Both the “ladybug” and the aura are quick and relatively easy to draw. Adding more auras until the area is filled makes quick work of filling the space.
Third, the concept of drawing an aura around shapes comes up over and over in embellishing various basic patterns. Tanglers refer to this as “auraing,” and use it frequently to add interest, to help a delicate pattern stand out, or to separate one pattern from another. Auras are generally kept as even as possible around an object–at least, at first. Also, drawing auras differtly–for example, several auras around one element before moving on to drawing auras around another–can yield a very different effect.
Fourth, Creacent Moon can be shaded in a variety of ways to give it different looks. Note the different effects produced by a combination of different ways of auraing and different shading. Suddenly, a simple Crescent Moon section becomes so much more!
What else can be accomplished with this single and foundational pattern? The auras can be omitted, for one thing, and the ladybug shape can be surrounded by something different, such as straight lines radiating from the basic shape. Instead of filling the shape with black, it can be filled with interior auras or different patterns. The sky’s the limit on possibilities!