Posted in Zentangle

Zentangle®️ Project Pack 4 (Spinner): Where to buy it and get instructions for tangling the project

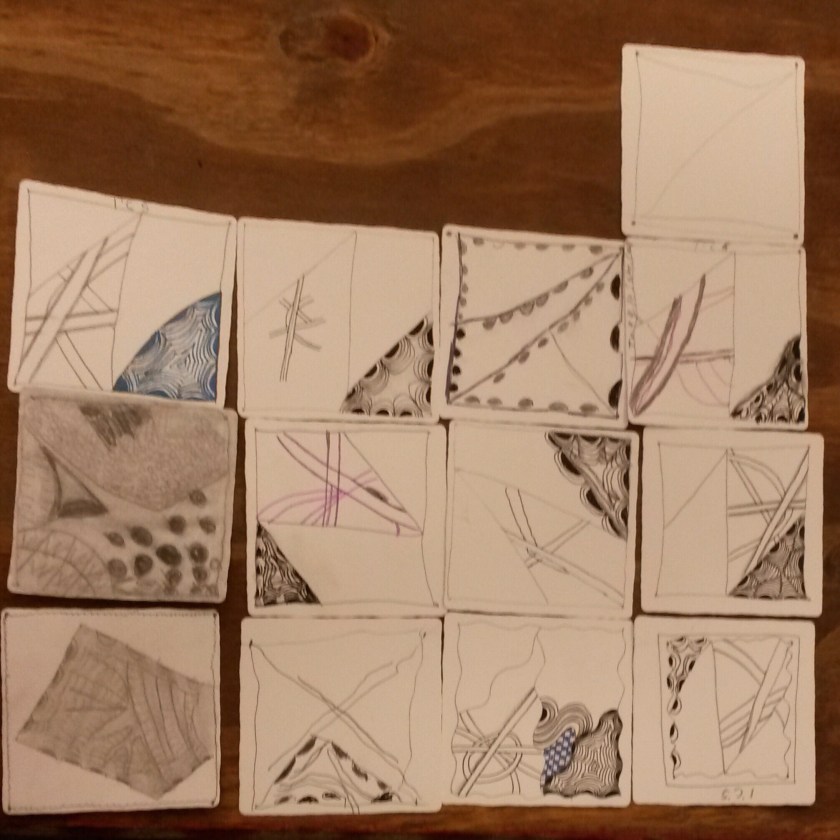
Yesterday, I completed 12 tanging days on a Zentangle®️ project. The project, which can be purchased on the official Zentangle web site (Project Pack page), uses the tag #PP04 on the Mosaic app, in the official Zentangle newsletter, and in various other venues. Each project pack contains all the materials needed to create the project, from appropriate or special tiles to pen, pencil, and other basic supplies.

Almost done, but still needs some finish work.

Project Pack 4 (or PP04) contains two 9-3/4″ spinner tiles, spinner device, two watercolor pencils, a good quality paint brush, a Micron 01 pen, a small Zentangle graphite pencil, and a tortillion (or blending stump). A video series on YouTube instructs you from tile preparation (ironing the creases from the tiles, coloring in the wedges of the spinner tile, directions for tangling the patterns, etc.) to finishing off your tile and inserting the spinner. You can find the Preparation Day video here.

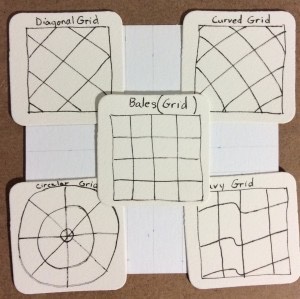
One of the best uses for the completed spinner tile is to help me select patterns to tangle on days when I just can’t get started. There are days when no tangle comes to mind.

Another use for the spinner is for on-the-spot tangling suggestions during an advanced class. It can be a fun way of selecting patterns to learn, if a tangle has not been used before; or just playing with sets or individual types of patterns. For example, the spinner can be used to select a border to use during tangling. It may be a pattern that would not come to mind on its own. After all, there are over 50 tangle patterns on the wheel.

Rather impatiently, I am waiting for the post-Project instructions. I don’t want to jam the spinner into the spinner tile the wrong way, making it non-functional. I also want to cruise the Mosaic app to look at other tanglers’ embellishments for inspiration on tangling the center and other undecorated areas. I already added Mooka and ‘Nzeppel to opposite corners.

Meanwhile, I am about to start on the second spinner tile, using brighter colors and tangles of my own choice.

Happy Tangling!

DrEllieCZT

Tangling from the beautiful Caribbean island of St. Martin

Posted in Zentangle

Promise to my class at MHF, part 2 of 2

Hello, Class!

Let’s finish that first tile. If you lost it, don’t worry. You can tangle on any paper, with any very fine marker type black pen, the darkest regular pencil you have or a 3B graphite drawing pencil, and a tortillion ( blending stump). At class, you used a black Pigma Micron PN pen with a .45mm tip and a General’s 3B graphite pencil. The tile is 100% cotton fiber watercolor paper. Instead of a blending stump, you can use a Q-Tip or other swab, or you can search YouTube for a video on how to make your own blending stump.

Here is where we left off, with Crescent Moon and Hollibaugh. For a quick refresher, click here.

Today, we will add the tangle patterns Bales and Tipple in the two remaining spaces.

(First, take a few deep cleansing breaths and relax all your muscles, especially the ones in your hands and arms.)

Bales is a grid pattern. That means it is worked in a grid.

Some examples of grids used in The Zentangle Method®️

Grids can have all sorts of shapes, but we will start with the simplest one that is just lines going across and up and down.

The corner is where I added my simple grid. It’s not a full grid, but I wanted to show how we can use the under or behind technique of the Hollibaugh pattern with other patterns, too.

The Bales tangle, or pattern, can be drawn using the following step-out directions. There are several ways to draw the basic Bales pattern, but this is the one I use most often. It keeps my hand and pen moving in the same repetitive stroke, and so has a calming effect on me as I draw.

Now I am ready to fill my grid with Bales.

Before I shade this section, I will tangle the second pattern, Tipple, in the last unused space.

Here is the step-out for how I tangle Tipple. There are many ways to draw this pattern. The orbs can be all the same size, or all different sizes. Tipple orbs can be drawn in rows, in spirals, in rings, or randomly. The most important thing is to be mindful of how you draw the orbs so they are closed where you started them, and as close to round as you can make them. My choice today for drawing Tipple starts in the center of the space.

Notice that in the fourth step I went back and added small orbs in the spaces formed between circles or along the border. It is perfectly OK to draw half orbs along borders, too.

Here is how Tipple looks when added on my tile.

Finally, let’s shade Tipple and Bales. Starting with Tipple, pick up your graphite pencil and, using some of the side of the tip, lay a heavy border of graphite around the inside boundary of your drawing space. Then, using your tortillion and small, light circular motions, “pull” the graphite from the border into the space. Like this.

For Bales, use your pencil to make a large graphite dot where the “petals” touch. Using your tortillion with the same light, circular motion, draw out the graphite about 1/4 of the way along the petals. Like this.

When you are finished, your tile will look something like this–although you may have chosen to put your tangles in different spaces.

And you are done! Congratulations on completing your first Zentangle tile! Take some time to admire your work. Don’t critique it; there are no mistakes in Zentangle.

Feel free to share your results in the comments section of this post. I would love to see how you did, as would my readers. If you have any questions, the comments is a good place to put them. I usually respond the same day, as WordPress lets me know when a comment is waiting for me.

Until next time, whether in a class or here on my blog, Happy Tangling!

DrEllieCZT

Tangling from the wonderful island of St. Martin, in the country of Sint Maarten

Posted in Zentangle

Promise to my class at MHF, Part 1 of 2

Last week, my class at MFH was much shorter than expected. It seems two activities were scheduled for the same time. So we got through only half of a first tile. Thankfully, we did the two foundation patterns: Crescent Moon and Hollibaugh. I promised to include the remainder of the tile here on my blog. But first, here is some beautiful creative work that came from roughly half an hour of a first class.

Now, I would like to review what we already did.

Using the pencil, we drew: Corner dots, a border (connecting the dots), and a string (Z) to divide the tile into smaller areas in which to tangle.

Next, we chose one of the four sections formed by the zed and border–or any created space–and drew half-moon “ladybug” shapes. The ladybugs were filled in and a halo (that we tanglers call an aura) was added along the curved edge. Then we aura-ed again. And again… When we ran out of aura space, we shaded with the pencil and the tortillion (a paper stump that we use to smooth the graphite from the pencil and spread the graphite out for a shadow effect).

After Crescent Moon, we used a different area created by the zed and added a pattern called Hollibaugh. Hollibaugh is an important pattern because it shows us how to draw “under” or “behind.” Hollibaugh can look like construction boards that are in a scattered pile, or a combination of straight and curved figures that are piled loosely one atop another. I chose a long area in which to tangle Hollibaugh. Then we shaded to make the first few “boards” stand out more and help with the illusion of under or behind.

And that’s when class came to an end.

Before everyone left, I promised to continue the “first tile” lesson on my blog space. And we will continue in Part 2 of Promise to my class… Part 2 will be published later tonight.

Hope you enjoyed this review of what we did complete.

See you back here soon!