Posted in Zentangle

Back to Basics 3

For the past couple of weeks, I have been sticking to my Back to Basics approach to tangling, partly to escape the feeling of being overwhelmed by so many new patterns emerging, partly to remind myself of the patterns I learned almost a year ago when I first started tangling. Using the Zentangle Primer, Volume 1, by Zentangle founders Maria Thomas and Rick Roberts, I started again from the beginning of the book, re-doing all the exercises with fresh eyes as well as accumulated experience. 

The very simplicity of the way I tangled through the first six lessons helped me touch base with the reasons I started tangling to begin with–to relax and re-center my mind, to let go for a few moments of the demands of the world around me, to remind myself that I can still learn new things and create. And so I kept things simple–nothing fancy or extravagant; just the original tangles presented in the Primer, without embellishment except as the exercises required. 

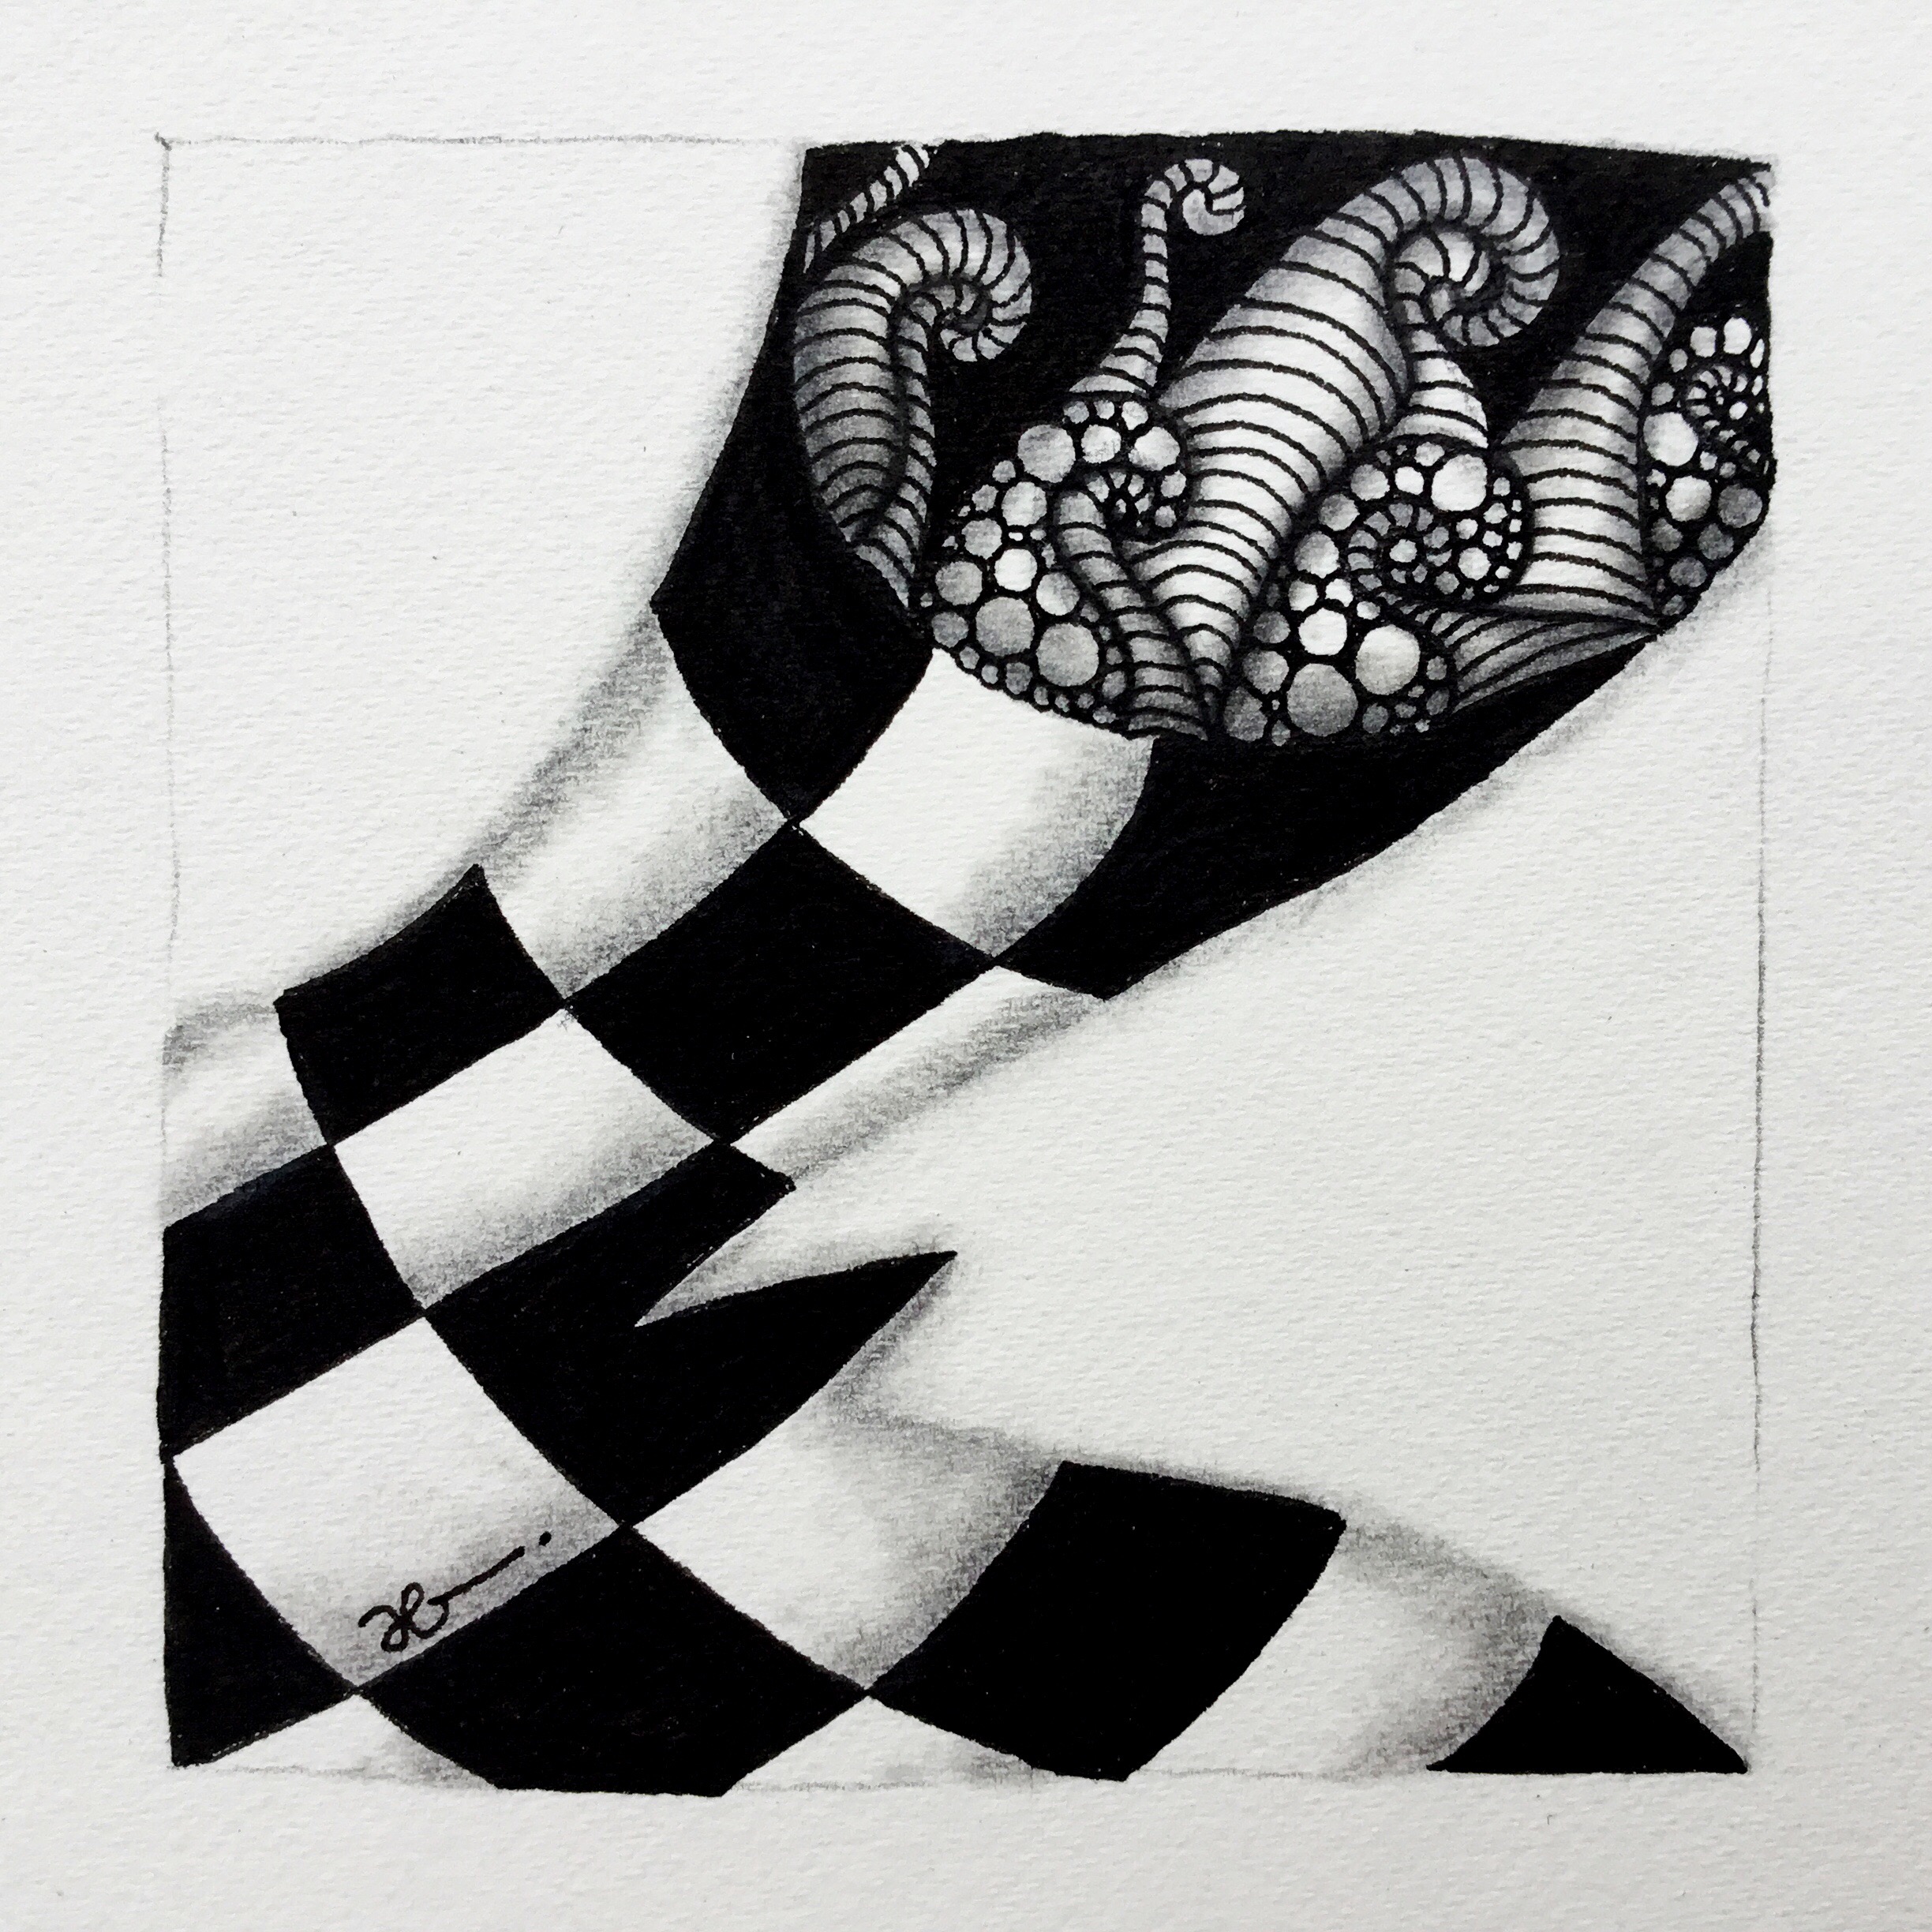
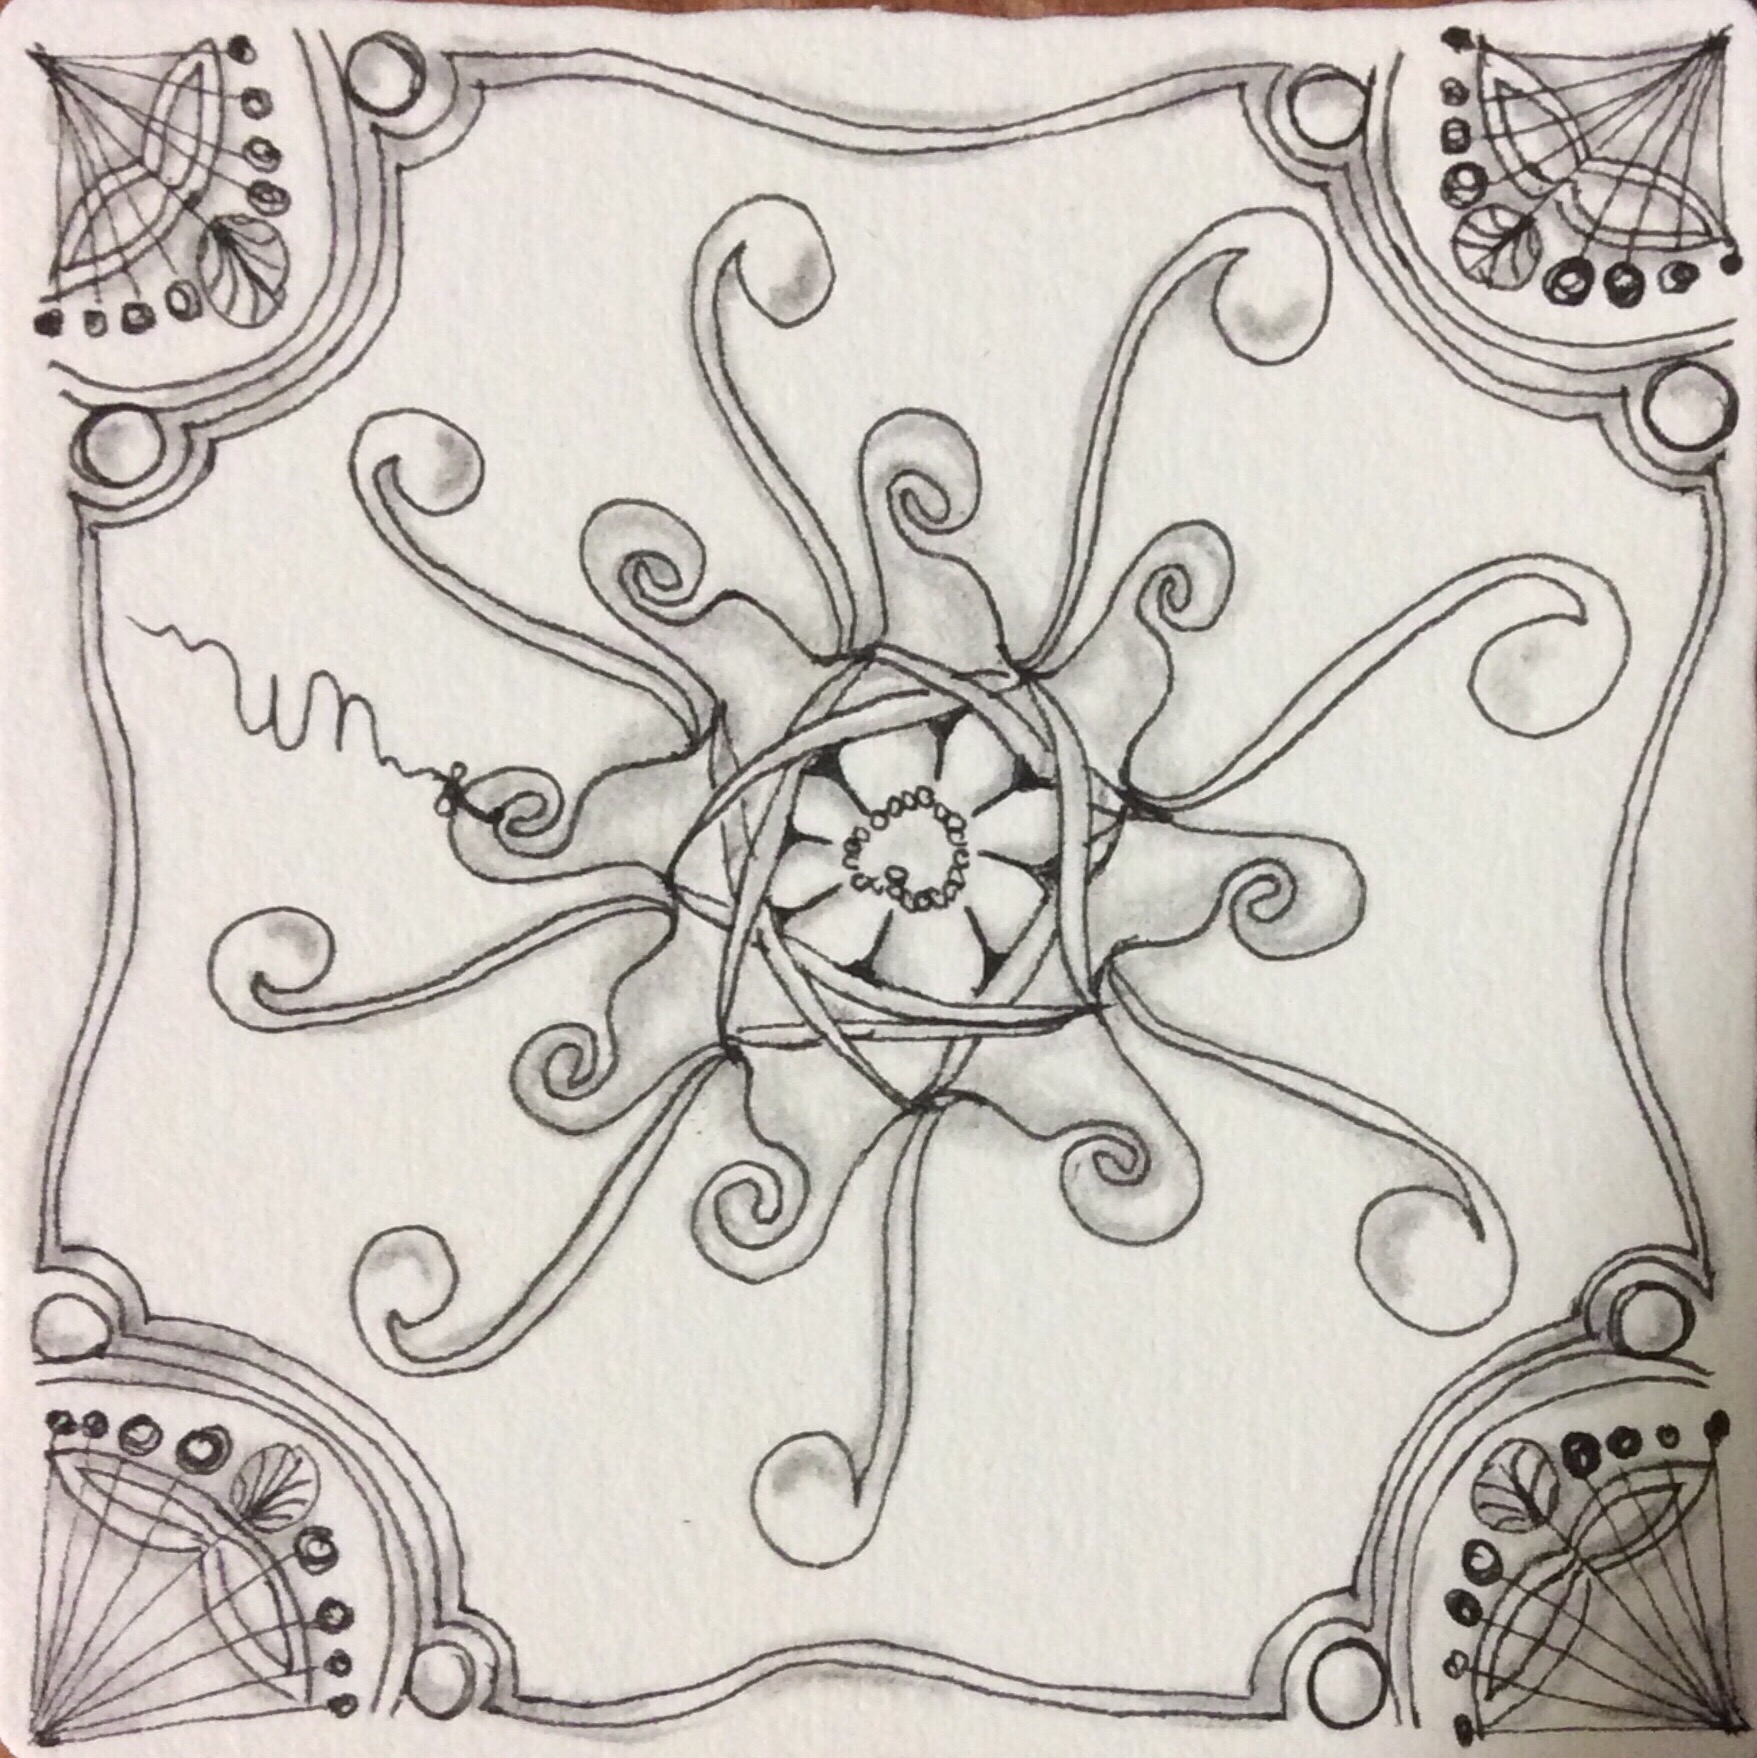
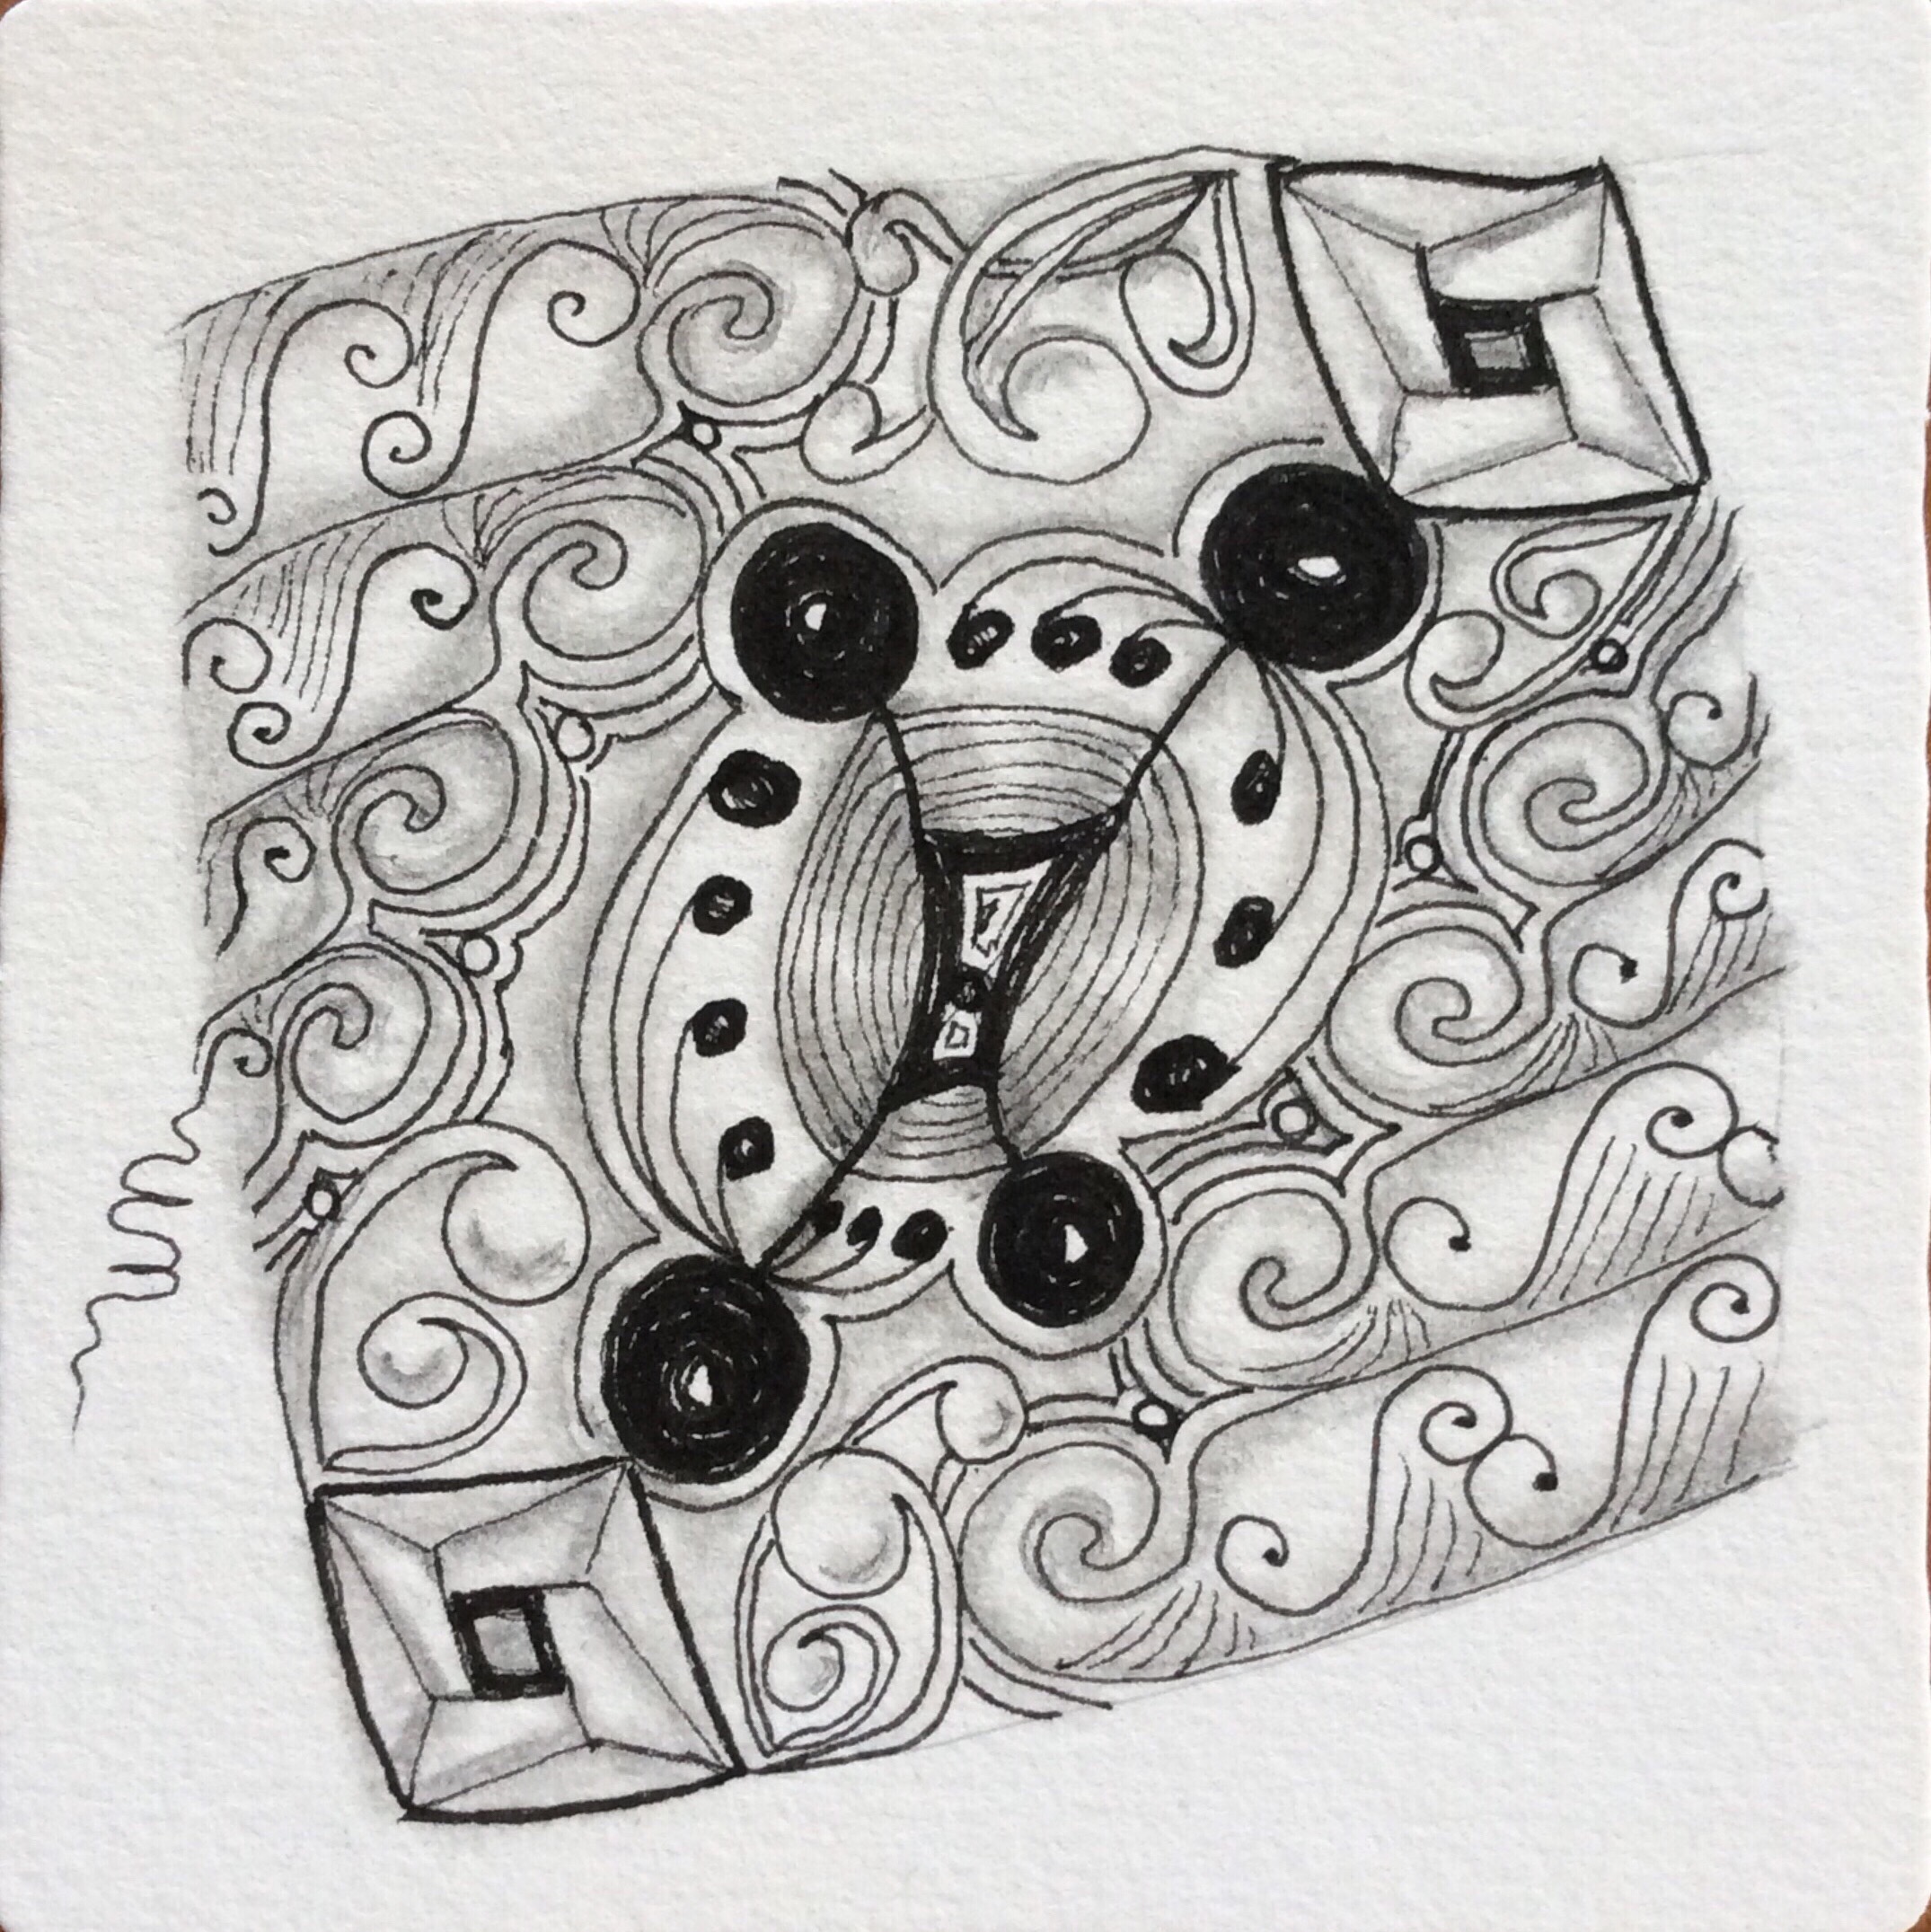
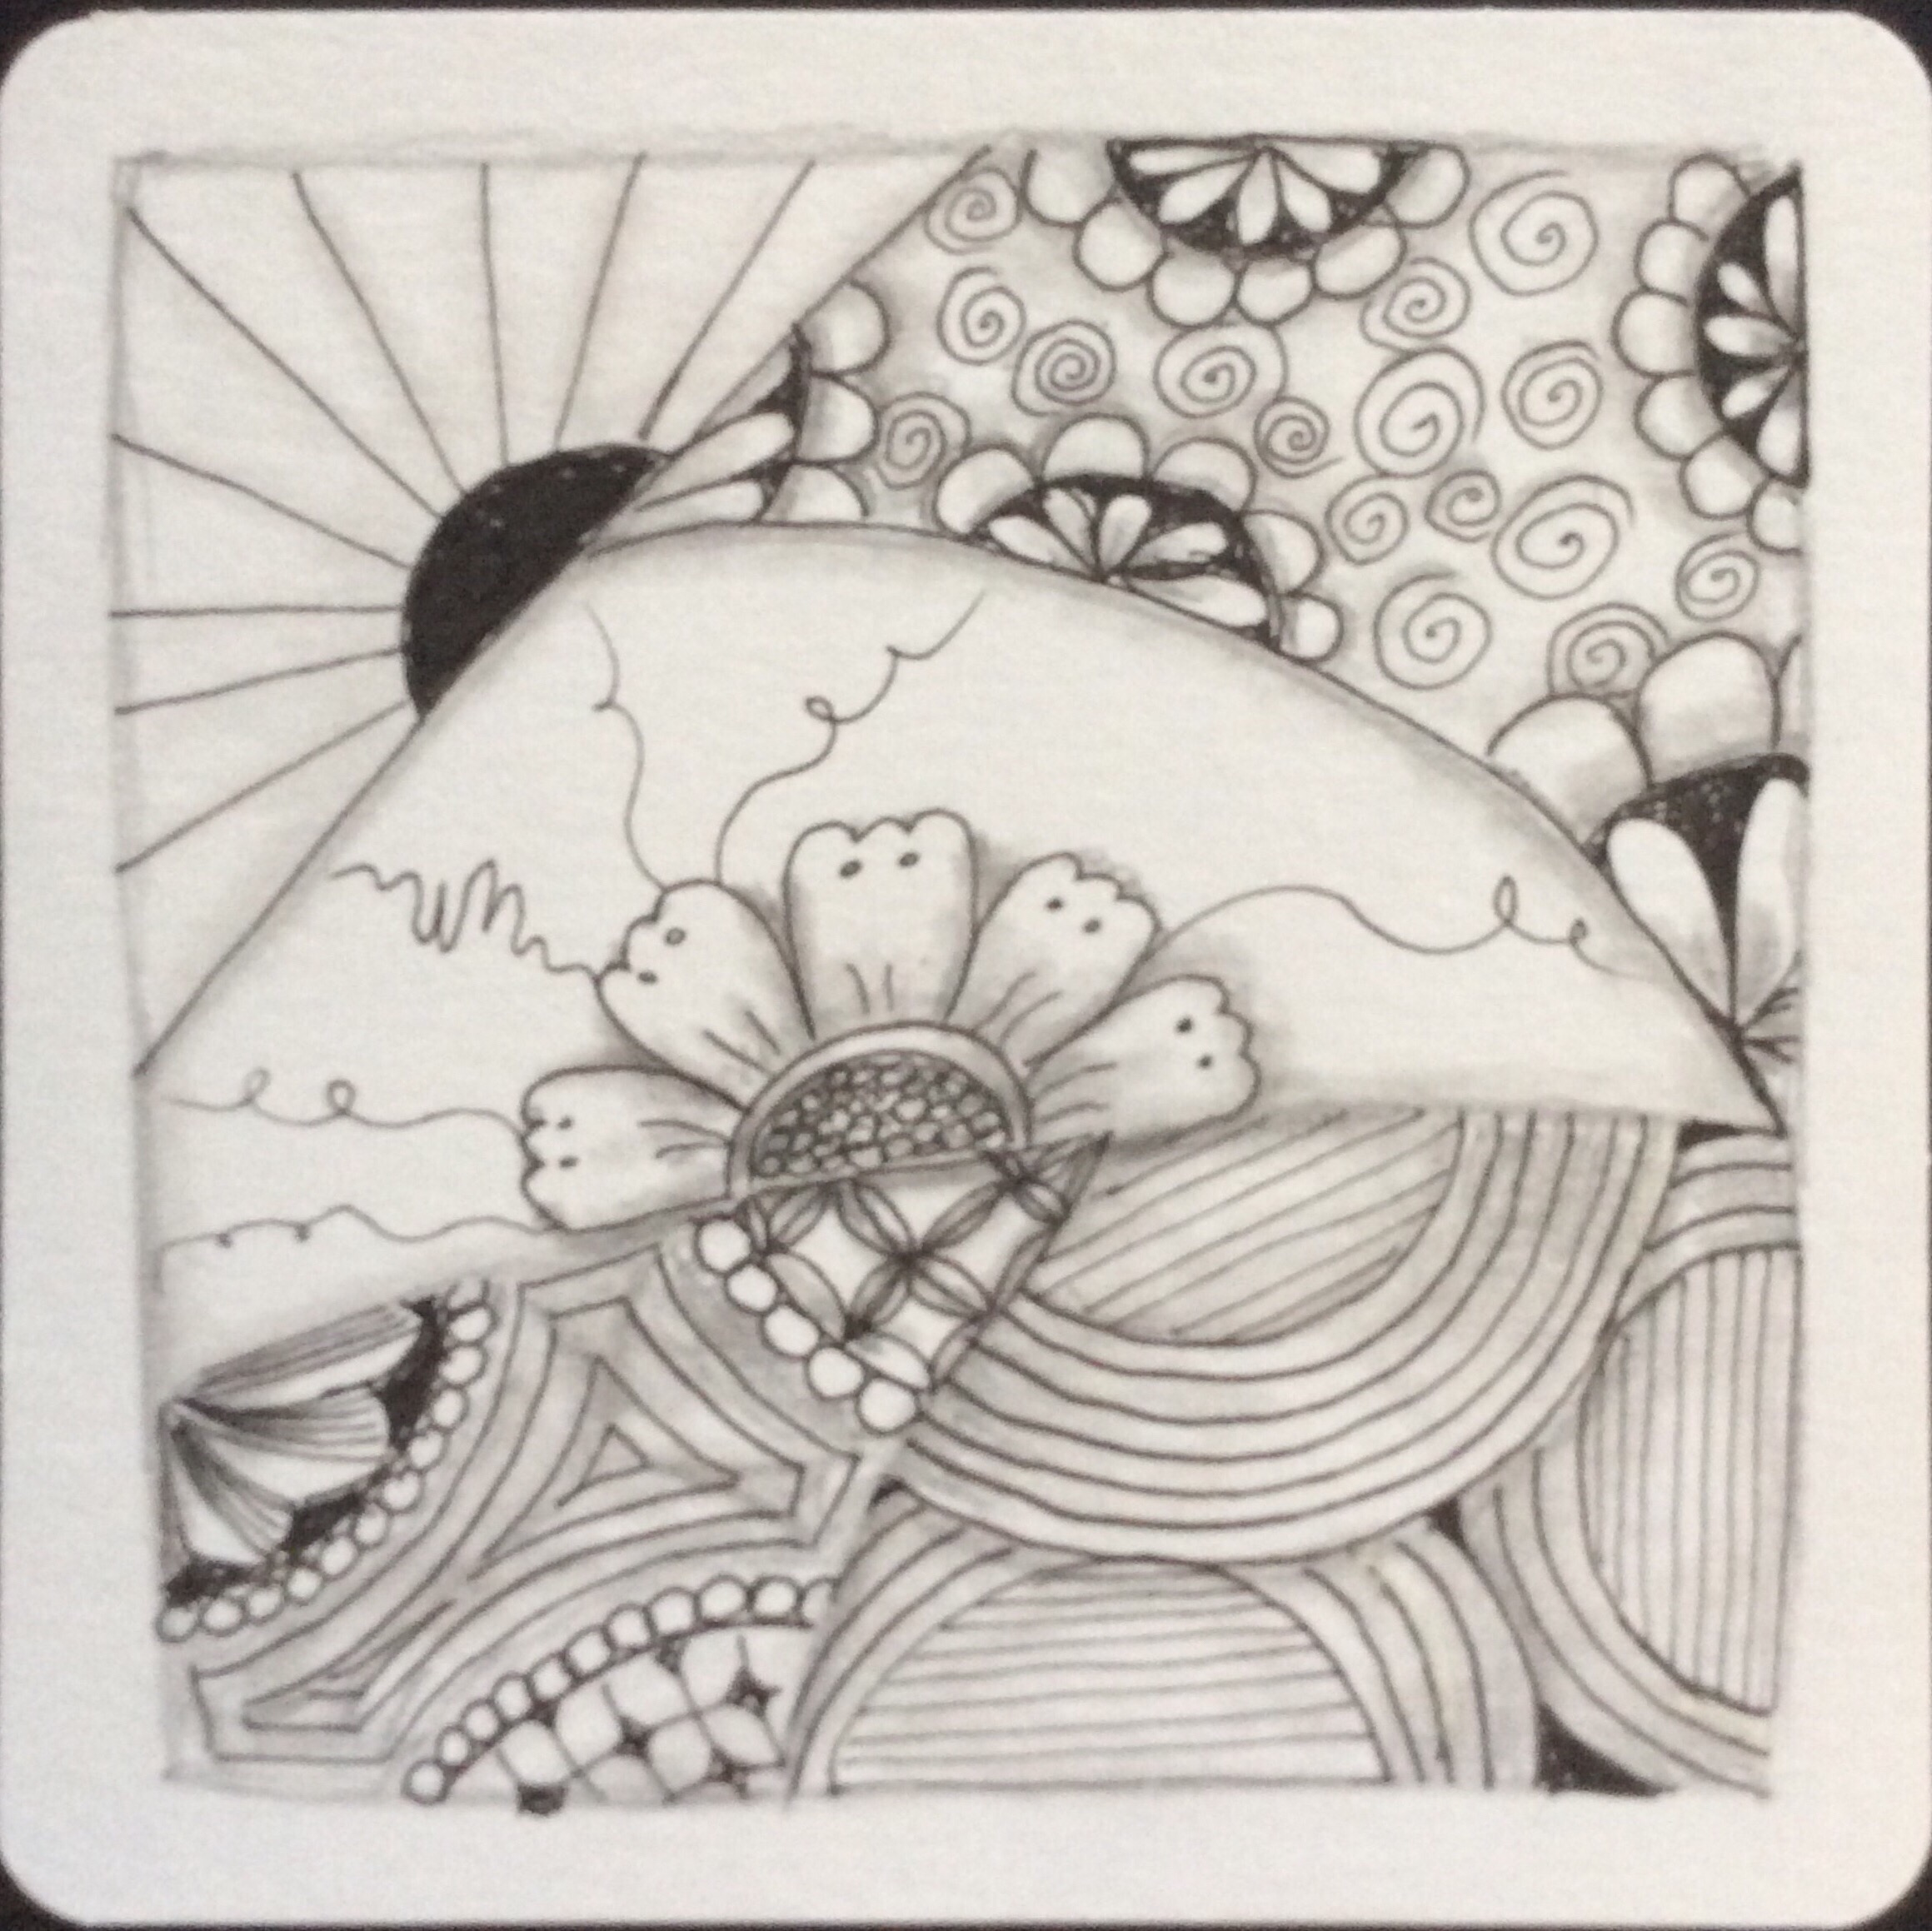
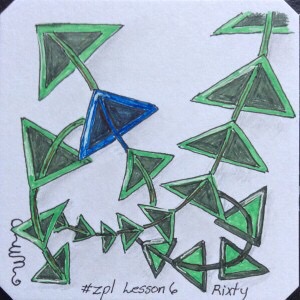
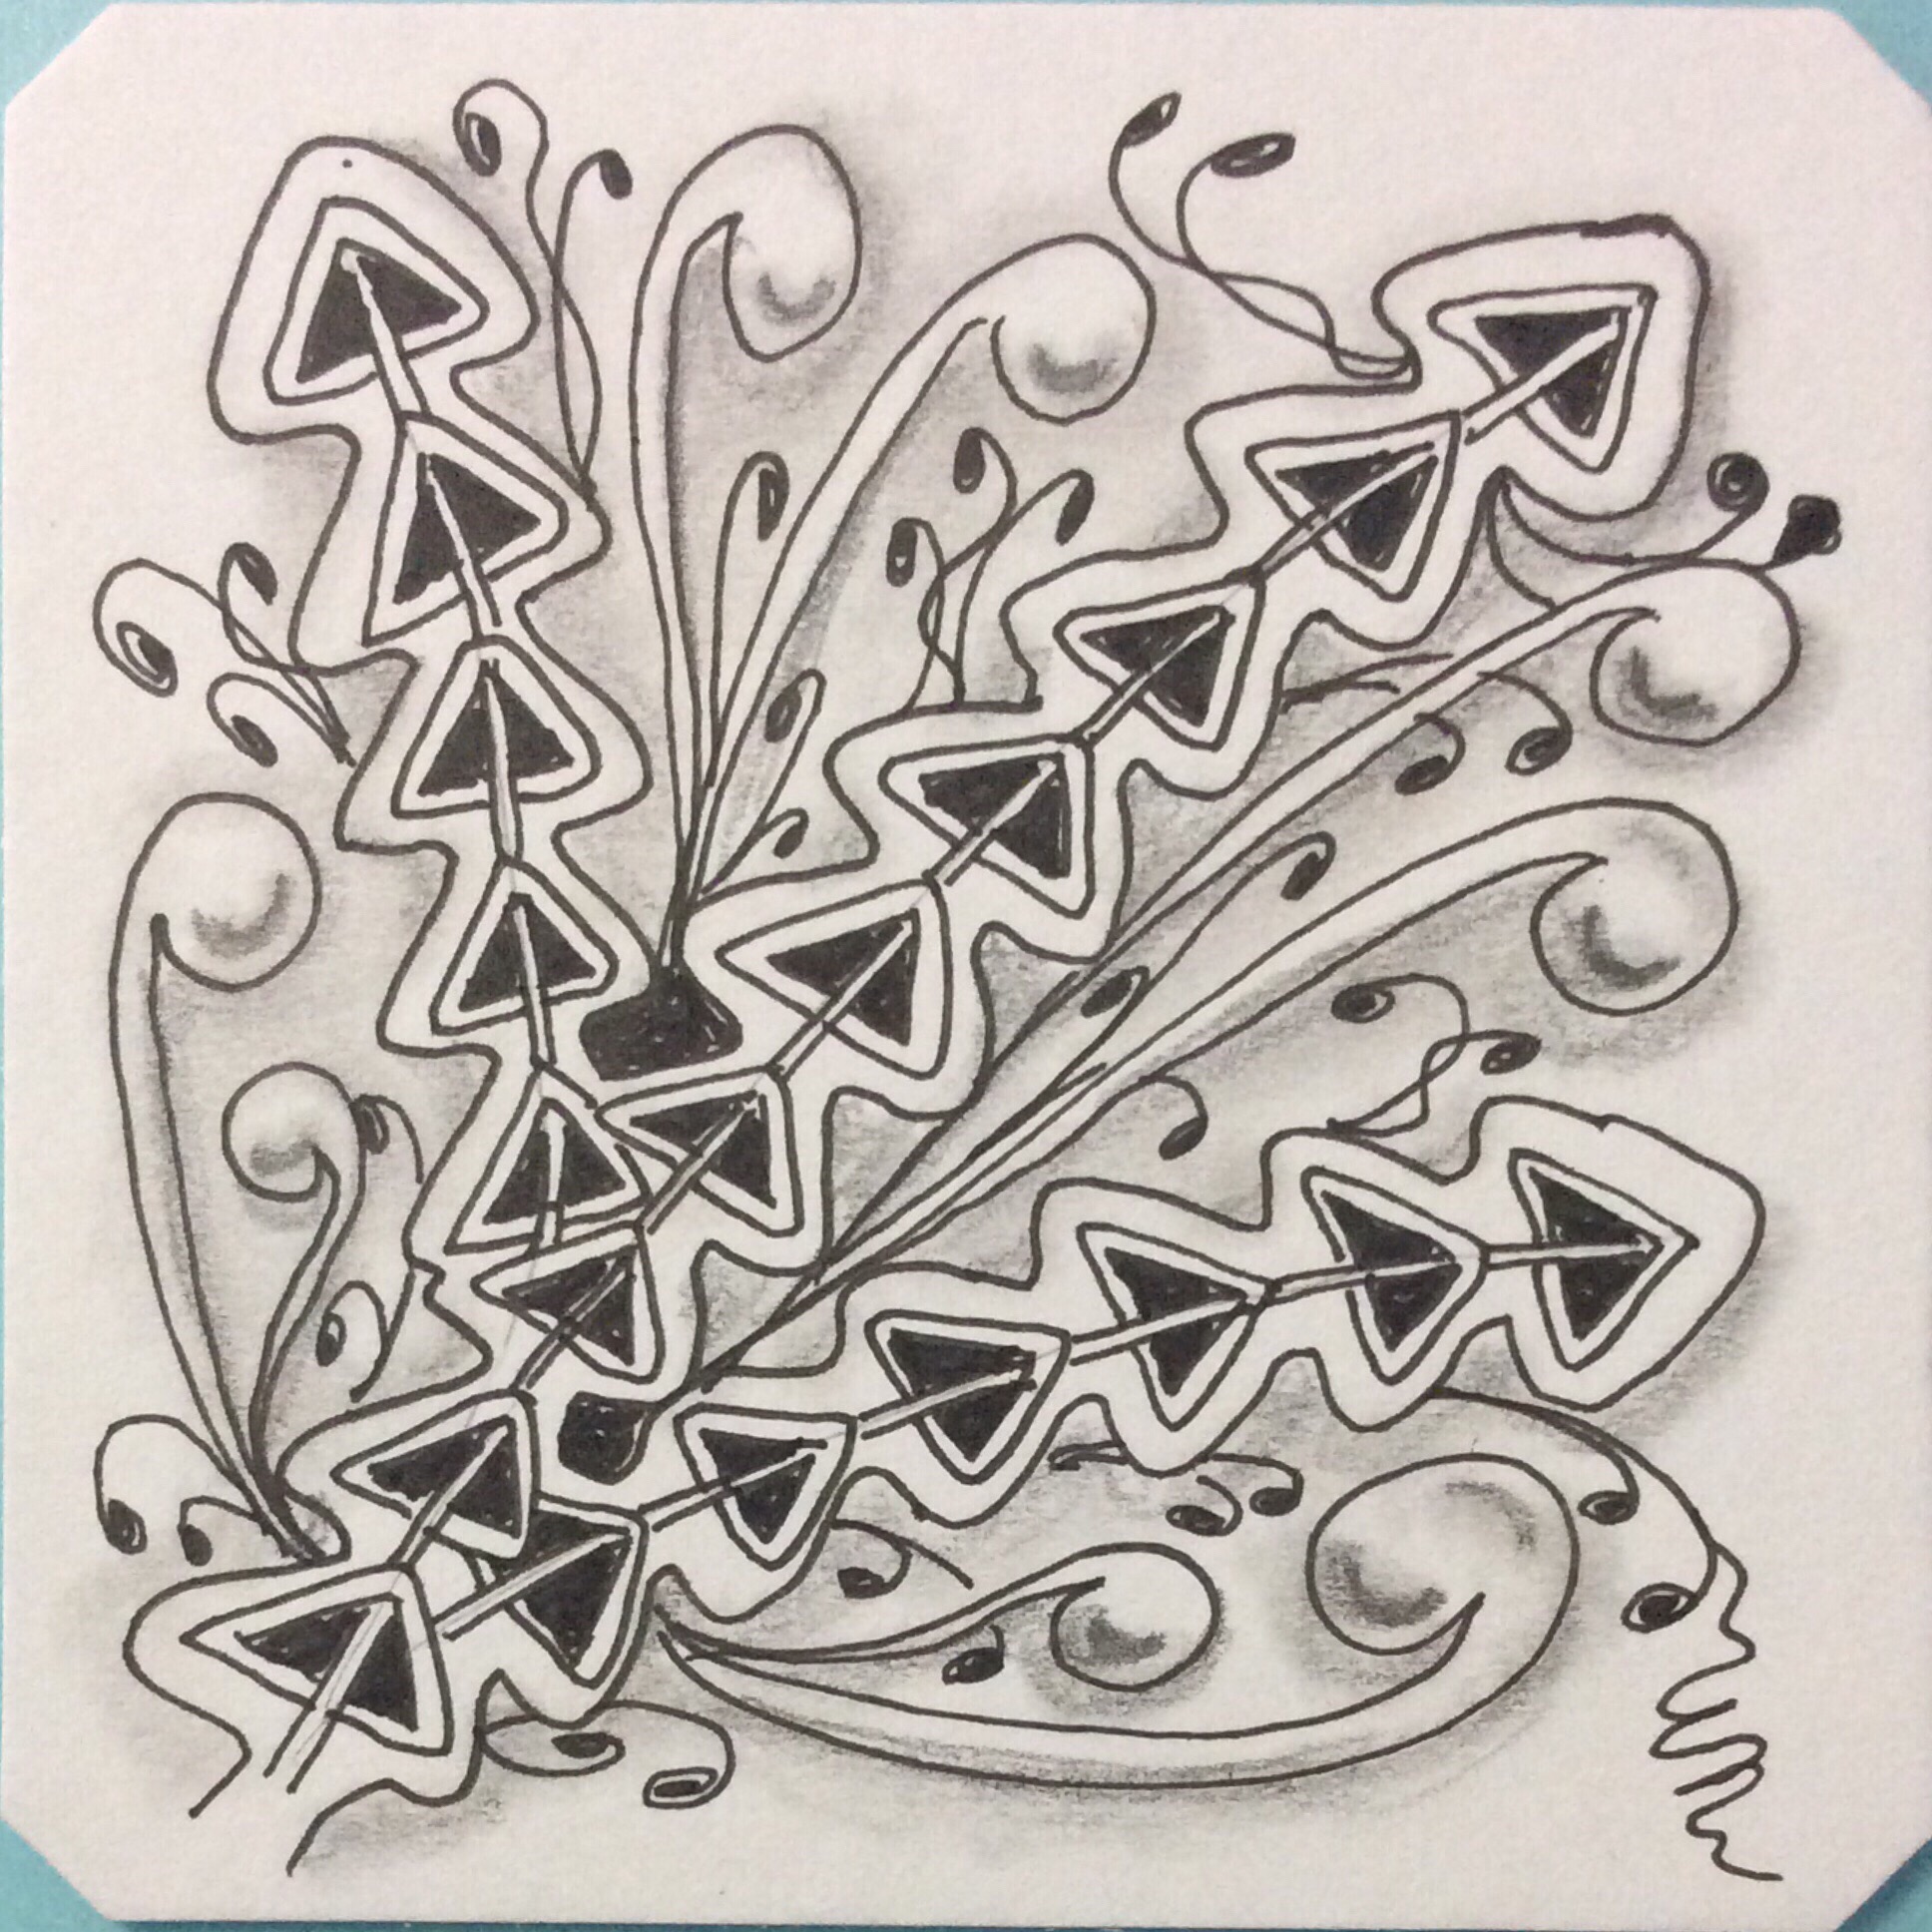
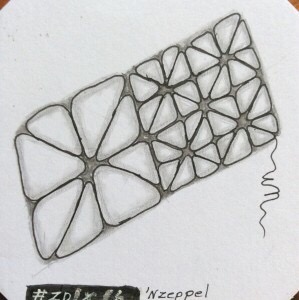
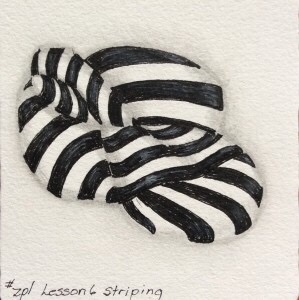
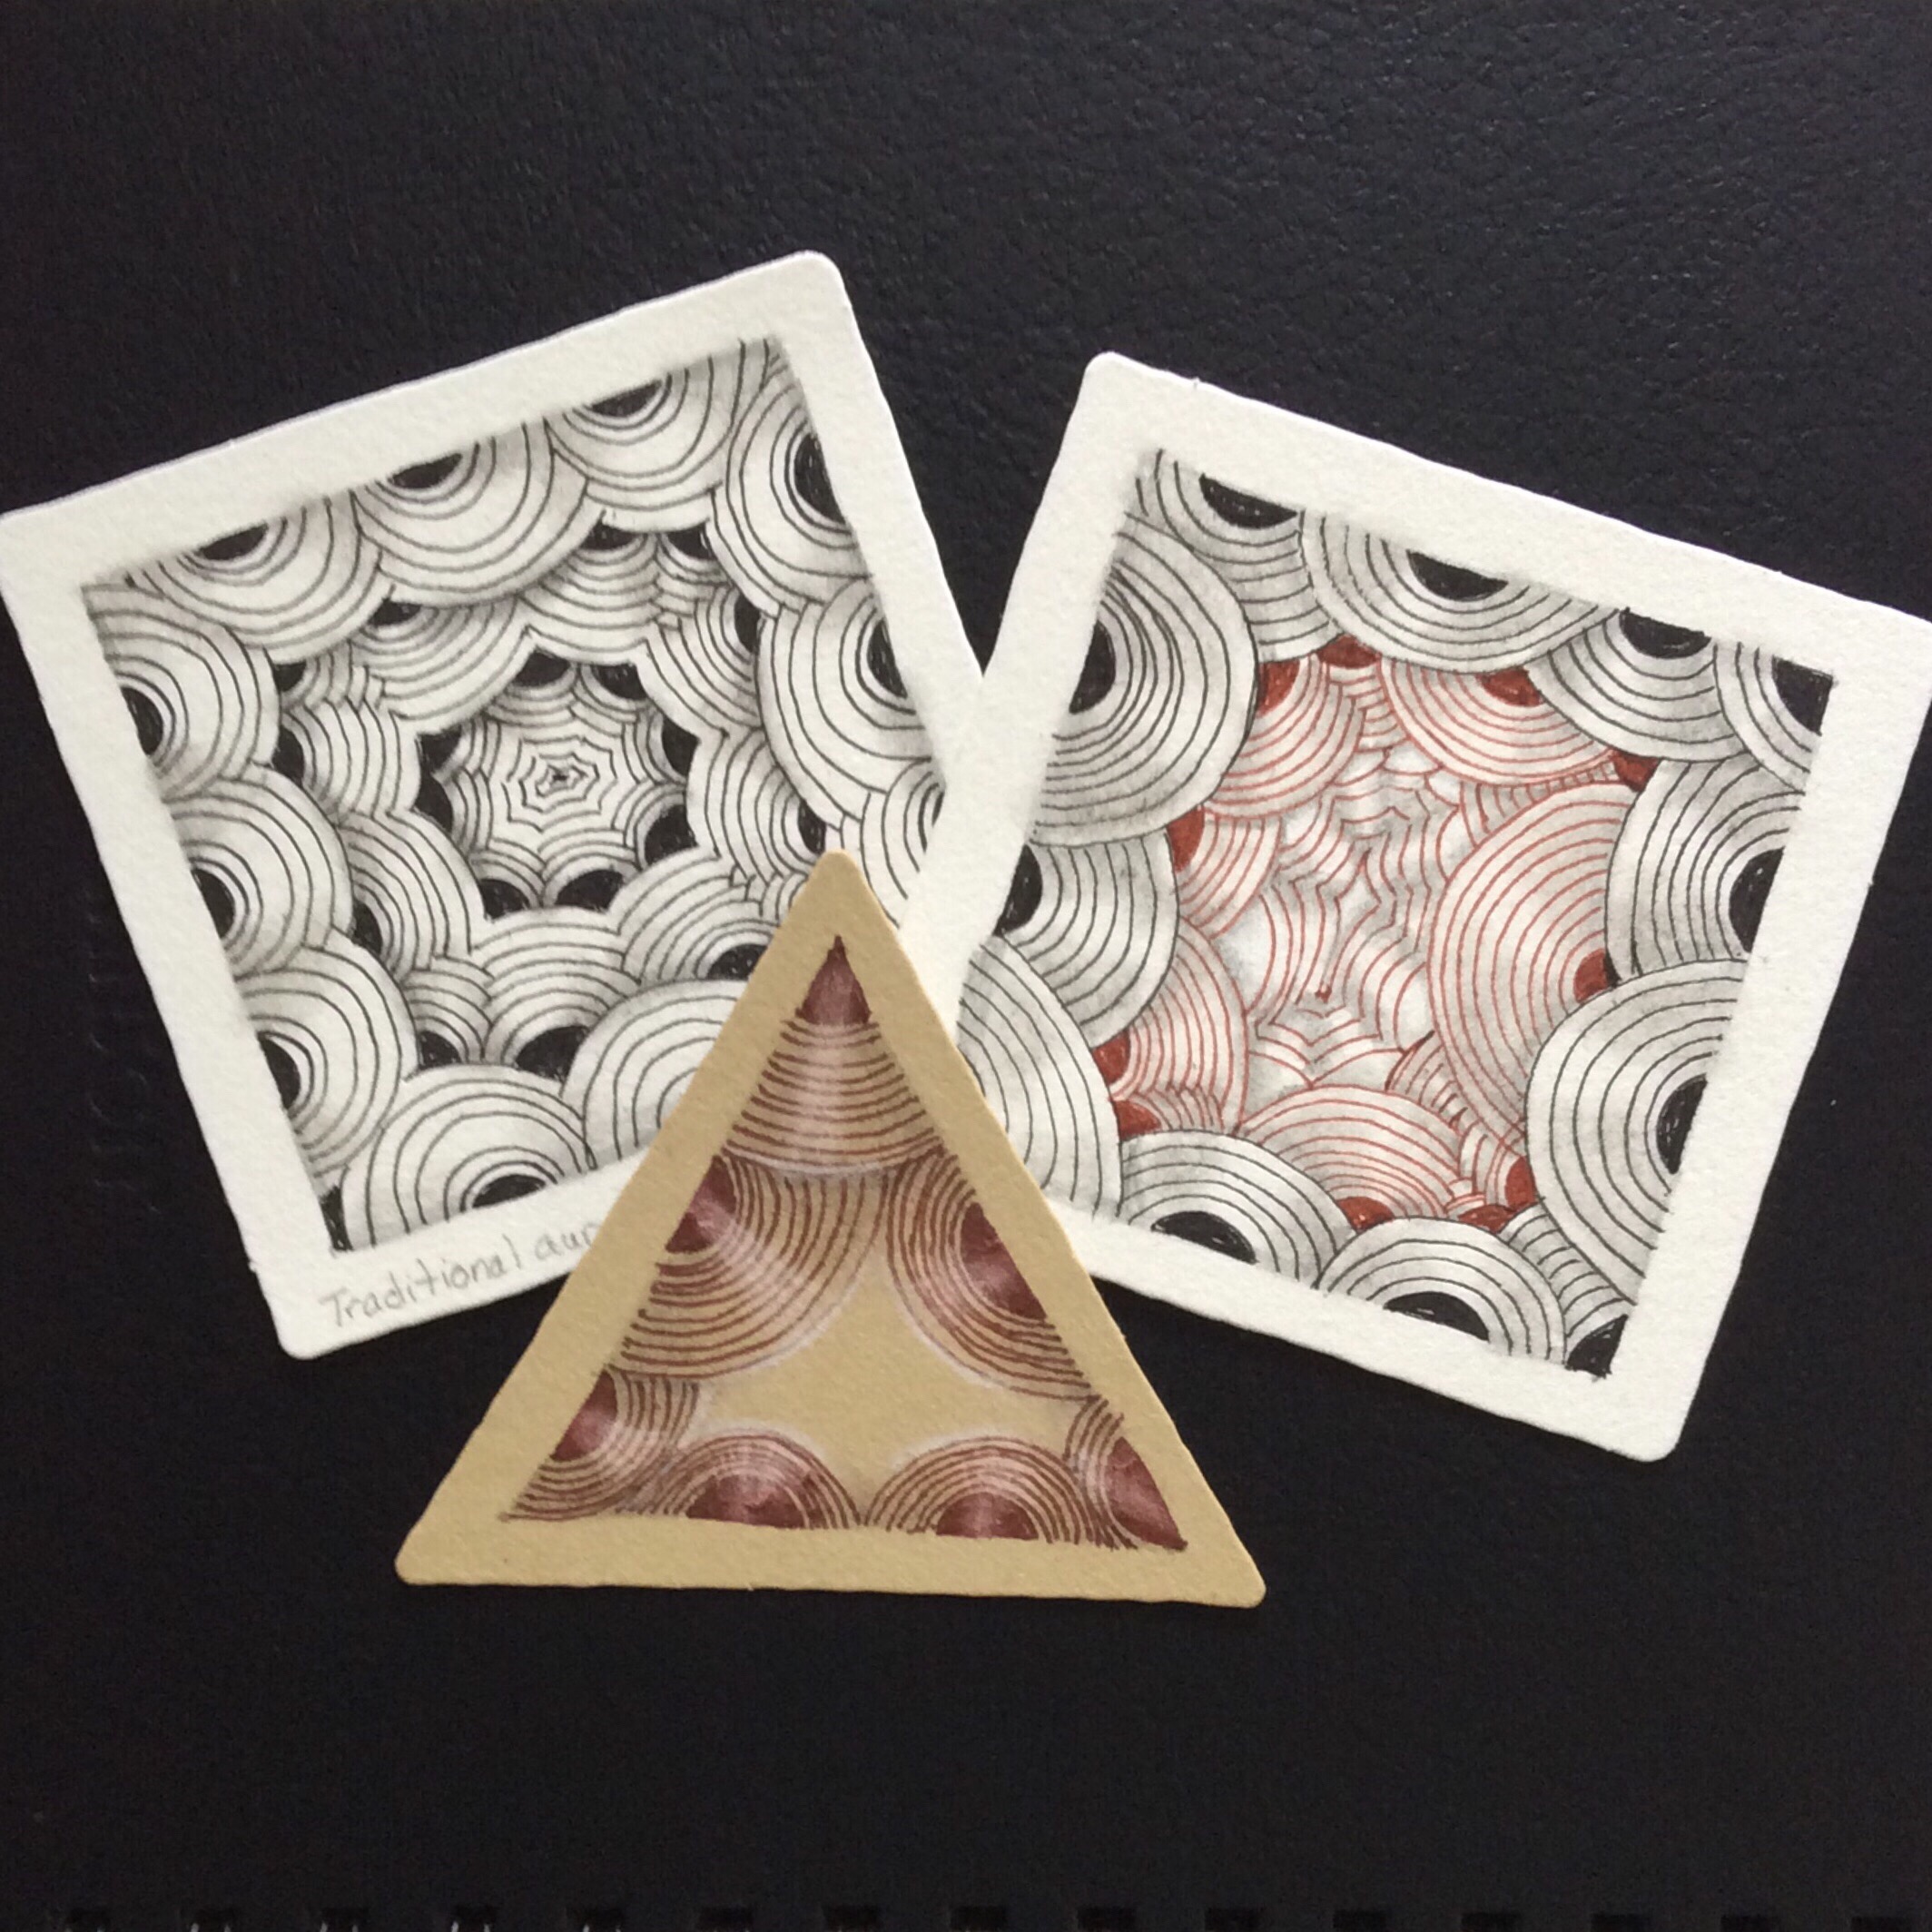
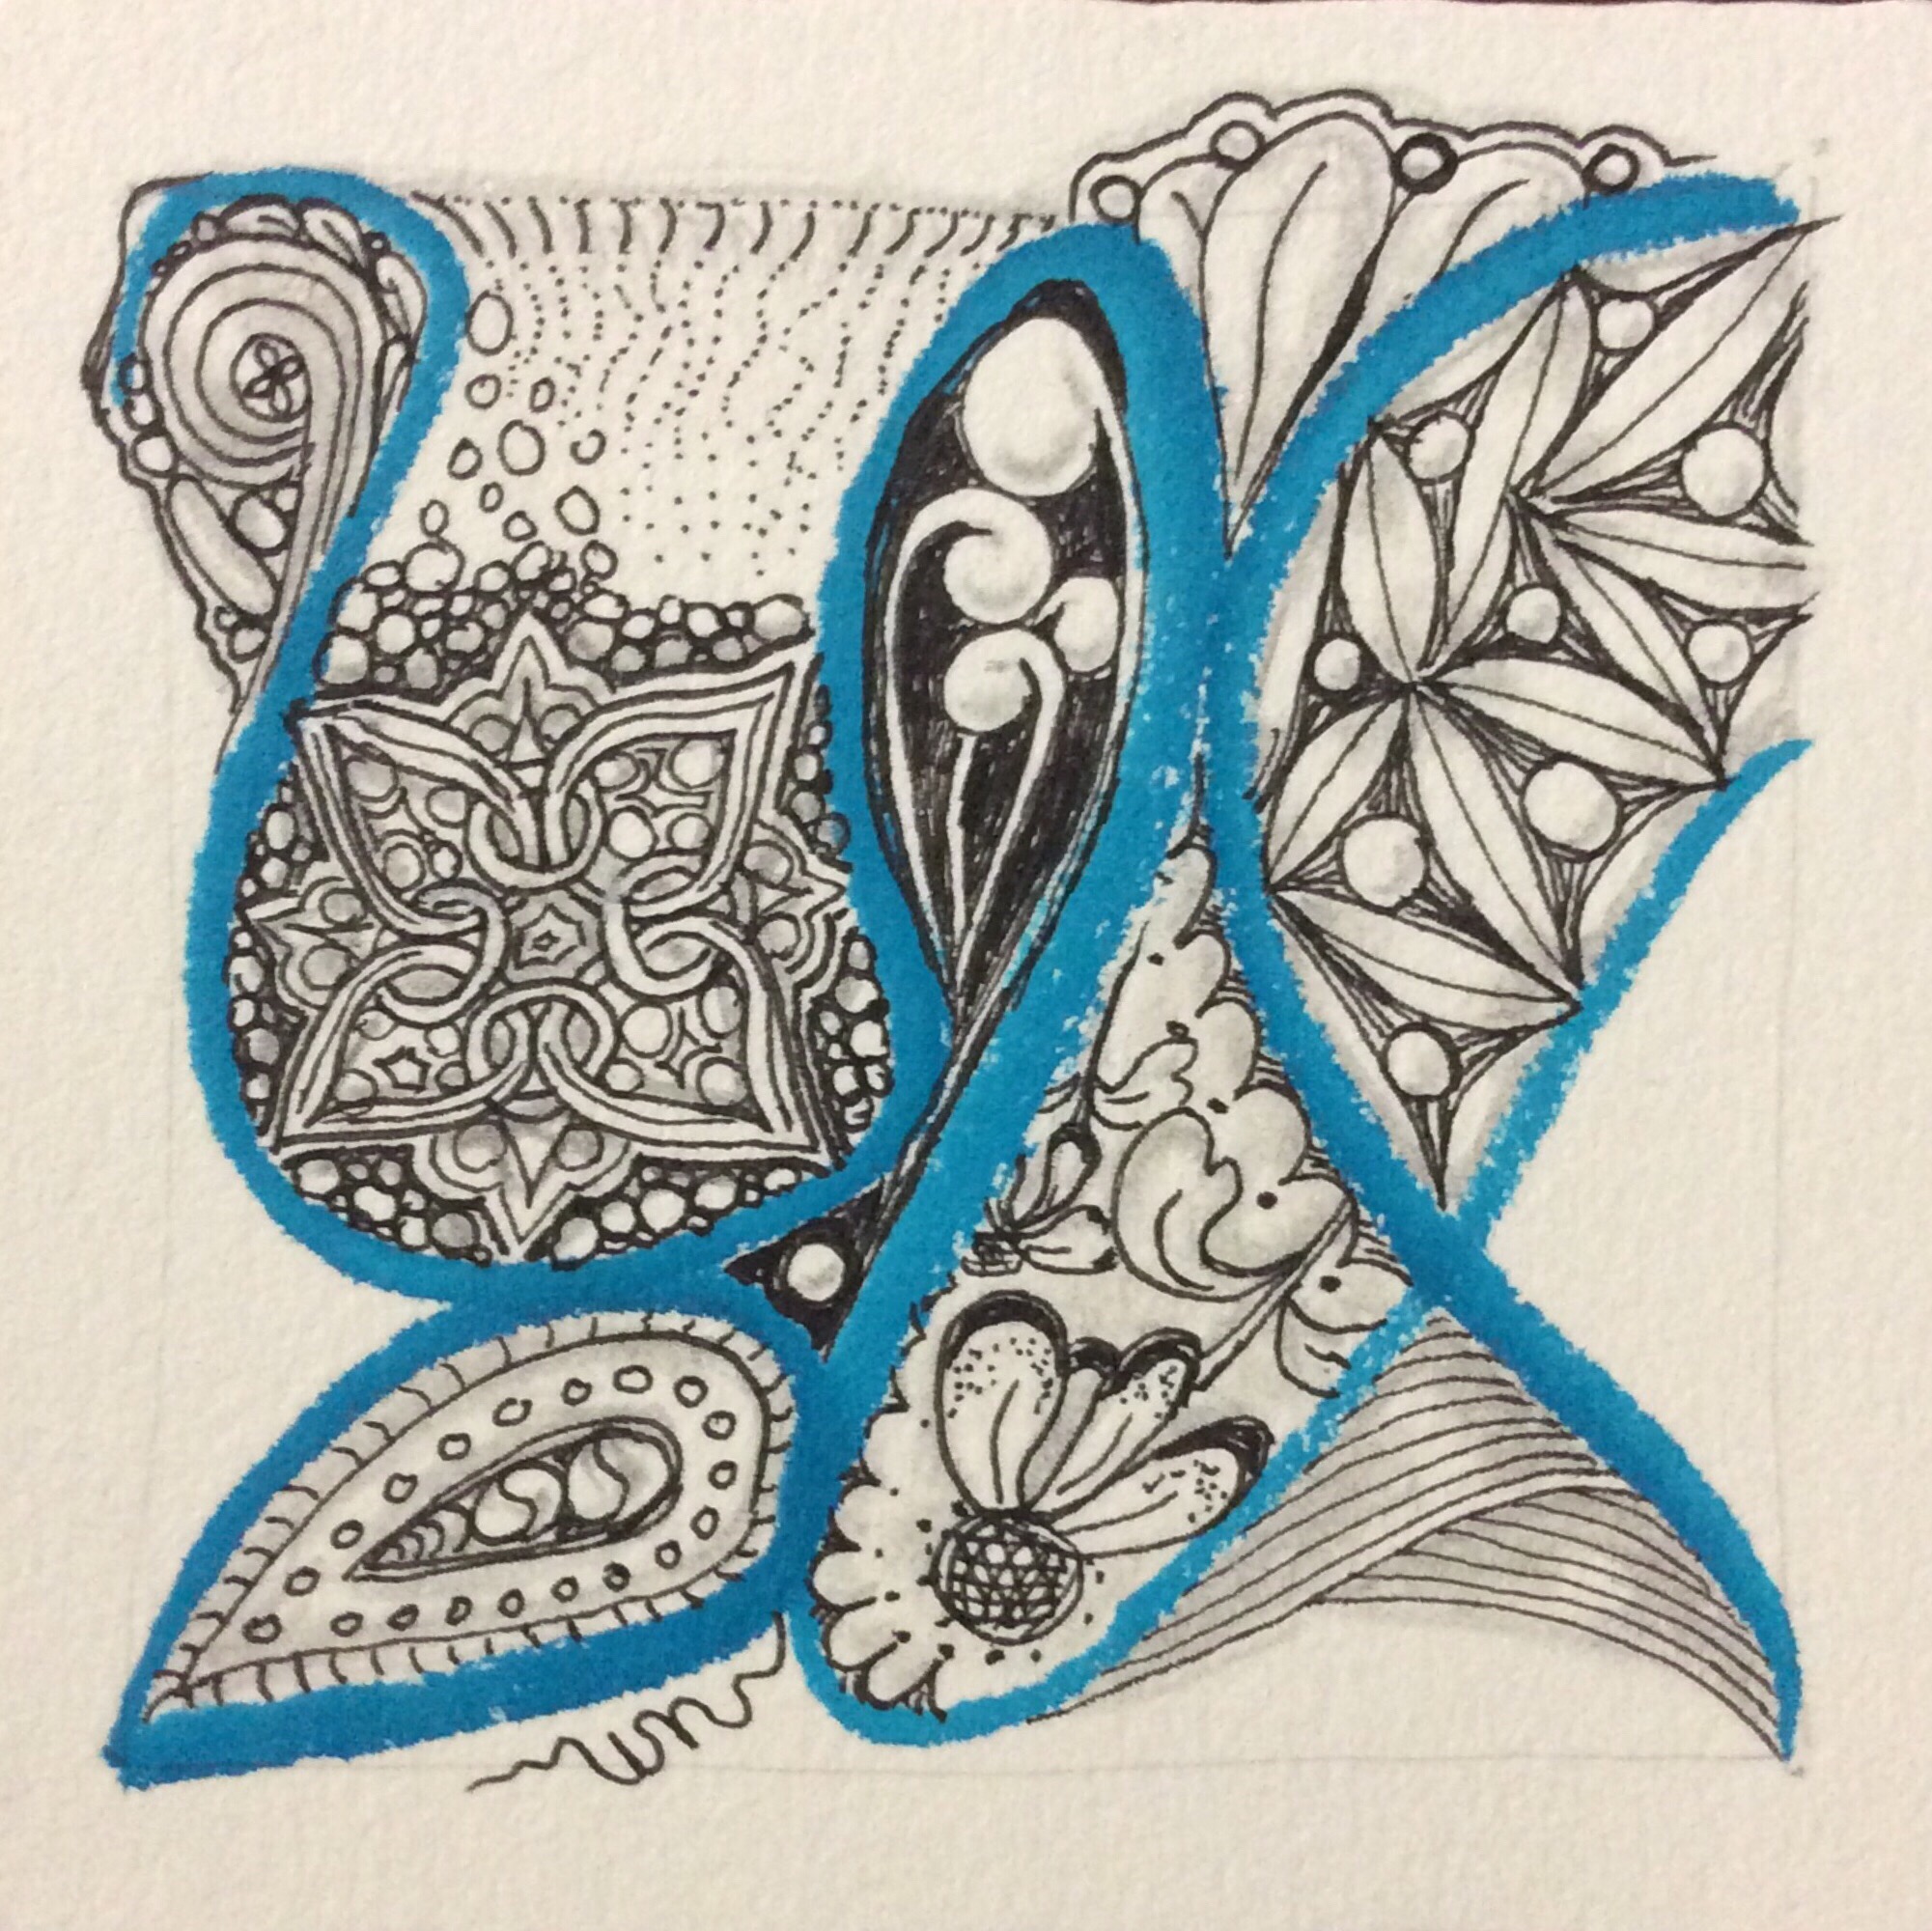
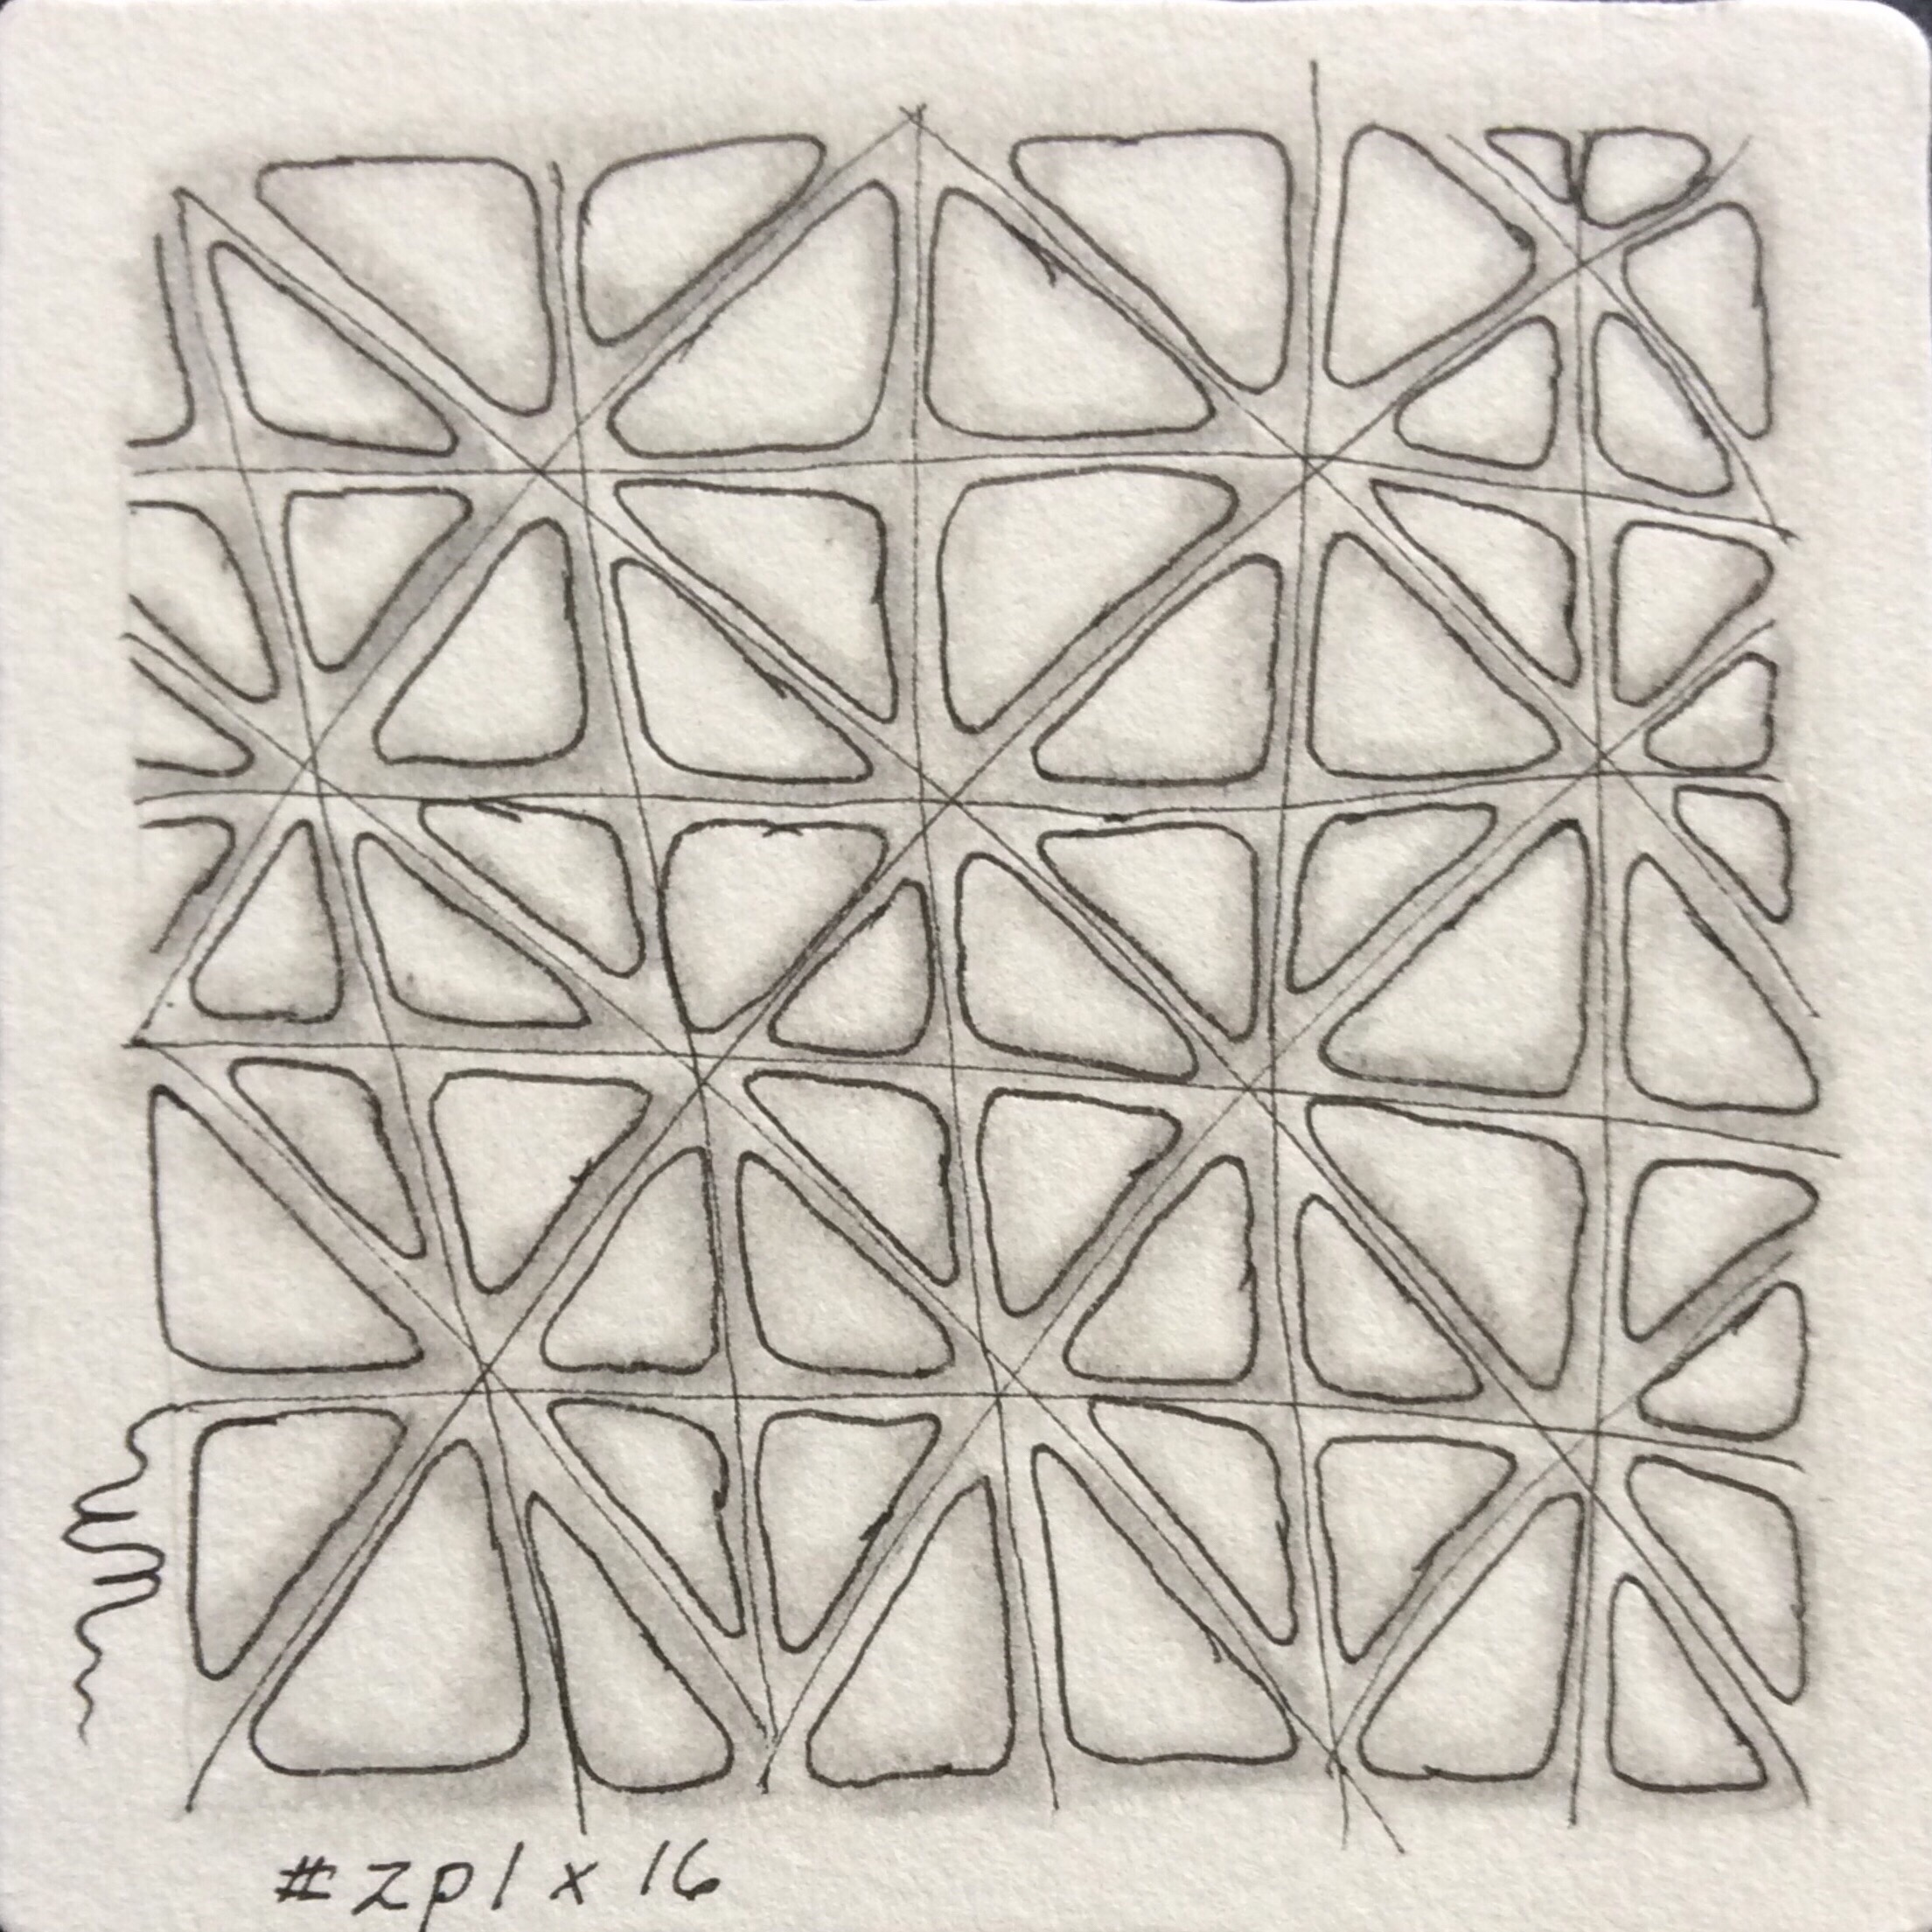
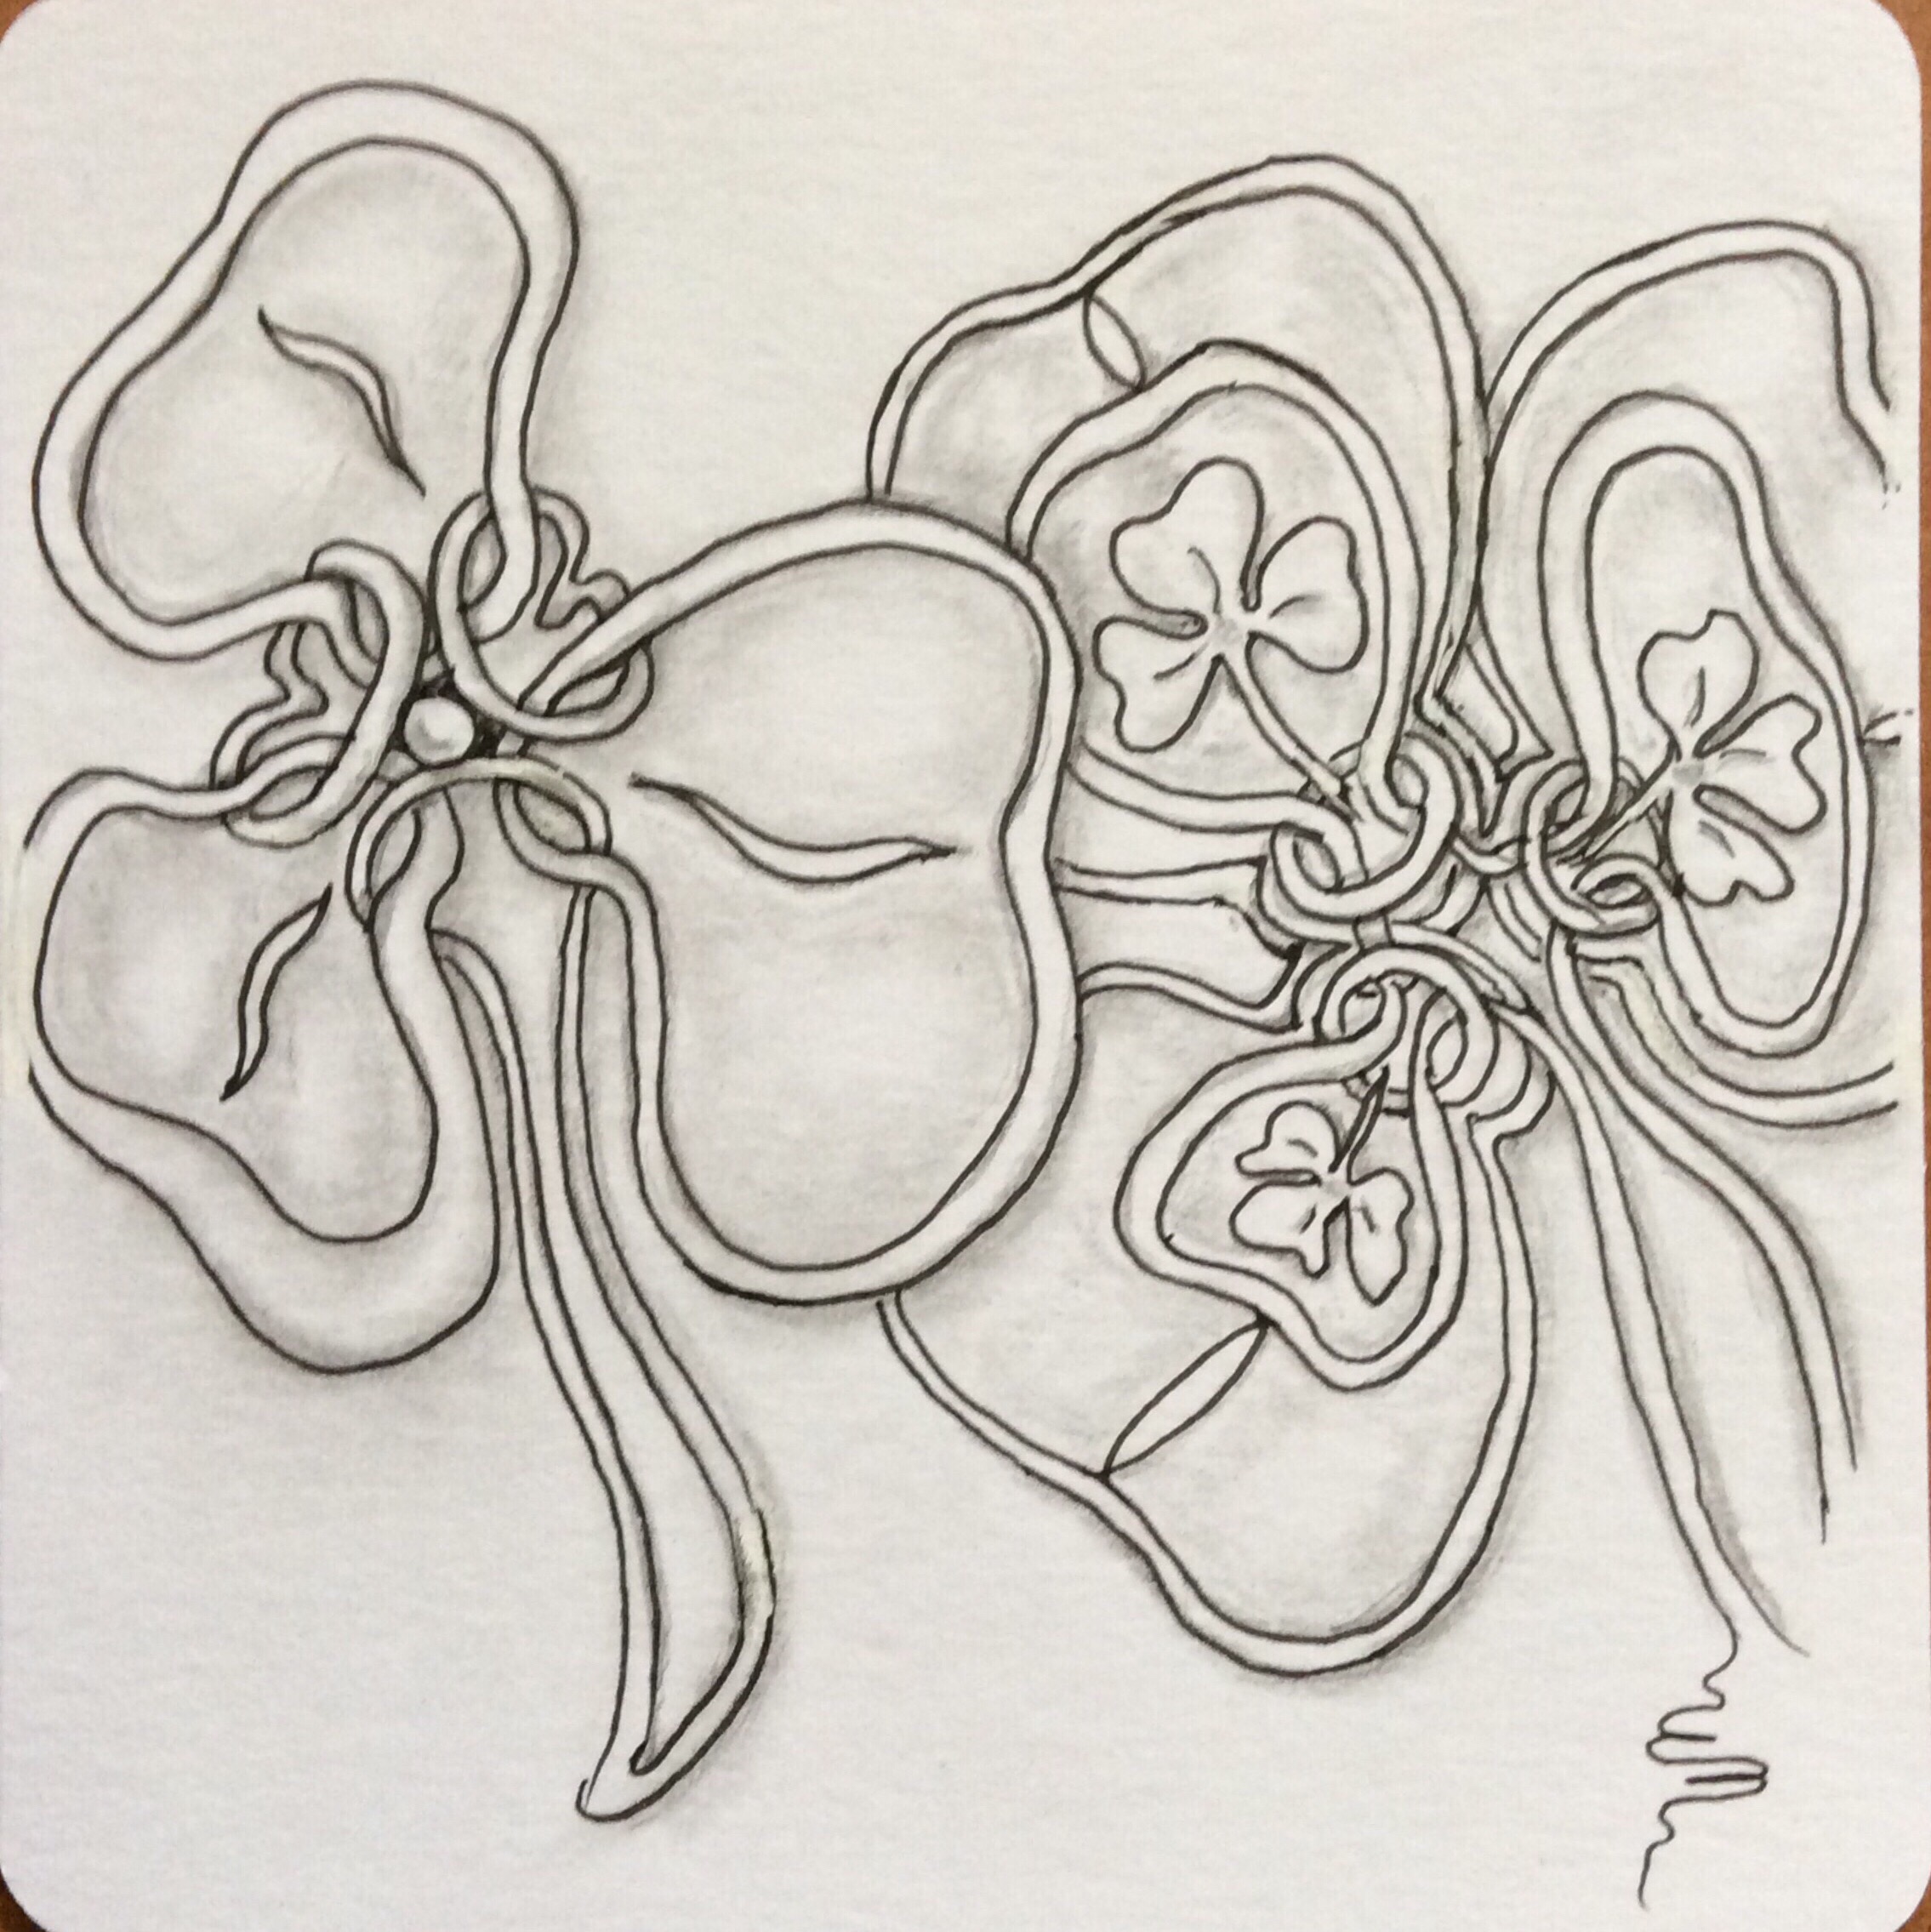
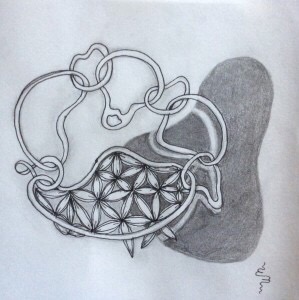
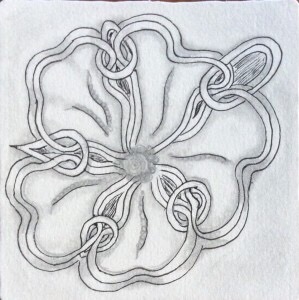
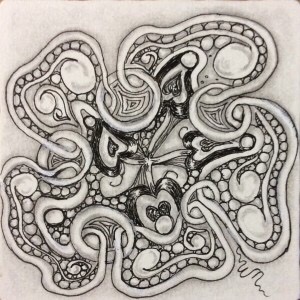
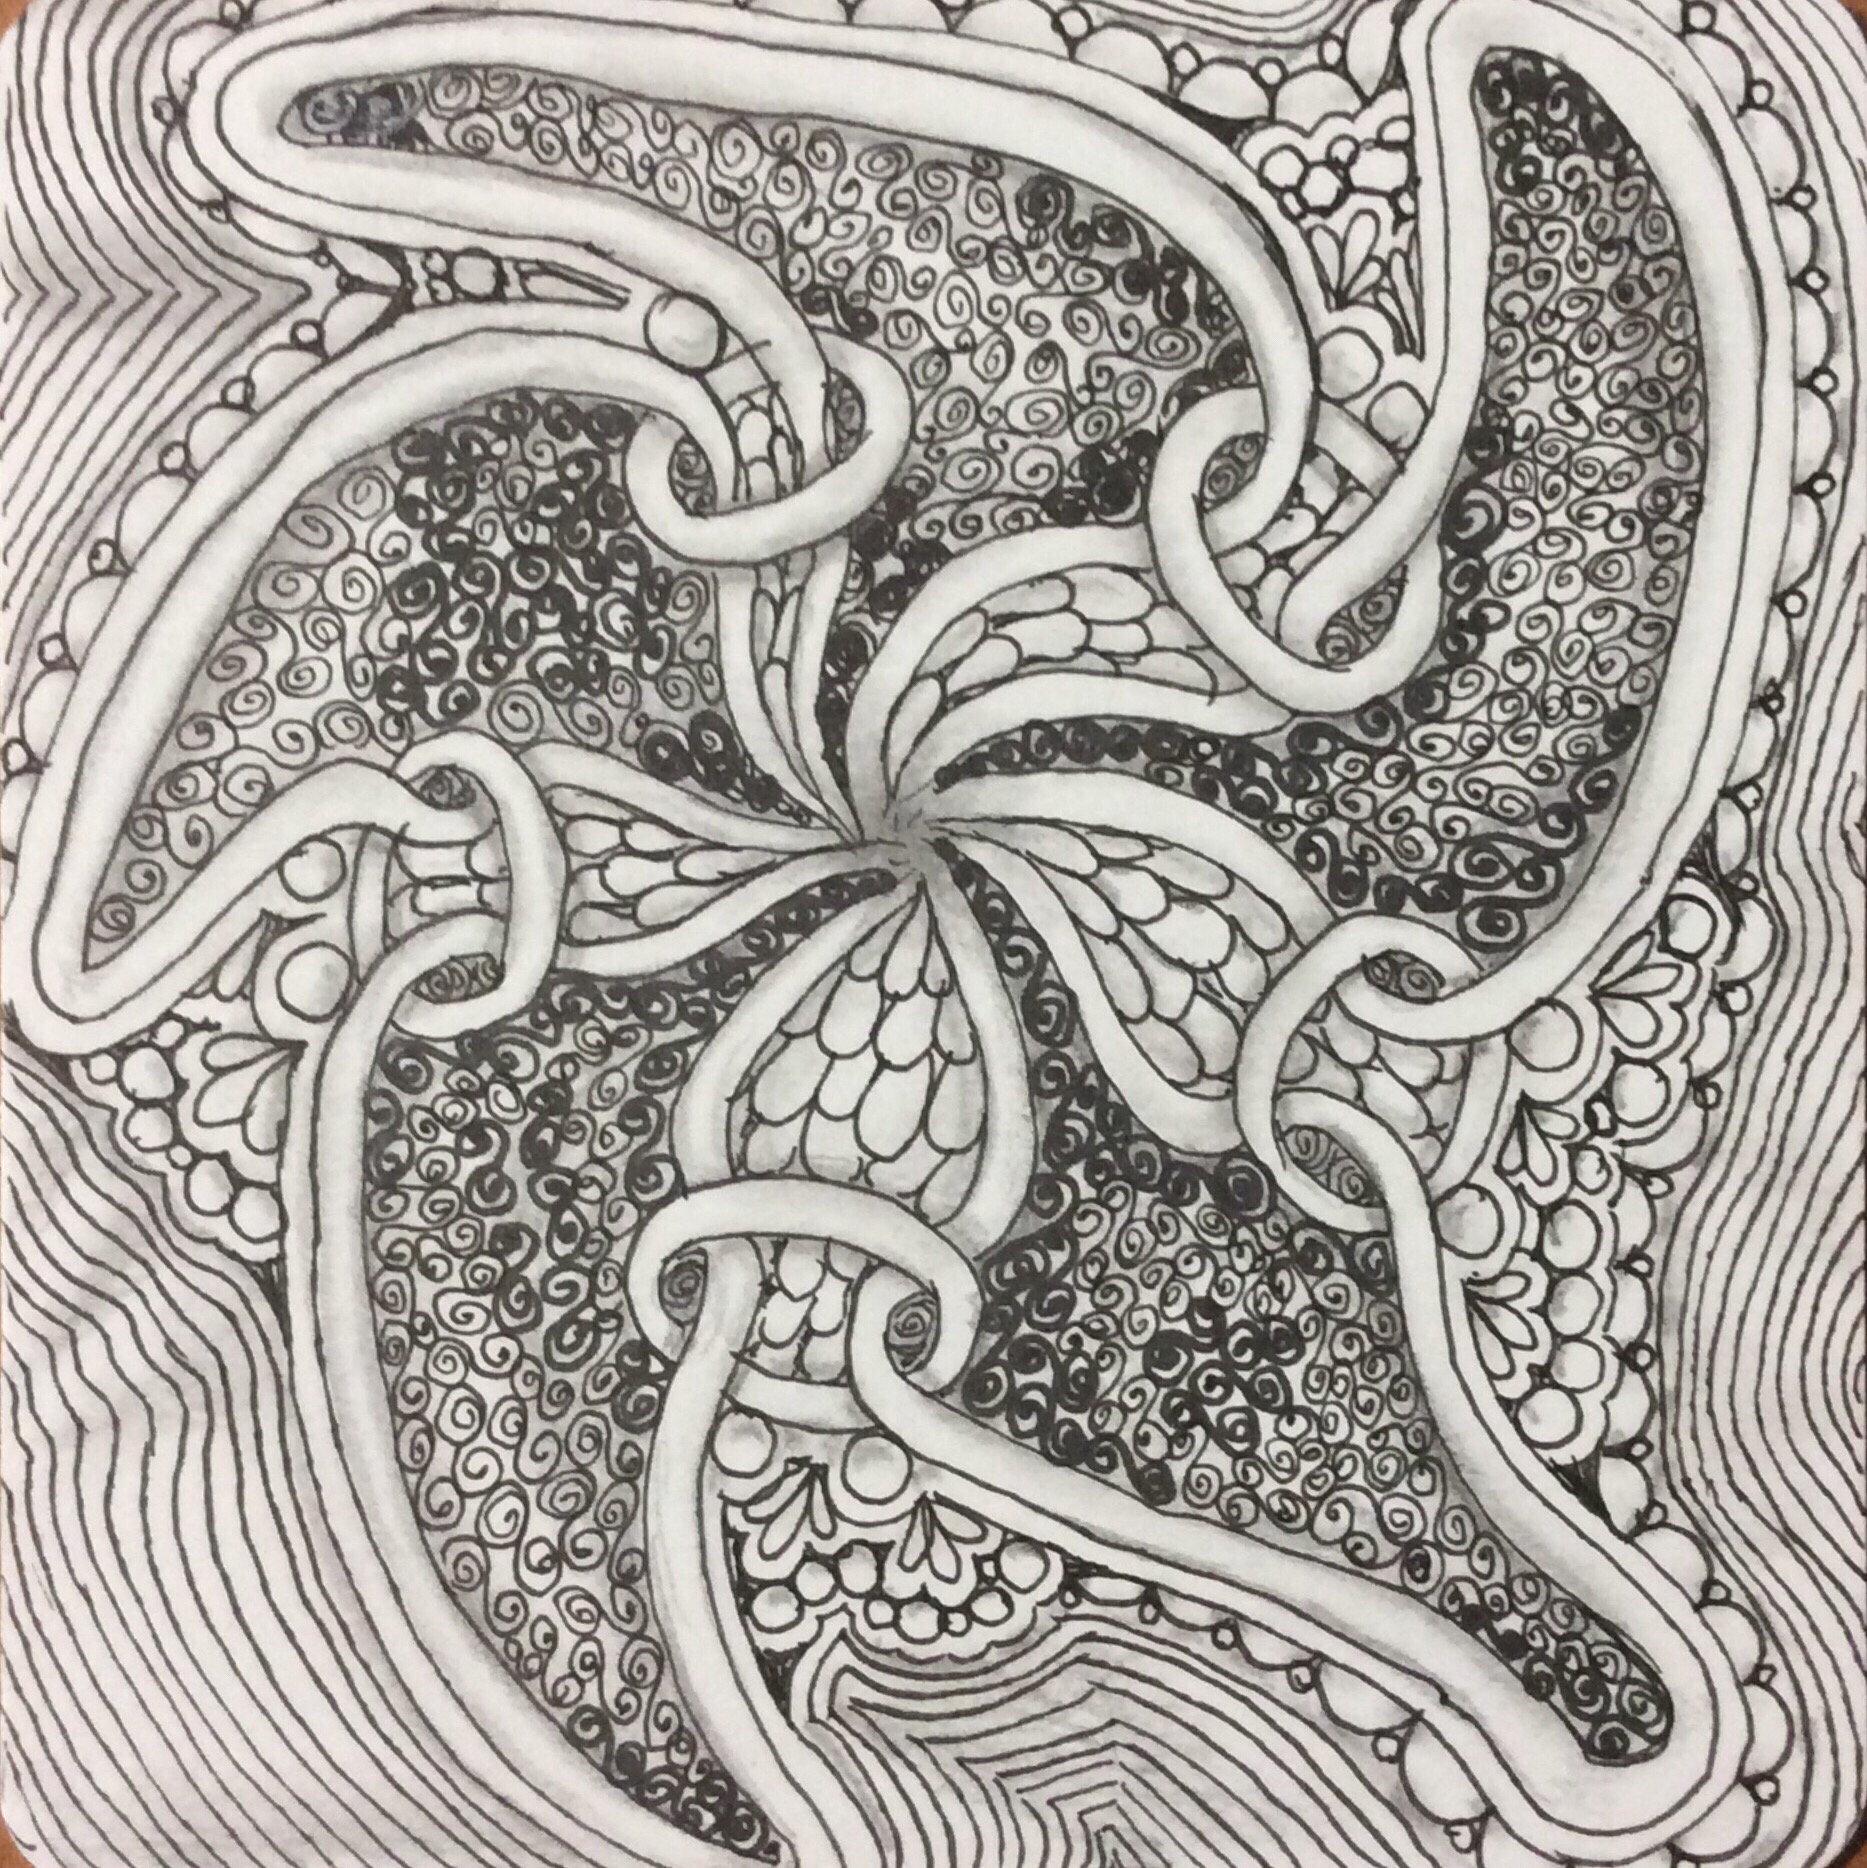
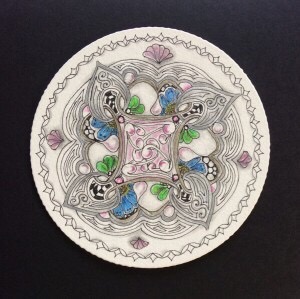
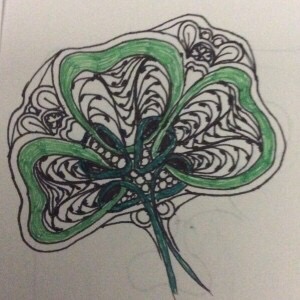
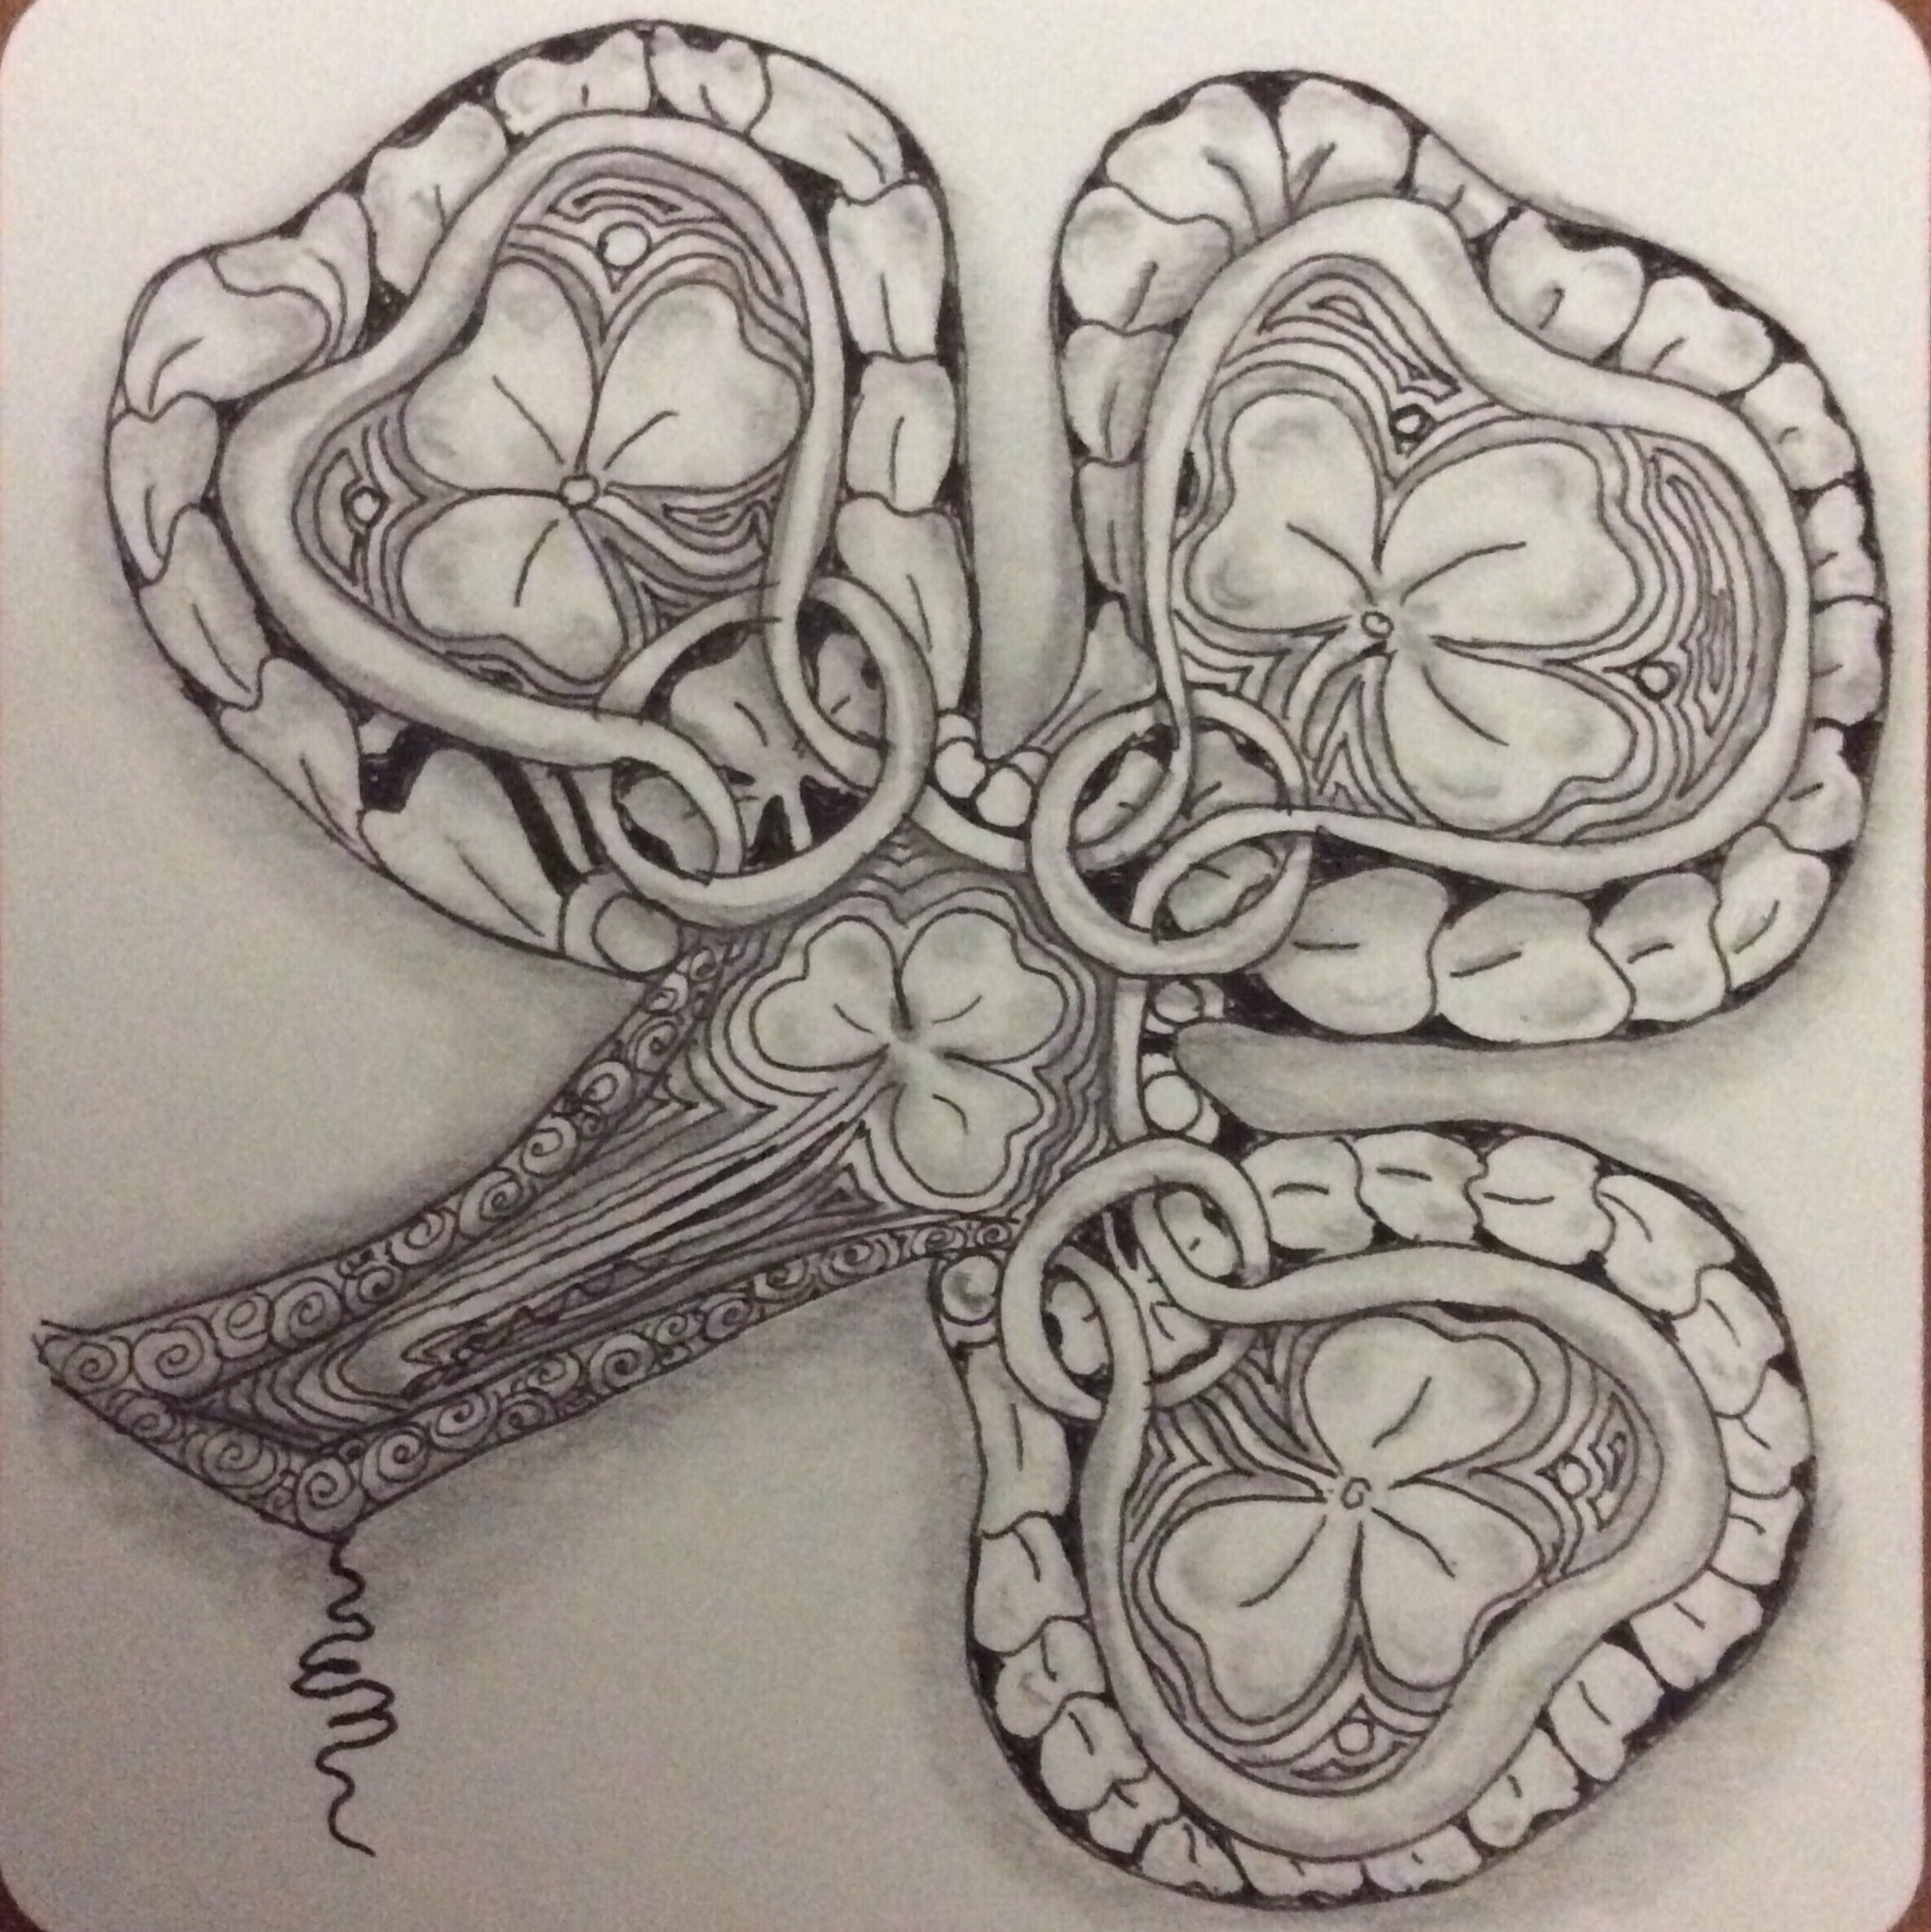
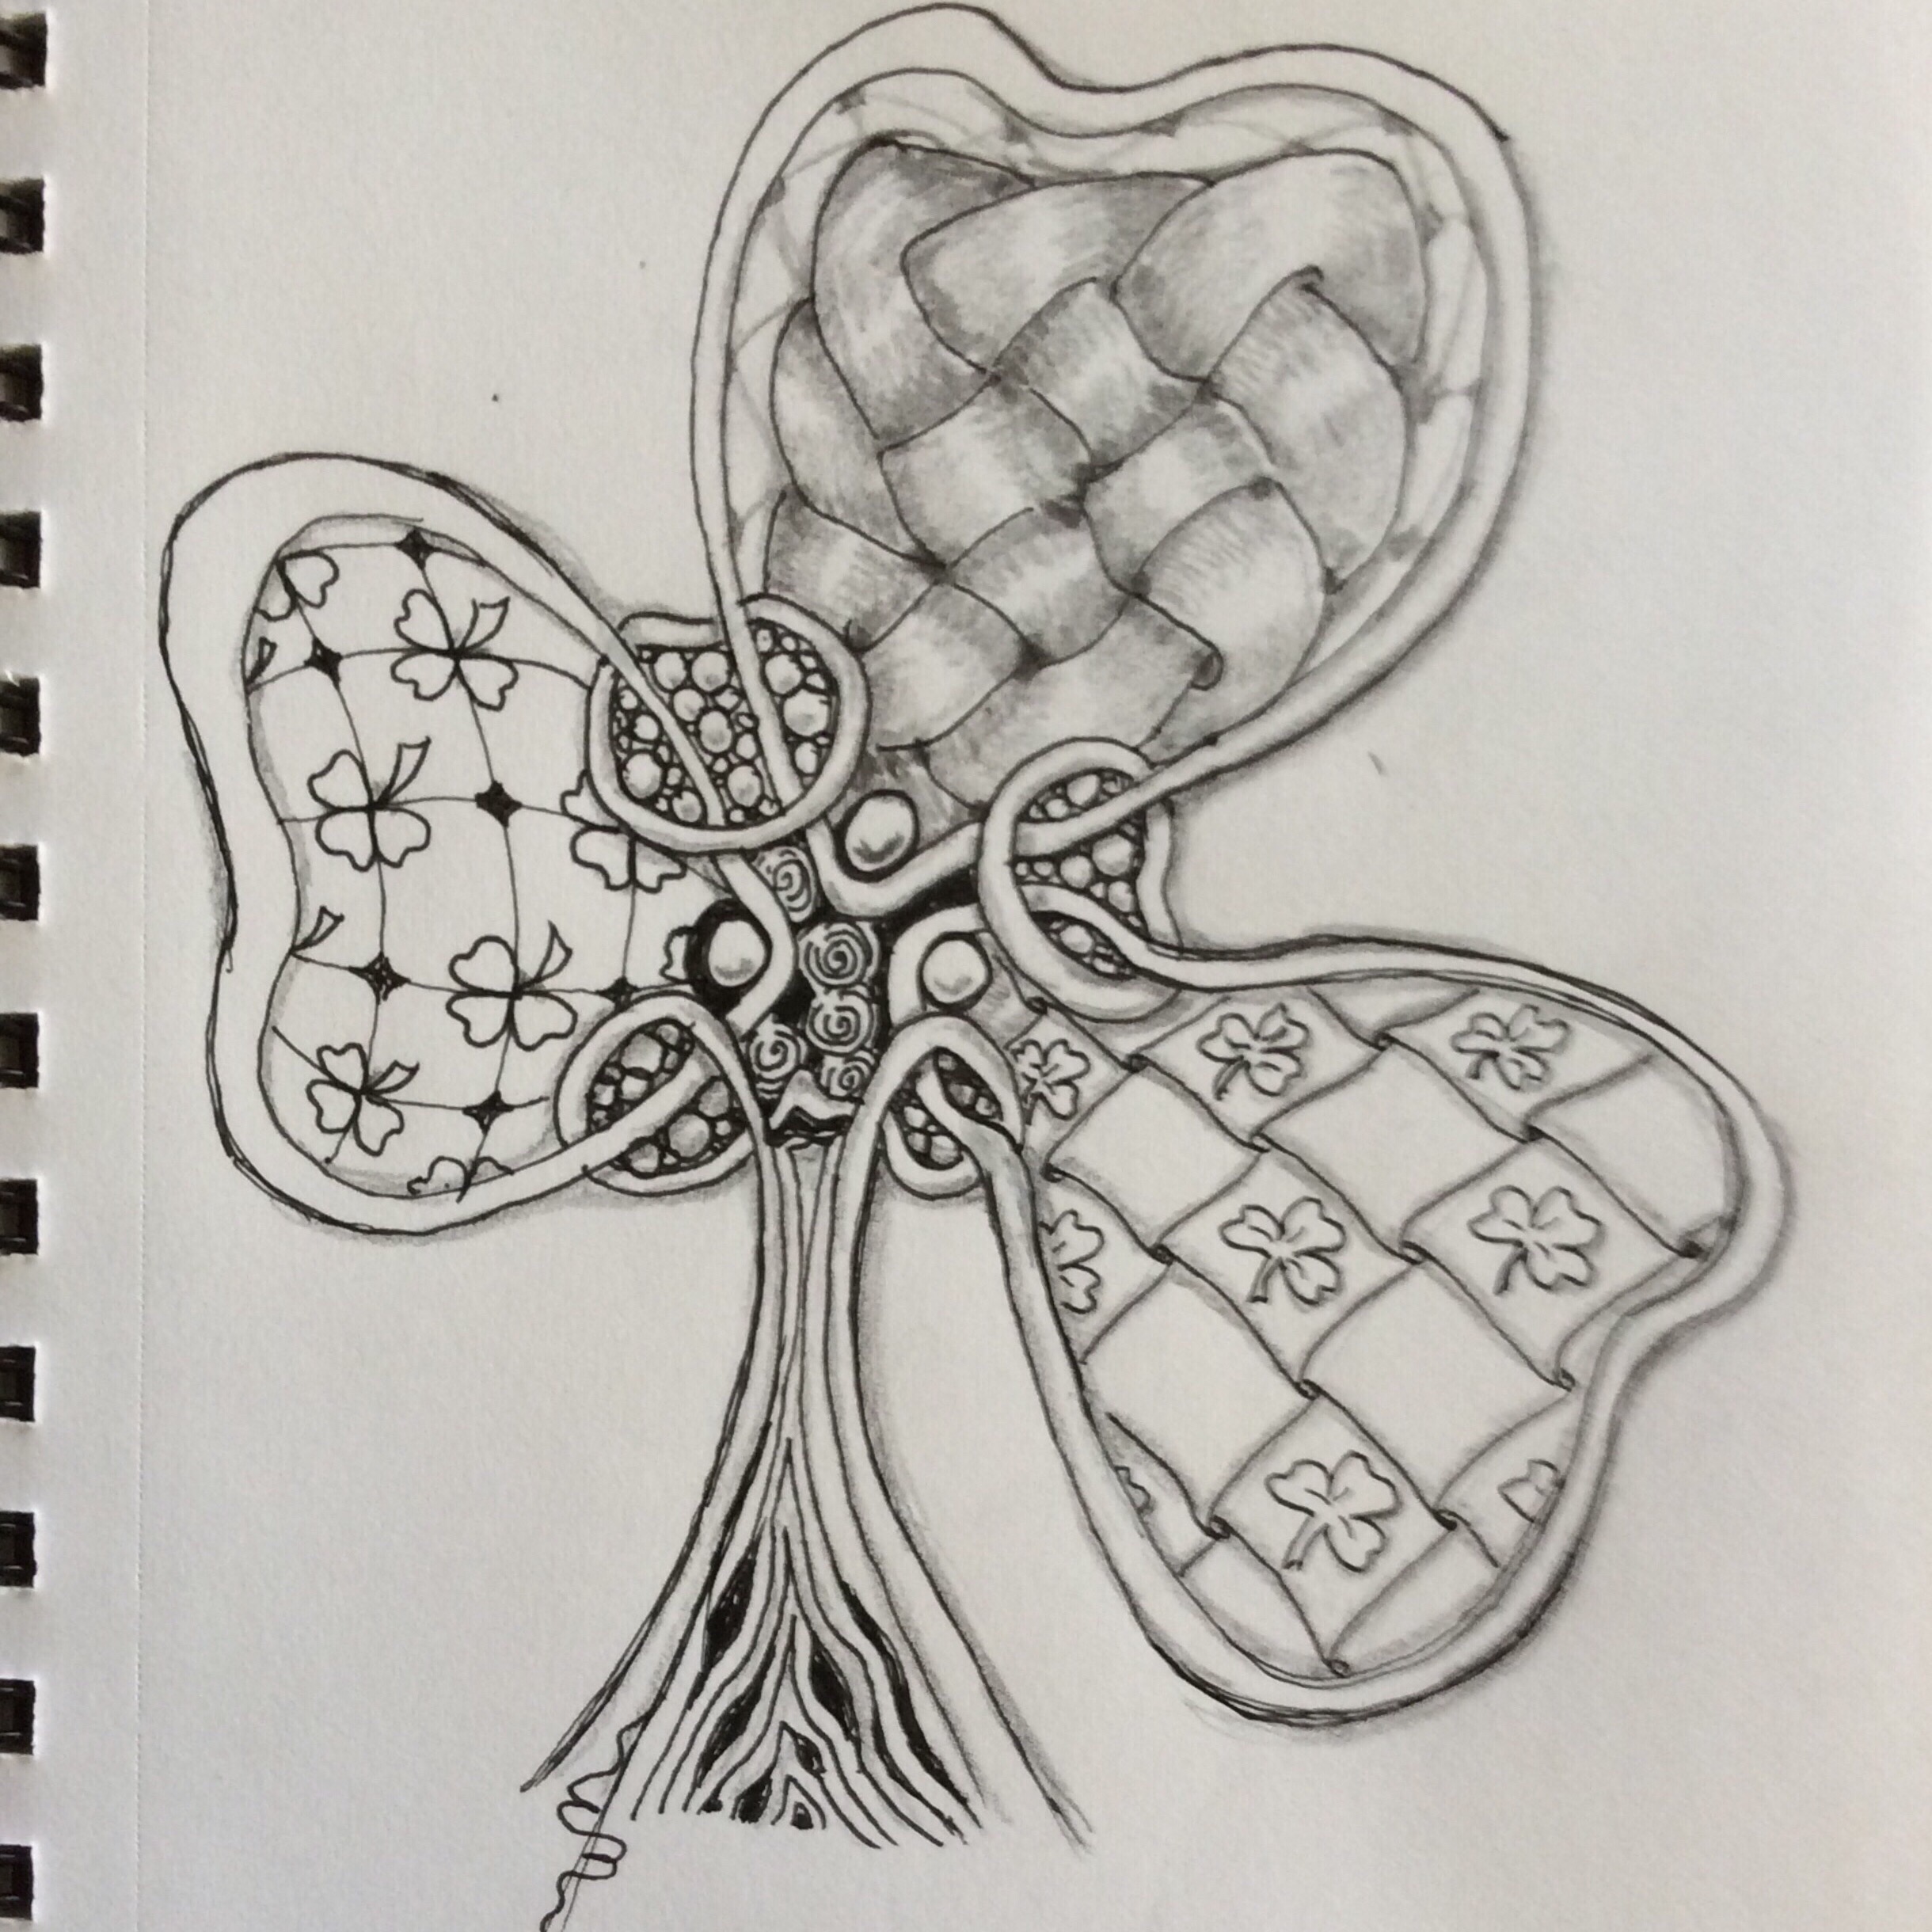
The tiles and tangles below are studies based on some of the Lesson 6 featured patterns and related exercises.


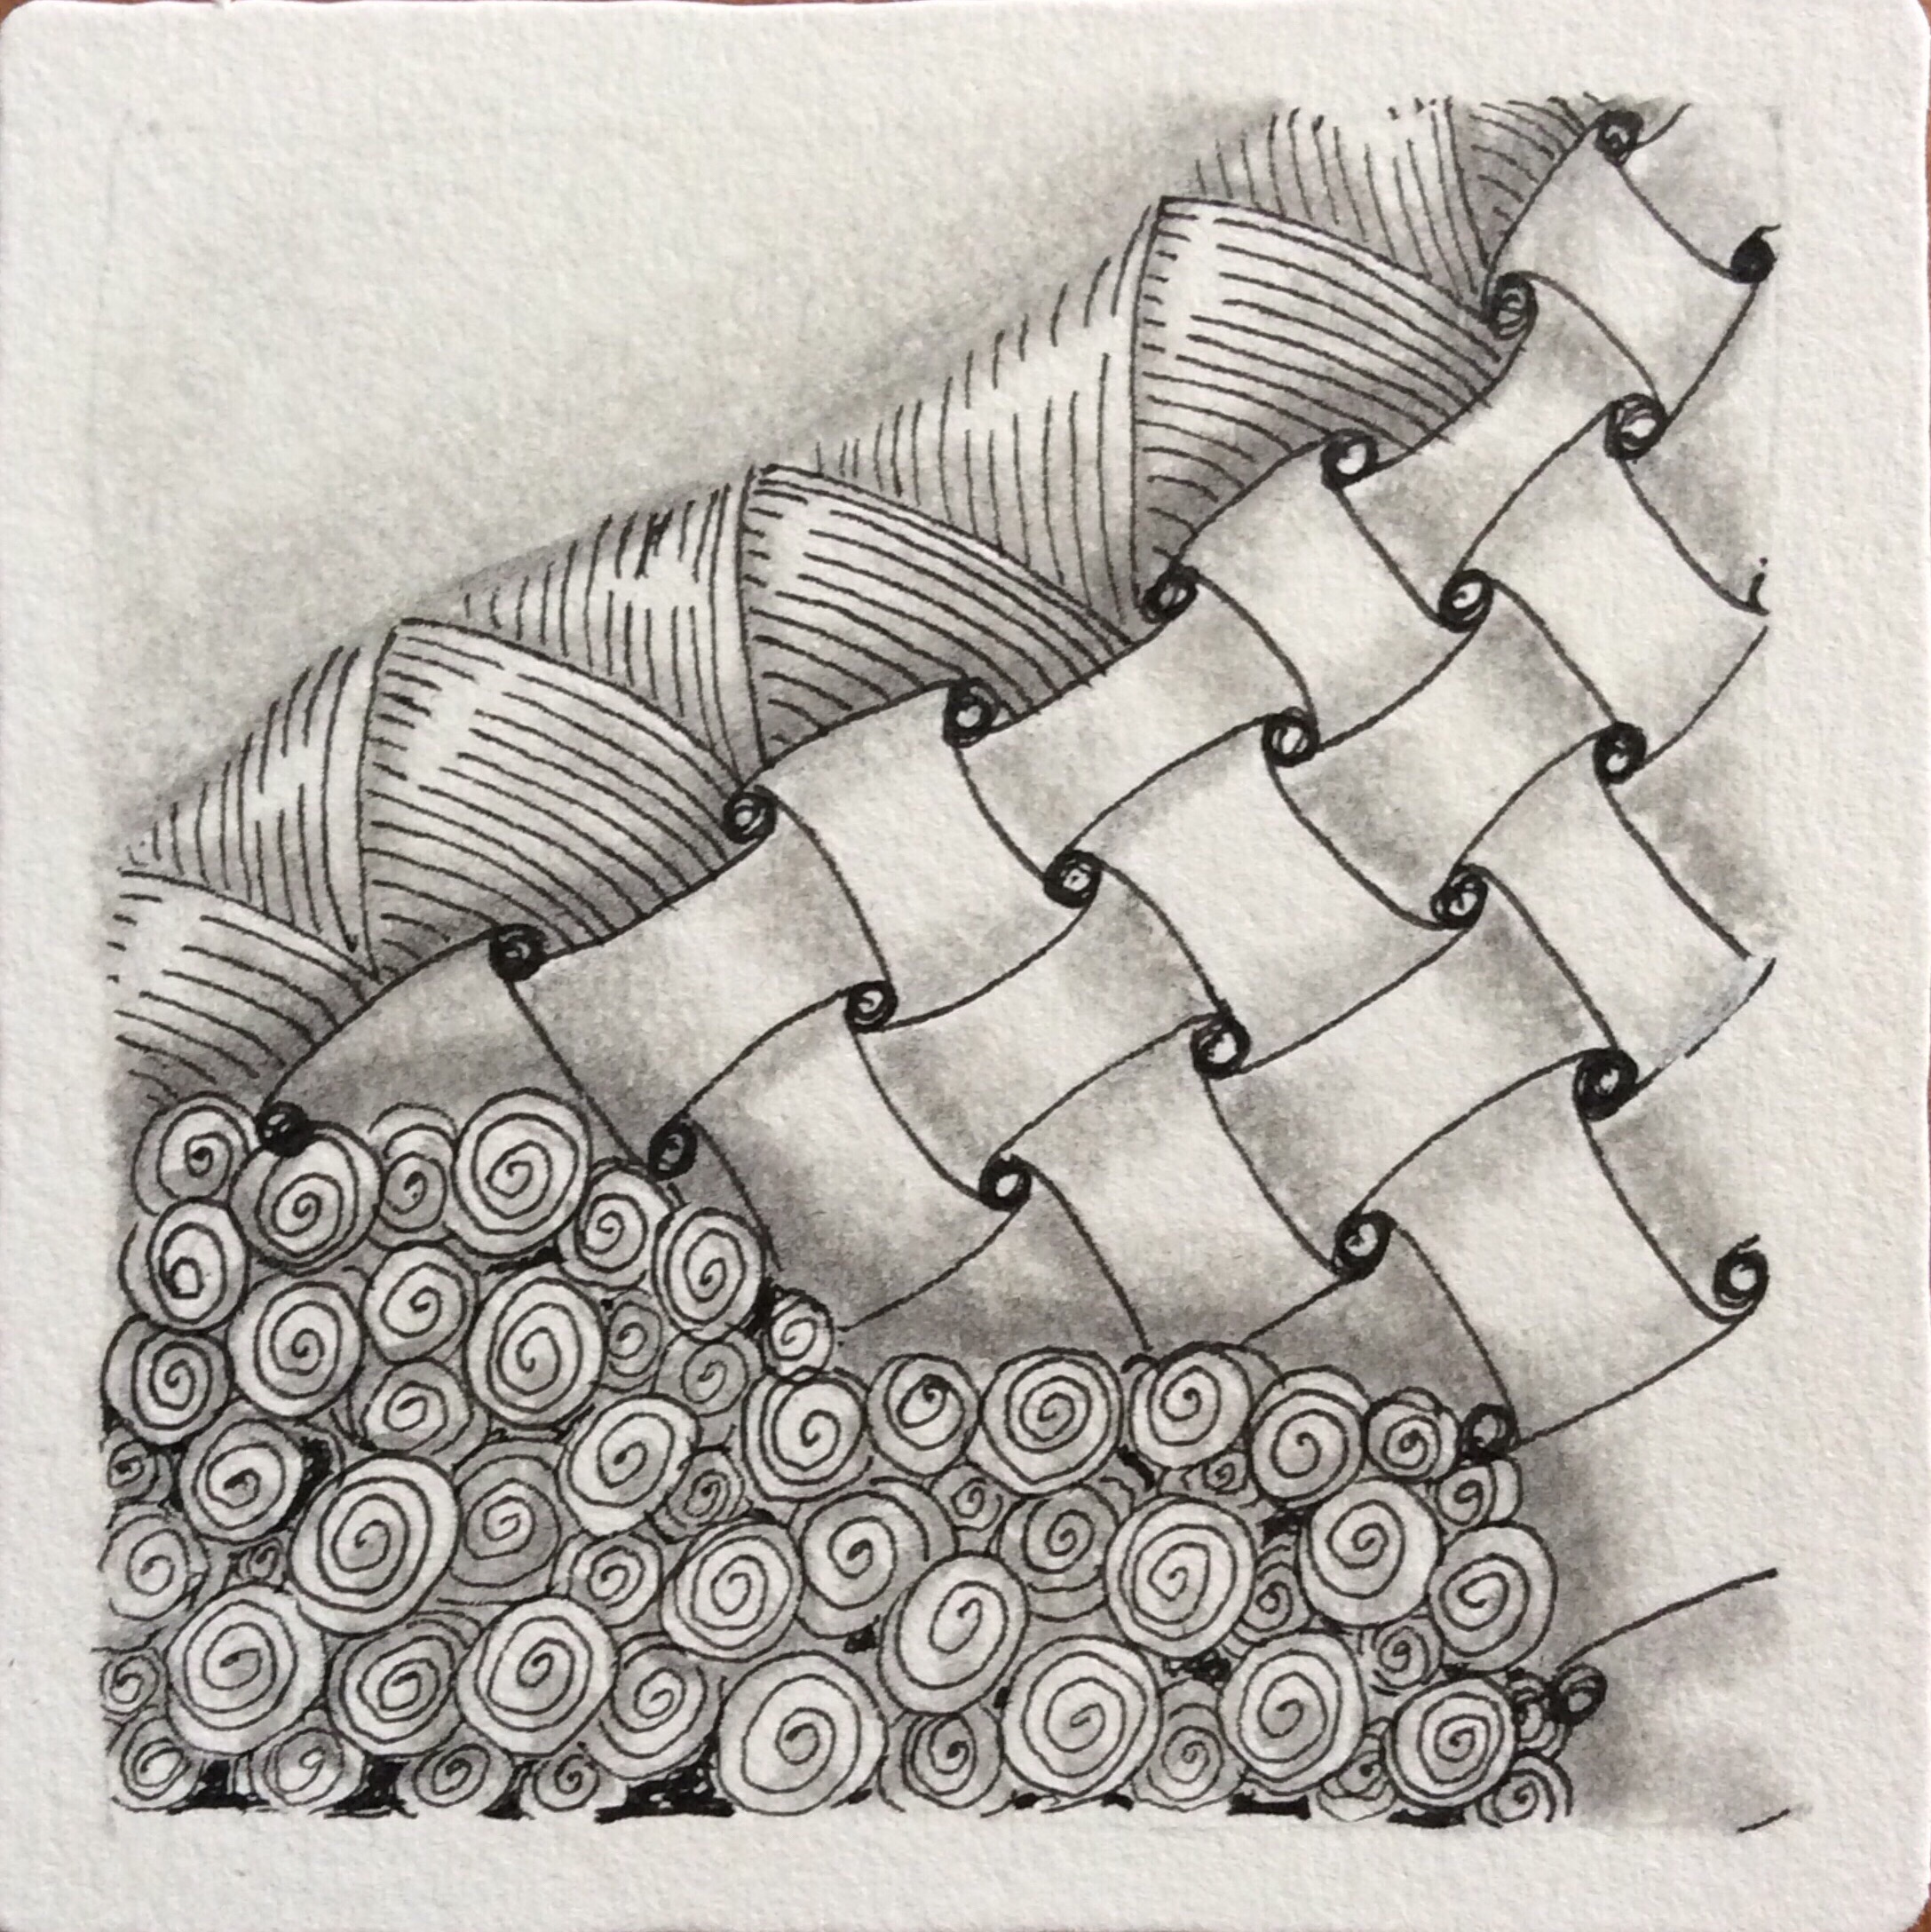
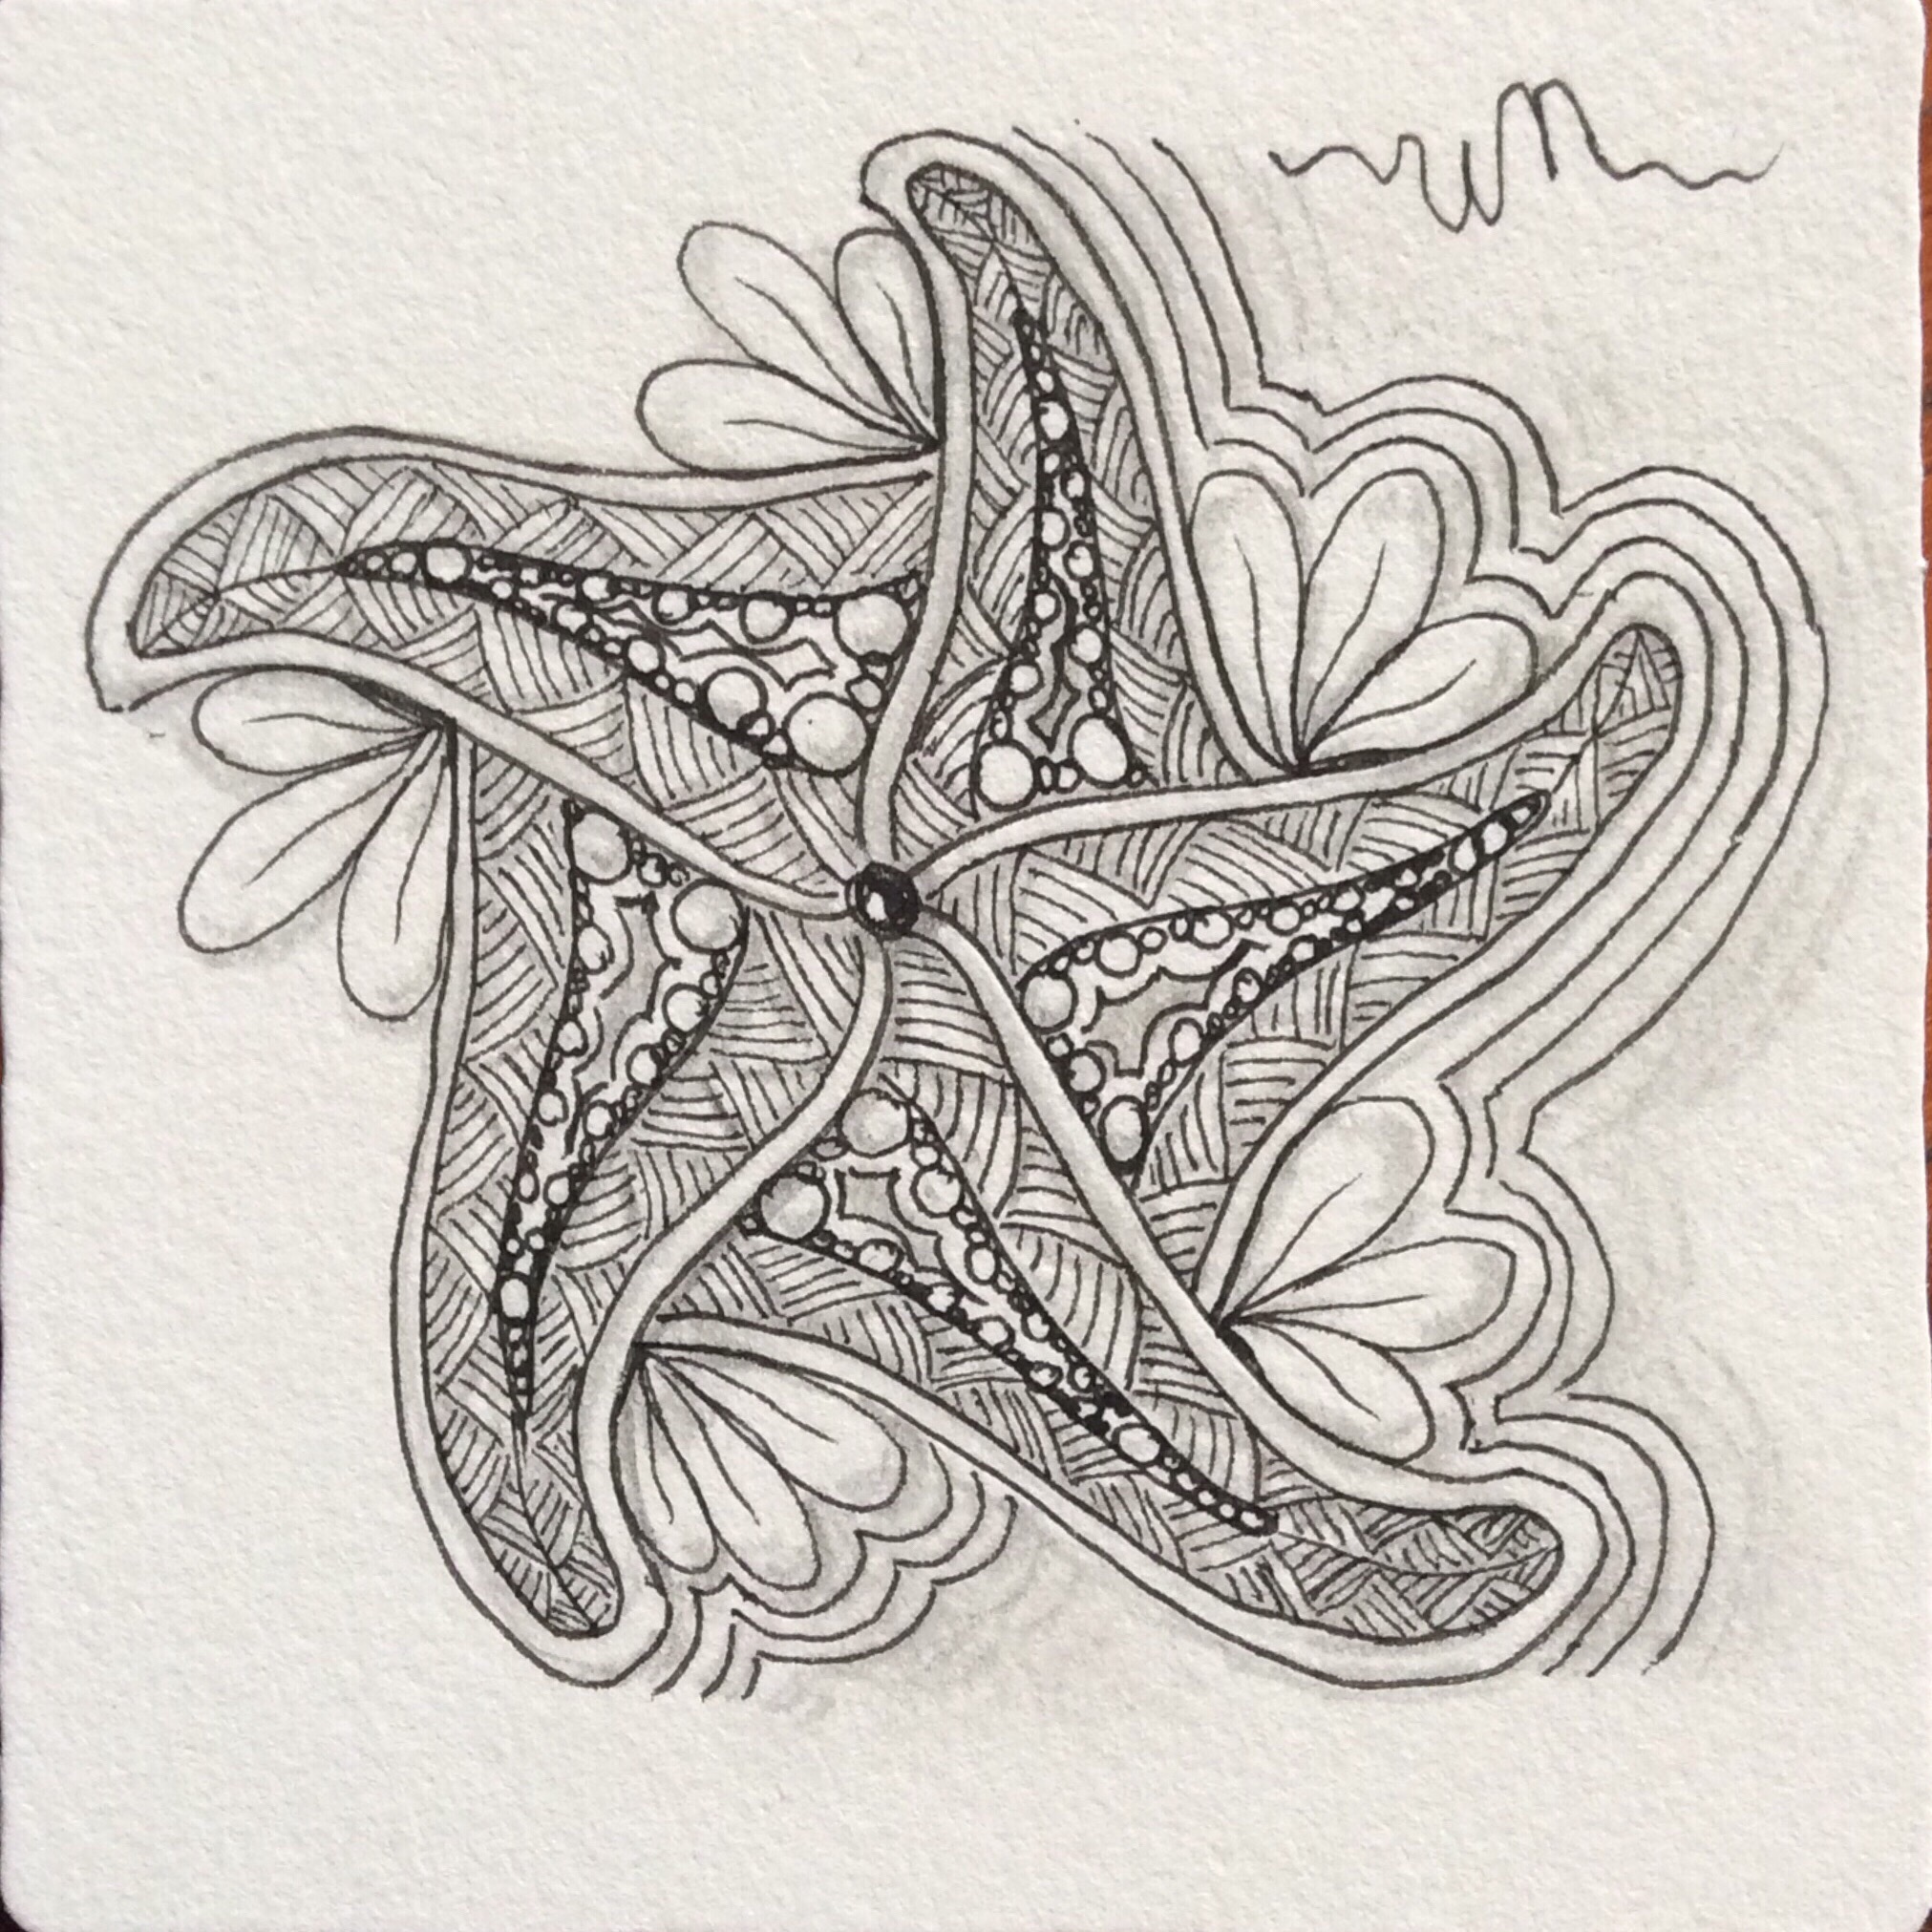
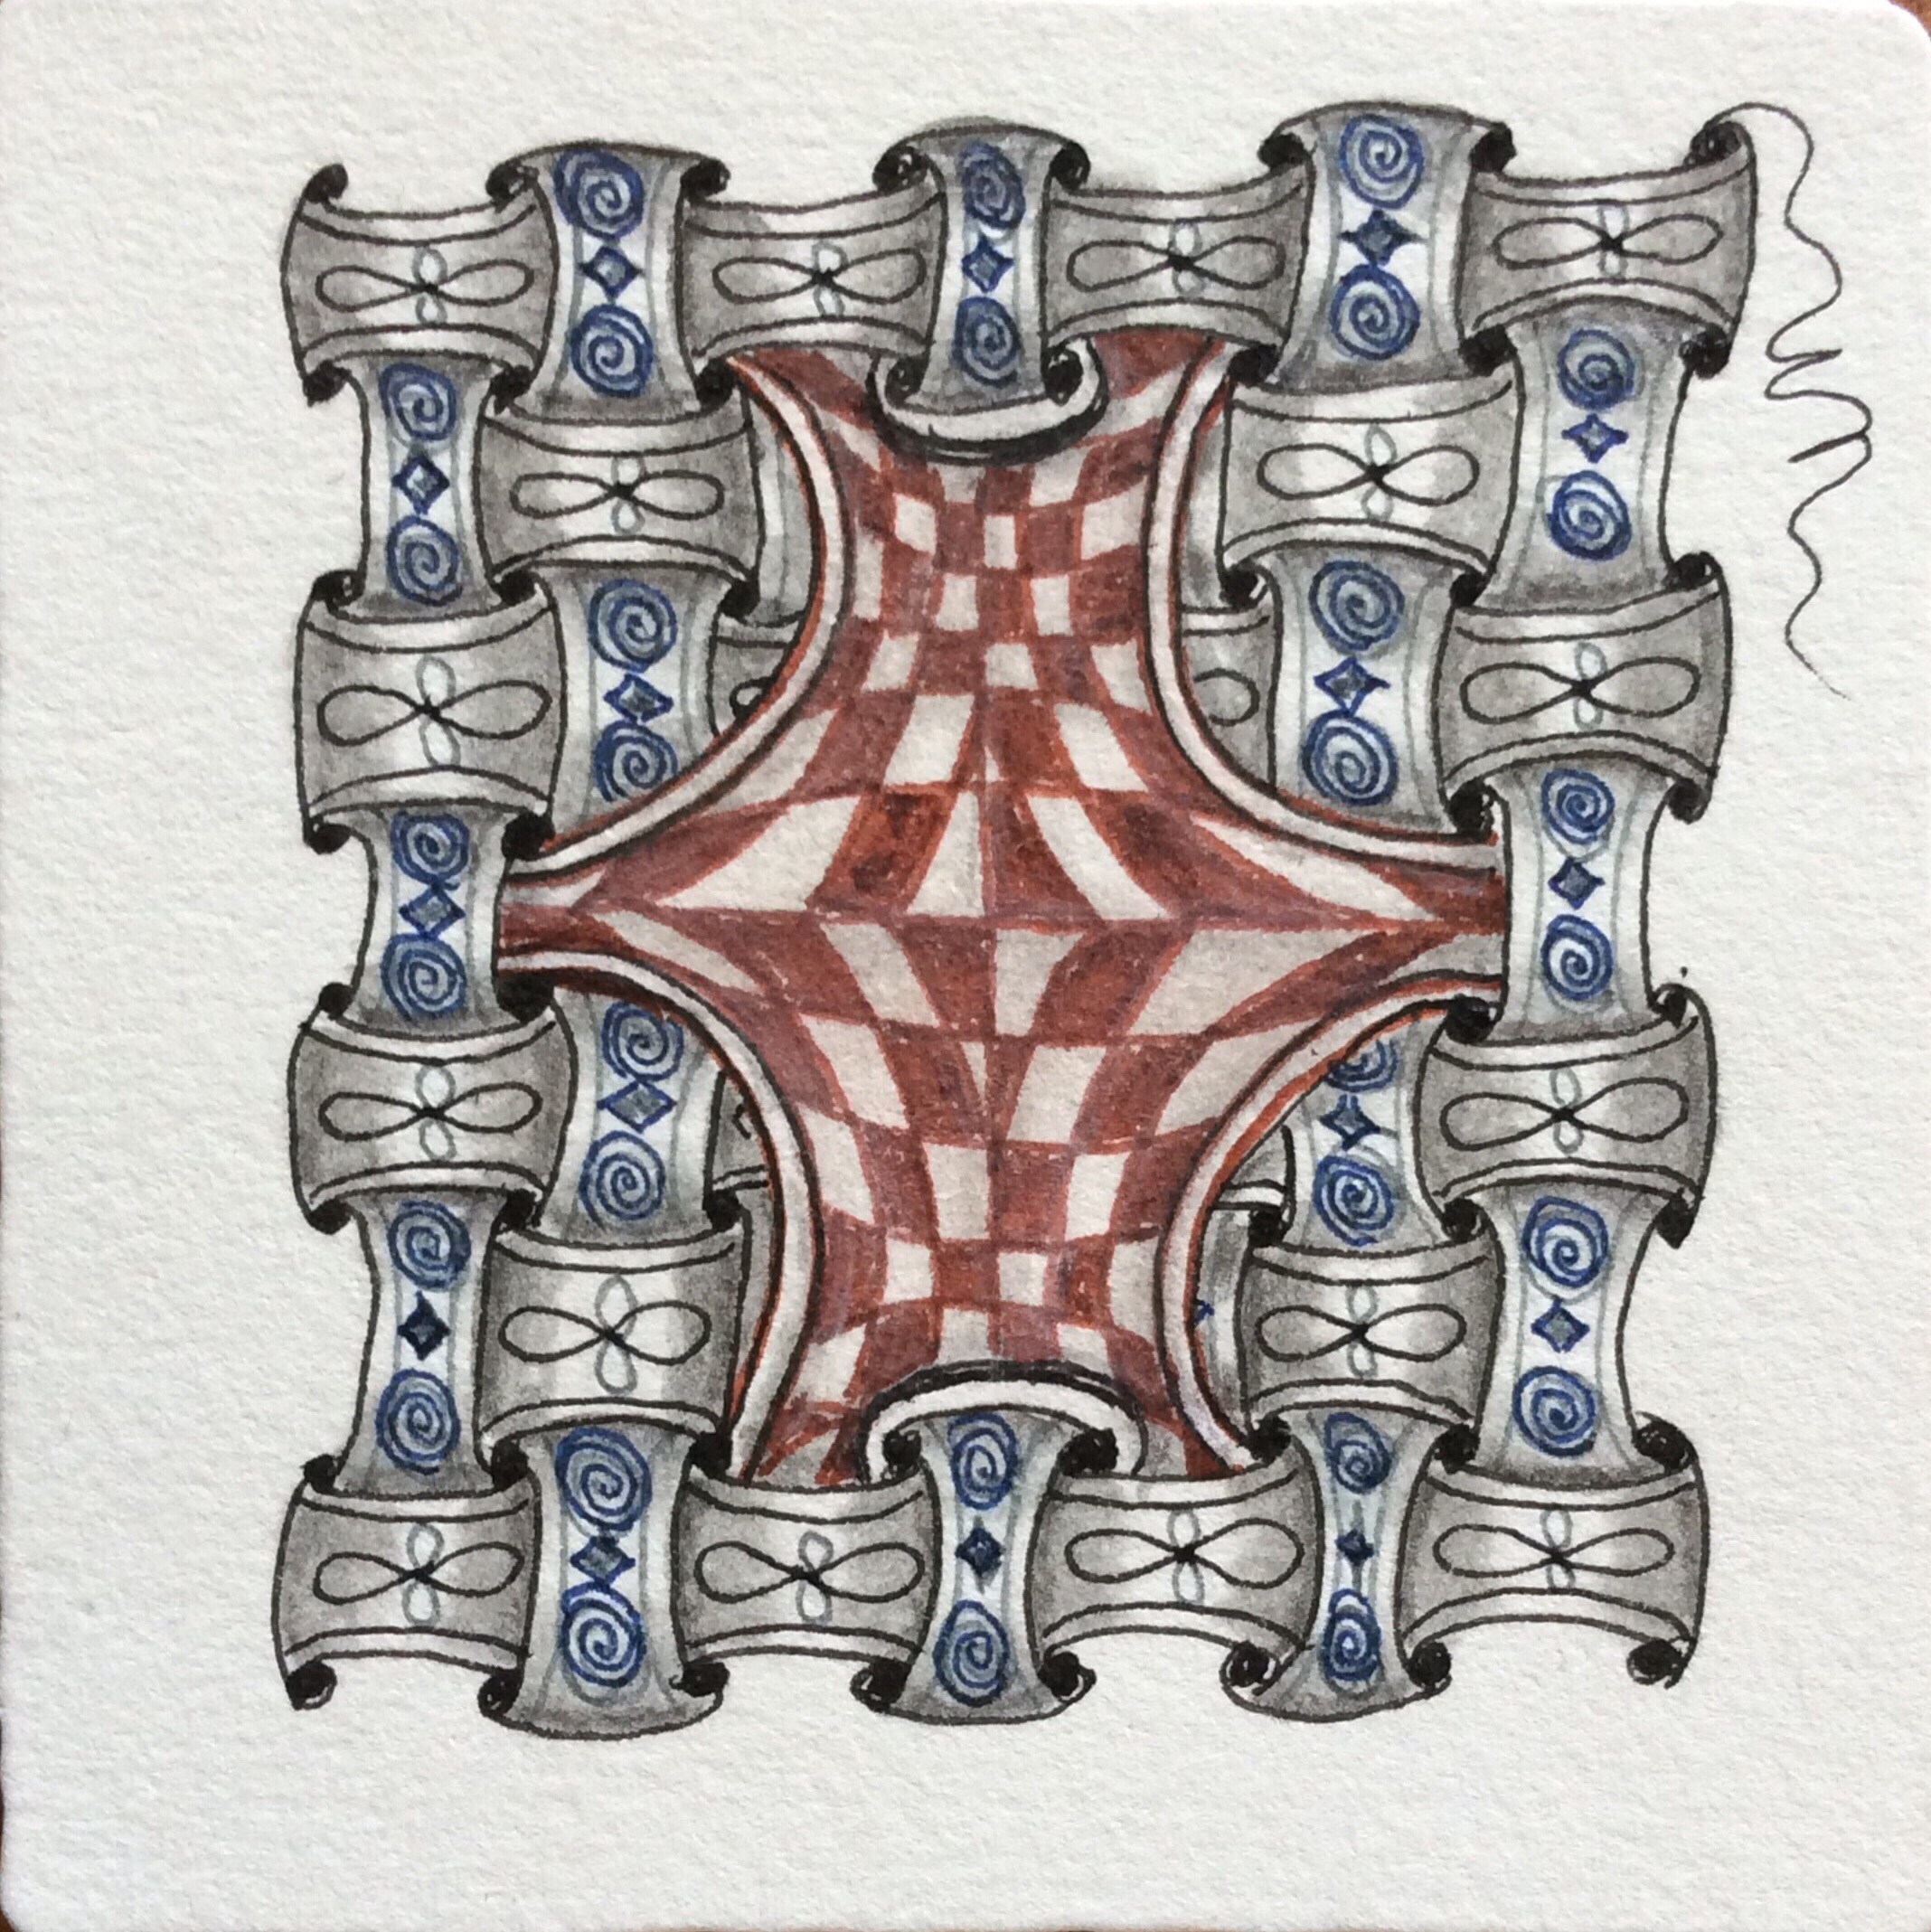
Only seven of the basic twenty-one tangles introduced in the first six chapters were used to create these four tangled tiles. One tangle–the checkerboard-like Knights Bridge–is used so often that I forgot that it wasn’t introduced in the Primer at all! It was introduced very early in One Zentangle a Day, by Beckah Krahula, the book that introduced me to Zentangle. (Incidentally, Ms. Krahula’s book was published in 2012–four years before the Zentangle Primer, Vol. 1 came out.) 

The order of things in the Primer allows the tangler to build artistic and Zentangle techniques as well as an arsenal of patterns that naturally spring forward during a meditative tangling session. Four basic patterns are introduced in the first chapter, three more in the second, one “correction” pattern in Chapter 5, and fourteen (15, if you count two versions of Flux separately) in Chapter 6, with the third through fifth chapter dedicated respectively to strings, shading techniques, and creative means of turning mistakes into new tangling opportunities. All of this information is presented using only the first seven tangles. The purpose is to not only show the abundance of creative tiles that can be produced by only seven patterns, but to also explore artistic techniques and elements of the Zentangle Method© and philosophy using the limited array of patterns which should become very familiar to the tangler as the lessons progress. Each lesson also encourages new pattern and design creation from two or more patterns, and provides suggestions for embellishment that make each pattern one’s own. 

Each time I work through these first chapters I try to vary the patterns I use, especially for the string and shading exercises in Chapters 4 and 5. Applying the exercises and techniques to newer or simply different patterns enhances the way I draw and use the patterns. This emboldens me to try new things with strings and with patterns new to me. Therefore, each pass through Primer provides not only new ideas for tangling, but serves as a reminder of classic drawing techniques and patterns and techniques that I forgot about as I picked up and used more and more patterns and as I developed my own style. This time through, I limited my tangling to only these first 23 patterns, concentrating on the first seven. 

(Note: The tiles above are from Chapter 6, which introduces the additional 14 or 15 patterns. As the newer patterns were presented, I concentrated on the single pattern–or combined a few consecutive patterns–presented in order up to that point. Exercises at the end of the chapter allowed more flexibility than I imposed on myself.) 

There is always the tendency to use the newest patterns as one tangles, so that “older” and classic patterns kind of fall out of memory for a while. Working through the Primer again–or just using it for inspiration or a reminder of a technique–reminds me of what has become part of my style as well as of the roots of my tangling. Mostly, it reminds me why I began to tangle and why I continue to tangle, even if I temporarily become overwhelmed with possibilities and the idea of meditation seems to fly out the window. 

Next week I will concentrate on one of my favorite Back to Basics chapters in the Primer–reticula and fragments. 

Until next time, Happy Tangling!

#

Posted in Zentangle

It’s a String Thing! (189)

While I concentrate on working my way through the Zentangle Primer, let me share another tangler’s post–this one on the wonderful It’s a Strng Thing weekly challenge from Adele Bruno.
Thanks for sharing your work, Cyndee!

The Tireless Tangler

Certified Zentangle Teacher, Adele Bruno has a special challenge every week on her blog. It’s a String Thing (IAST) Challenge gives a pencil drawn string to copy in pencil on your tile. Then she chooses specific tangles to use in conjuction with the string. Last, email a picture of your finished tile and Adele will post all of the entries on her blog.

I’ve been wanting to add another challenge to the blog and this was perfect for me as I do better work with some parameters! 😉 Plus, she chose my friend Jody Genovese’s “Patience” pattern to use this week!

Here’s my tile #iast189! Using tangles patience, aura-leah, CO2 and ibit. If you’d like to join the fun you can find it at Adele Bruno’s Tickled to Tangle bloghere.

View original post

Posted in Zentangle

AD690–A New Tangle from Germany

Tangler, Artist, and CZT Jutta Gladnigg has created a wonderful new pattern called AD 690. It is a great pattern that reminds me of a crochet hook, but has a story behind it of a period of gladiators and romance. According to Jutta, the pattern first appeared in the year AD 690. It is found in the Gospels of St. Willibrord of Luxembourg, and is associated with Evangelist St. Mark. Clearly, Jutta has done her research!

Jutta Gladnigg is active in the creation of new tangle patterns. AD690 is only the latest in a series of lovely designs. More of her work can be seen on the Zentangle Mosaic app, to which she is a frequent contributor. Jutta is one of the most supportive of and helpful CZT on Mosaic to newbie and experienced tanglers alike. I have learned much from Jutta. 

It is with great honor that I present to you, with Jutta’s permission, the step-out for AD690.


Larger versions of Jutta’s inset tiles follow.


And…


Here is yet another of Jutta’s pattern, drawn with the checkerboard tangle called Knights Bridge.


Although I have a long way to go before I can do AD690 nearly as well, here are some tiles in which I used this pattern for the first time (not counting the practice in my sketchbook, that is).

Enjoy this lovely and versatile tangle!

Until next time, Happy Tangling!

Posted in Zentangle

Patience: The Pattern

Recently, CZT Jody Genovese created a pattern called Patience, which was featured in this week’s newsletter from TanglePatterns.com. Jody is celebrating the arrival of Spring with this pattern based on the lovely impatiens she grows. She graciously allowed me to share her step-out for this wonderful floral pattern.


Thank you, Jody, for giving us this magnificent new tangle!

Until next time, Happy Tangling! 

Posted in Zentangle

One Simple Pattern, Many Possibilities

One simple pattern can create a small masterpiece with Zentangle. You don’t even need to plan out a drawing strategy. Just let your creativity flow.

One of the things that drew me to the art form of Zentangle is that it is art that is supposed to be unplanned. That is, there is no preconception of what the result will be. Instead of a rough draft of s subject, the starting place for a tangle is most often the string. The string itself is a random line or sets of lines that create spaces to be filled with patterns. 

With most art forms, a sketch of the subject is often drawn on the surface. For oil and acrylic painting, it is often a charcoal sketch on canvas. A light sketch often gets drawn on watercolor paper before paint is applied. For drawing, a rough graphite silhouette of the subject is sketched onto paper in such a way that the graphite can be blended into the finished design. But in Zentangle, only the drawing spaces are delimited lightly in graphite, and these boundaries are blended into the shading of the contained tangles, if the lines have not disappeared entirely into the designs. 

At first, new tanglers learn a few patterns at a time. The first pattern taught in the Zentangle Primer and in most workshops is Crescent Moon. It is a simple pattern consisting of an inked in half circle and half halos, or auras. Auras are added individually until no more can be added to one of the half rounds. Then a sort of “collective aura” continues the effect. 

Without shading, Crescent Moon doesn’t seem to have much to recommend it. Even with shading, it may not look like much. So why is it the usual “first pattern” taught? For several reasons. First, it introduces drawing within a small space. It is a pattern that can be easily drawn all along a boundary. The ladybug shape is small enough for easy inking in. Because of the shape, if the ink fill goes beyond the outline, the shape can be made a little bigger to accommodate the slip of the pen, especially if the shape is filled in before an aura is added. 

Second, adding one aura gives the individual pattern a bit more flair. Both the “ladybug” and the aura are quick and relatively easy to draw. Adding more auras until the area is filled makes quick work of filling the space.

Third, the concept of drawing an aura around shapes comes up over and over in embellishing various basic patterns. Tanglers refer to this as “auraing,” and use it frequently to add interest, to help a delicate pattern stand out, or to separate one pattern from another. Auras are generally kept as even as possible around an object–at least, at first. Also, drawing auras differtly–for example, several auras around one element before moving on to drawing auras around another–can yield a very different effect.

Fourth, Creacent Moon can be shaded in a variety of ways to give it different looks. Note the different effects produced by a combination of different ways of auraing and different shading. Suddenly, a simple Crescent Moon section becomes so much more! 

What else can be accomplished with this single and foundational pattern? The auras can be omitted, for one thing, and the ladybug shape can be surrounded by something different, such as straight lines radiating from the basic shape. Instead of filling the shape with black, it can be filled with interior auras or different patterns. The sky’s the limit on possibilities! 


Until next time, Happy Tangling! 

Posted in Zentangle

No Mistakes??

Working along on Lesson 6 in the Zentangle Primer, I drew two tiles of the next pattern, Rixty, and uploaded them to the Zentangle Mosaic app as I finished them. The first was a monotangle to which I decided to add color; the second featured Rixty, but had other tangles included. Rixty isn’t my favorite patterns, but I tried to do a good job just the same, even if I wasn’t concerned about drawing pretty tiles.

There is a major flaw in both of these tiles, although the compositions are barely affected.  But I know the problem, and so do other tanglers who use Rixty.

   
The problem? The triangles are all upside down!

A few weeks ago, I was playing with the inverted triangles and morphing them into shamrocks to see if I could use them that way for a composition. The problem is that the inversion apparently “wrote over” the part of my brain that knew what Rixty is supposed to look like. Today, even though I reviewed the step-out and drew them correctly in a practice sketch, I turned them around again when I drew the tiles and never realized why they felt wrong while I was drawing them. The “wrongness” hit me as I was placing the tiles in my album.

Now, a very important tenet of the Zentangle philosophy is that there are no mistakes. If we perceive an error, we should view it as an opportunity to make something new or different. The idea is that there are no do-overs in life–not like a re-take for a TV show or movie–so that all we can do is make the most of what we did by accepting it, creating something new or different, and moving on. In some instances, there is a “fix” that can be applied to mask the problem area,  but in most cases we need to use the inadvertent new pattern and use it in some way that lets us finish the work.

The “moving on” part doesn’t really relate to my new-styled Rixtys since I wasn’t even aware at the time that I had erred. The error neither stopped me in my tangling tracks nor affected the way I drew the rest of the tangle. In actuality, I created a tangleation of Rixty in the way I drew it. A tangleation is a change to an established pattern that adds something or changes part of the basic pattern concept. Despite the fact that it wasn’t my intent, I made a big change to the construct of Rixty. That others recognize it as Rixty regardless of the triangle orientation may add interest for tanglers who know the basic idea of Rixty. It could very well be that viewers think this was deliberate. And so, the error is not important, and maybe shouldn’t be considered an error at all.

Zentangle is such a forgiving and versatile art form. No wonder it is so relaxing! It is next to impossible to make a mistake!

Until next time, Happy Tangling!

Posted in Zentangle

Back to Basics 2

Ten days ago, I talked about being so overwhelmed with so many new tangle patterns being developed and shared. I decided to spend time working on the basics of Zentangle and a more manageable number of patterns. I pulled out my handily shelved Zentangle Primer and started from the beginning, as though learning tangling for the first time. I have shared some of my Back to Basics work here and on the Zentangle Mosaic app, and I have temporarily removed myself from the world of Zentangle challenges (not that I take part in more than two or three!).

It has been an interesting week of tangling for me, as I draw for the lesson exercises, breaking things up with an occasional meditation with greater complexity. But I continue with the Basics to get my tangling back on track. 

‘Nzeppel practice
Striping practice
Crescent Moon exercise

The ‘Nzeppel I shared previously, as I got it almost perfect with input from friends on Mosaic. The Striping exercise is the result of a “teaching session” in the Primer. The Crescent Moon tile is the result of an exercise challenging the tangler to shade Crescent Moon in several different ways. Interestingly, today a T3 (Tangles, Tips, &a Techniques) video was posted on the Mosaic app showing three specific things that could be done with Crescent Moon to make it look different on each tile. A lot was covered that I had recently completed in my tile, but there was a lot more information that kept me interested and following along. The resulting tiles, each containing only the single pattern, made me realize that I don’t need all those new tangles that are constantly showing up to produce something special. 
Three ways to tangle and enhance Crescent Moon

Today I practiced Crescent Moon as monotangles (one pattern tiles) three ways. I started practicing a tangle I am not especially fond of–Rixty–but am not ready to share where that pattern is taking me. It happens to be the next pattern introduced in Lesson 6 of the Primer. It’s a long chapter and will take some time to complete, even though none of the patterns are completely new to me. After all, this is not my first time through the book. Each time I go through it or check a step-out or seek inspiration, I learn something new or see the pattern from a different perspective. 

There is so much to learn from practicing the art of Zentangle, not the least of which is meditation and relaxation. I hope to be tanglingin the physical company of others soon, as I will be attending a certification seminar in late April (2017). Afterwards, I hope to bring Zentangle, its methods, and its philosophy to people here on Sint Maarten who would find it beneficial to their health and outlook.

If you are in or near Sint Maarten, join me for a tangling session! 

Until next time, Happy Tangling!

Posted in Zentangle

So Why Am I Tangling Small Again.

After a slew of back to basics tiles that addressed exercises in the Zentangle Primer, and after doing my best to tangle larger, I drew my first “for fun” tile in what feels like ages! I started with a freehand string drawn in turquoise ink with a Pentel Art Brush. This created thicker strings than I am used to using. The idea came to me after o used a pre-watercolor-augmented tile for the  Valentangle 2017 challenge on Facebook last month. I thought it might be funny. To see where something similar, but in a single tont of a color was used for a string.


The freehand and freely drawn string created some marvelous spaces that could be filled with tangles. I started with a miniature Way Bop, filling out the space with Tipple and Msst. Next, I added the Mooka, surrounding it with black space as though it were a silhouette. After adding 2 Flee flowers (like cone flowers or thistle) in the lower center (one is tiny and can barely be made out) and embellishing the area with Queens Crown,  I randomly inserted Floo, Flux, a paisley, a favorite triangular Fragment, and those crossing wavey lines at the lower right into the remaining areas. In short, I had a lot of fun working with recently learned patterns as well as older ones in my collection of patterns. 

The problem: I really did mean to draw larger. I even promised myself the next pattern after the minuscule Way Bop would be big. Well, you can see where that got me. And the rest of the patterns seemed to refuse to tower over the ones already drawn, once more, I was stuck with patterns draw much smaller than intended. 

Yet, all the patterns look (to me) like they belong where they are and in their drawn size. Amazingly, they seem to go together just as they are. As an experiment, this turned out surprisingly well — if you like this sort of thing, that is. 

Thankfully, I do like the unexpected. I like the way the turquoise string looks almost like a ribbon tossed on the tile between uses in someone’s hair. The Way Bop could be a rare and exotic tropical starfish-like creature needing a constant stream-like water supply and plenty of pebbles to hid in. The surrounding flowers might thrive on the humidity provided by escaping water vapor.  Other sections serve as decoration for the flowers and fish tank. 

Posted in Zentangle

A Little Help From My Friends

For the past ten days or so, I have been re-visiting patterns I learned early in my Zentangle “career,” but have stopped using. Some fell into disuse because I simply didn’t like them; others because I couldn’t make them work for me; still others for reasons I have forgotten. Using the Zentangle Primer to guide me, I simply started at the beginning.

Yesterday, a Primer exercise (#zp1x16) directed me to draw a tangle I either don’t like or have trouble drawing to my satisfaction. I selected a pattern that looks simple but that gives me trouble, ‘nzeppel. 

‘Nzeppel

‘Nzeppel is a simple enough looking pattern that is drawn in a grid of exes. But it has given me a lot of trouble because I can’t get the corners to curve instead of come to a point. This tile shows my best effort in the 10 or 11 months I have “known” it. I posted it on the Zentangle Mosaic app with an explanation, figuring that was the end to it for a while. I was incredibly surprised to learn how many experienced tanglers–individuals whose work is incredibly artistic and beautiful–had difficulty with this pattern as well! Their admission left me feeling so much less klutzy! I am so grateful to them all.

Some CTZs offered suggestions (privately) on how to draw ‘nzeppel better–tips that they used themselves. These made me think about the pattern differently. So I redrew it. 

Better ‘Nzeppel.

This is much closer to the effect I was trying to create all these months. It reinforces my feeling that tangling with a group has many significant advantages over tangling alone. Other tanglers can offer advice based on personal experience or contact with other tanglers. It also made me realize that I am not simply having a unique and personal difficulty with a simple pattern. So often, the most complex patterns turn into an easy exercise (my experiences with Way Bop before seeing the step-out, for example), while the simple, easy-looking patterns are challenges for even artistically gifted tanglers. It is such a relief to know that I am not simply an untalented klutz with a pen and pencil. 

Several of the tips and suggestions I received after uploading the first tile yesterday included references to personal difficulties with the pattern and the tip or instruction that yielded that “Aha!” moment. But it came from group participation and sharing. 

And sharing is just another important aspect of Zentangle. We all get by (and get better!) with a little help from our friends!

If you live on the island of St. Martin, in Sint Maarten, or are planning a visit to the island, let’s get together and tangle under a palm tree or beach umbrella by the sea! 

Until next time, Happy Tangling! 

Posted in Zentangle

Mosaic App Honor

Yesterday was a big surprise. My morning email brought a request from Zentangle.com to use one of my tiles for part of a Mosaic App T3 (Tangles, Tips, & Techniques) post for St. Patrick’s Day. Shocked out of my mind, I agreed, of course, thanking them for the honor in my reply.

A St. Patrick’s Day Shamrock Way Bop tile.

Nothing fancy or exciting, I know. It was the idea that was being used, although maybe the shamrock doing a jig got someone smiling. 

I love the tangle called Way Bop, and waited somewhat impatiently for months for a step-out to come out. I tried to mimic Way Bops as drawn by artists and tanglers for the Zentangle Mosaic app and for challenges all over the Internet. I came close, but the procedure I used was convoluted and the results were far from satisfying. I was certain there was an easier way to draw Way Bop, and that I would have to wait until the step-out was released. 

About a month ago, Zentangle released the step-out for Way Bop (link to my post with step-outs) along with another step-out of a heart-shaped variation. I must admit that I was excited beyond words. I started drawing nice, conservative Way Bops, but realized I have a long way to go before I can draw ones that look like the fancy ones appearing all over tangling blogs and in Mosaic. So I started fooling around. Here is one of my favorites, called Anger Management. 

Anger Management
  And another that was inspired by a hibiscus outside of my patio door. 
Hibiscus — sort of

Way Bop is an amazingly versatile tangle that looks best when it is used as a structure for filling in with other tangles and “fragments.” But it is a flexible enough pattern to be morphed into all sorts of fun and modernistic shapes. 
After tangling a heart-shaped Way Bop for the Valentangle 2017 challenge on Facebook, I figured other shapes could be made from the pattern, too. So last week I started fooling around with shamrock shapes. Here are some examples–nothing fancy or beautiful, but they definitely are shamrock shapes filled in with other tangles or shapes. 


If you can’t tell, I love Way Bop! If you need the original step-out mentioned above, click on the link in the second paragraph. It takes you to the post that contains both the regular and the heart-shaped variation step-outs. 

Where can Way Bop take your tangling? Anywhere you want it to go, of course! 

Until next time, Happy Tangling!