So, it’s the last day of 2019, and I have been thinking about high focus tangling. A lot.
A tangle pattern does not need to be difficult to be high focus. Any stroke or combination that is difficult for you (not necessarily for someone else) is high focus, at least initially. For me, any pattern that requires auras is high focus. Even when I maintain my focus, strokes don’t always come out the way I want them to. But that’s OK, because there are no mistakes with Zentangle.
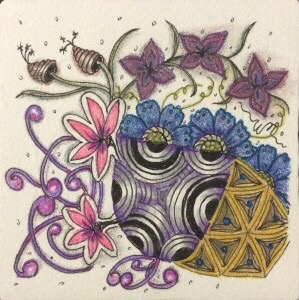
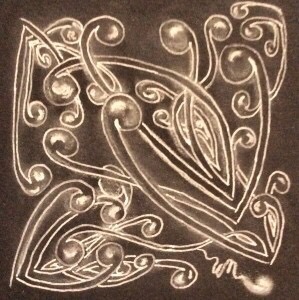
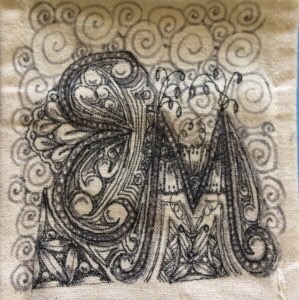
One of the loveliest projects to come out of Zentangle HQ is something called Embedded Letters, tagged #EmbeddedLetters. This project relies heavily on auras. Interestingly enough, even if the auras aren’t perfect, and even without shading, the result is lovely. Here are a few examples of my own embedded letters.
As you can see, they are not perfect, yet the people for whom they were created seem to love them. And I have gone on to embed whole names.
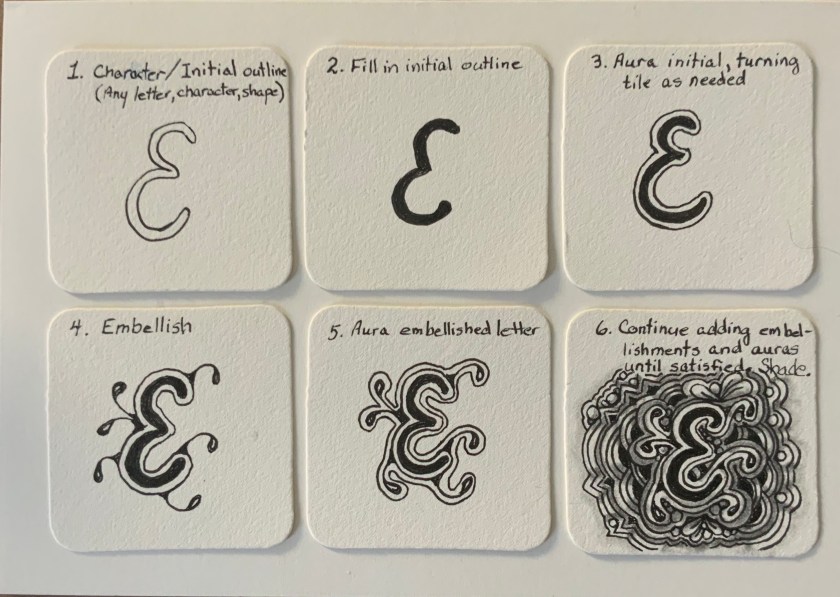
Here is how to get started with your own embedded letters project.
1. Create an outline of the letter (or word) you want to embed.
2. Fill in the outline.
3. Aura around the filled letter(s).
4. Add some embellishments. The easiest is to add a few fescue around the edge. Weight the bottom of the fescue to give it a feel of old fashioned engraving. Add as many as you like, wherever you like.
5. Aura around that embellished layer.
6. Add another layer of embellishments, maybe adding some flux and perfs (or pearls) to fill in spots too small to add other patterns to. Then aura that. Or just add several auras. As you gain confidence, add bits of other patterns. Whatever you do will look great.
Lastly, shade as desired–or don’t shade at all. Either way, you have completed a project that took a bit of focus, a few simple strokes, and a lot of yourself.
Tangling isn’t difficult, but it does take mindfulness to keep strokes even or balanced. The mindfulness is meditative and relaxing. Using the whole 8-step Zentangle Method, from gratitude for time, place, materials in step 1, to appreciation of your accomplishment in step 8, helps to calm your anxieties and stress, at least for a little while.
Happy 2020 to you and yours. As always, Happy Tangling!
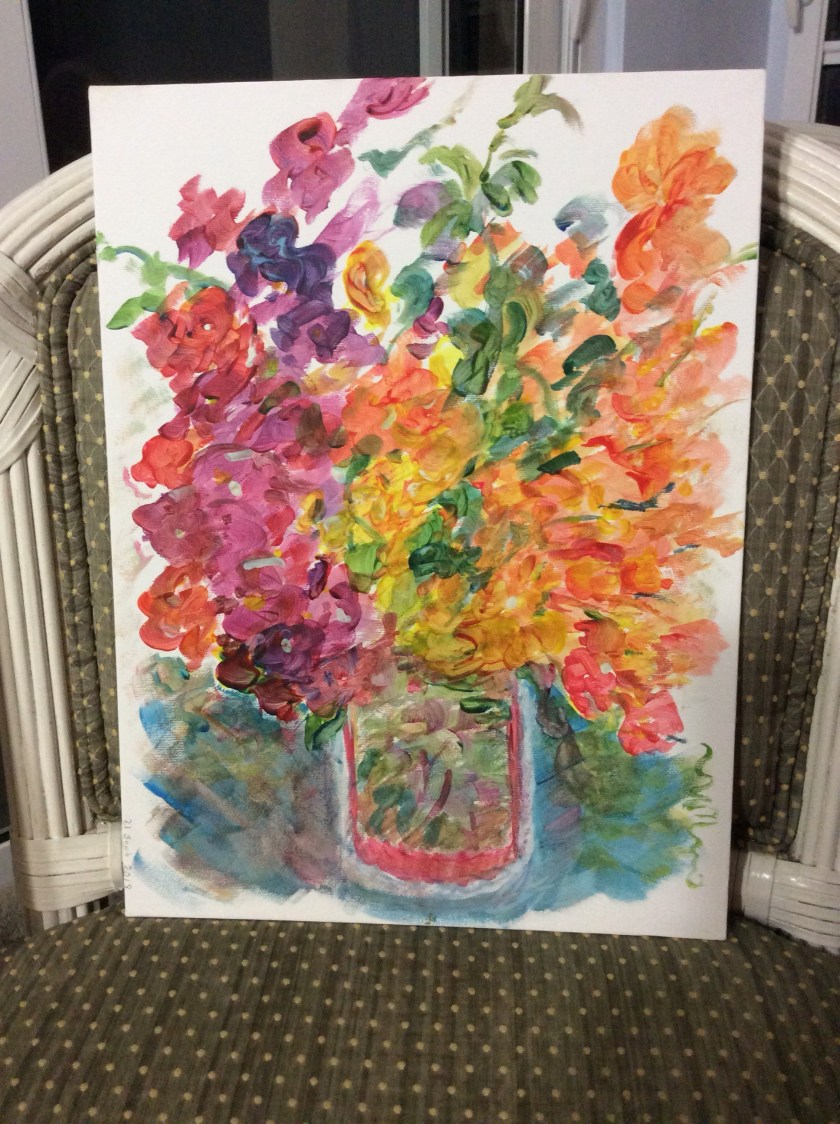
Tonight, I did something different and fun. I attended a sip’n’paint event to help sponsor talented SXM (Sint Maarten) kids to travel to NYC for a week to learn not only more about their particular talent ( singing, dance, painting, etc.) but to also take a workshop about the business end of the professional artist. The painting event was led by world renowned St. Martin artist Sir @RowlandRichardson, who showed us how to paint a still life of three colors of bougainvillea in a simple jar vase.
We used exactly three colors–blue, red, yellow–and white to produce a lovely pallet of colors. Here is a photo of my work tonight. How many distinct colors can you see? Certainly more than the three we started with!
This is not to highlight my lack of talent with oil paint, but to show the influence of my Zentangle work and patterns on Zentangle-inspired art ( ZIA). In essence, I tangled a painting of real-life bougainvillea in a simple jar-style vase. Not only that, but it’s my first genuine still life work. That is, working from the real thing instead of a photo.
Note the number of poke leaf and flux in this painting, adding dimension to the simple patterns through how the paint was applied.
I will never be a famous artist, but I am really proud of this silly little piece encouraged by a famous artist, but completed because of the Zentangle Method®️. Tangling is so simple and versatile that it adds richness and texture to a piece that would have been completely flat and dull without my grasp of Zentangle patterns and techniques.
You may not be into Zentangle for the stress reduction, but if you are an artist, the method is definitely worth exploring for its patterns and unique shading techniques. I am proud to be a CZT (Certified Zentangle Teacher). Thank you, @MariaThomas and @RickRoberts! Without your influence, even a master artist like Sir @RolandRichardson could not have helped me do any better than apply dabs of color and hope for the best!
Yes, I am feeling guilty! It has been weeks since I posted. So much has been going on…
Did I mention that I got a job? It’s half-time, on contract, and tons of fun! I get to work with students, teaching them better ways to study, or tweaking their current study skills. A few weeks ago, I even gave a Zentangle workshop for students at the American medical school here (my employer) and a few were young people I helped (hopefully) and encouraged to attend.
The purpose of the workshop was to provide students with one more way to relieve stress and general anxiety. Some students were so tense that 4 Microns had to be replaced. Medical students are probably the most tense group of students under the sun.
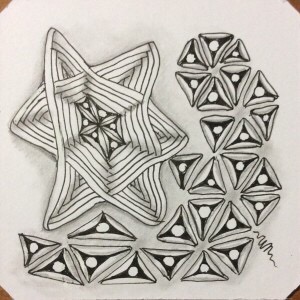
As I ran the workshop, I tangled along with them, using a really fancy overhead projector that broadcast to several monitors. Here are my versions.
We had started a third tile, but ran out of time.
We ran short of time because, close to the time of the workshop, the sponsoring department decided to push through a protocol that made the workshop part of a research project. A “before” survey, which was supposed to take two minutes, took up a quarter of an hour. Then time needed to be left at the end for the “after” survey, cutting ten minutes off the end. Still, the students left with supplies and enough information to do some tangling on their own in a very Zen-oriented way.
I really wish there had been time for a photo of the participants’ work. I saw a few tiles that were outstanding. But we go with the flow and do what we can. More workshops are going to be scheduled for the next semester that starts next month with over 200 new students.
Next post, I will share some experimenting I’ve been doing with different pens and colored pencils. You will be left with little doubt that spending just a bit more for better tools can increase your enjoyment and the satisfaction with results many times over.
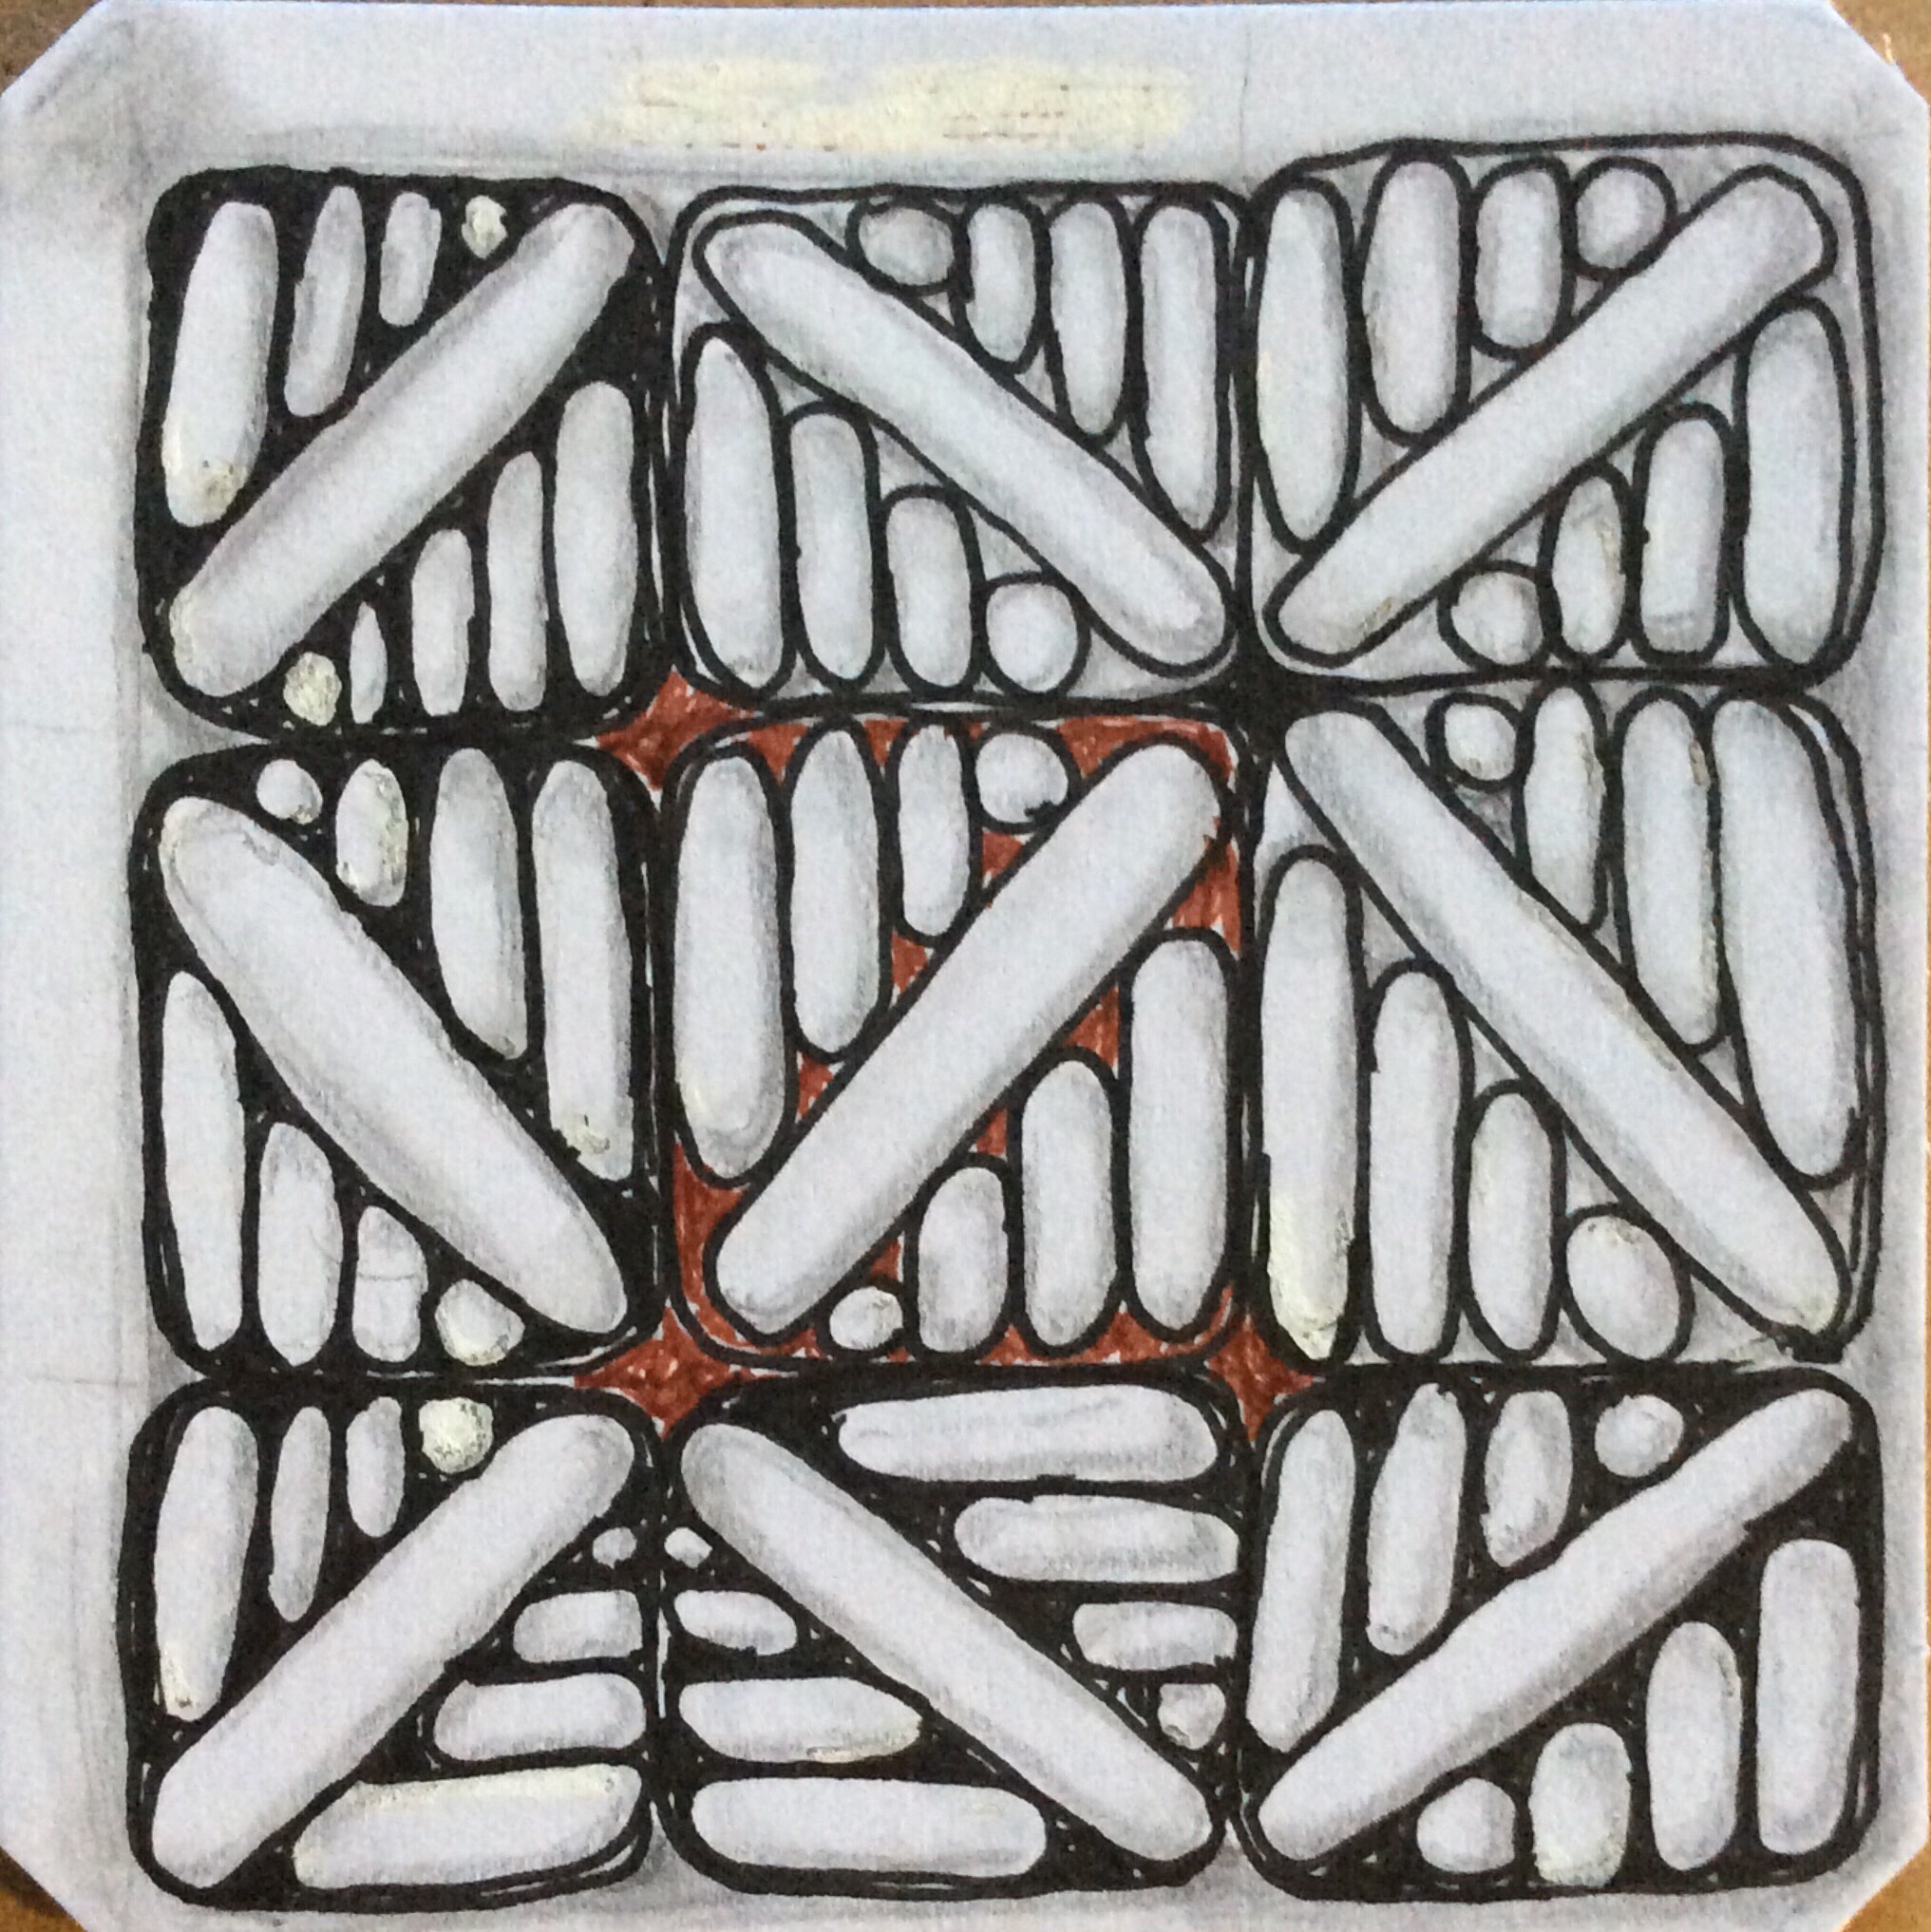
Tripoli may be a place and a fantastic vacation destination, but tripoli is also a Zentangle pattern. If you have the Zentangle® Mosaic app, you probably saw this week’s Kitchen Tabe Tangling (KTT) video on how to draw tripoli and embellish the elements. Although i have been tangling with tripoli for quite a while, the video added some new information about tripoli that I didn’t think about before. The KTT inspired me to both blog about this versatile pattern as well as to try my hand at something more creative than the mundane way in which I’ve been drawing it.
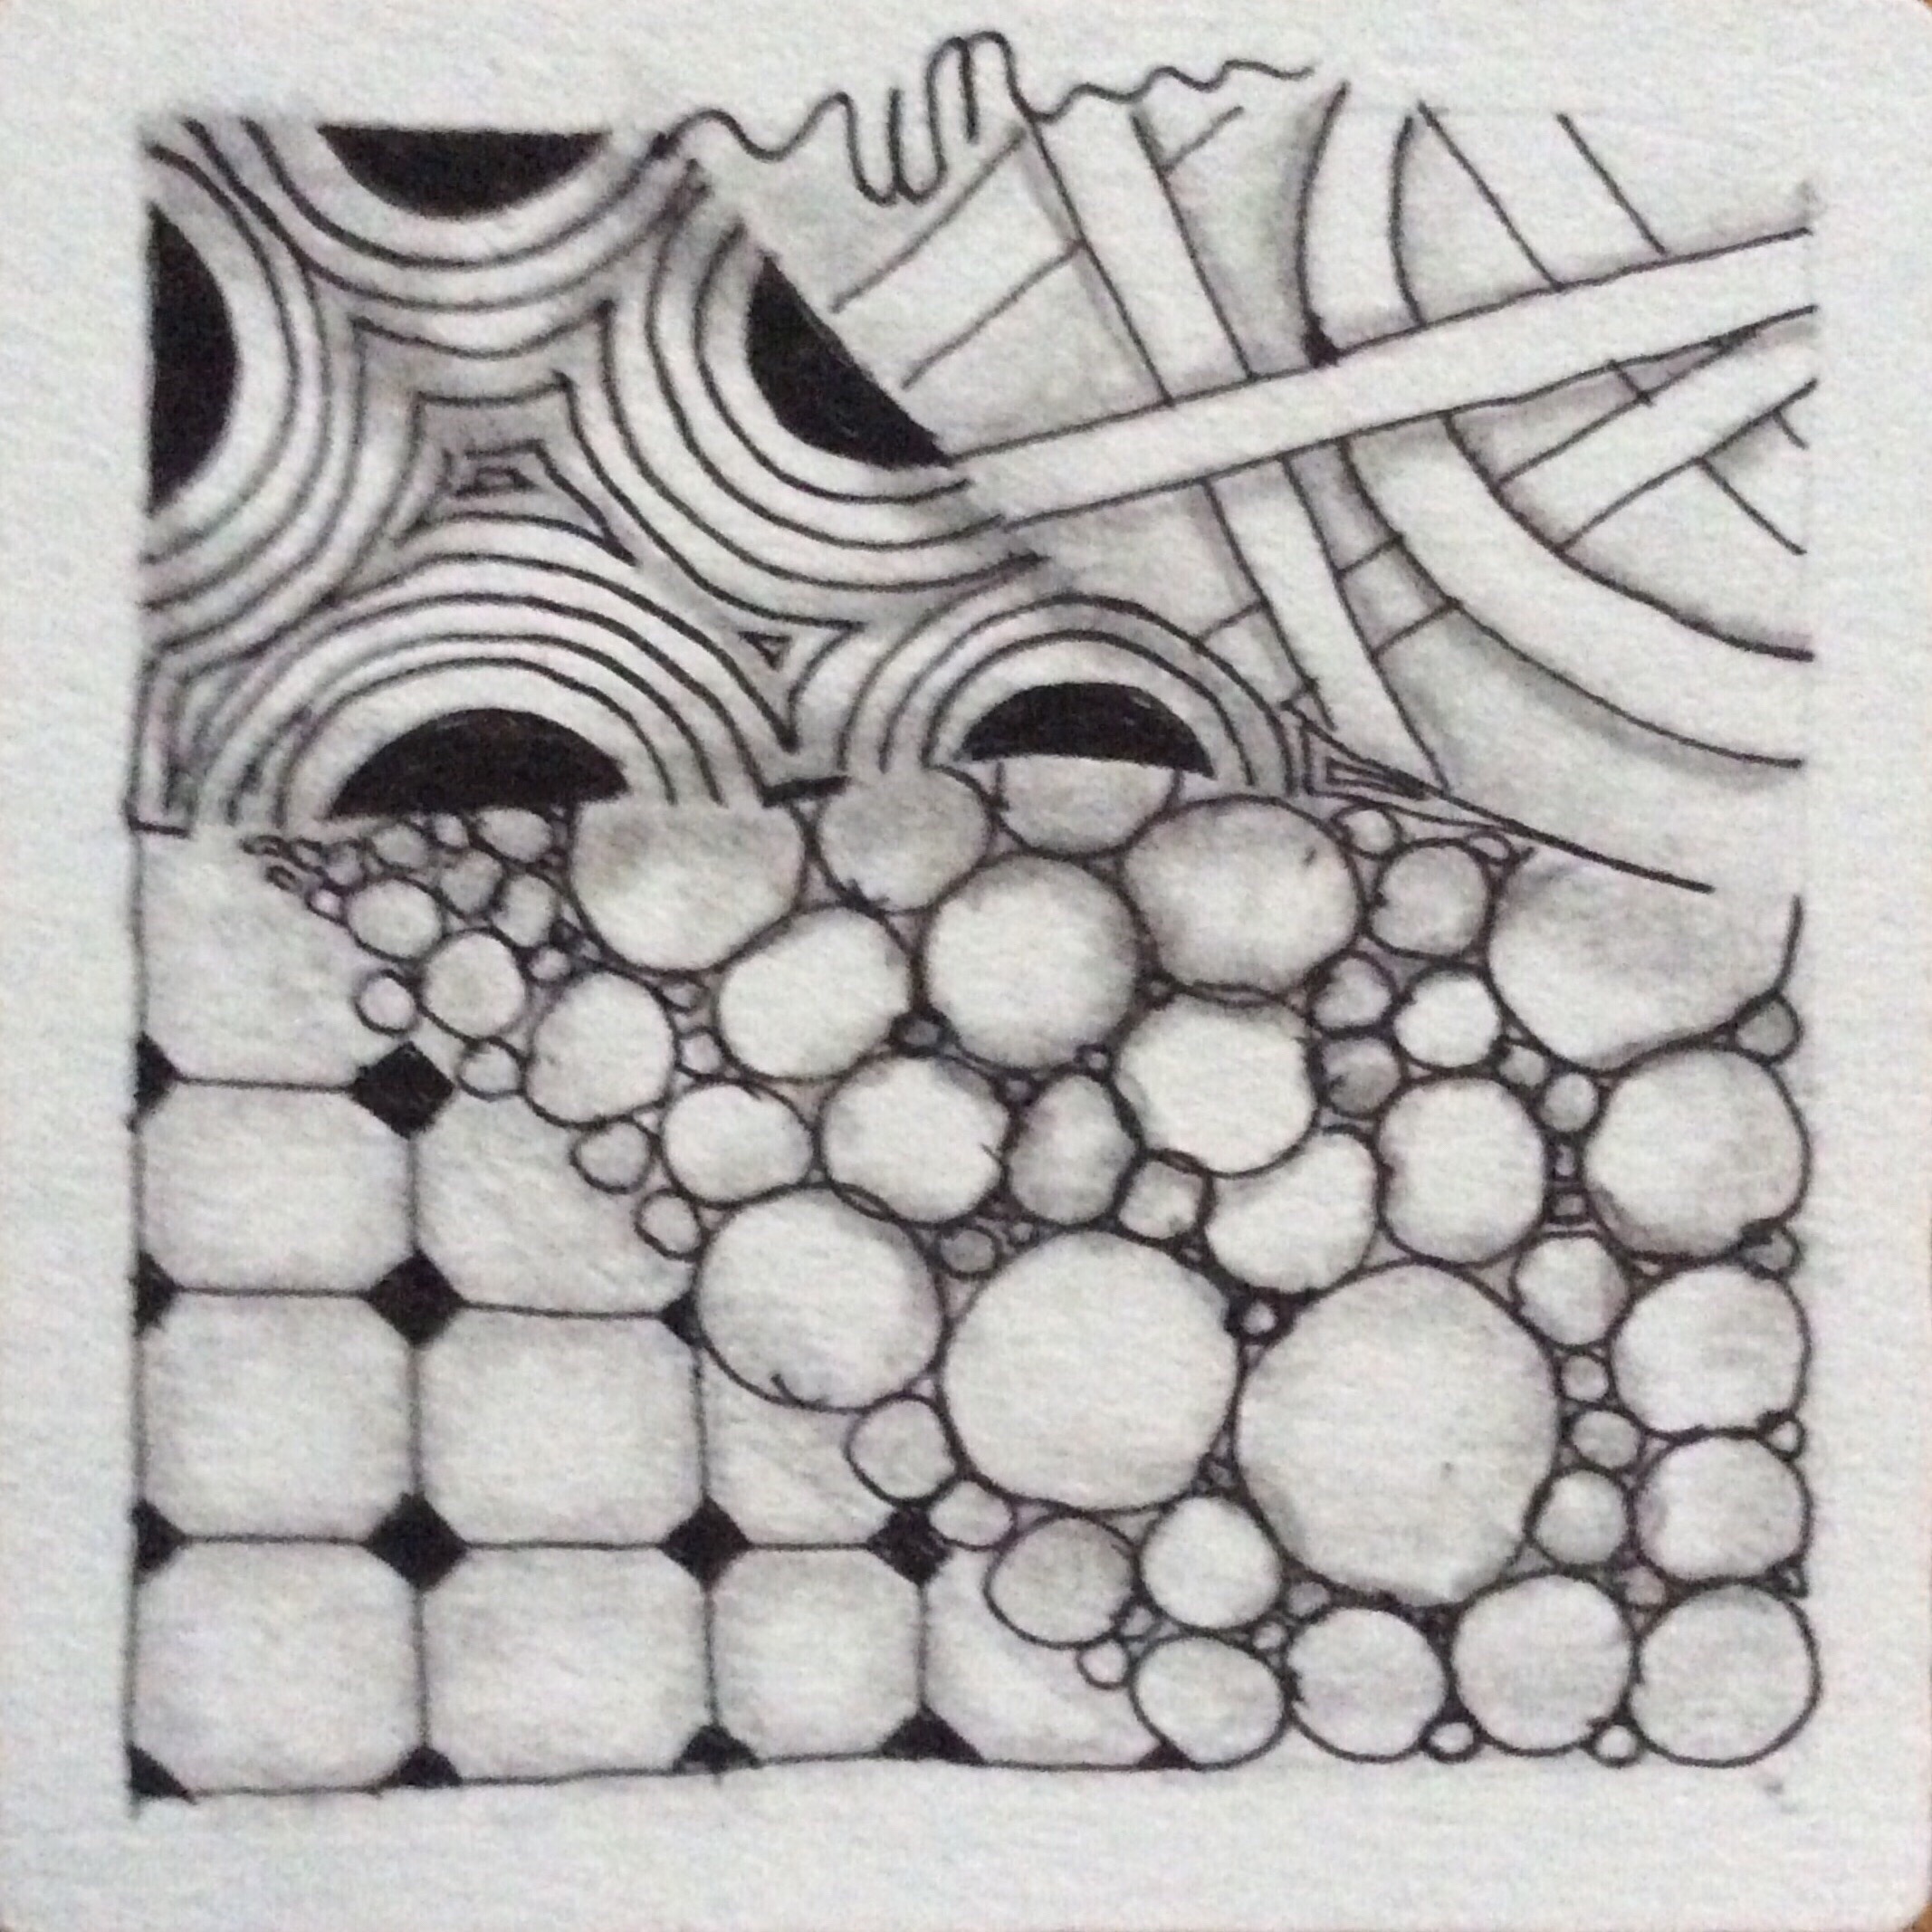
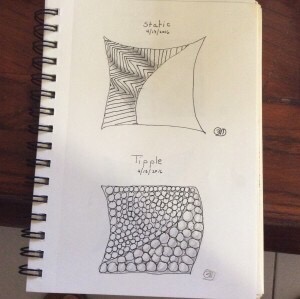
Tripoli is not a single triangle element, but a bunch of elements connecting to form free-flowing paths and groupings of triangular shapes. Typically, the triangles are filled with “fragments,” which are patterns used in part to fill elements of a grid pattern. Below are a few example of simple grid patterns.
Fragments can be used all sorts of ways, including to fill a shape or to embellish a string.
Usually, when tripoli is tangled, each triangle is filled with a fragment. In the examples shown below, you can see how the tripoli elements build from each other. The next triangle builds from a line that auras one side of the previous triangle.
In these tangles, grouped triangles are about the same size and contain the same fragment pattern. However, there is no hard and fast rule; consecutive triangles can grow or shrink, and fragments can change from one element to the next.
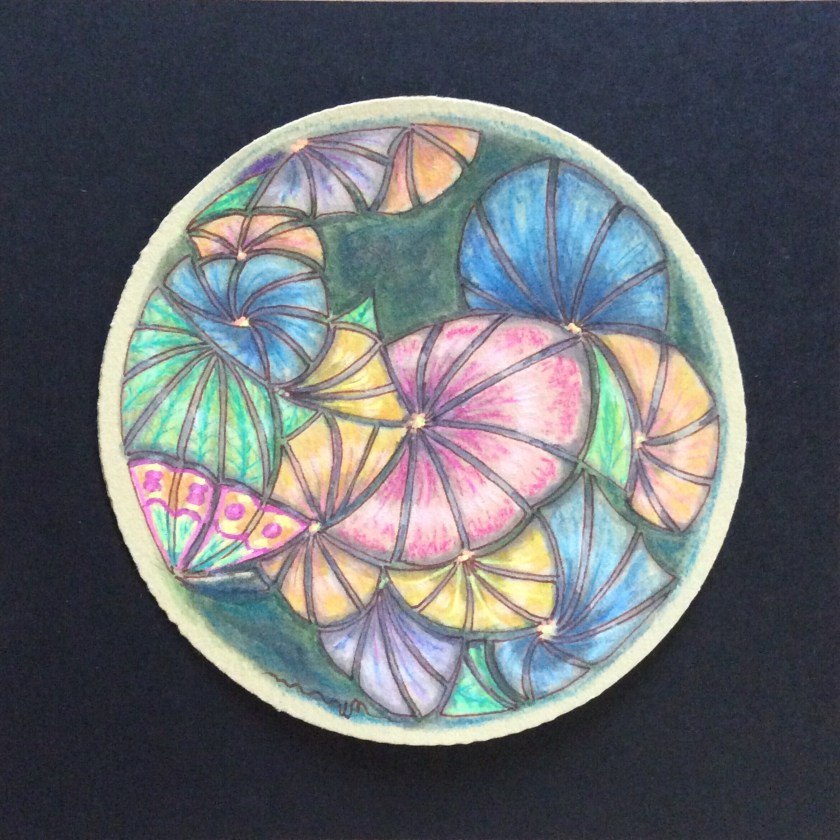
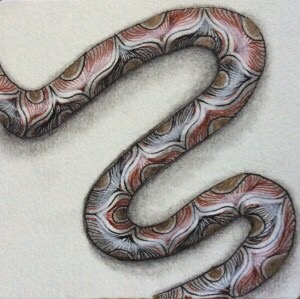
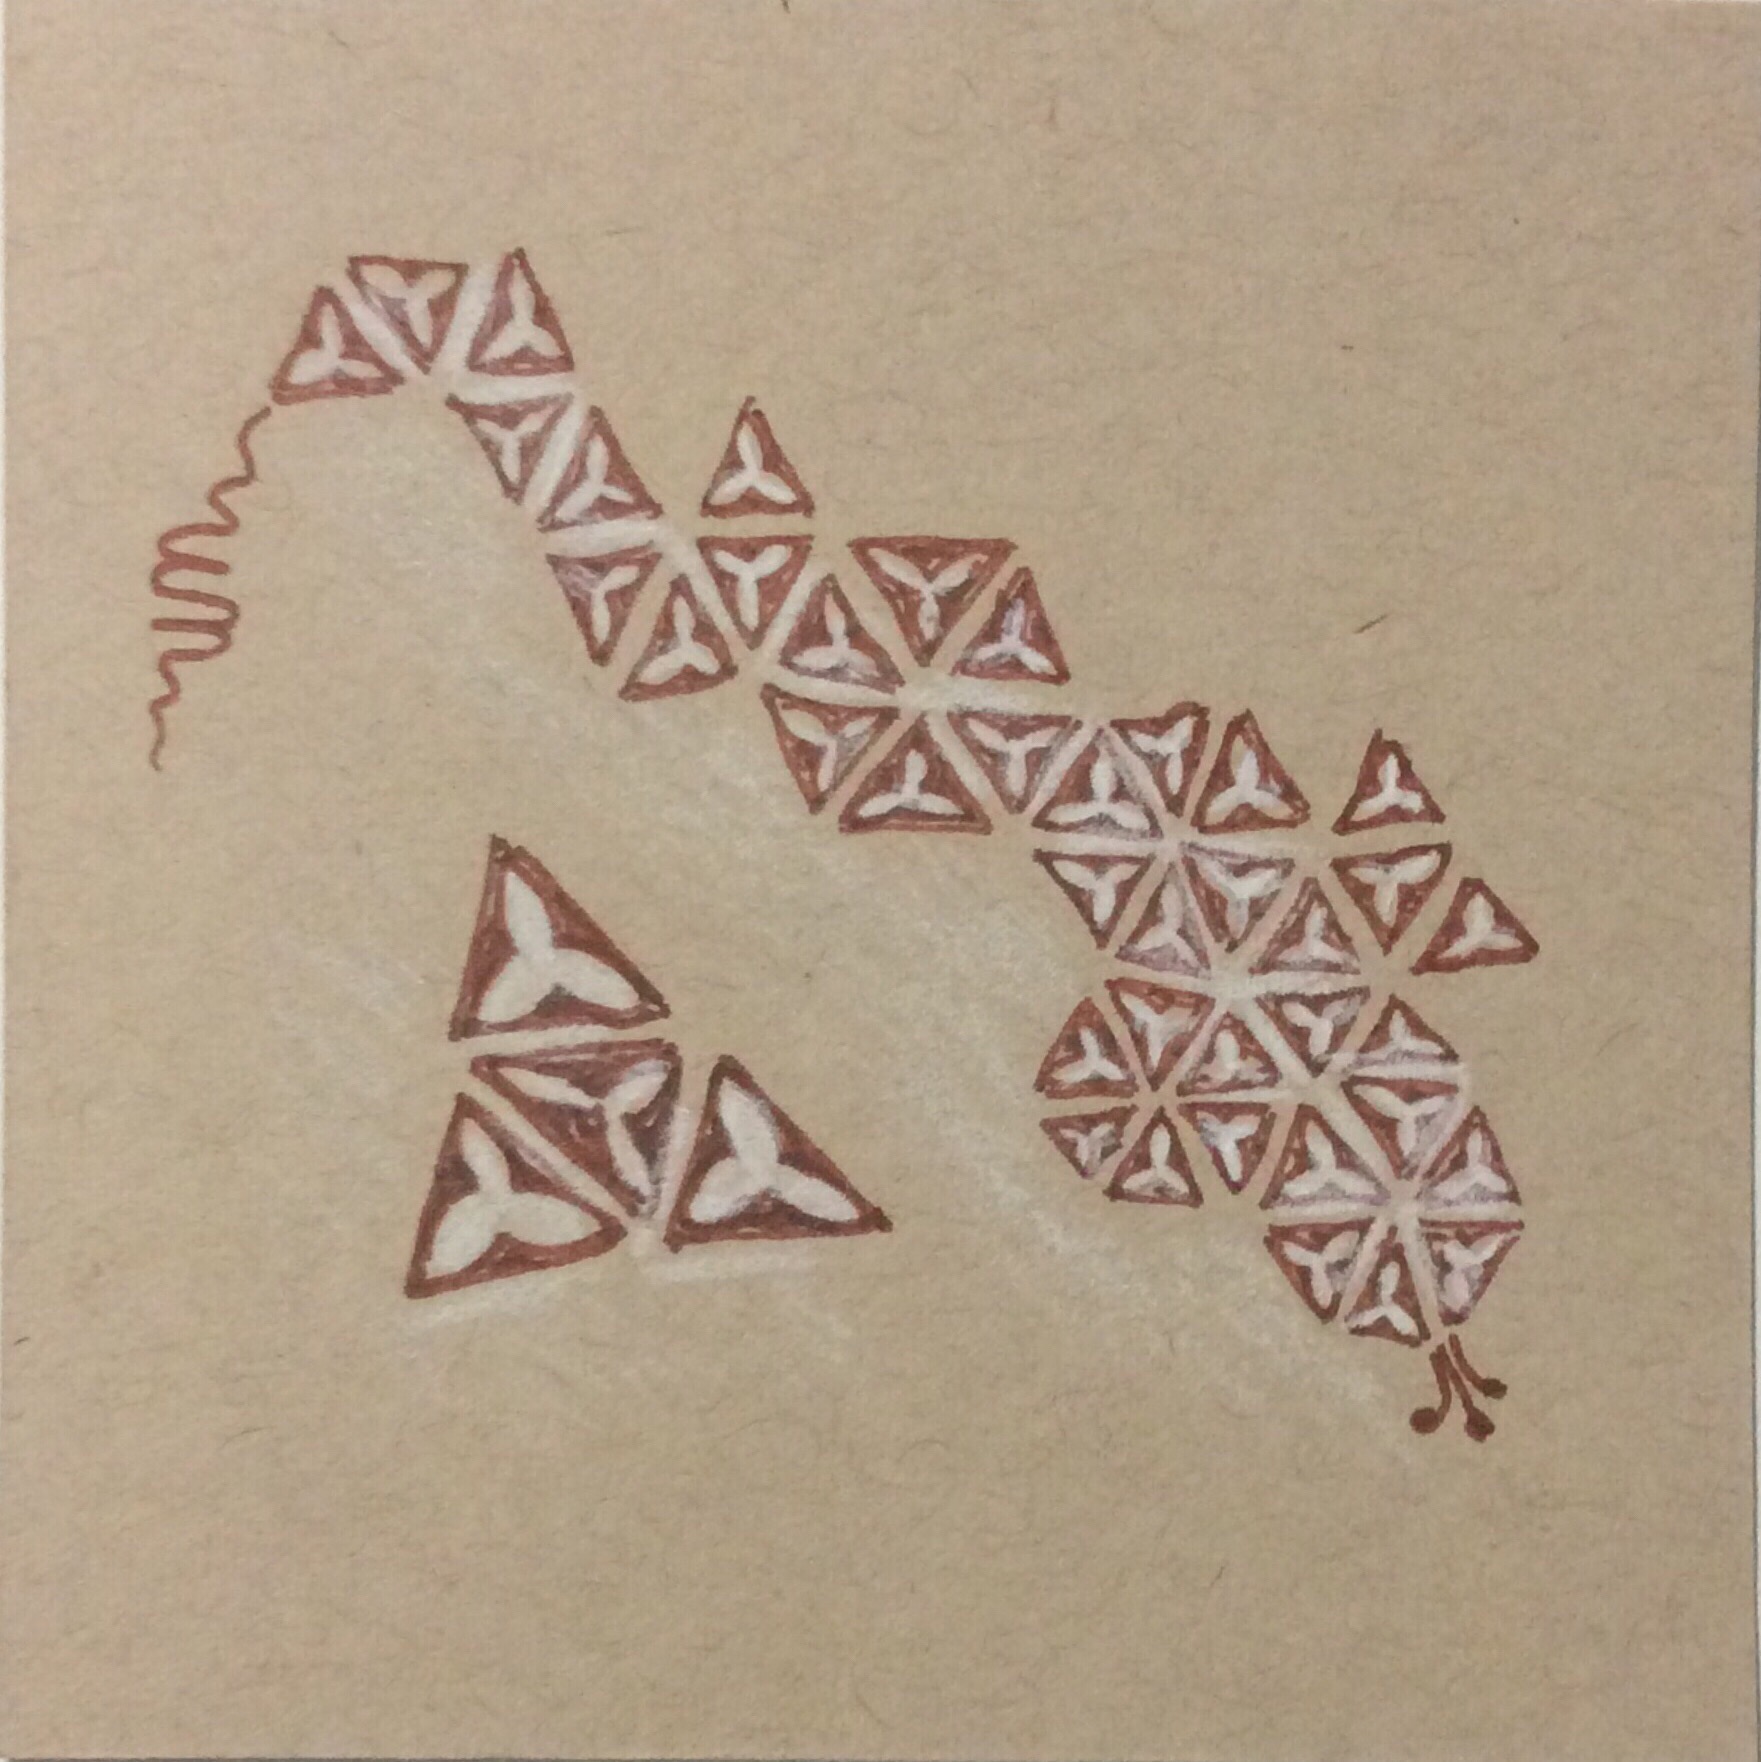
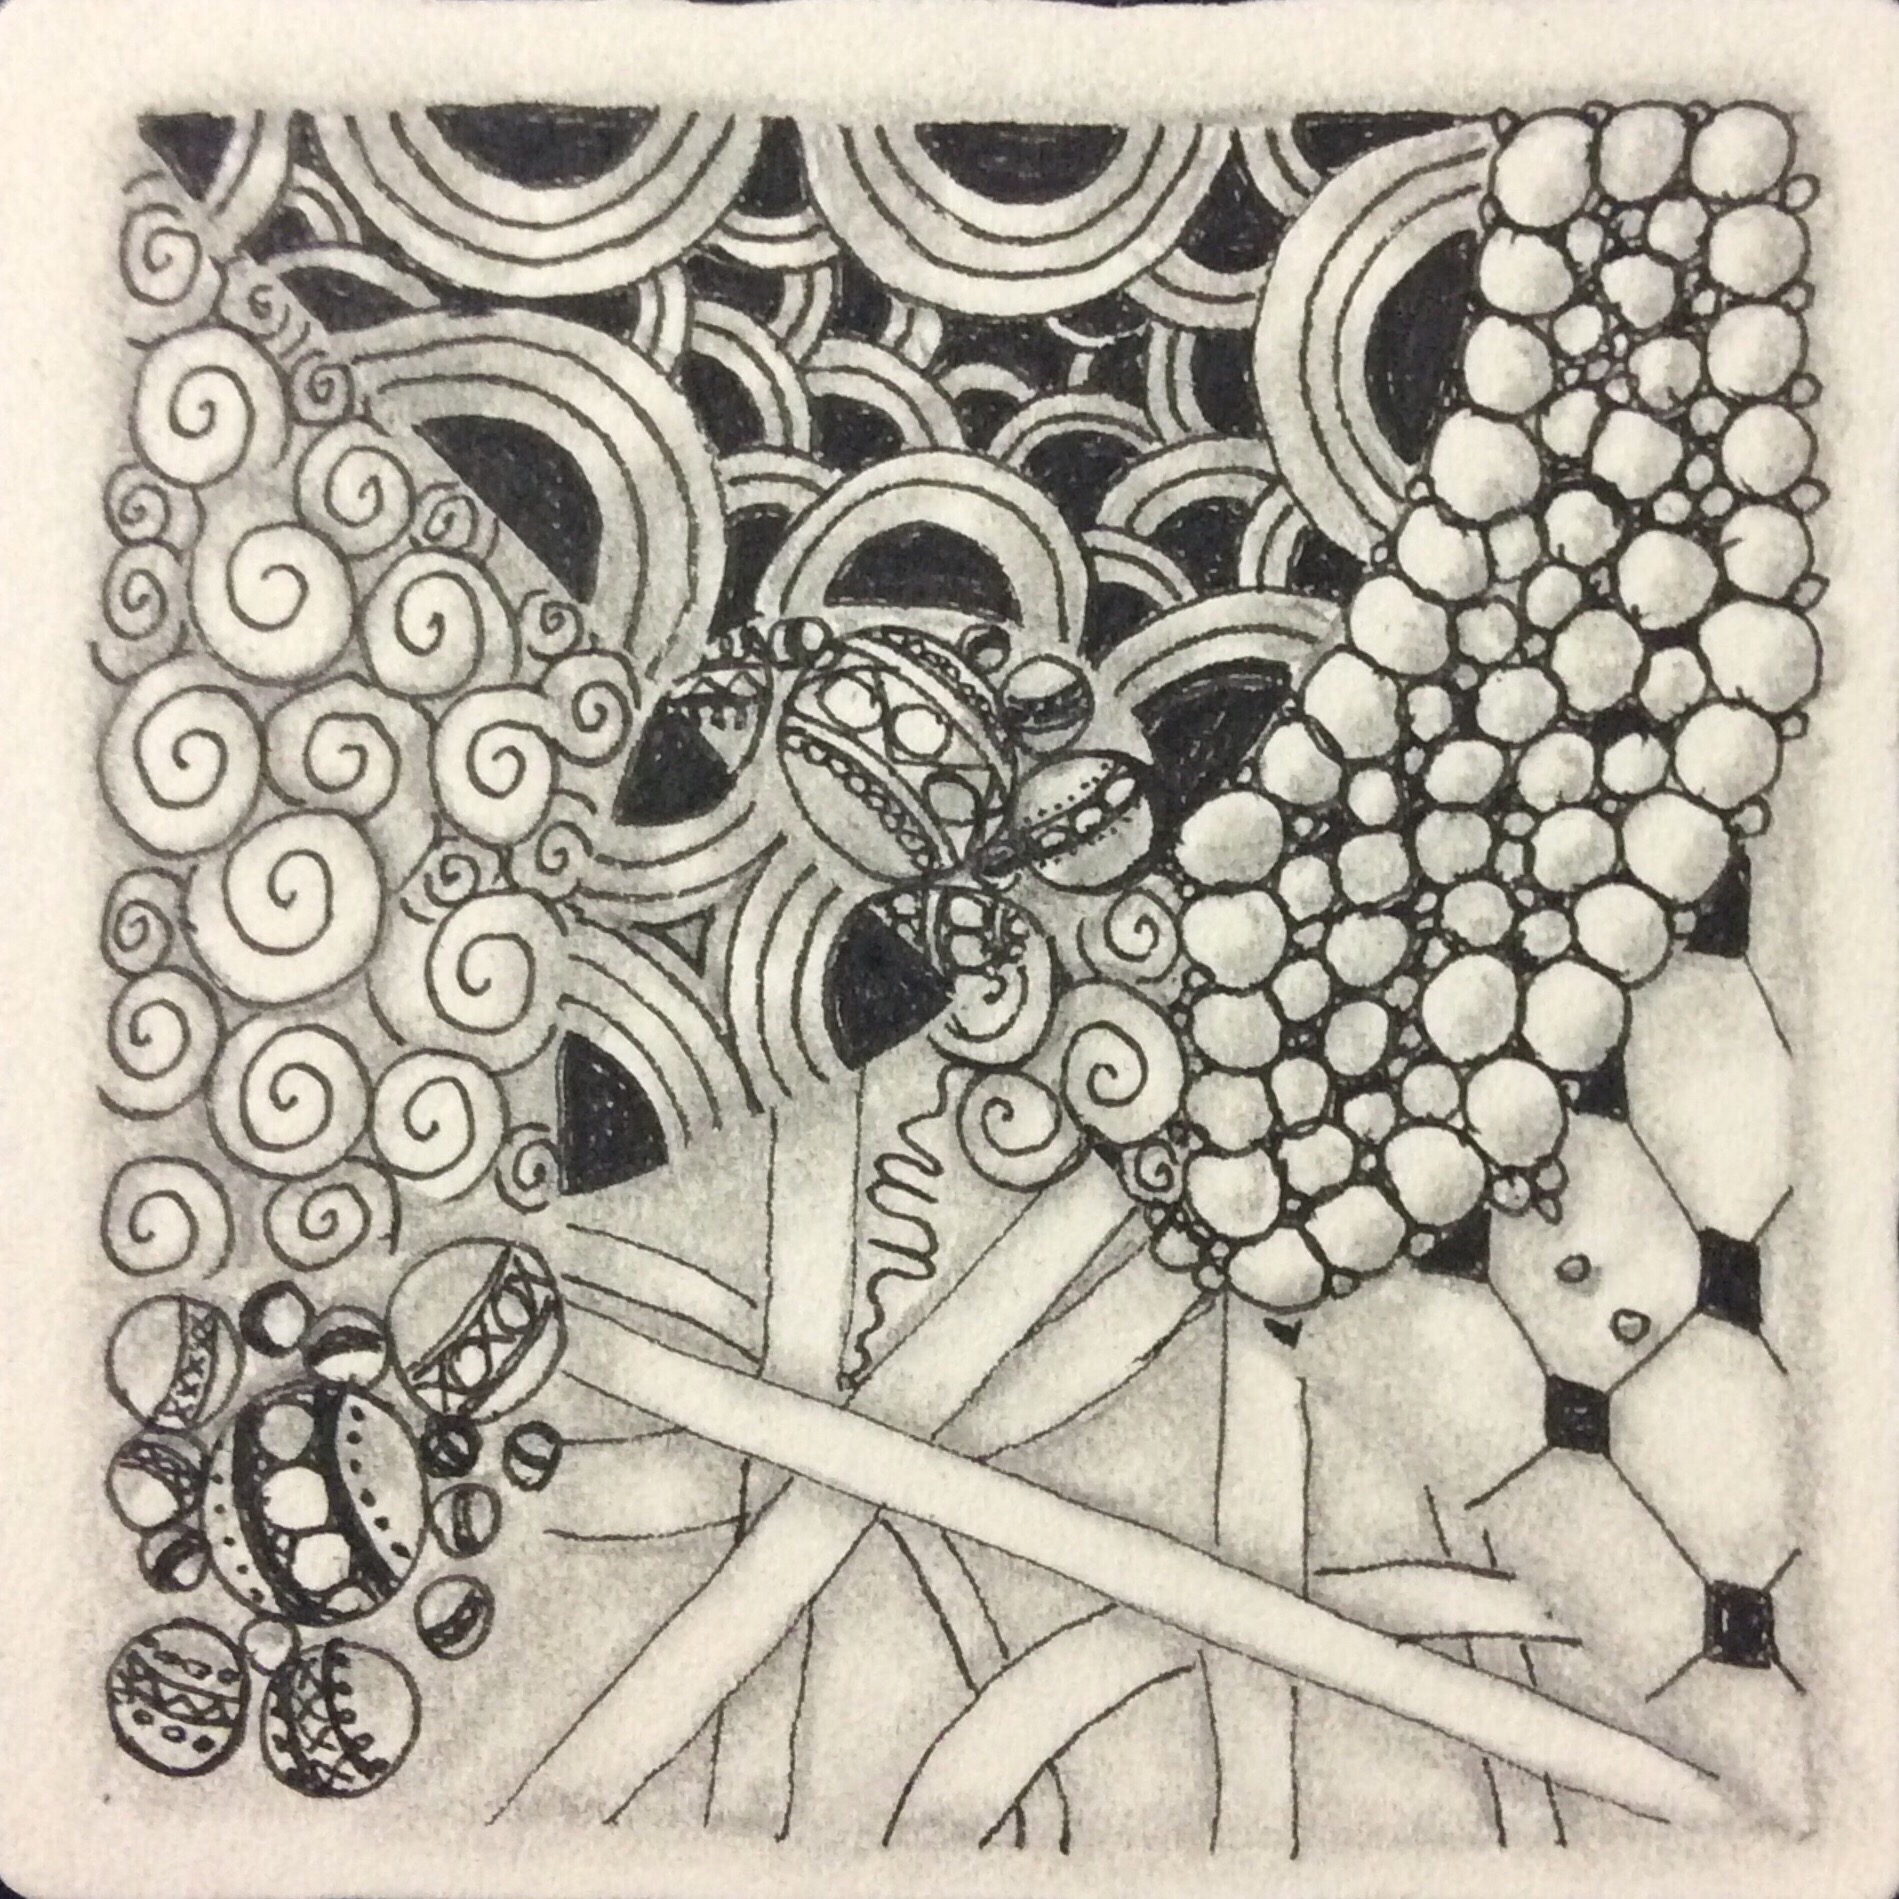
The wonderful thing about tripoli is that the elements don’t need to be filled at all. The individual triangles can be filled with anything that seems to fit the path or grouping as well. In the example below, the paths and groupings reminded me of a bunch of flowers in a garden. So I filled the triangle elements to reflect that. Shading and color smoothed the edges and points to look more like something Nature would do.
Each “petal” and “leaf” is a pointed triangle, and most of the sides of the triangles are slightly curved–mostly because I prefer a bit of curve over straight lines. Each triangle began with an aura of one side of the previous triangle. The aura became the first side of the next triangle. It is even OK to slightly “hook” the aura if you are going for a rounded grouping–or just because. In this example, although some triangles were later filled with a pattern that resembles the veins found on a leaf, the rest were simply filled with color and texture to resemble petals. Even the butterfly body started out as a triangle which was subsequently filled with color.
Tripoli is one of the most versatile Zentangle patterns. It can become a lizzard or a flower and many things in between. The flow of the path or the grouping your pen creates as you tangle suggests an object or design. You fill the triangles with patterns or color or texture to produce beautiful effects.
Remember: Anything is possible one stroke at a time.®
Earlier this week, I posted a picture on the Zentangle Mosaic® app of a holder I made out of an Apprentice tile (4.5 inches square) to keep my brand new 2.5-inch square business cards from VistaPrint®.
This post caused several people to ask how I made the holder, and I promised to post directions here on my blog.
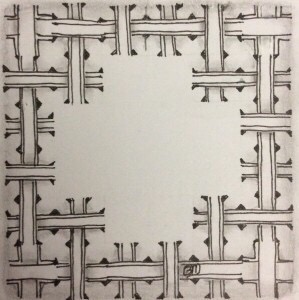
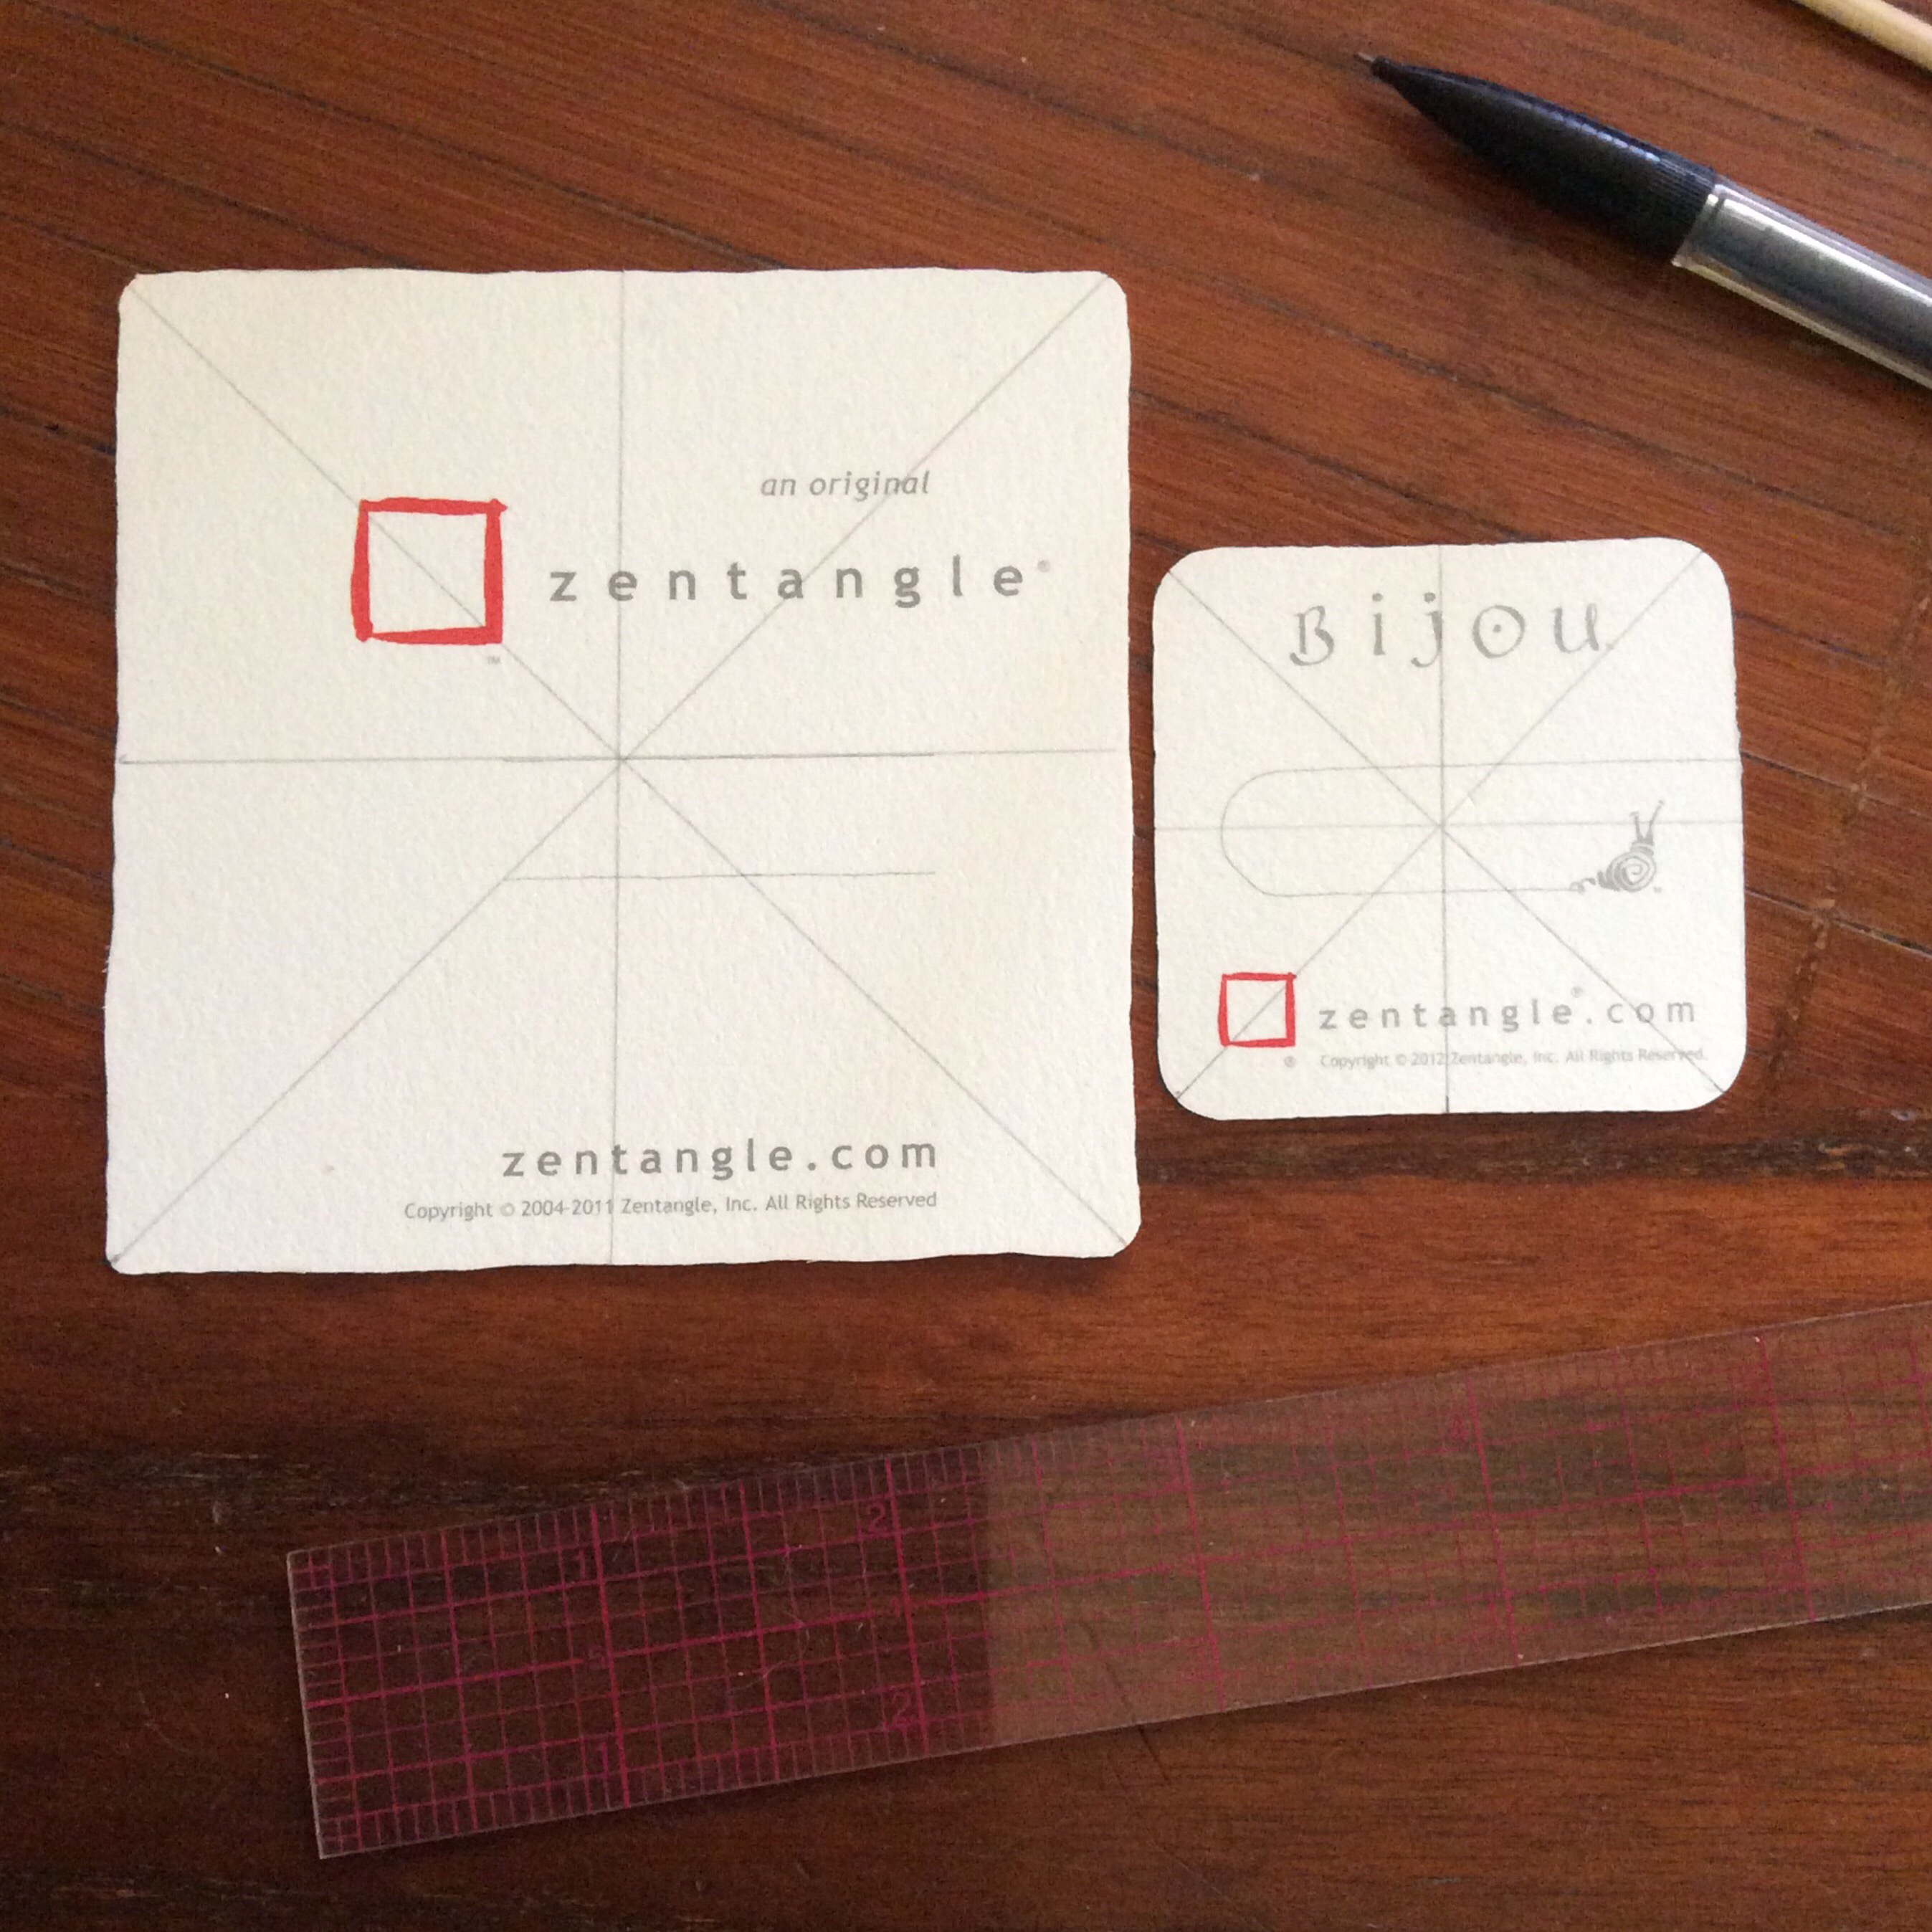
Thinking back to a four-piece bijou puzzle I tangled for Valentangle2017 on Facebook, I thought it might be better to create a bijou-sized holder instead of the business card holder. Where the business cards are 2.5 inches square and need the larger Apprentice tile, bijou tiles are only 2 inches square, so a standard 3.5 inch square tile is plenty large to make a holder. No matter what size holder you need, the procedure is the same.
Step 1: Mark the center and diagonal lines.
Mark centers and diagonals.
With a pencil, find and draw the diagonals and centers on the backs of both your “final size” tile and the tile from which you will make the holder. Measure for accuracy. Your tile will resemble a squared round pizza.
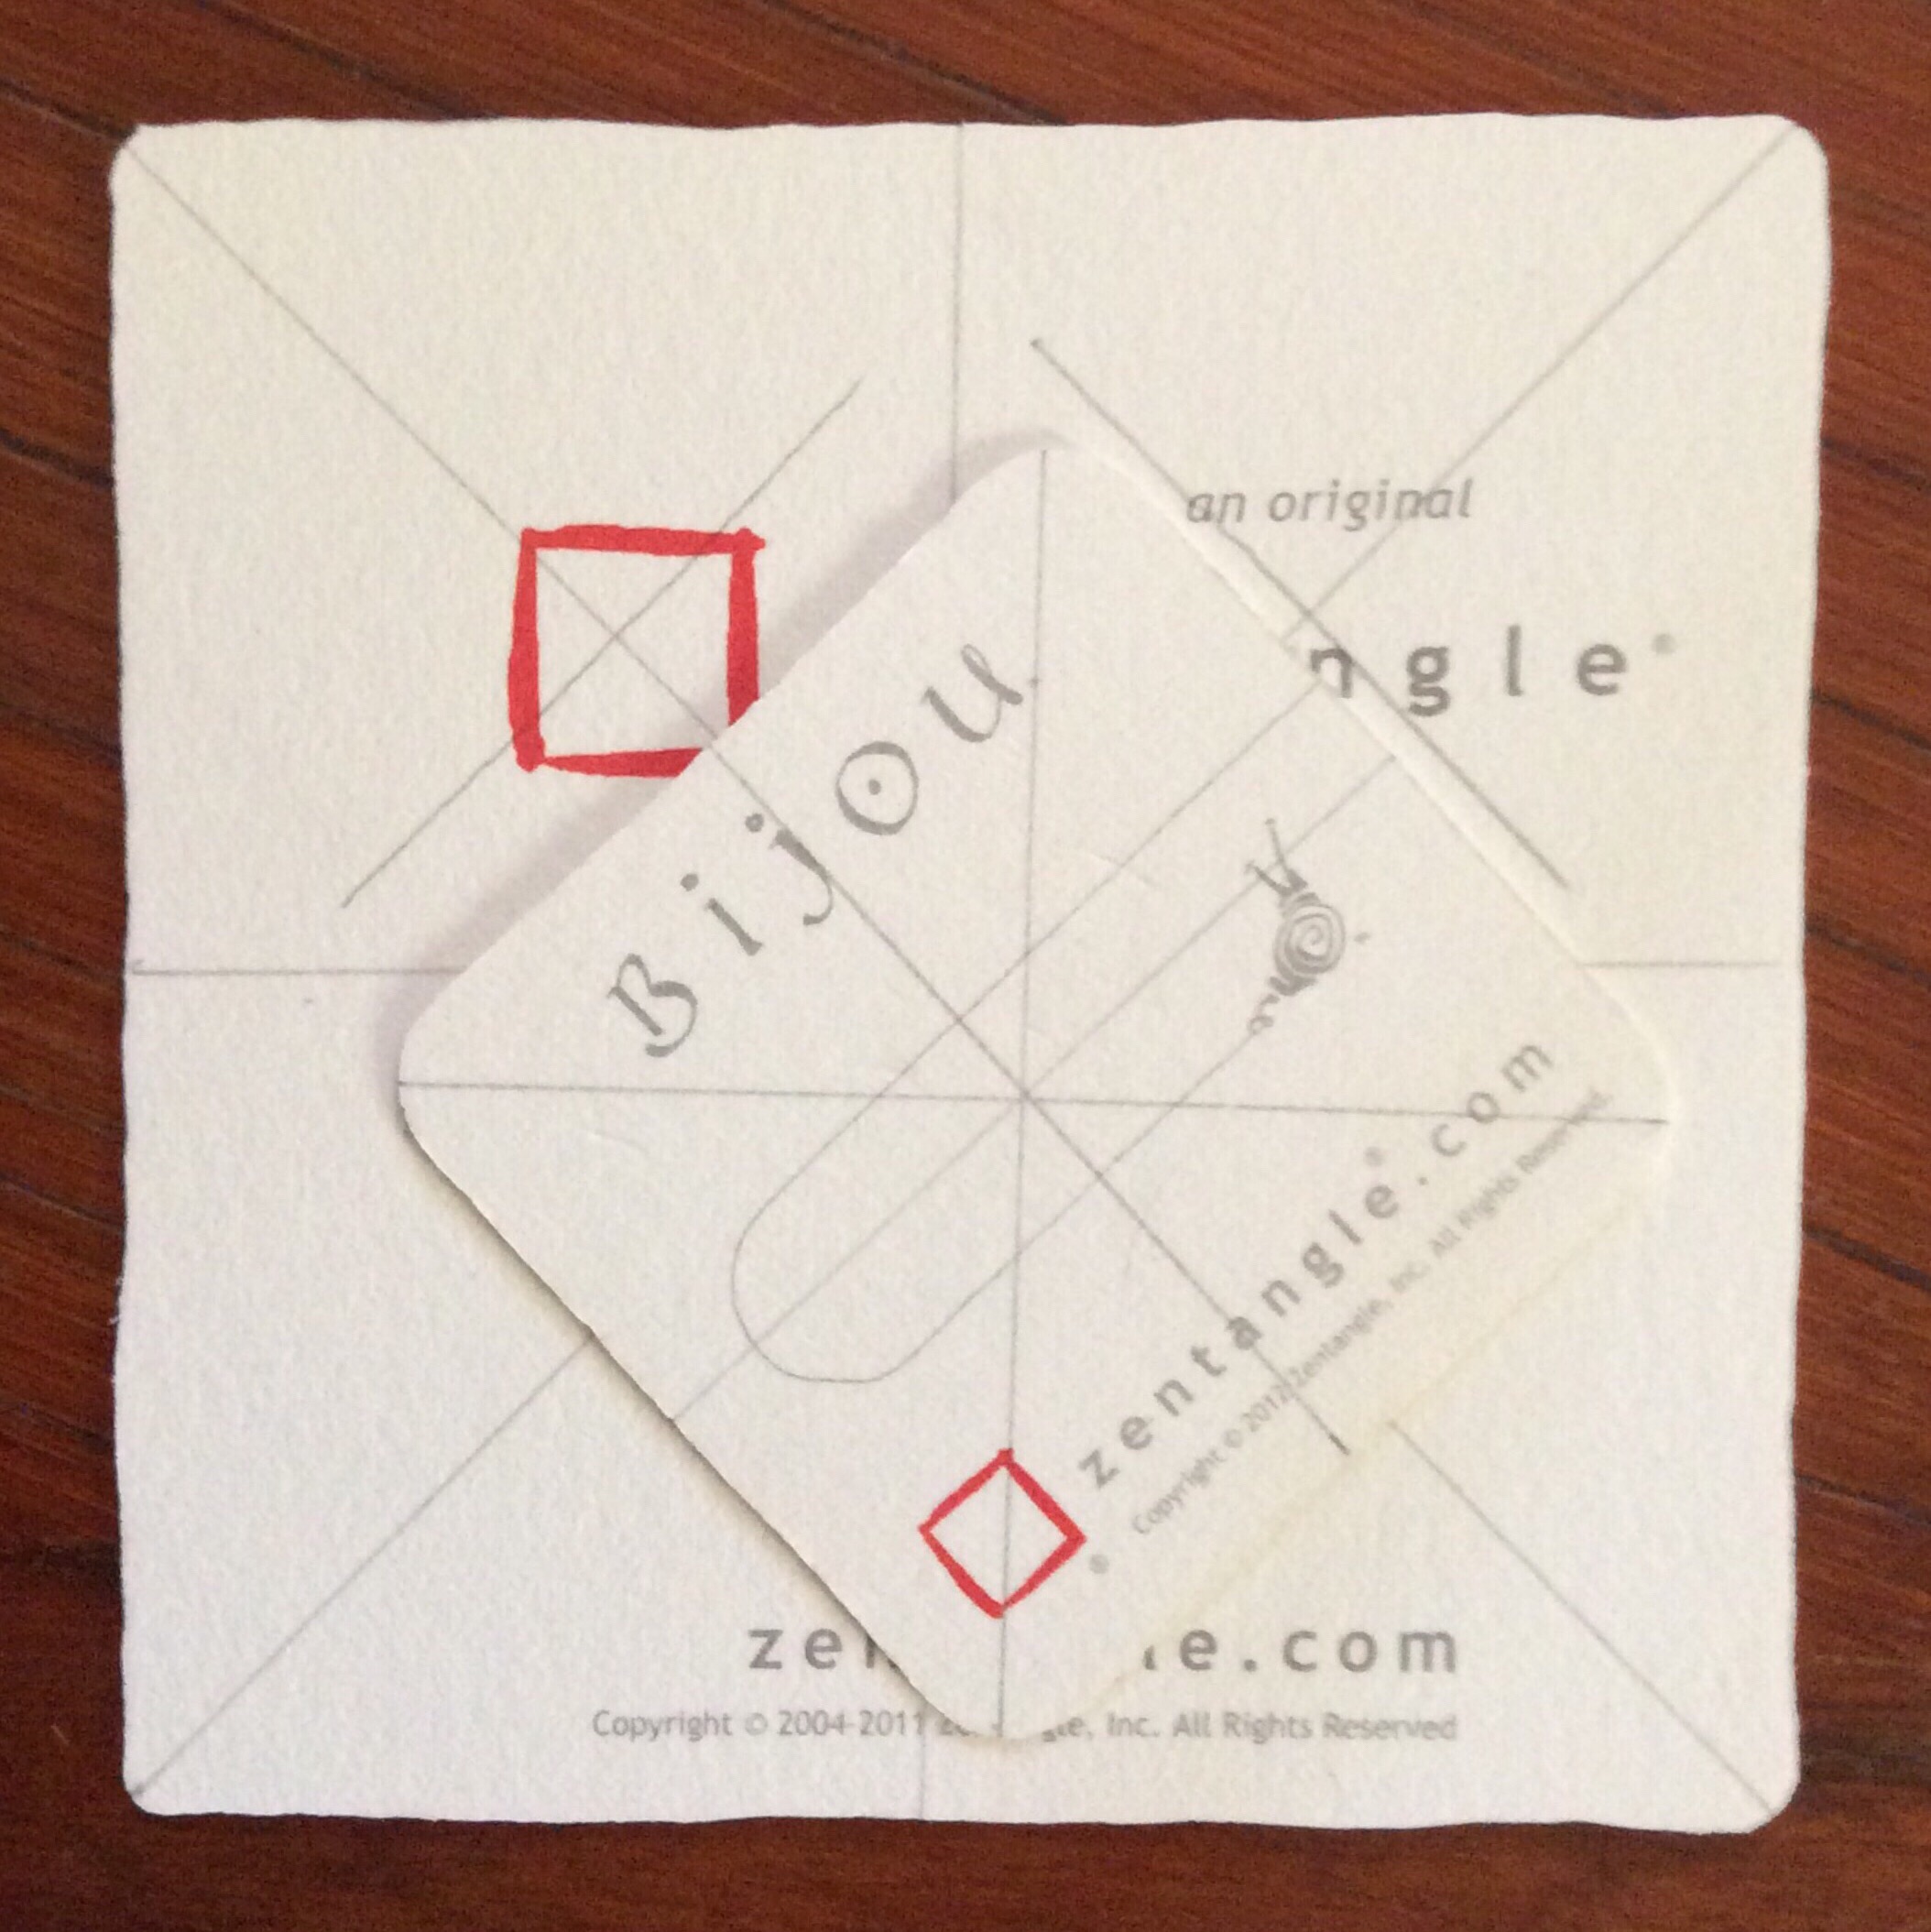
Step 2: Line up the two square tiles, then trace.
Align diagonals with center lines as shown; trace bijou.
Turn your bijou 45 degrees, and match up the bijou’s diagonal lines to the standard tile’s center lines, and the bijou’s center lines to the larger tile’s diagonals. It may not be a perfect match, but match as closely as possible. Once the lines are matched, trace the bijou onto the larger tile.
Step 3: Re-draw 3/16-ths of an inch away.
Draw a 3/16-inch frame around the bijou tracing.
Aura the bijou outline 3/16-ths of an inch away from the center on all sides.
Step 4: Score for folding.
Score just outside pencil lines.
Line up a ruler or other straight edge tool with the drawn lines. With your favorite paper scoring tool (I use a bamboo skewer), score just outside the pencil lines, going from one edge of the larger tile to the other. Do this for the bijou tracing and for its frame.
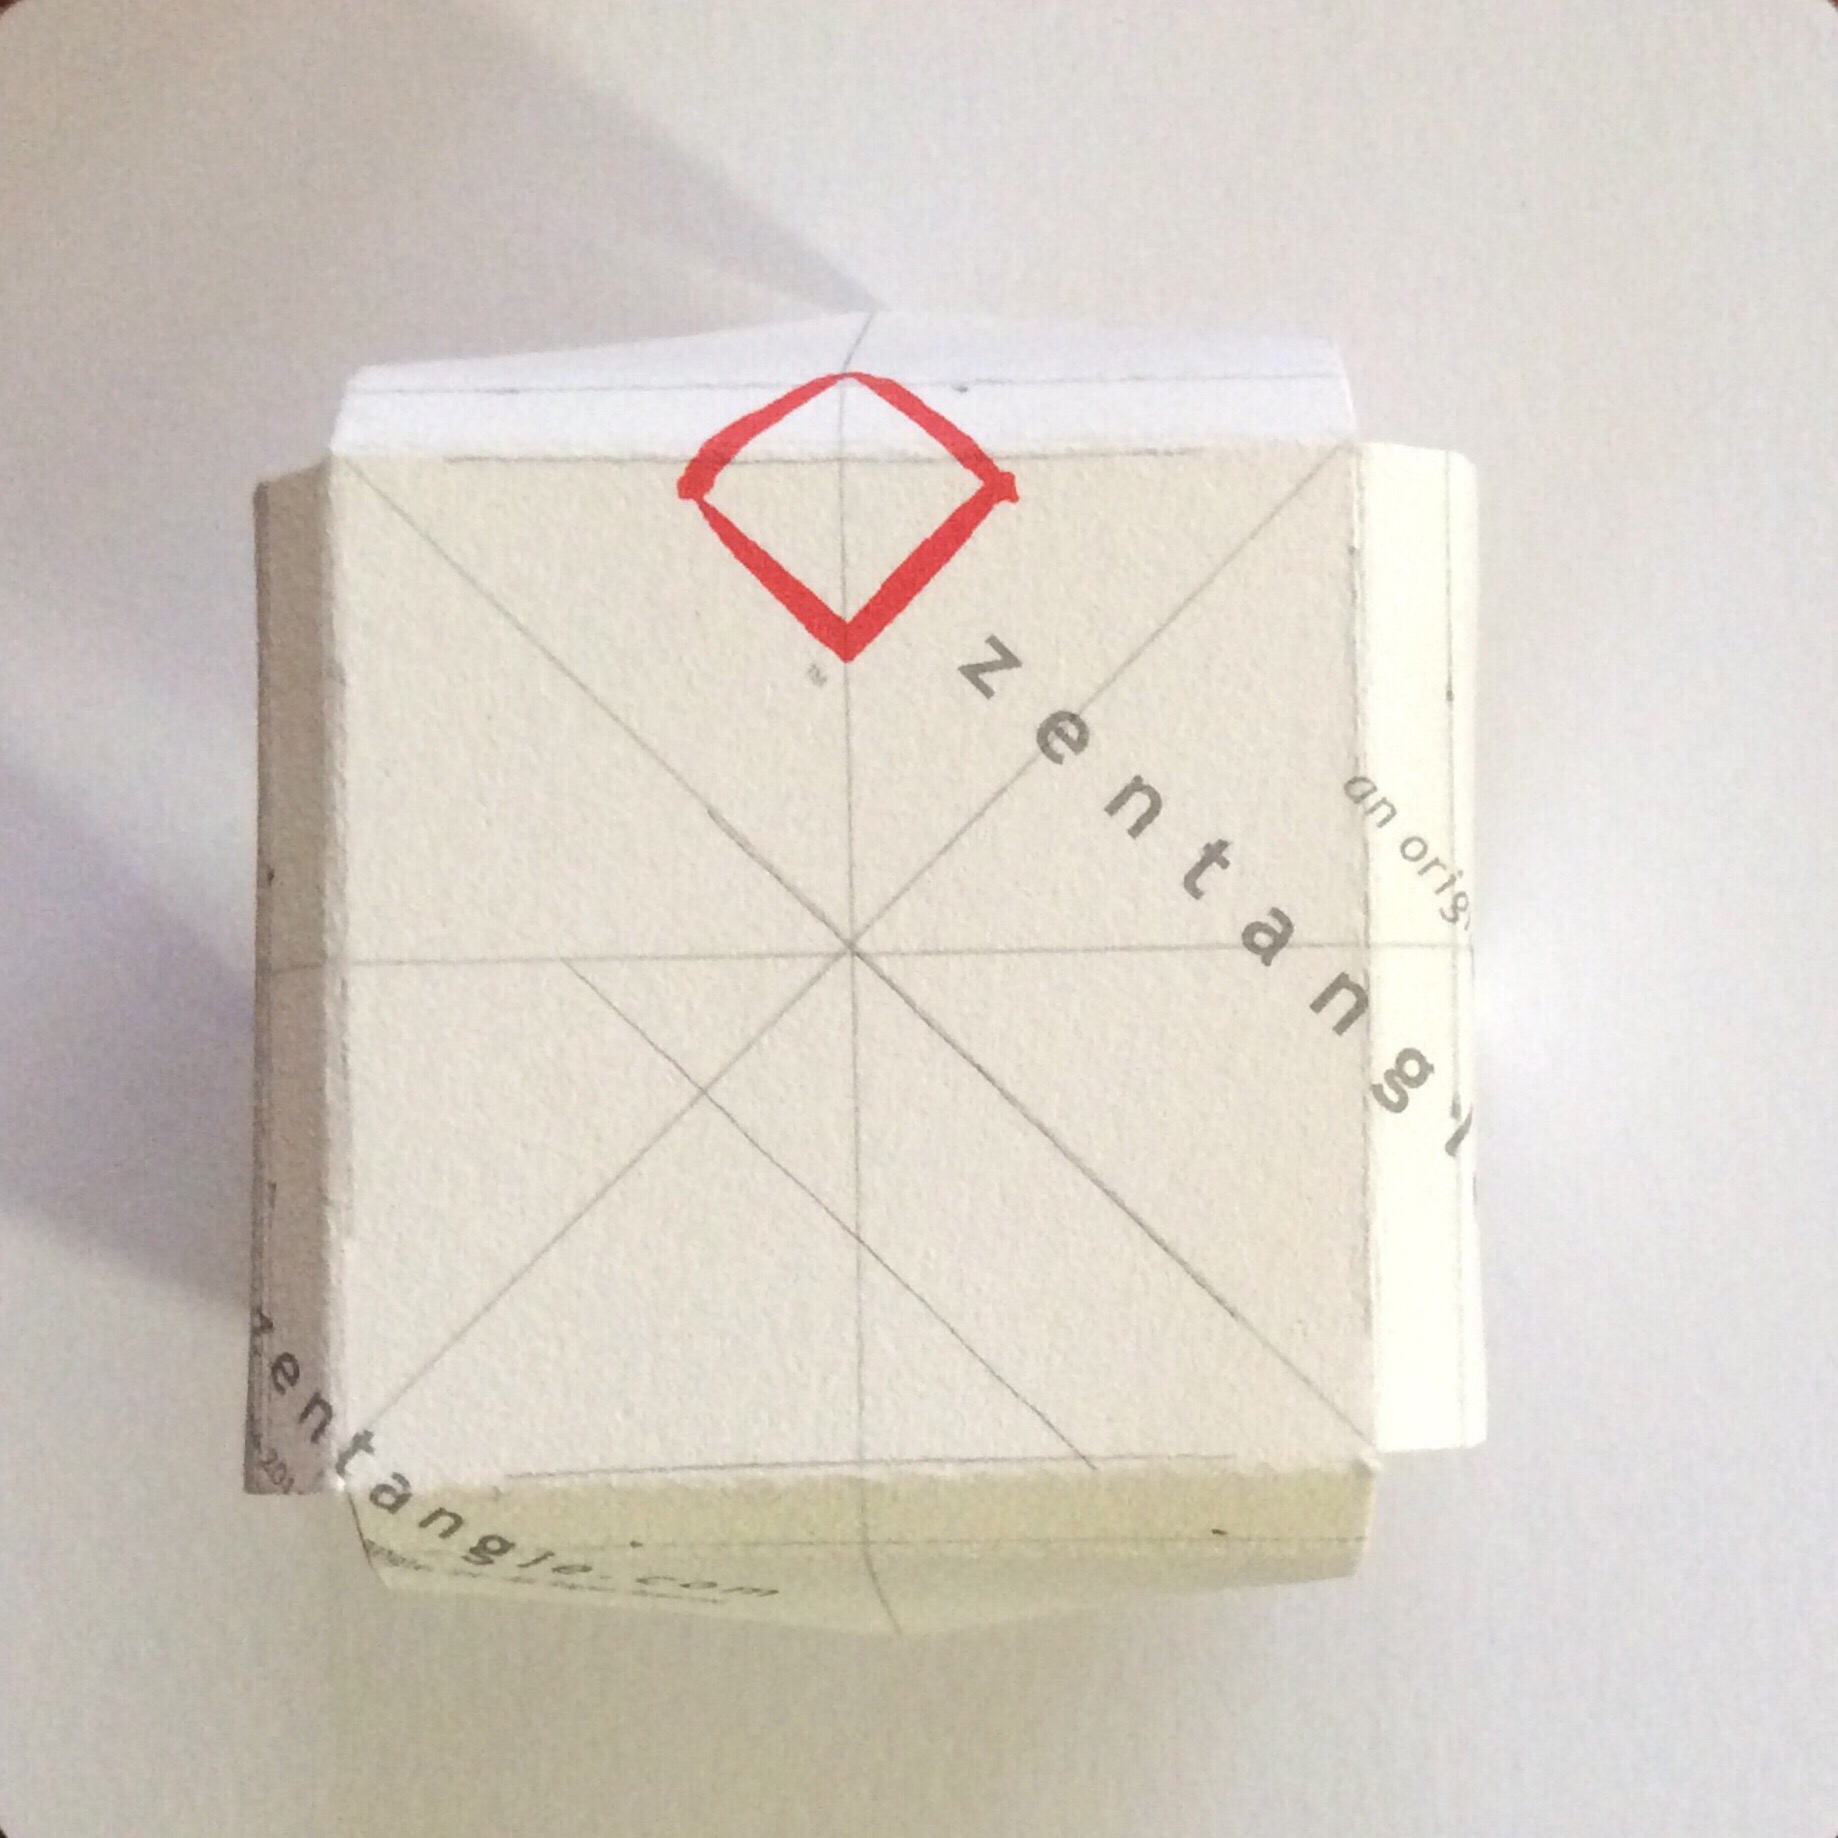
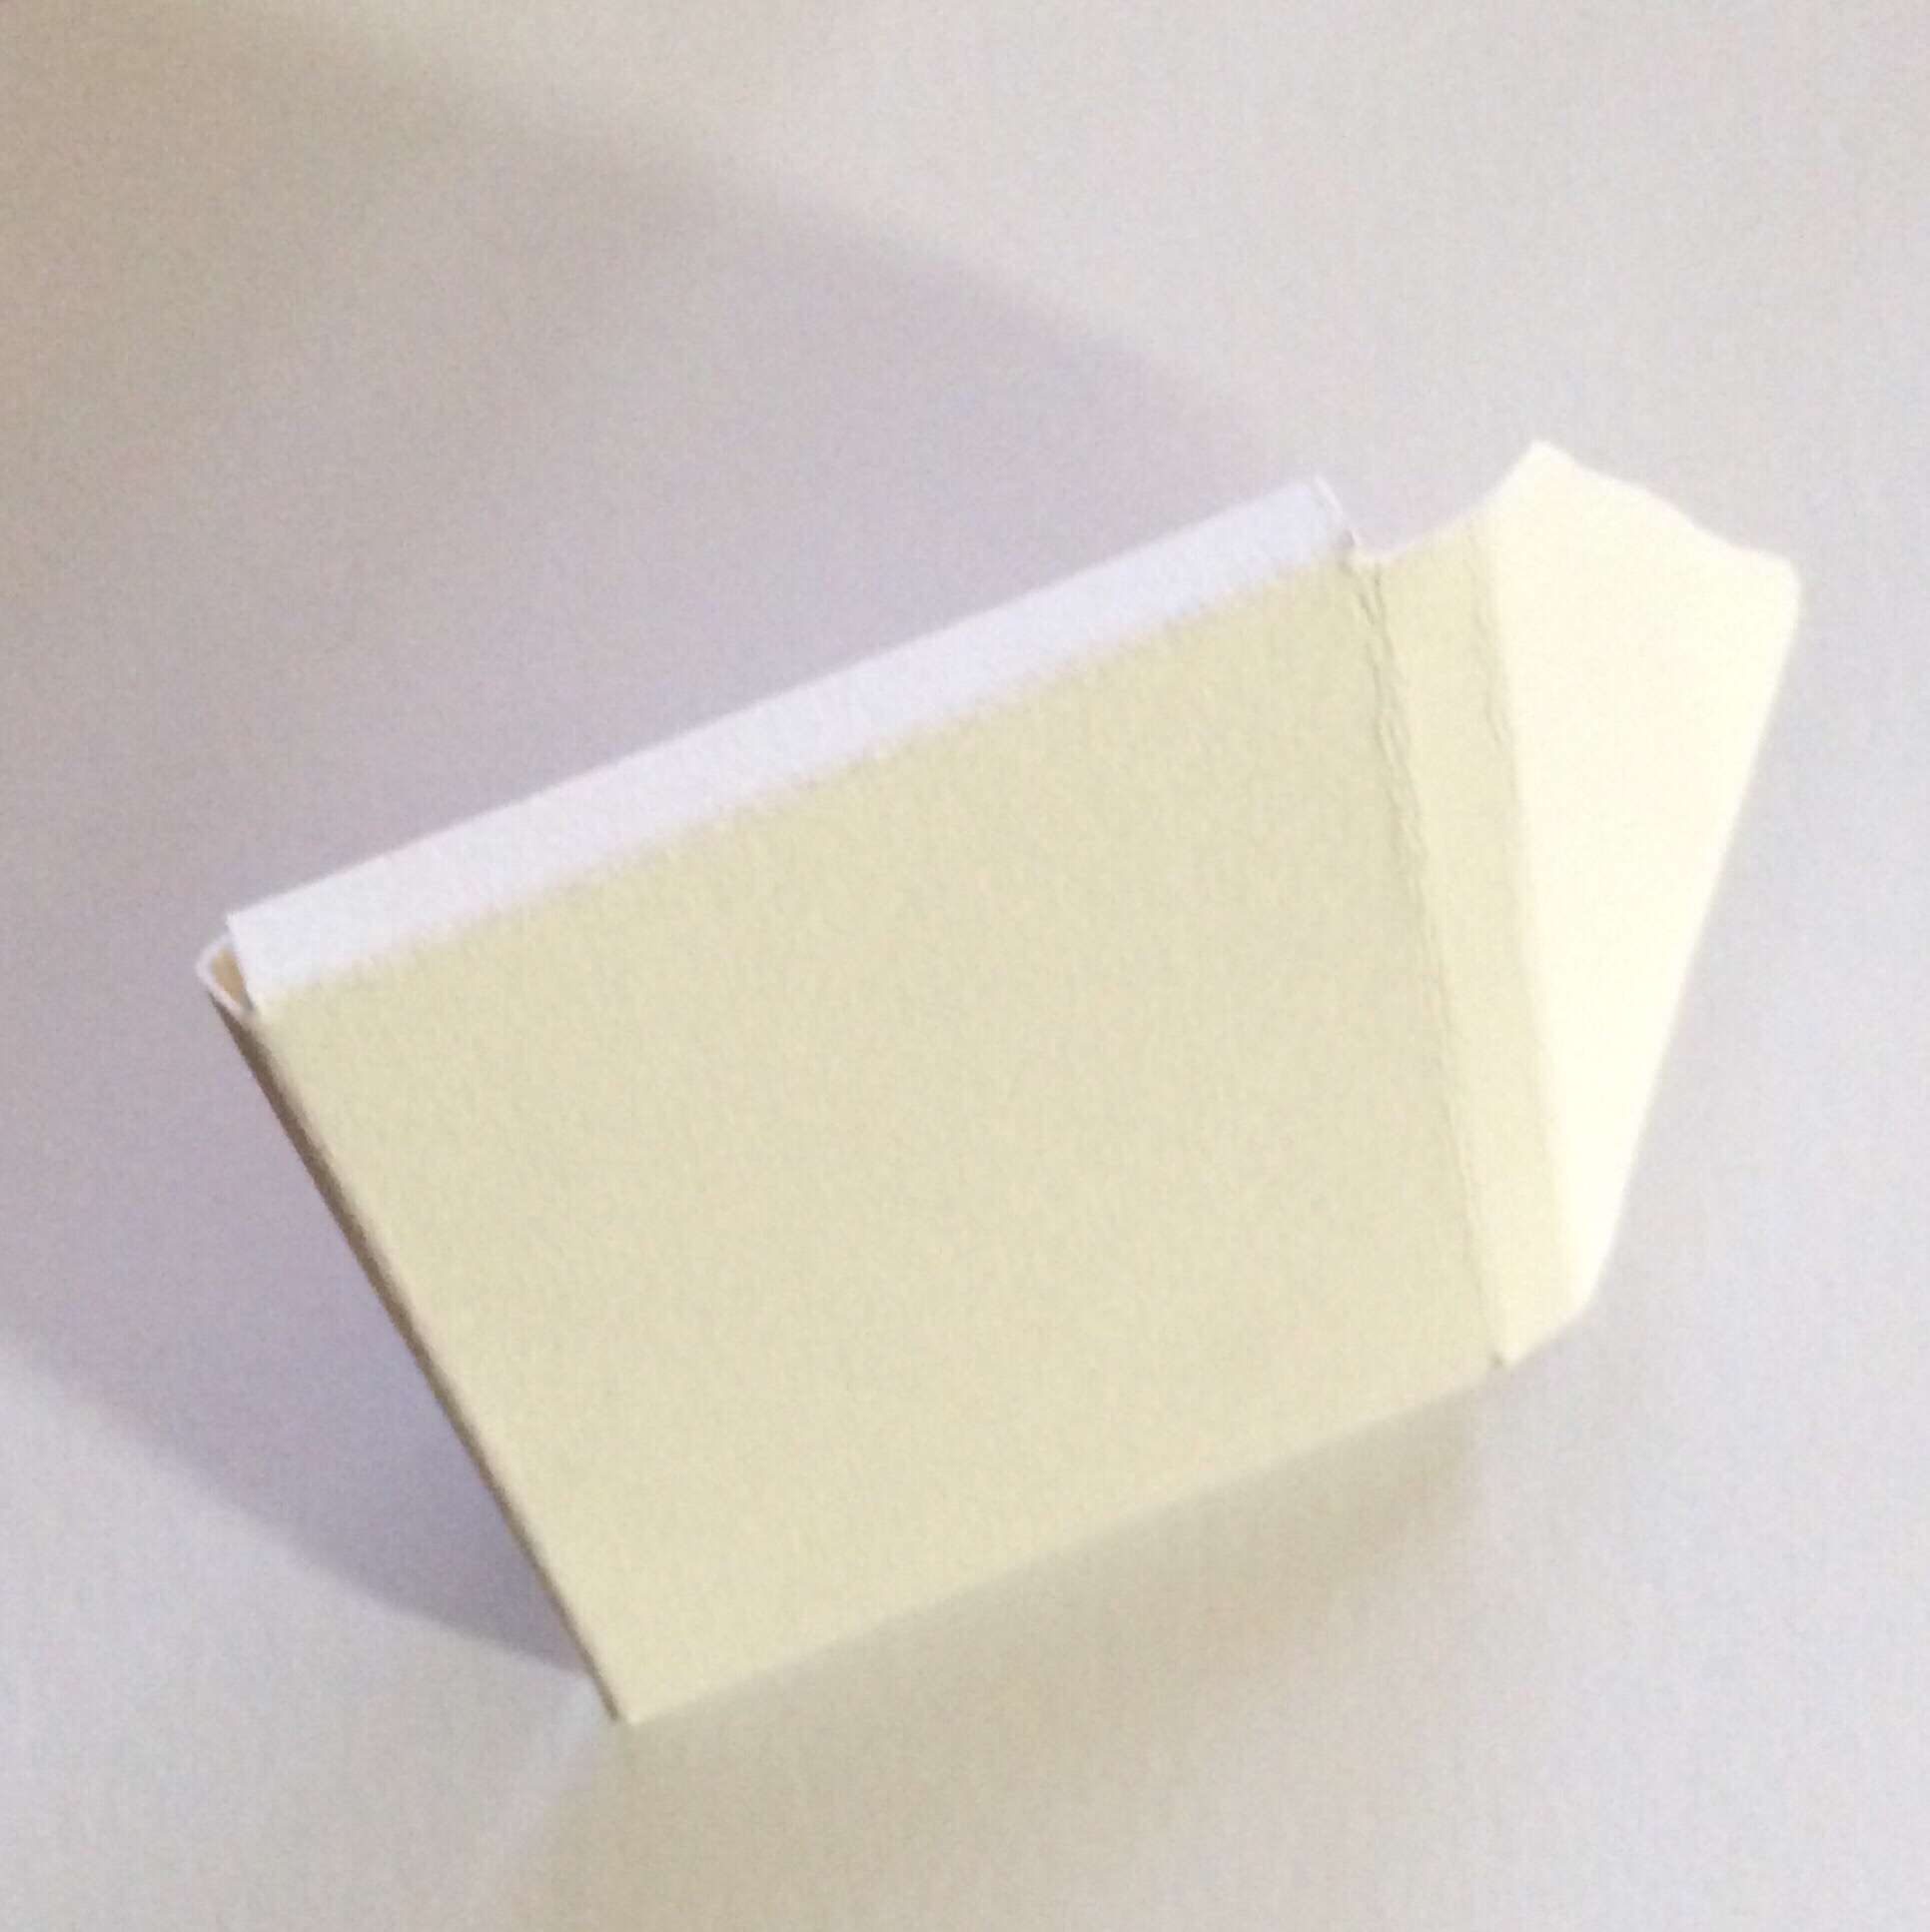
Step 5: Fold along scored lines.
Fold along the scored lines. Trim away corner pieces.Fold along all of the scored lines. At the corners, there will be extra paper. Trim away this extra space with two inward snips along the main fold lines. Cut no further than the inside folds.
Step 6:
Sharpen creases.
Re-fold the tile so the clean side is to the outside. Sharpen the fold lines by pressing on them again with your fingers or with a smooth hard object for a sharper crease.
Step 7: Tangle.
Fold out tile and tangle as desired.
Unfold the box and tangle it any way you like. Remember that three flaps will fold over each other in the box to contain the bijou tiles. You may want to wait until the holder is glued together before tangling the back.
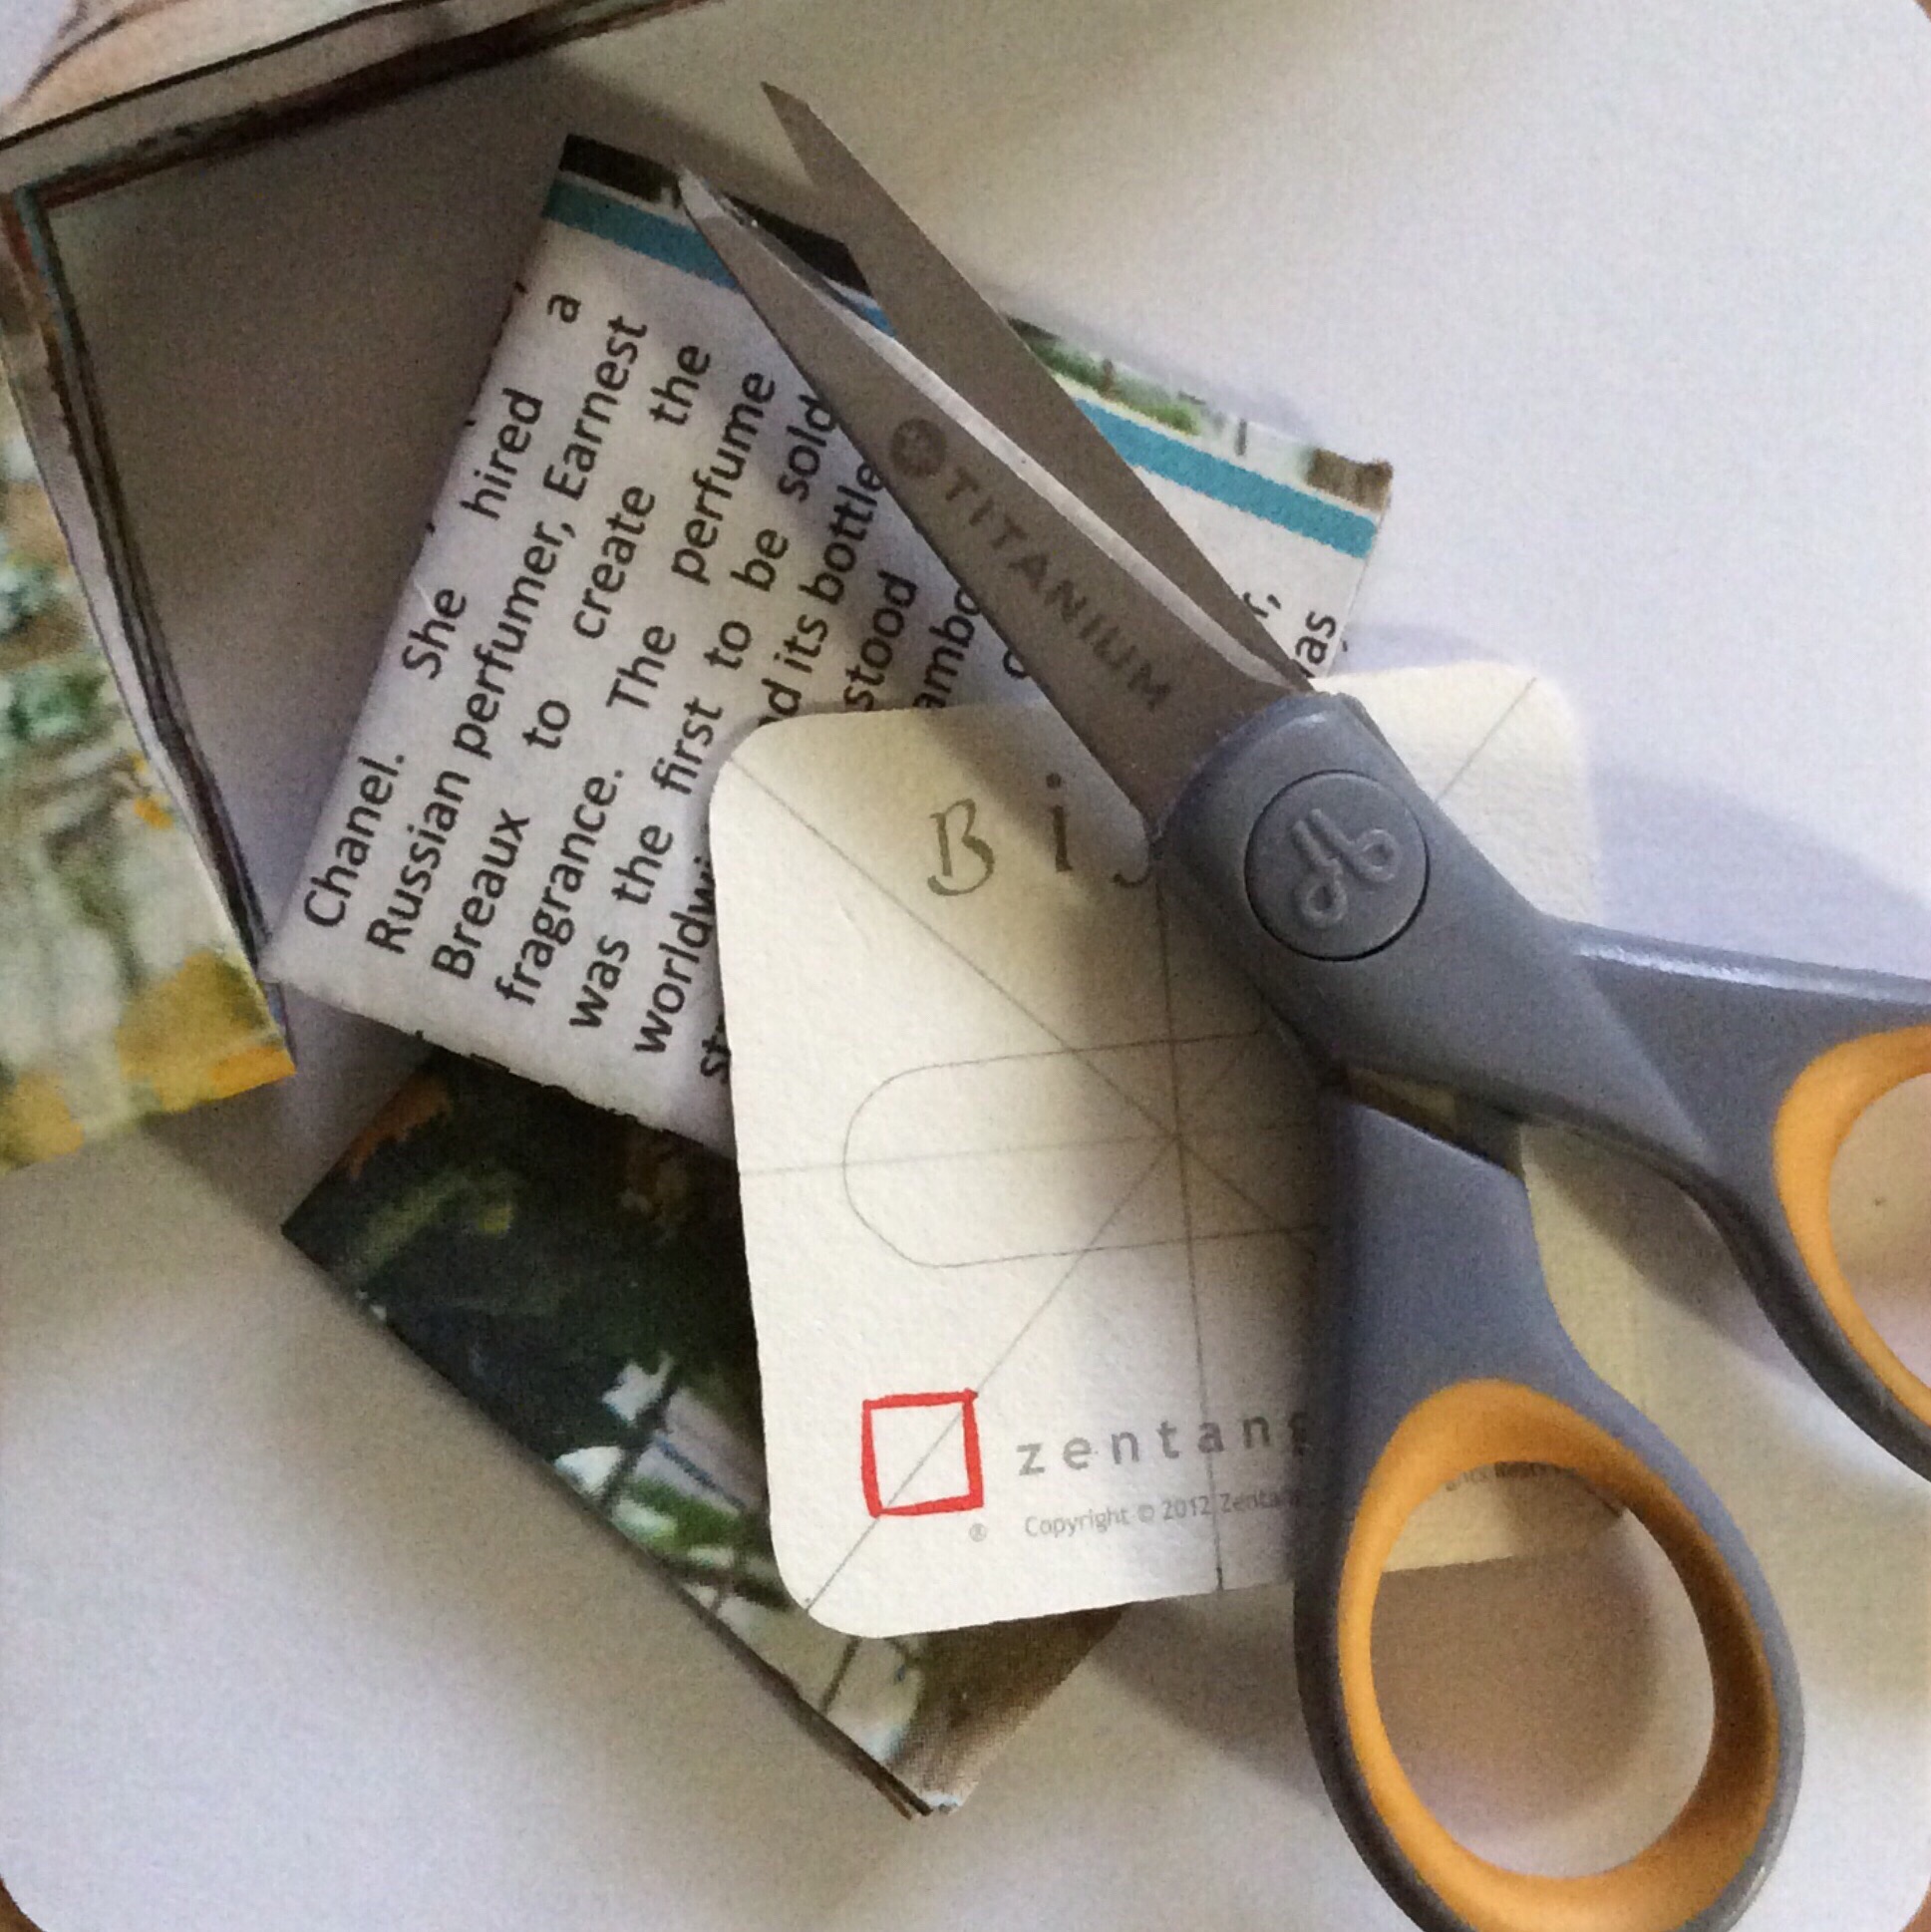
Step 8: Cut some filler.
Cut some filler to make gluing, tangling on the back, and closure cutting easier.
Before going further, take some time to cut some bijou-sized filler for your holder. I generally fold a newspaper page several times and cut out a section the same size as what I plan to fill with–such as bijou tiles or business cards. While you are at it, cut a piece of waxed paper or baking parchment to the same size. Slide this between your filler and the flaps. The filler makes it easier to glue the flaps together and later tangle the box, as well as provide a surface to cut into if you plan to make a flap tuck for your holder. The square of waxed paper or parchment keeps the filler from being accidentally glued inside the flaps when the glue spreads out inside.
Sometimes, I just carefully wrap bijou tiles or cards in waxed paper and slip them into the holder before gluing. This works best if I use tiny wafer-thin magnets as a closure. The waxed paper does nothing to prevent the X-acto knife from cutting into a good tile or business card!
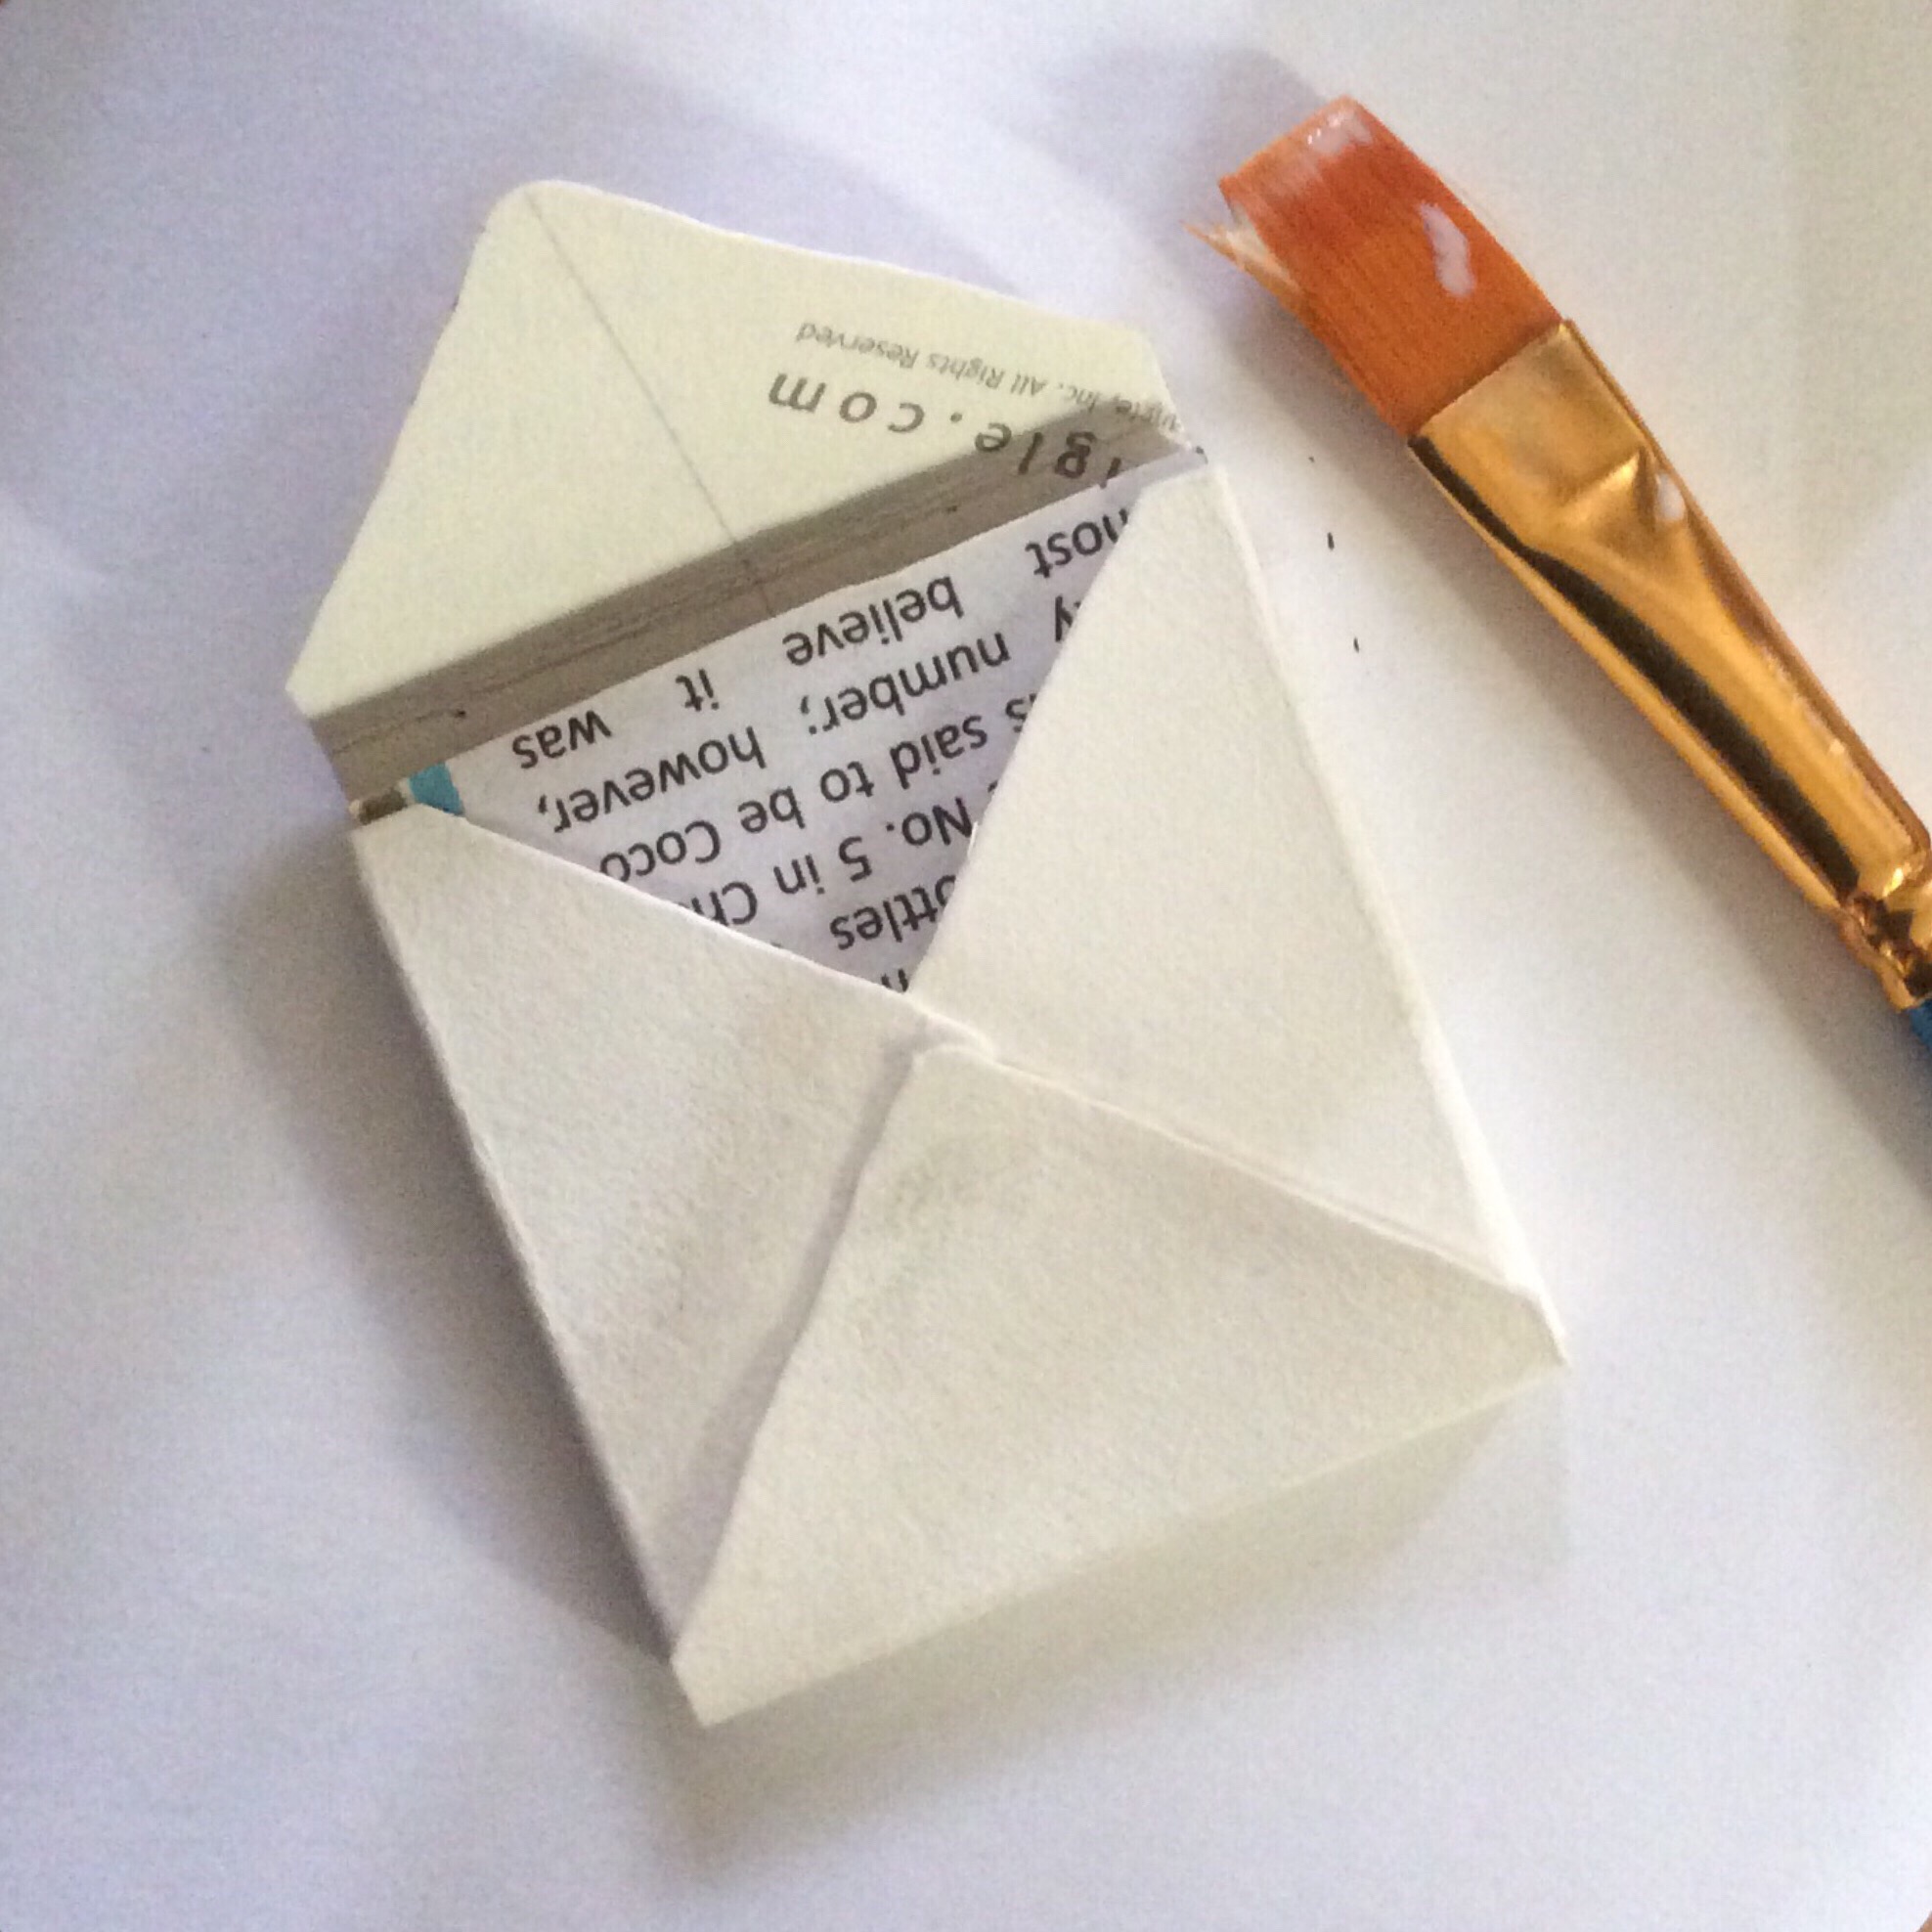
Step 9: Glue flaps together.
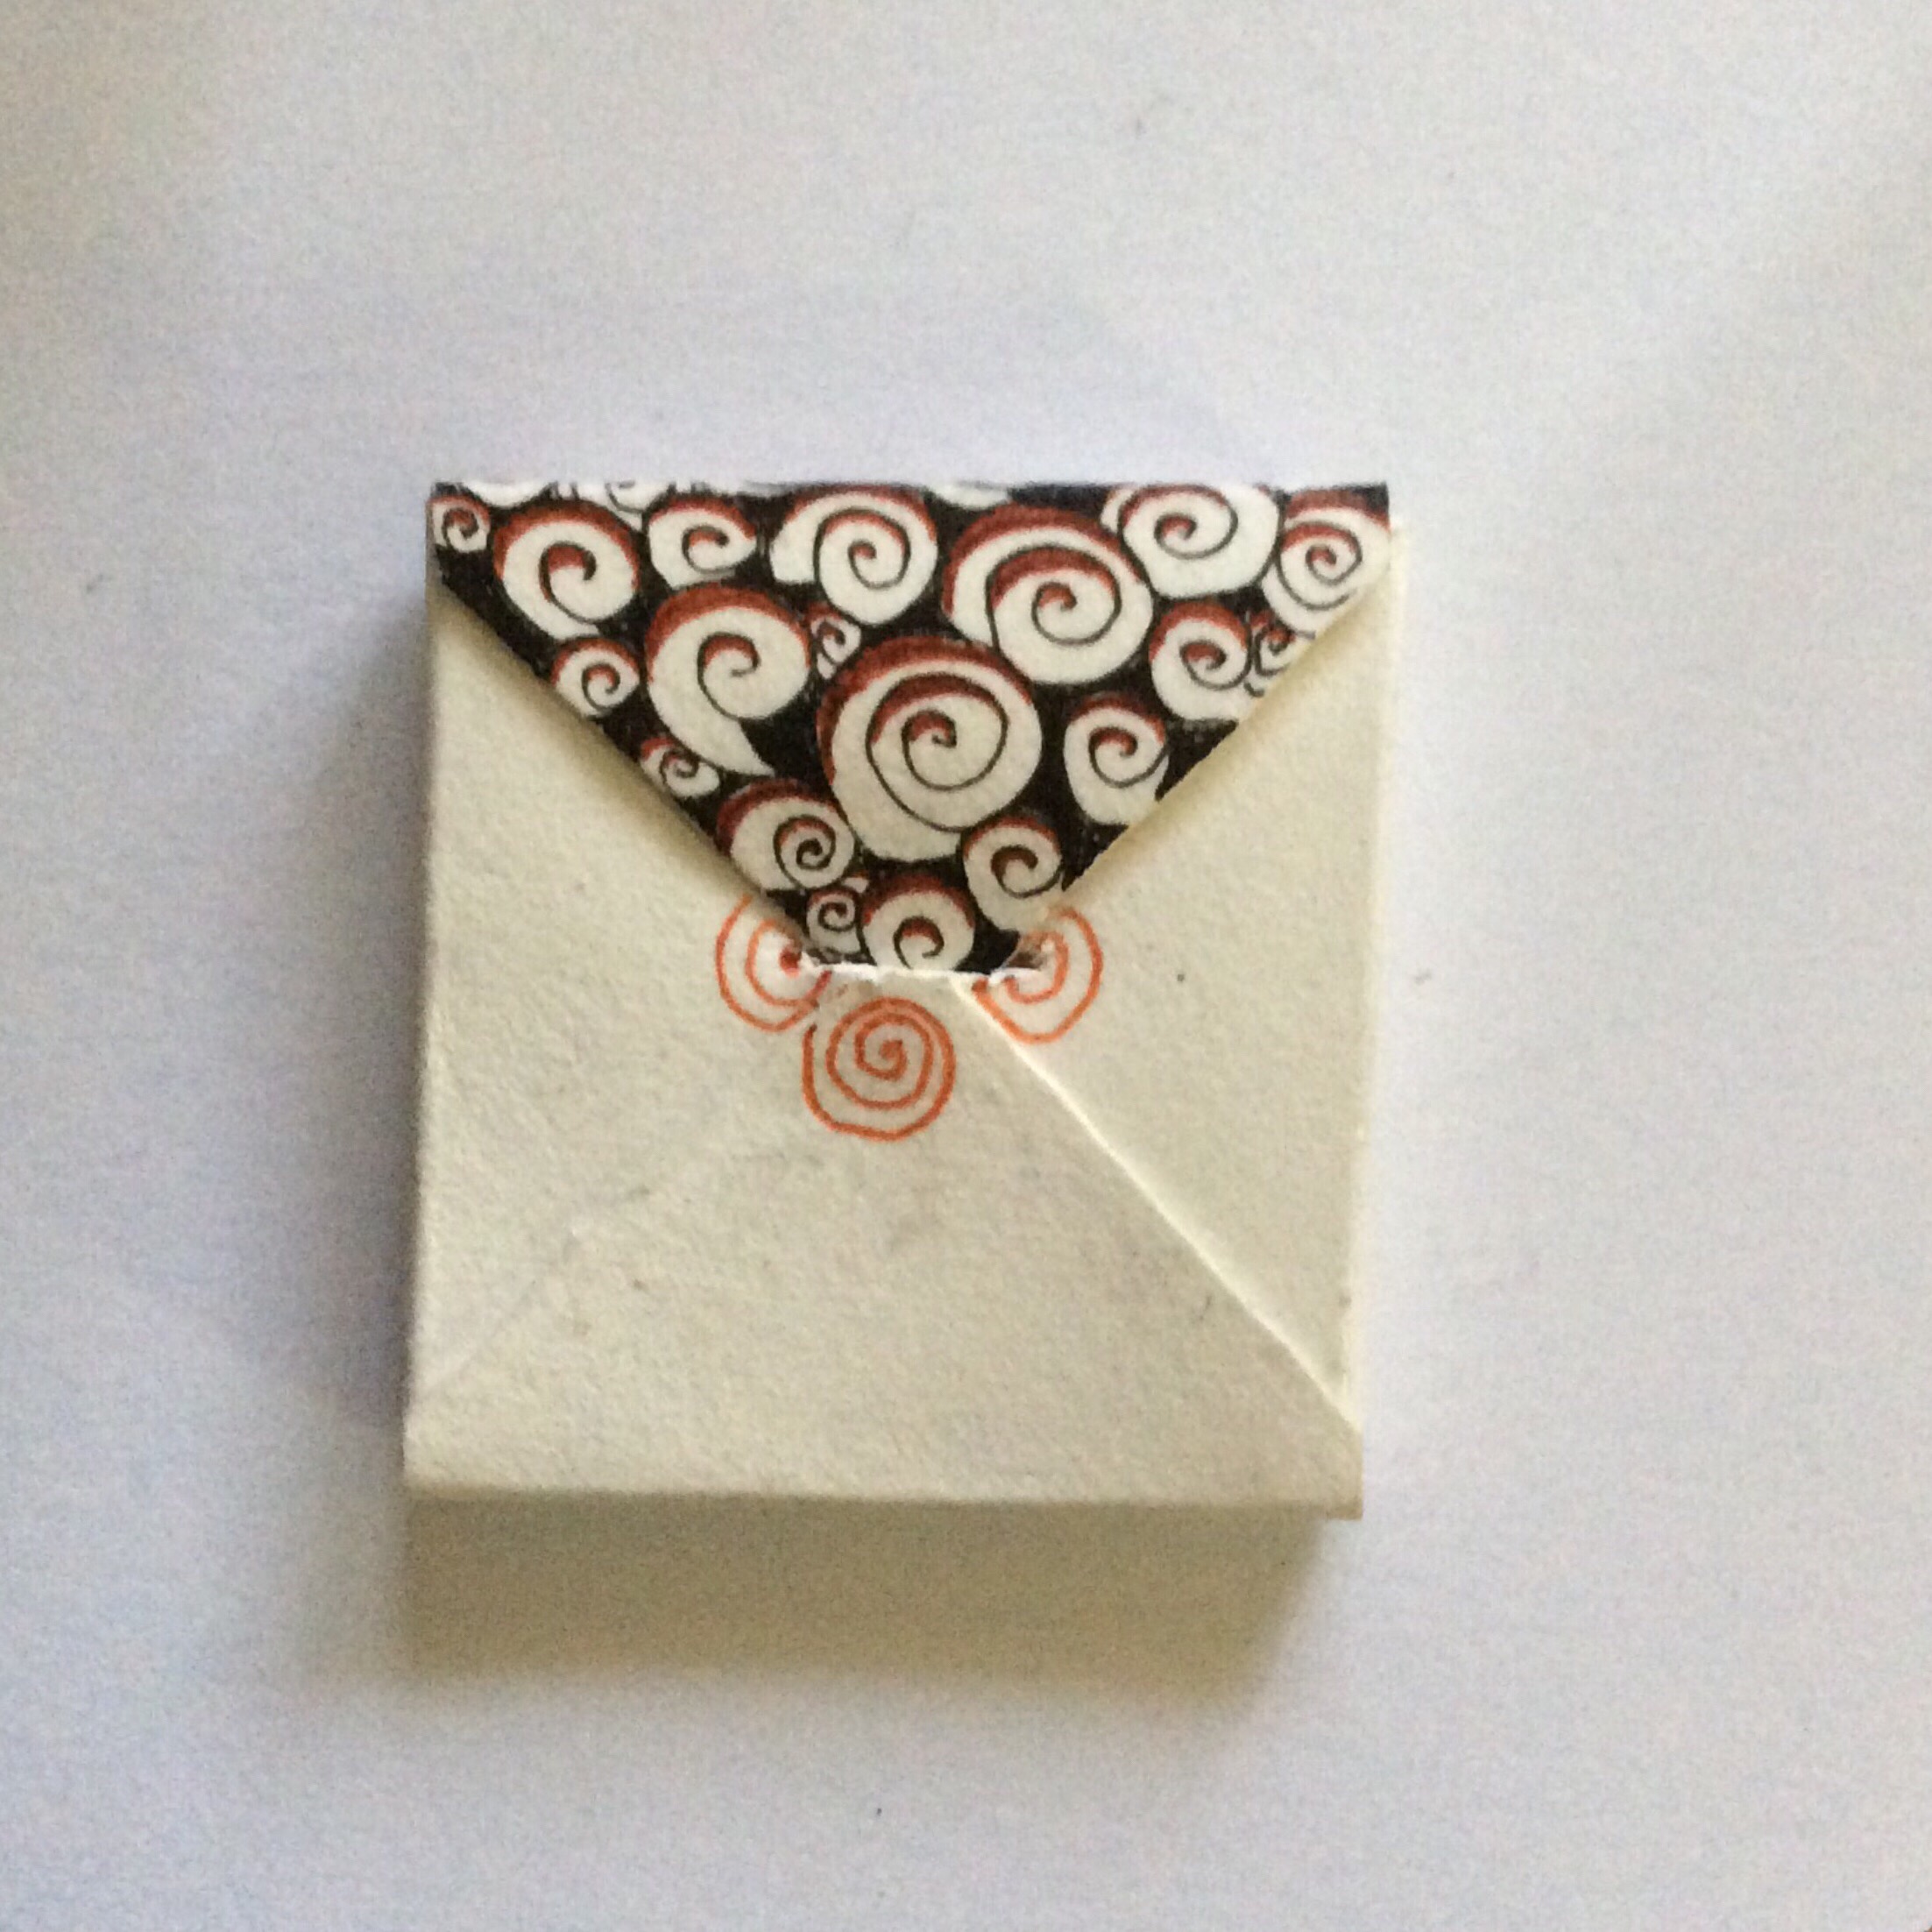
Glue three flaps together, envelope-style.
Overlap the two side flaps and glue them together. Next, bring up the bottom flap and glue it in place so the section resembles an envelope. This is far easier to do and let dry with filler inside.
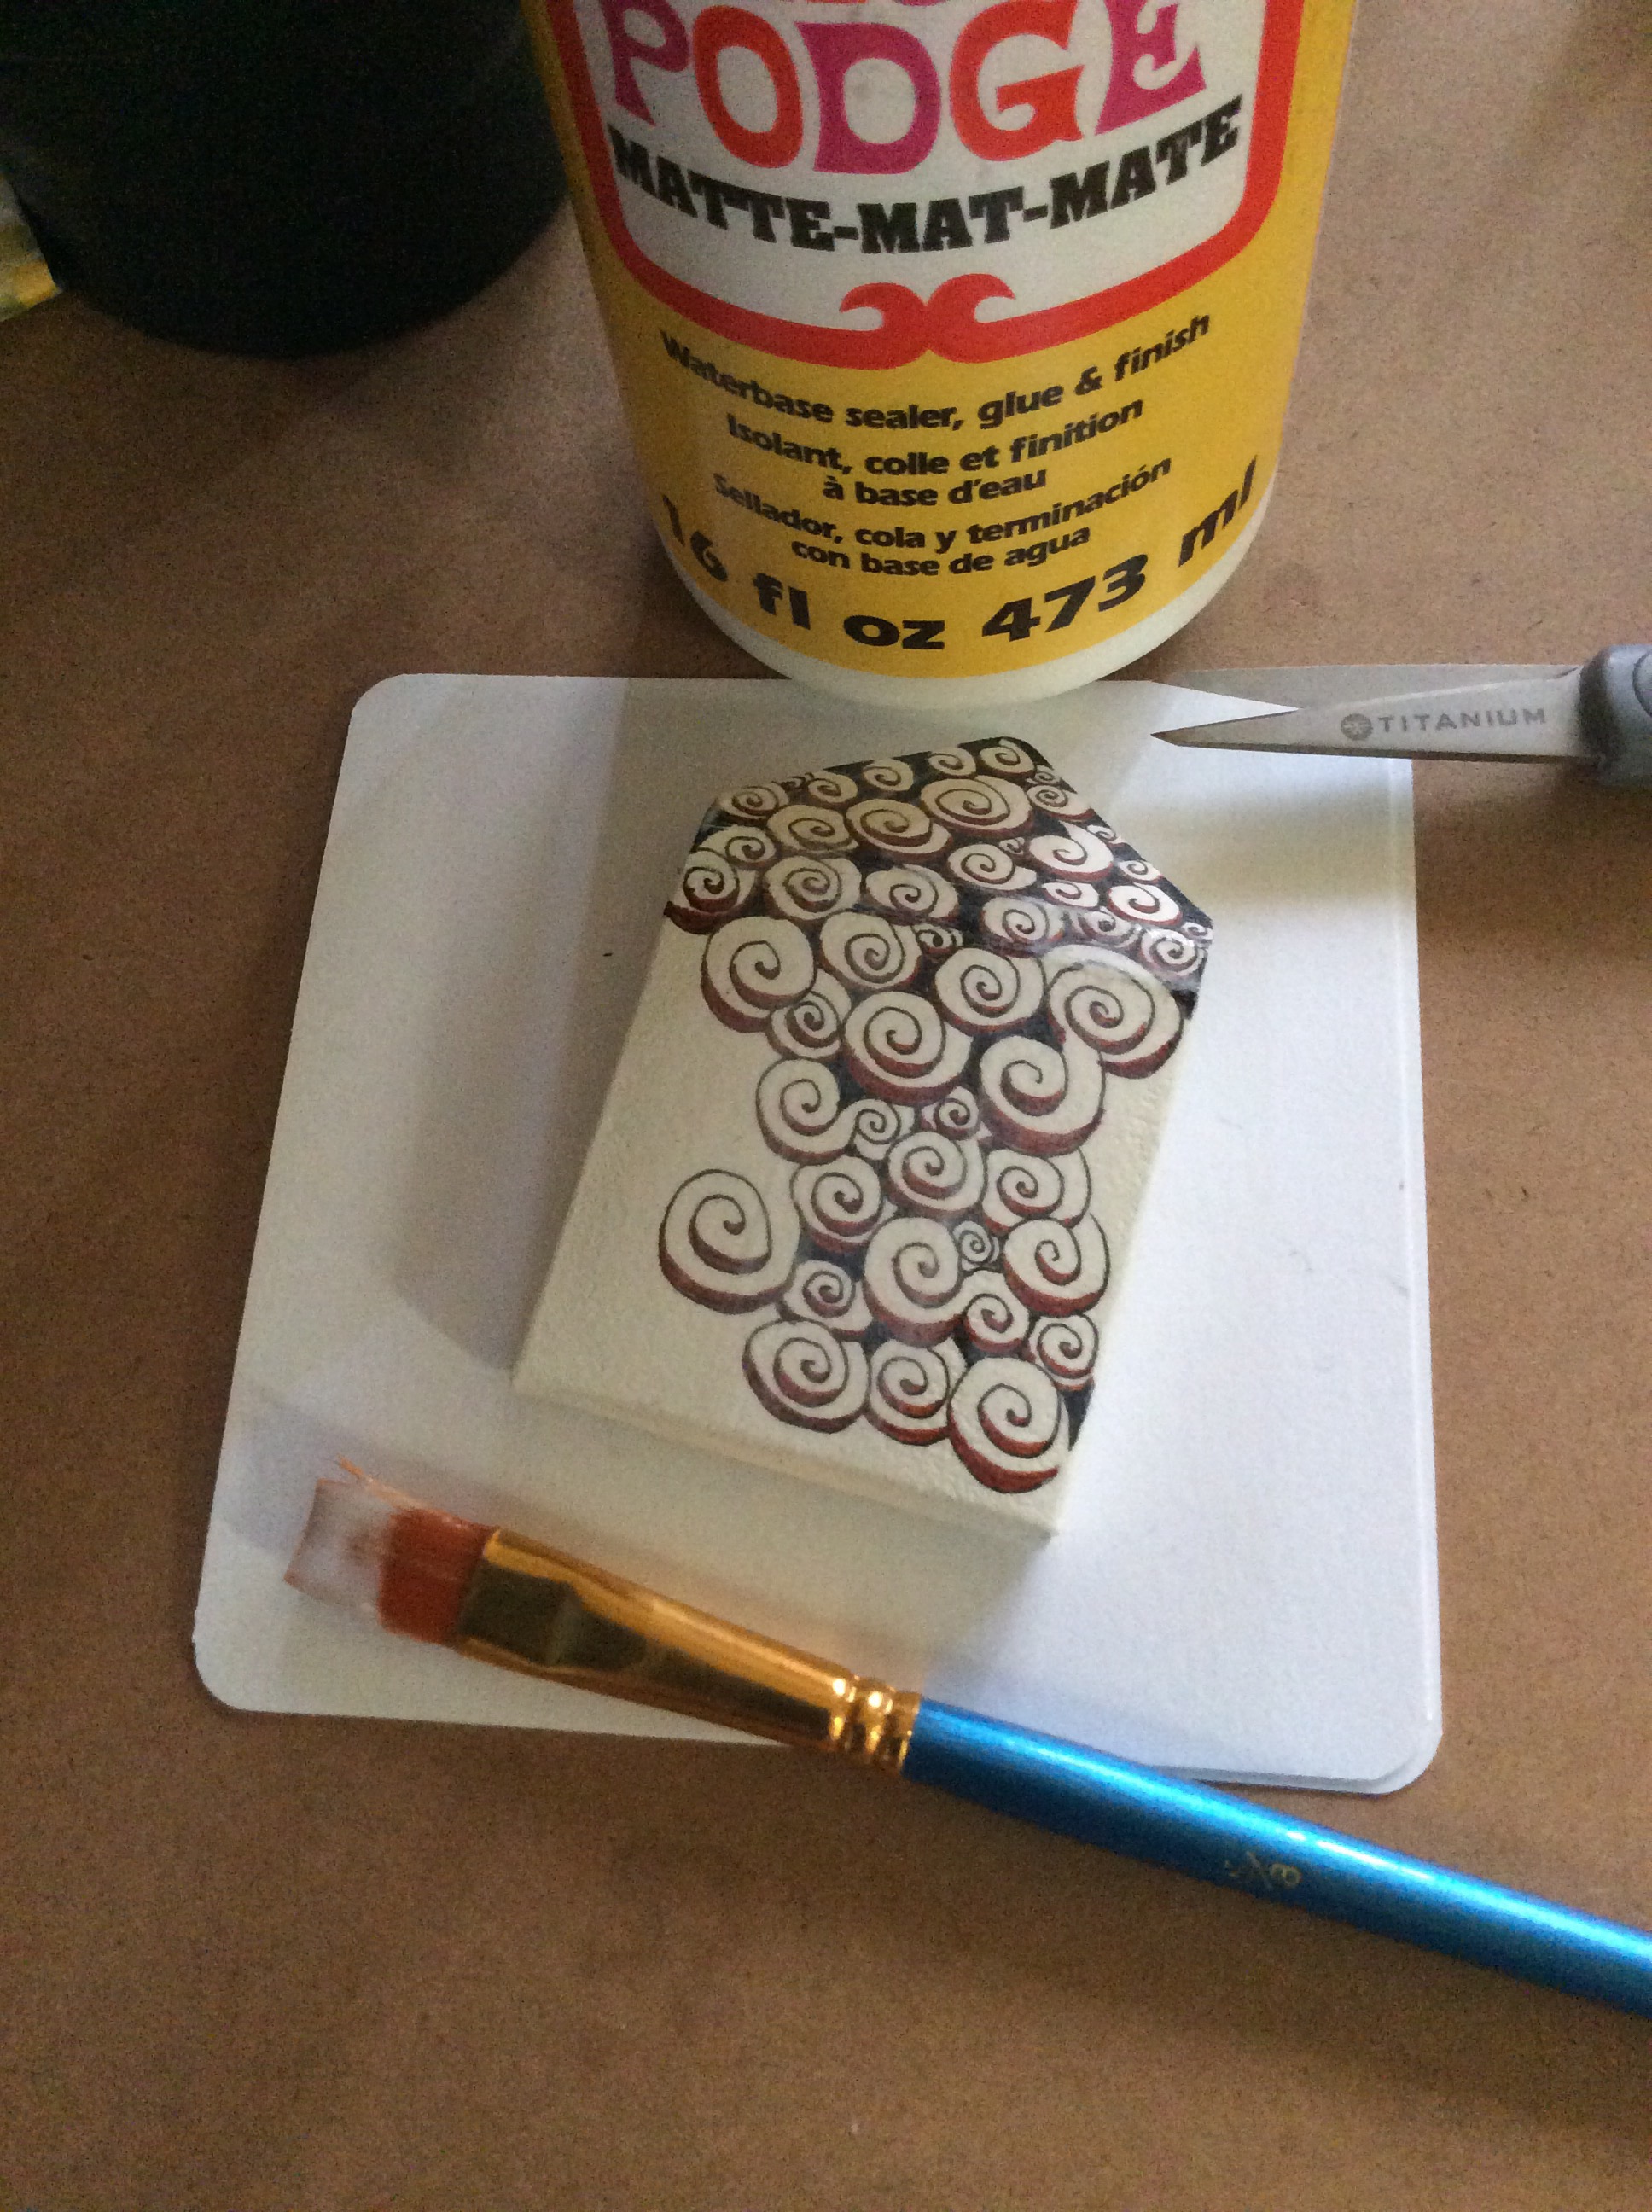
For gluing, I use the same thing I use to seal my artwork–Mod Podge® Matte water-based sealer, glue, and finish. It works great as a glue and as a sealant to protect the paper from wearing too quickly, and to keep my artwork looking fresh longer.
Once the glue is dry, you may want to tangled the back. You can wait until after you have sealed your holder, but you will need to seal the work again, as even Micron® ink can smear when used over the Mod Podge.
Step 10: Seal your work.
Seal the paper.
To protect your artwork and to extend the life of your holder, seal the entire surface–front, back, sides–with a protective sealer such as Mod Podge Matte or Mod Podge Glossy. Using an inexpensive art brush, cover the front and sides with the sealer, wipe away excess at the edges with a damp cloth, and allow to dry completely.
When dry, flip the holder over and brush the back with sealer. Wipe away any excess, as with the front. If you like, erase any pencil marks from the inside of the loose top flap piece, and seal it, too.
Give the holder time to dry completely before continuing. Mod Podge is dry to the touch in minutes, but could take half an hour or longer to dry through layers.
Step 11: Flap closures.
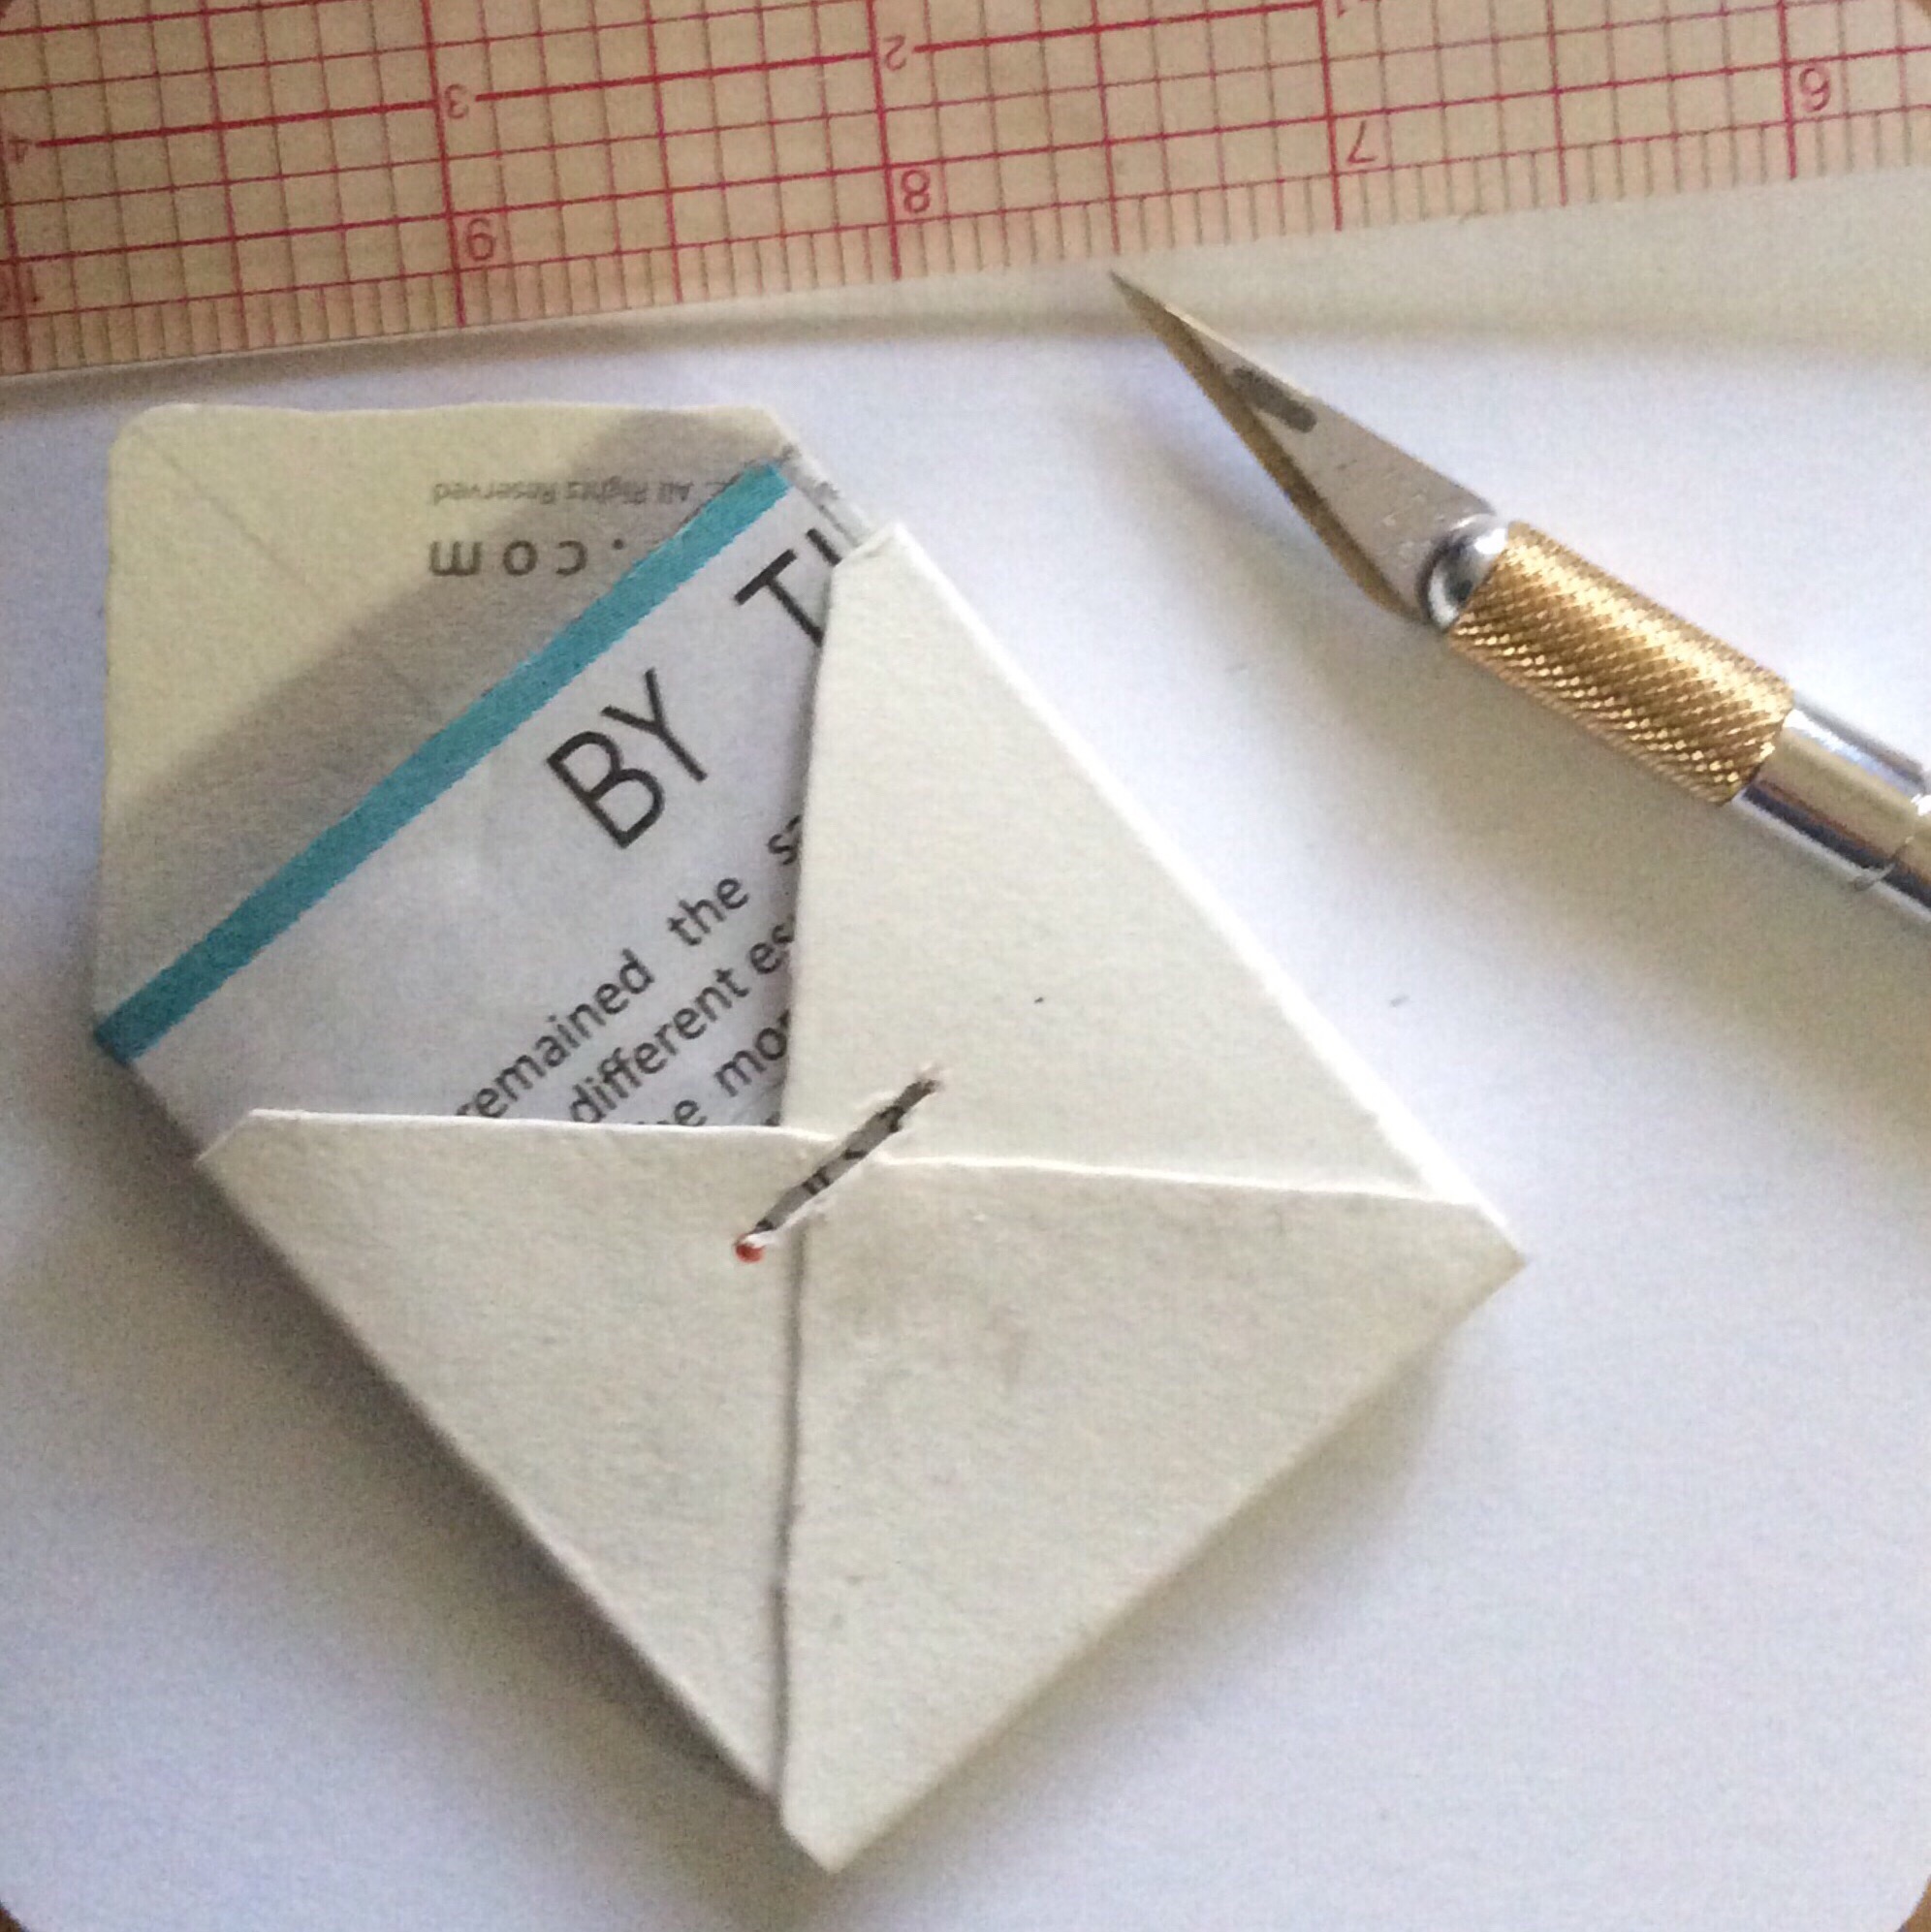
Cut out flap tuck, if desired.
Once everything is completely dry, fold the top flap over, and make marks to either side of where you want to cut a flap tuck. Using a straight edge and an X-acto knife, cut two parallel lines close together through all thicknesses.
I didn’t wait long enough, and the damp glue not only got all over the knife edge, but also created some problems for cutting through damp paper fibers. The result is a slit that is more ragged than it would have been if I were a little more patient.
If you prefer to use magnets or Velcro as fastenings, this would be a good step to apply those closures.
Step 12: Decorate back, if not done earlier.
Decorate back, if not already done.
All I wanted to do was add a bit of printemps around the flap tuck. You may choose to tangle the whole back, if you haven’t done so in an earlier step. I was going to leave the back untangled, except for the flap which I tangled with the front. However, I got finger smudges along the flap tuck because I cut too soon. I wanted to cover them up a bit.
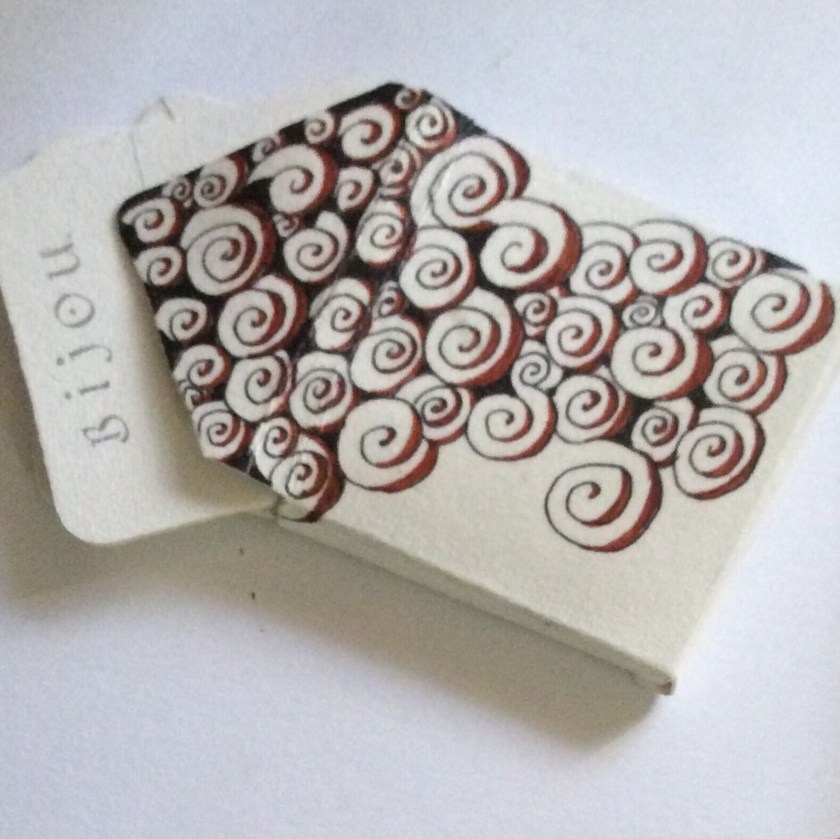
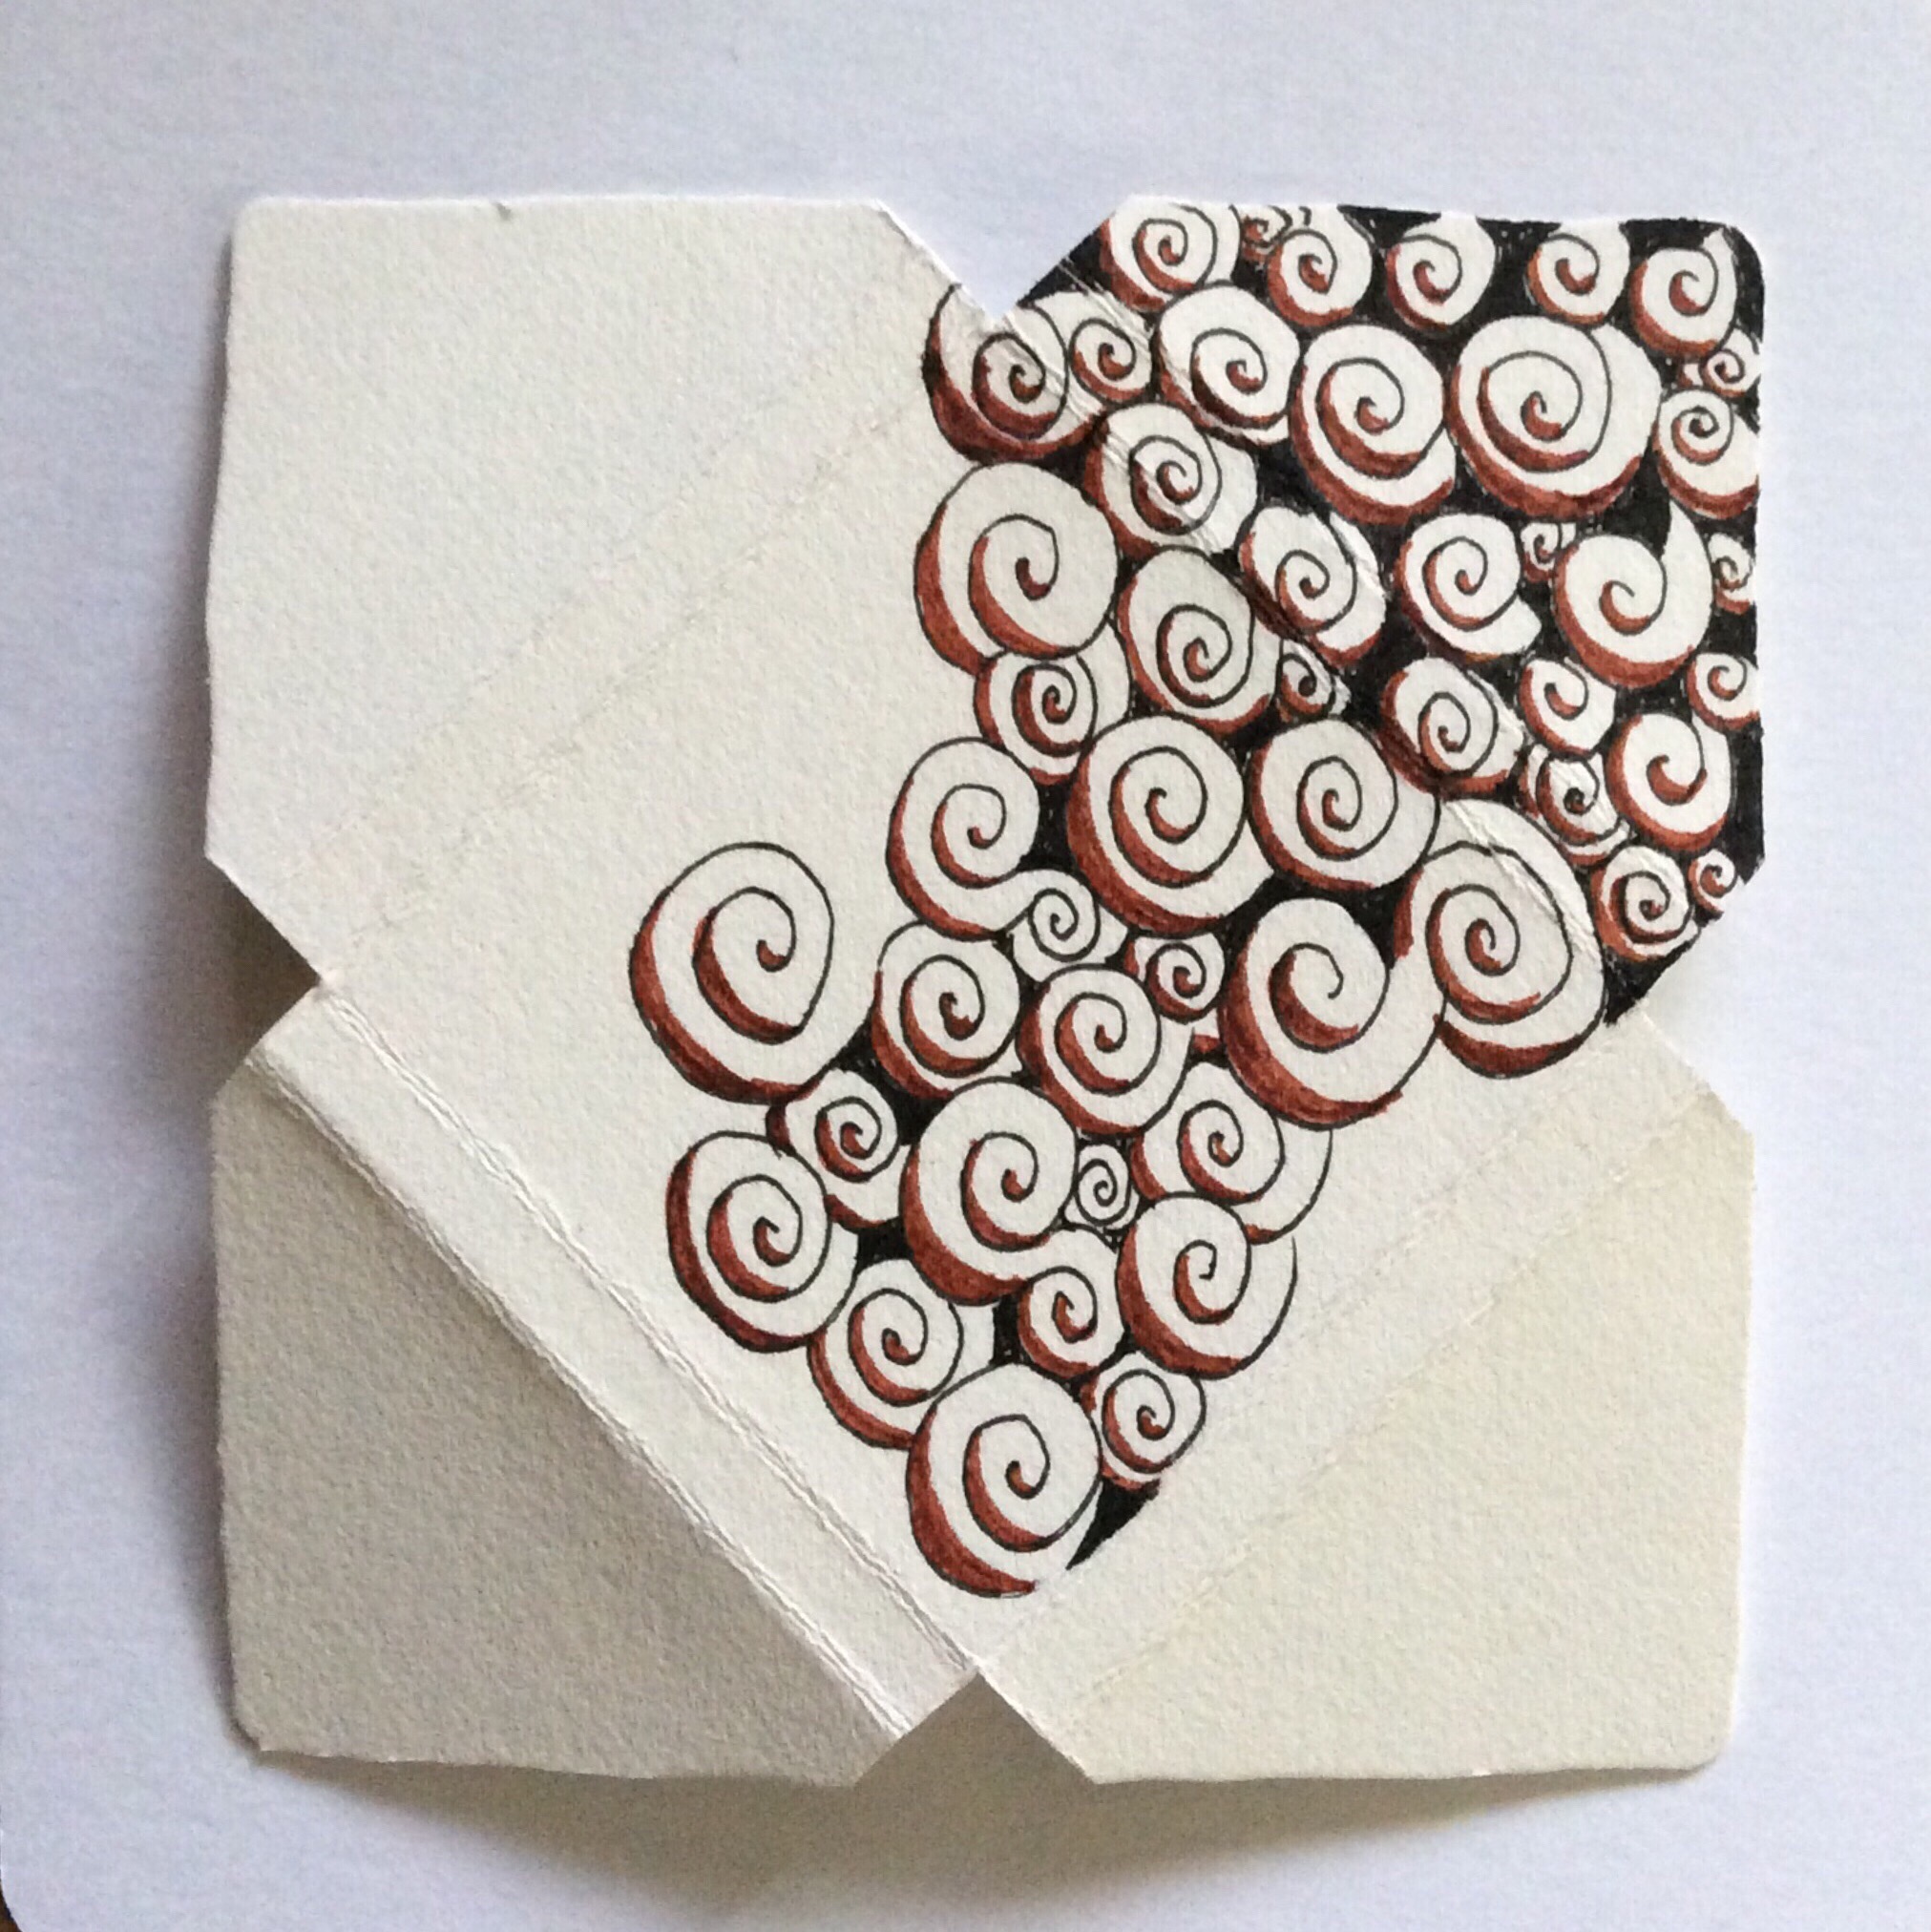
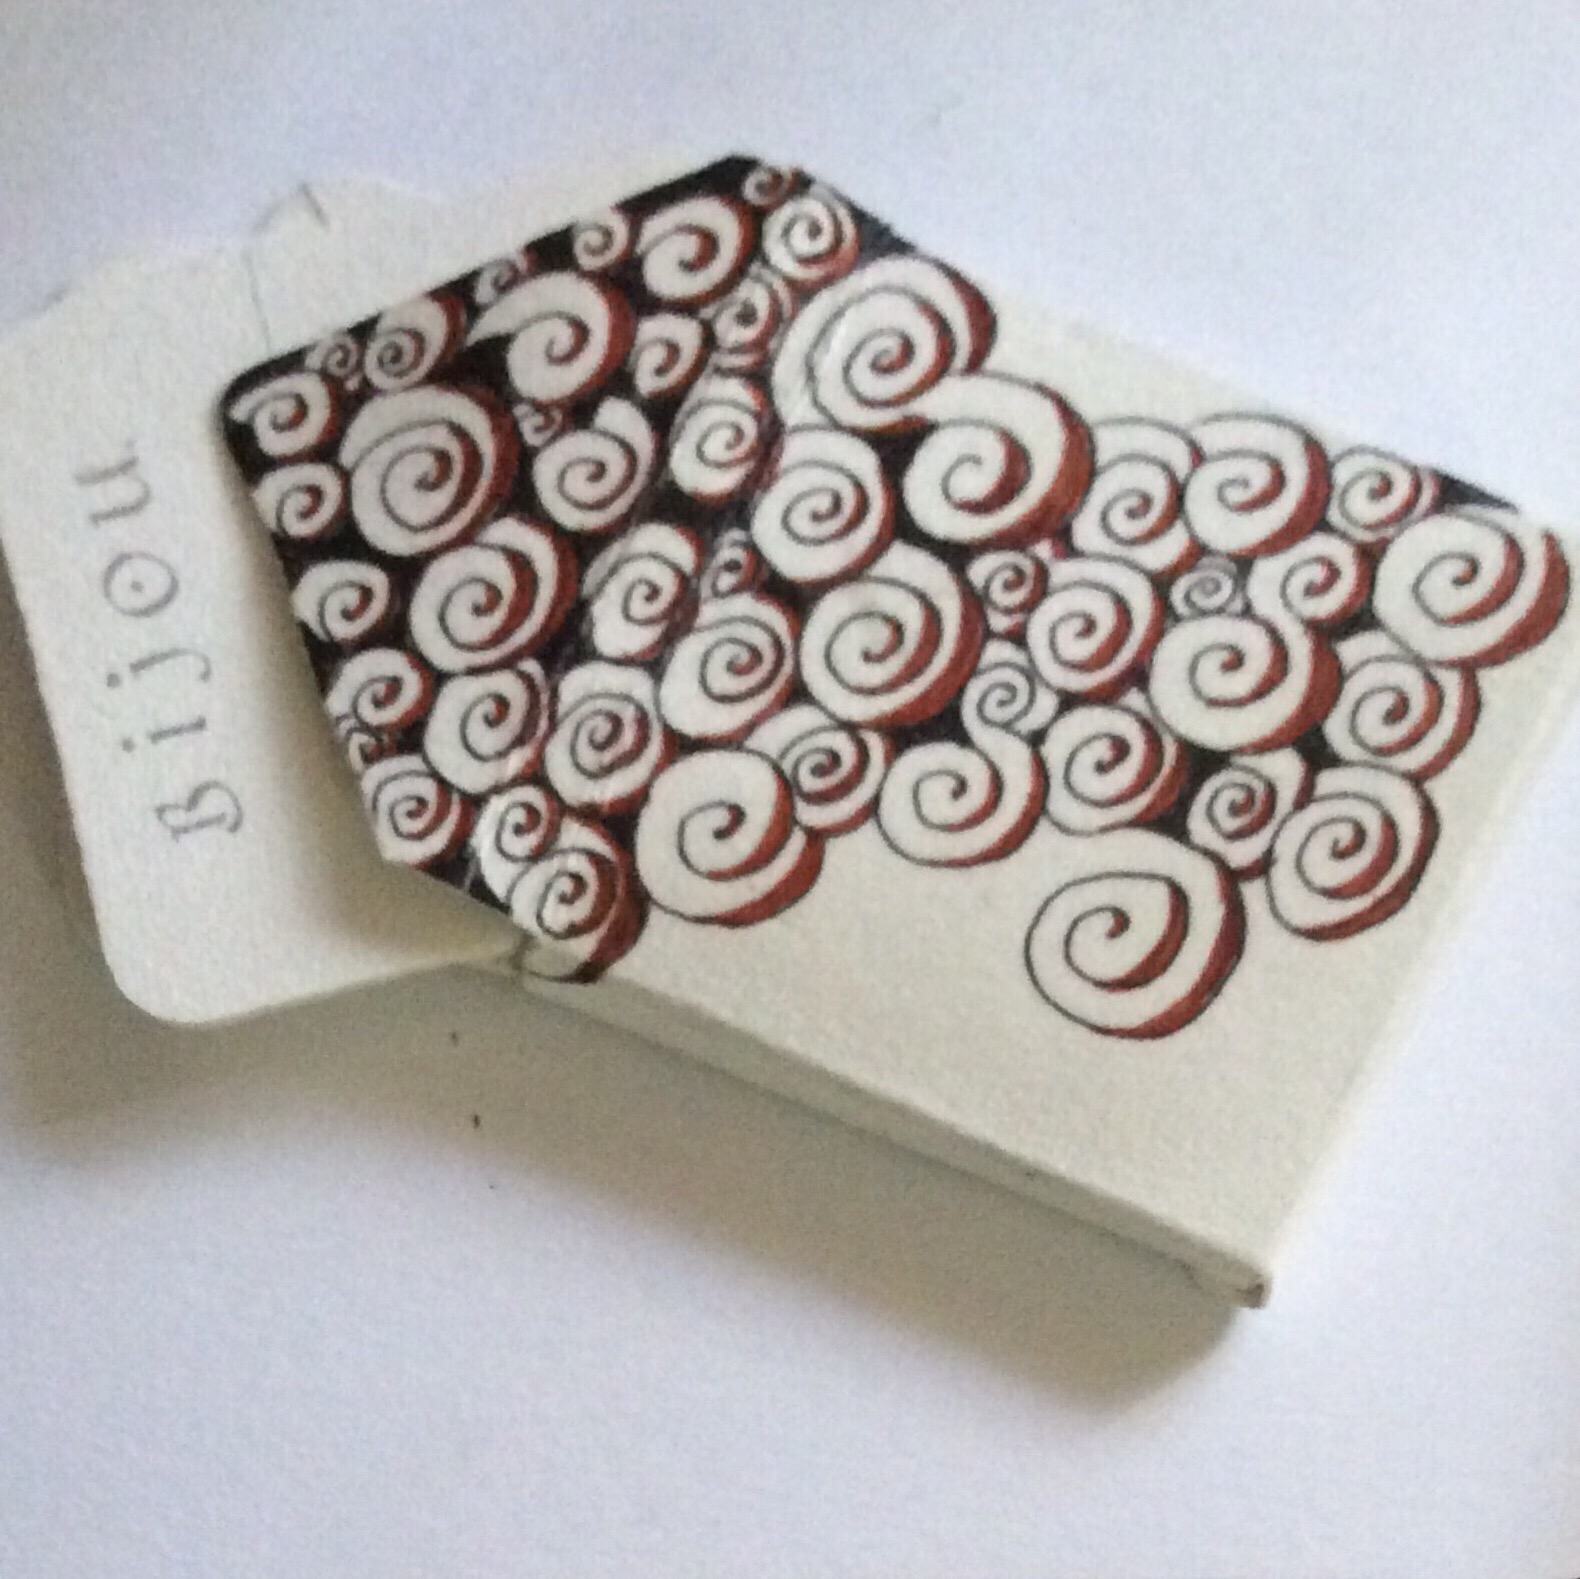
And the holder is done!
Completed bijou tile holder
Hope this gives you some ideas about what can be done with tiles, other than draw on them. There are so many beautiful, creative art works by tanglers all over the Internet. Maybe you will add to them to inspire others!
Earlier this week, on the Zentangle® Mosaic® app, founder Maria Thomas shared one of her first tangling pieces from very early in The Zentangle Method®’s history. She encouraged us to share our firsts.
As I read through descriptions of uploaded first works, I marveled at how many tanglers were introduced to Zentangle through use of the book One Zentangle a Day, by Beckah Krahula. Individuals who had not been able to locate a CZT (that’s Certified Zentangle Teacher) began their tangling journey using that book One Zentangle a Day was published in 2012, four years before the more comprehensive Zentangle Primer, Vol. 1 came out. Although Suzanne McNeil had been publishing thin workbook-style books for several years by then, it did not take a rocket scientist’s math abilities to realize that Krahula’s book was more cost-efficient and comprehensive than twelve workbook volumes. Before spending $50 on the official Zentangle kit (available from the Zentangle.com site or from any CZT) and, for the past year, another $50 on the Primer, so many of us took the less expensive introductory experience of purchasing One Zentangle and a stack of inexpensive card stock paper tiles by Peter Pauper Press (probably all purchased via Amazon, too!). Or we used sketchbooks in lieu of tiles. This way, if we didn’t like tangling, we spent less than $30 for book and tools rather than $100 or more to get started. Not one of us regrets having spent that $100 later, though, because the tangling journey made us feel good, and we needed more.
My tangling journey began 15 months ago, with One Zentangle a Day and a sketch book that had many of my traditional drawing attempts in its first half. I worked almost exclusively in the journal for several weeks, mostly because I lacked the confidence to ruin even a cheap tile. Sometimes, I drew 3.5-inch squares to simulate tiles. More often, I simply drew a square that was big enough to tangle in, but was either larger or smaller than an actual tangling tile. Perhaps I was deciding whether I liked tangling, or maybe I was sticking to the sketchbook because I needed the sense of familiarity and security of a well-used surface. It took a while before I started using the inexpensive tiles.
Much of my tangling was originally done in pencil–just in case I wanted to erase, even though we don’t erase in tangling. Then I moved on to more complex tangling as I learned more patterns and came up with more strings. Gradually, my work improved and I out-grew One Zentangle a Day.
That’s when I decided to invest in the Zentangle Kit, the Primer, and finally the Zentangle Mosaic app. Following the lessons in the Primer and getting insight and inspiration from fellow tanglers on Mosaic, I kept tangling and found my art–and my ability to meditate–growing, expanding, evolving. By then, I had also decided that I needed to attend the Zentangle teacher certification Seminar, if for no other reasons than to attend a formal class, and to legitimately spread the love of tangling to the island’s residents so I wouldn’t have to tangle alone.
Maria Thomas’ challenge on the Mosaic app opened so many opportunities to share where many tanglers started, and why we started. Some people took up tangling because they were established artists wanting to learn a new technique. Many started their Zentangle journey because of a major life change–the loss of a loved one, a move to a very different environment, retirement. Still others came across the Zentangle Method when they were searching for a form of meditation that didn’t force physical stillness. A few were introduced to tangling by a close friend. Some simply stumbled across Zentangle on the internet and thought it was pretty. Most started tangling because of several of these reasons, plus others. But we all started somewhere, fell in love with tangling, and continued to grow through certification seminars or various local tangling workshops.
The humble beginnings project got many of us communicating and sharing how the Zentangle Method has helped us personally. Both on this blog and on another blog site (Write of Passage, or dremiller.com), I have shared both why I tangle and what my experiences have been. Among the ways Zentangle has helped me personally is calming my mind, helping me learn (or re-learn) to focus on something, relieving physical and mental tension and anxiety; and providing meditative opportunities to examine my past, including behaviors, and to brain-storm the possible impacts of important decisions. Meditation has helped me explore myself in many ways, with the topic of exploration showing up often in my tangled works.
Why do you tangle? How did you get started? If you have been tangling a while, how has the Zentangle Method helped you with your life and your art? How has your art changed?
Leave a comment to this post and share your tangling journey!
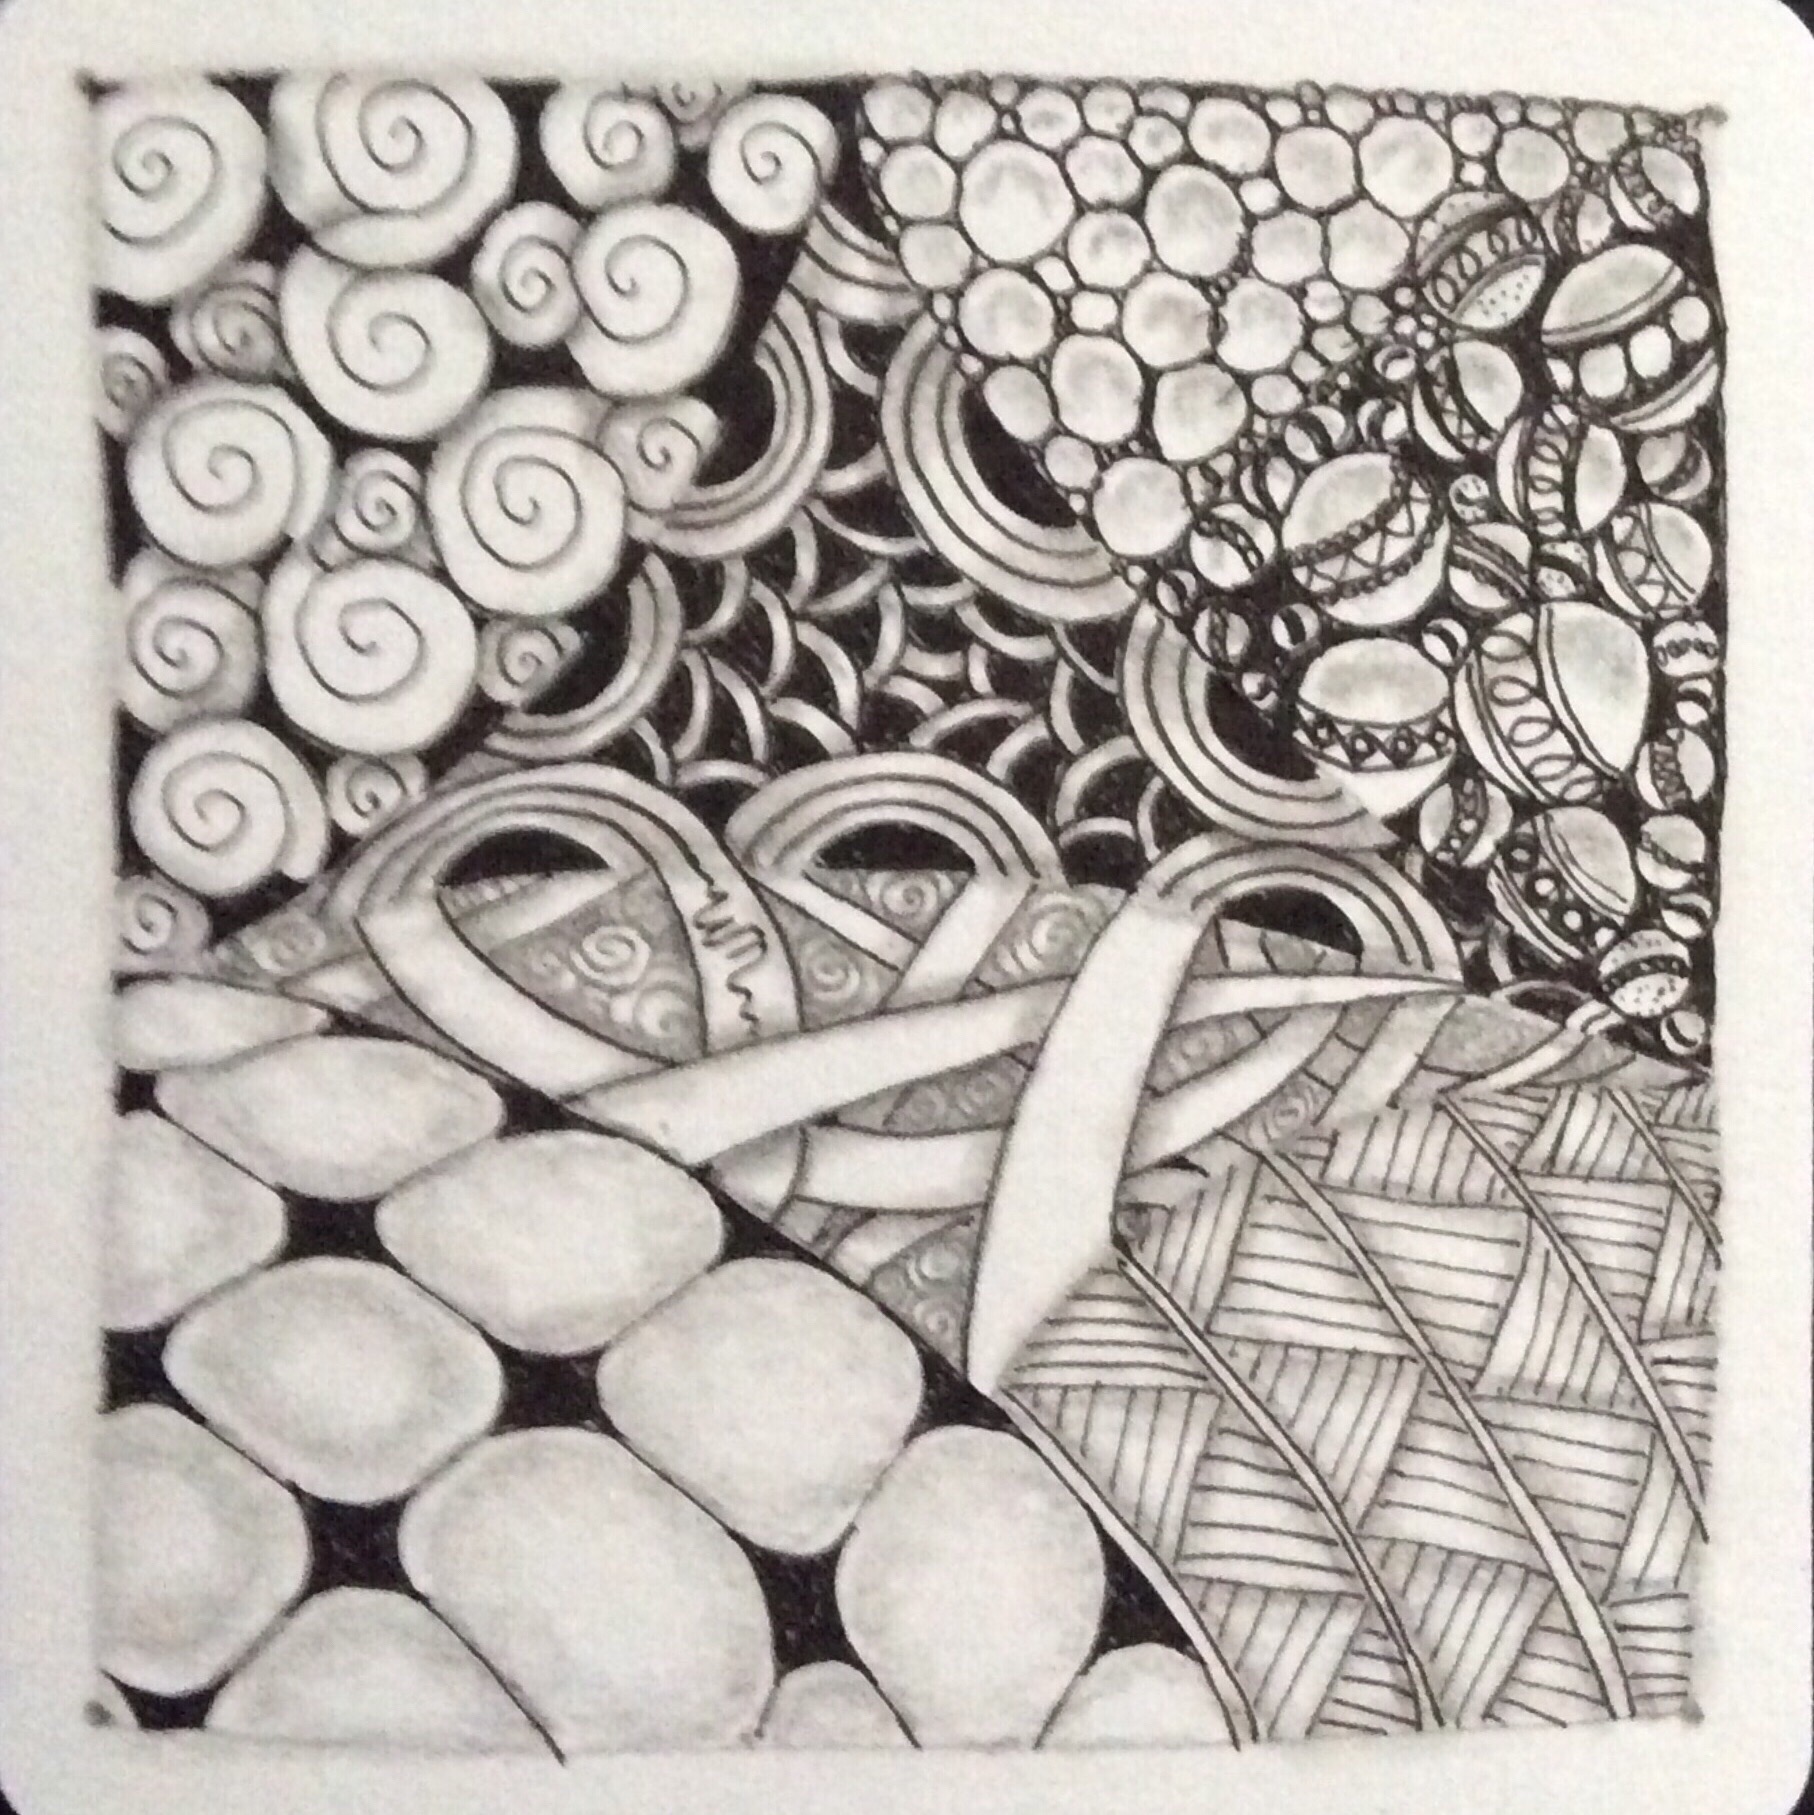
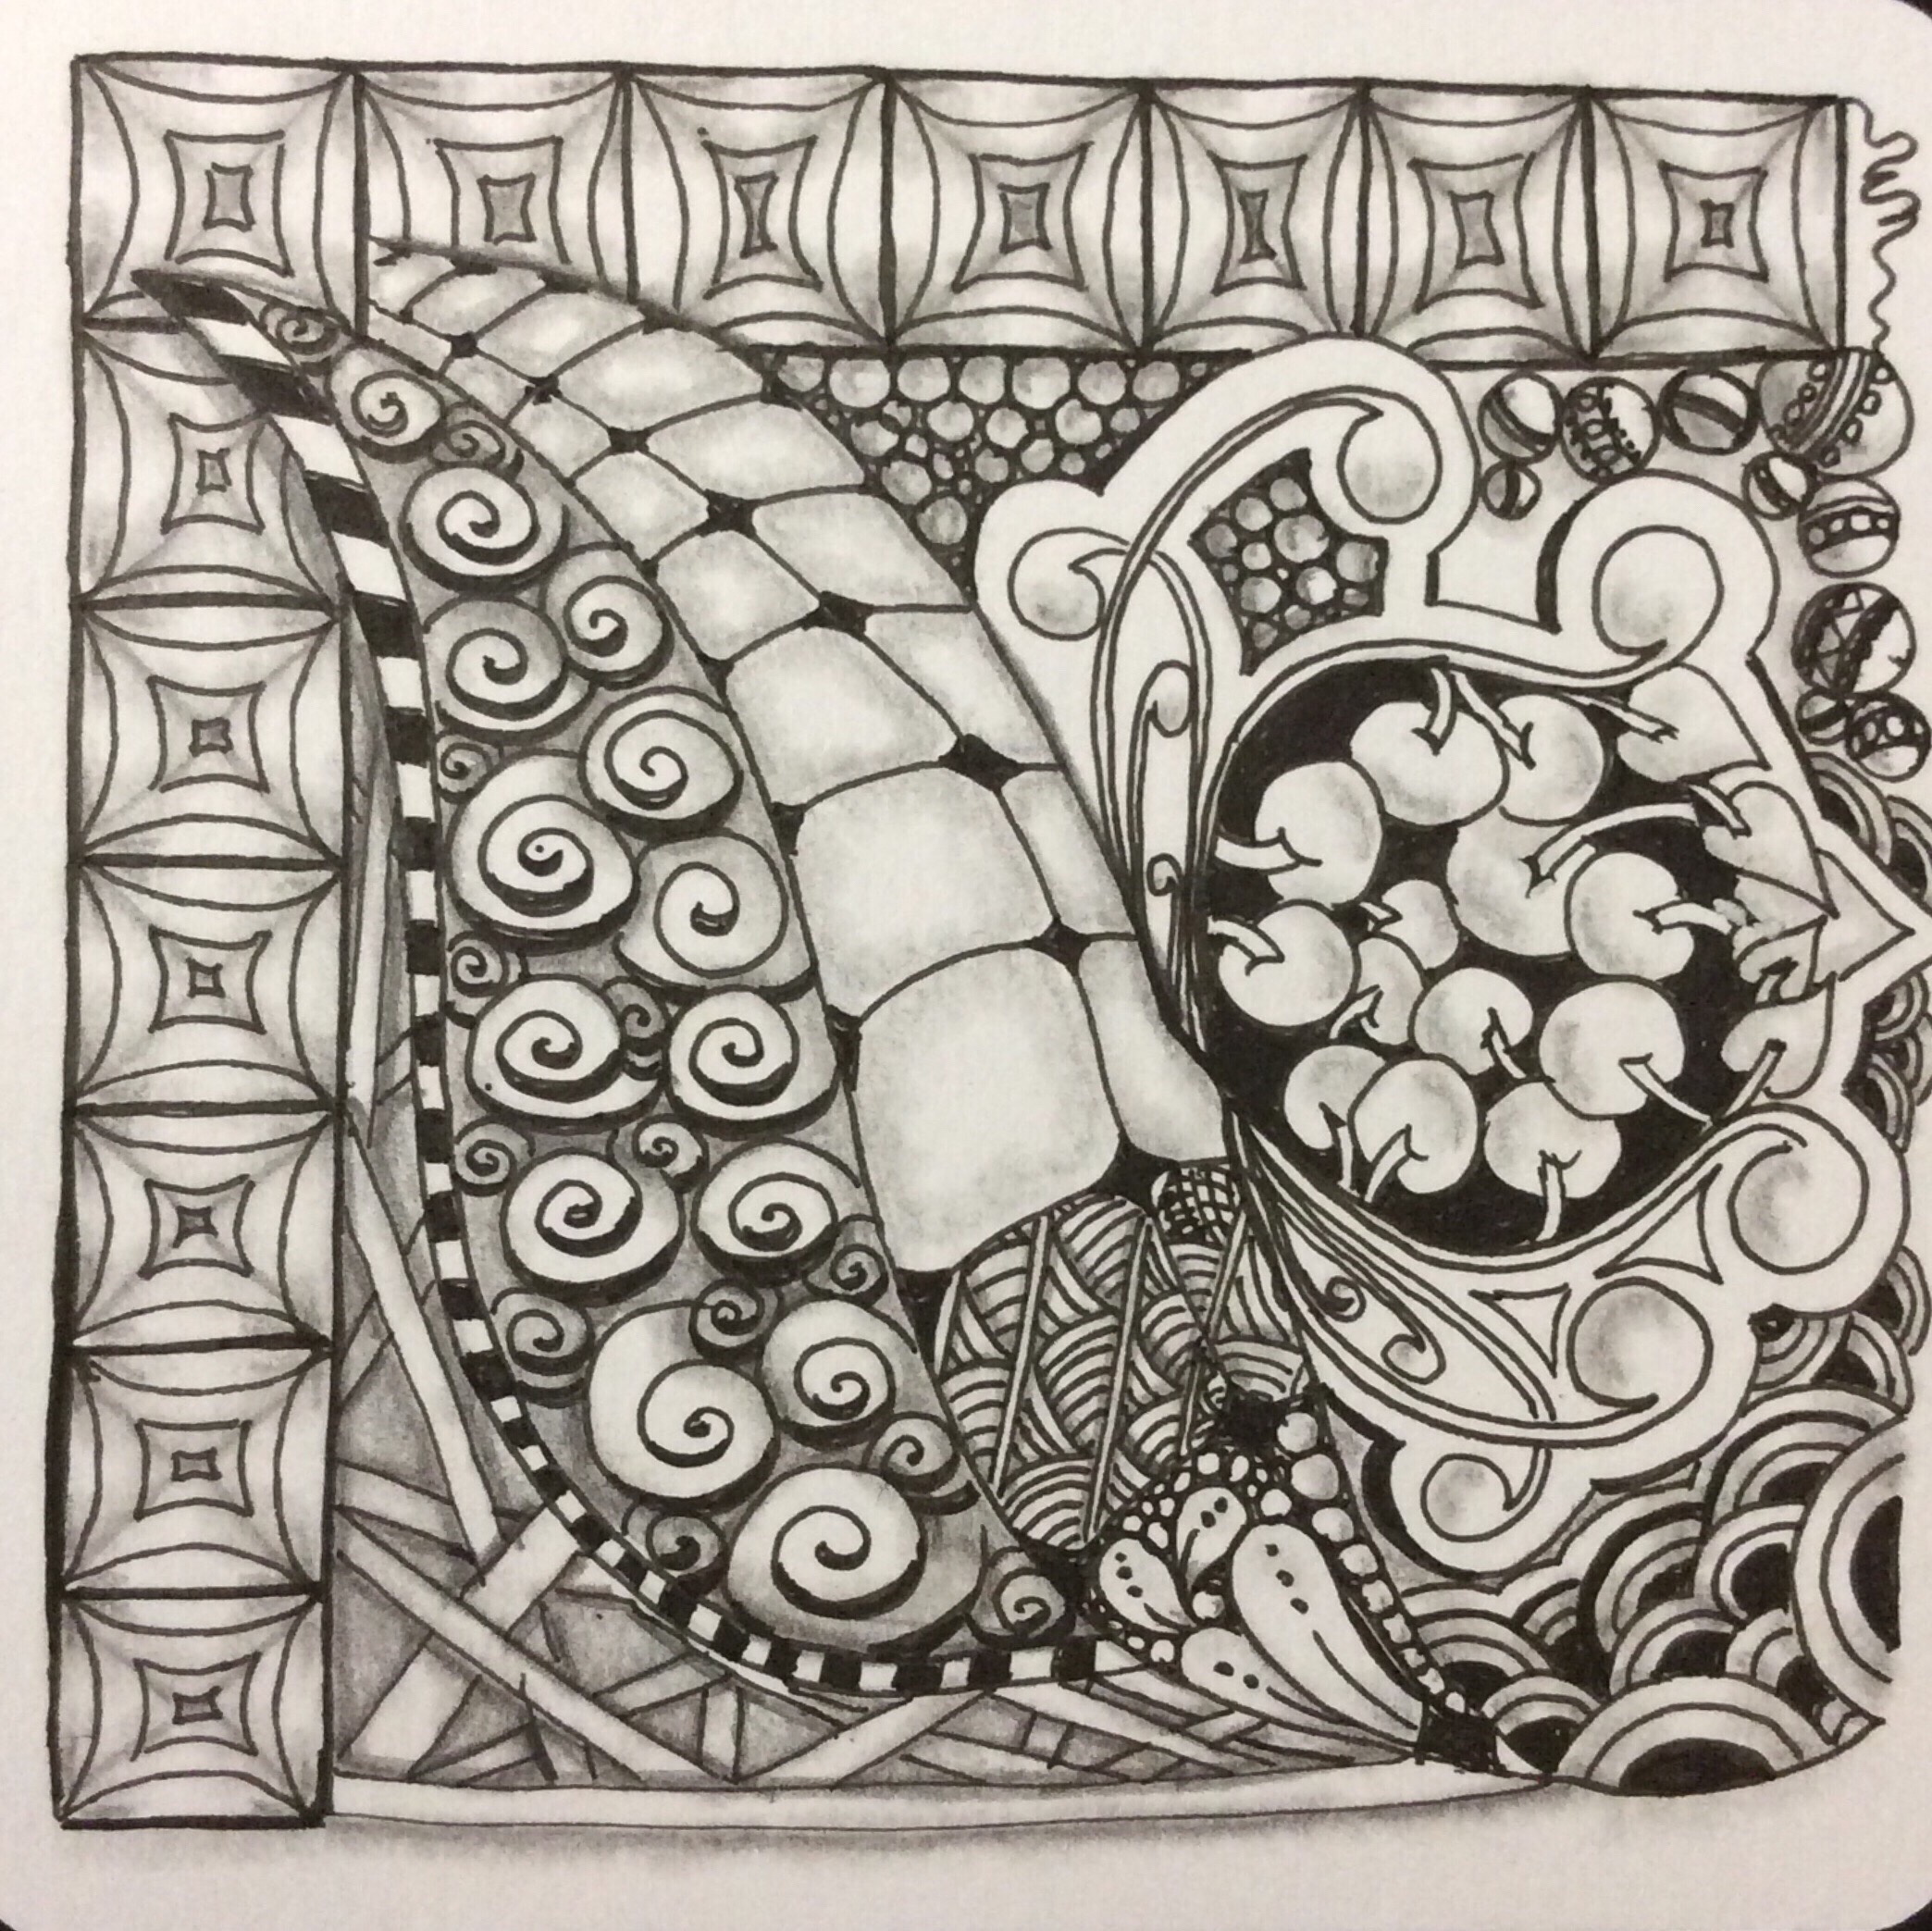
Lately, instead of blogging, I have been tangling away for a “first workshop.” The Zentangle Method® workshop is being conducted for students and faculty of a local medical school. This may be a “one shot” as the group is very busy with classes and studies. So I need to present as many workable tangles as possible into a 2-hour workshop. It’s not for another six weeks or so, but I want to give participants an idea of what can be done with just six or seven basic tangles.
The purpose of the workshop is to help students to learn an active meditation technique. Tangling can help them relax, relieve anxiety especially before exams, and learn focus and concentration tools that can be applied to studying. The purpose of the examples is to help them see the versatility of using only a few patterns to get them started.
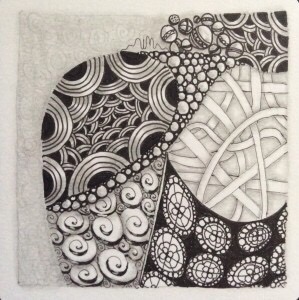
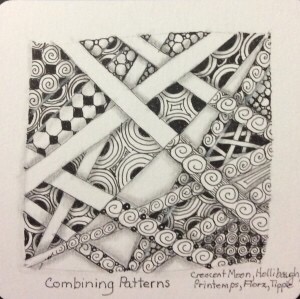
These are the first tiles I have tangled with just the first six (or seven) patterns I will be teaching during that workshop. I plan to teach both Tipple and Jetties together, because I kind of think of them as the same basic tangle–a basic version and a version with attitude. The other tangles will include Crescent Moon, Hollibaugh, Florz, Printemps, and Shattuck. And Bales, if there is time. These should provide an idea of the versatility of learning and tangling with such a limited number of patterns.
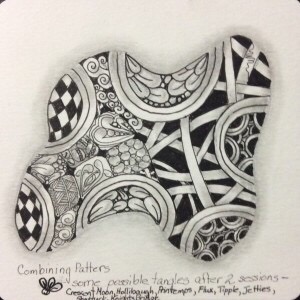
In addition, I am working up tiles that would include tangles from a second session. That session would include Bales (if not covered in the first session), Knight’s Bridge, Flux (both versions), Mooka, Poke Root and Poke Leaf. So much more versatility with only five more patterns!
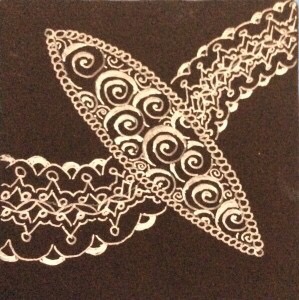
A month ago, the thought of tangling on a black tile–especially with a white Gelly Roll® pen–made my stomach knot up. I kept trying, but it was more difficult to conquer the fear of black tiles than anything I’ve ever done–except quitting smoking; I’m still working hard on that.
When I was at CZT Seminar 27 last month in Providence, RI, the topic came up in a conversation with Maria Thomas, one of the Zentangle® founders, about fear of tangling on black. Every wobble of the white pen is so vivid. Amazingly, many talented tanglers had trouble working with black tiles. Maria thought about it for a moment and said, “Start with gray.” The next session was starting, so there was no opportunity for clarification. But I thought about that, and thought hard.
When I returned home, I tried several things. I tried gray markers and brush pens first, but they just disappeared into the black tiles. Next, I tried some light gray color pencils, which worked OK in terms of showing up on the black tile, but required a lot of pressure and constant sharpening. Using gray gel pens produced better results. I even tried using gray markers and gel pens on top of white ink. Nothing was working for me. So I simply turned to some of the less bright Gelly Roll Moonlight pens I had in my arsenal. Those gave me a feeling that not every wobble was showing up on my tiles, and helped me get comfortable with tangling on black.
Finally, I started tangling on black tiles with white gel pens again–but not with the recommended Gelly Roll. Instead, I used a slightly finer tipped white pen by Uniball, called Angelic. That slightly finer line made the difference for me. From there, it was nothing to pick up the white Gelly Roll without thinking, and tangling away without fear, and quite happily!
For me, it was a process to lose the fear of tangling white on black. Although I am still unclear of what Maria meant by suggesting I start with gray, her suggestion got me trying new things with black tiles. I found that tangling with colors was a lot less scary. I also found that moving to a finer white pen helped a lot, especially with working towards using the broader white Gelly Roll pen. And sometimes, we need that process of discovering what works better for us before we can pick up the expected tools again.
Interestingly, cost may have been a factor for me. I started tangling white on black using the far less expensive black tiles from Peter Pauper Press. Official Zentangle black tiles are costly in comparison. I had tons of PPP tiles, but only a handful of the Zentangle tiles. At the Zentangle store during Seminar, I bought tons of official black tiles. When I came home, I pretty much dropped the less expensive tiles. That recommendation–not using inexpensive black tiles–actually came from a methods e-book by artist and CZT Eni Oken, in Glow on the Dark, an e-book on 3D shading on black tiles (available from EniOken.com). Since I had a bunch of high-quality official black tiles, I was a bit braver about using them for experimentation. [It is so difficult and time-consuming to get specialized stuff on the island that I cringe every time I put in an online order. It doesn’t stop me from buying online, but I still cringe at the extra mailing costs, especially if I don’t want to wait months for postal inspection. (That’s why we use a courier service–stuff gets through so much faster!)]
I guess what I am trying to say is that I couldn’t conquer my fear of tangling in white on black until I had the right tools to play with–tools that made it easier for me to move from cringing to creating.
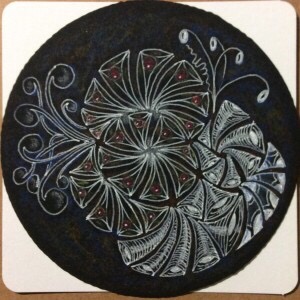
Note to readers: I am the guilty party–I inflicted abuse on a poor defenseless classic black Zentangle® tile. I am ashamed and remorseful, but the fact exists–I mistreated my precious tile. Below is a reconstruction of the original tangle on this poor tile’s surface.
I started out right. I gave thanks and appreciation for my time and the quality of the materials before me, to the comfortable tangling space, for the opportunity to create something beautiful. However, all this took place under the influence of a little pill meant to help me sleep. That is no excuse for the behavior my tile will explain. But it was a circumstance, one which even led to my dating the original work as June 26, 1921! I can’t even explain where that date came from, or how I could have believed I was creating magic with my tile. But that’s the start of this tale. Only she–my abused tile–can tell the actual non-drug-influenced story.
Good evening, readers. My name isn’t important, but you can call me Glitter, as that’s the name I chose once DrEllie fixed me. But let me start at the beginning.
Ellie is an insomniac. Most nights she fits in a couple of hours of sleep, but sometimes she is awake for 48 hours or more straight. Most prescription sleep aids cause sleep walking. She has already fallen down the steps twice, so she refuses to take them. Instead, her doctor prescribed a tranquilizer that she can take at bedtime–but only half a pill. Those things are wicked! Last night, the half pill was not working, even as she partially tangled tiles to send to friends who sent her some before. She already felt badly about being so far behind. Unfortunately, even the tangling, along with the sleeping dose, were not helping her get sleepy. After a few hours, she decided to take the other half pill.
Over the next hour or so, I watched as her drawing deteriorated across half a dozen tiles. Crooked lines that didn’t meet, circles that looked like–well, not circles at all. Finally, she picked me up–the first black tile of the bunch. And then she picked up the white gel pen. And I felt her drawing all over me–a sort of curved frame, some “curved” lines in the corners that resembled squiggles more than lines, the worst mooka I’ve seen her draw since she was first learning it–this one looked like a misshapen Meerschaum pipe!–and some really off-base fescue that looked like squiggly blobs with jagged stems. I begged her to stop–that she was destroying my beauty and anything akin to balanced composition. All she did was scowl at me and keep drawing.
Suddenly, she lifted her pen and dropped it on the drawing board. The pen rolled off the surface and out of sight. “I need to cap my pen!” she told the dog who sleepily lifted his head, regarding her through barely open eyes. He was tired, too. He was only there to keep her company. Ellie almost fell off her chair to search for the pen. She began crawling around on hands and knees in her search. And she barely kept herself from toppling over more than once. At least twice, she asked the dog what she was looking for. The dog had fallen asleep again and didn’t answer. Finally, she found the white gel pen (hard to do on white tile flooring with only overhead lights to help see). It took her a while to stand up again, using the chair and table top for support. I watched her sway back and forth as she tried to remember what she needed to do next. “The cap,” she finally whispered.
The cap was easy enough to find. It was right next to me, on a clean black tile she hadn’t used yet. I guess the tile was patiently awaiting its turn. After three tries, Ellie finally clicked the pen closed and very carefully set it on top of me. Still standing and swaying, she murmured to no one in particular, “I think the meds have kicked in.” I watched as she made a drunkard’s path to the staircase leading to her bedroom. I held my breath as she navigated the steps. The dog, who follows her everywhere and normally pushes past her up the stairs, quietly sat waiting until she reached the bedroom door and turned out the hall light. Then he zipped up after her.
It’s me again–Ellie. I don’t remember climbing into bed, but that’s where I was when I overslept this morning. Ten-thirty! Where had the time gone?
After throwing on some clothes, I made my way downstairs. I made a cup of coffee, and wandered over to my tangling area. I vaguely remembered working on a group of tiles, but it took a few minutes to remember that I was creating some traveling tile project pieces to get in the mail. I saw Glitter–nowhere near resembling her new name–sitting in my active drawing area. Then I saw the pile of started tiles. Setting the coffee mug down, I examined each tile. The first two were awful, but there was improvement as I got deeper into the short stack. I must have tangled the lower ones first, placing each next tile on top as I finished it. I cringed at the higher tiles–a two-year-old would have produced better results.
Next, I picked up Glitter, and tears began rolling down my face. She was utterly disfigured–and I knew I had done this to her. Only the original border lines were passable. Through my tears, I heard, “You can fix me! There are no mistakes in Zentangle!” I stared at her.
“How?” I asked, barely above a whisper.
“I’m a black tile, right?” I nodded. “You have a whole assortment of black Micron® pens with lots of nib widths, right? Even a black Micron brush pen?” Again I nodded. “Well, sit down and make me something special–something that will help you remember never again to tangle after taking pills.”
Smiling now, I dug out not only my standard supplies, but also my Gelly Roll metalic and Stardust pens. For good measure, I also pulled out my Souffle pens, just in case. Good thing, because I couldn’t find my gray brush pen, and the black Soufflé dries beautifully gray.
It’s Glitter again. I’ll finish the story.
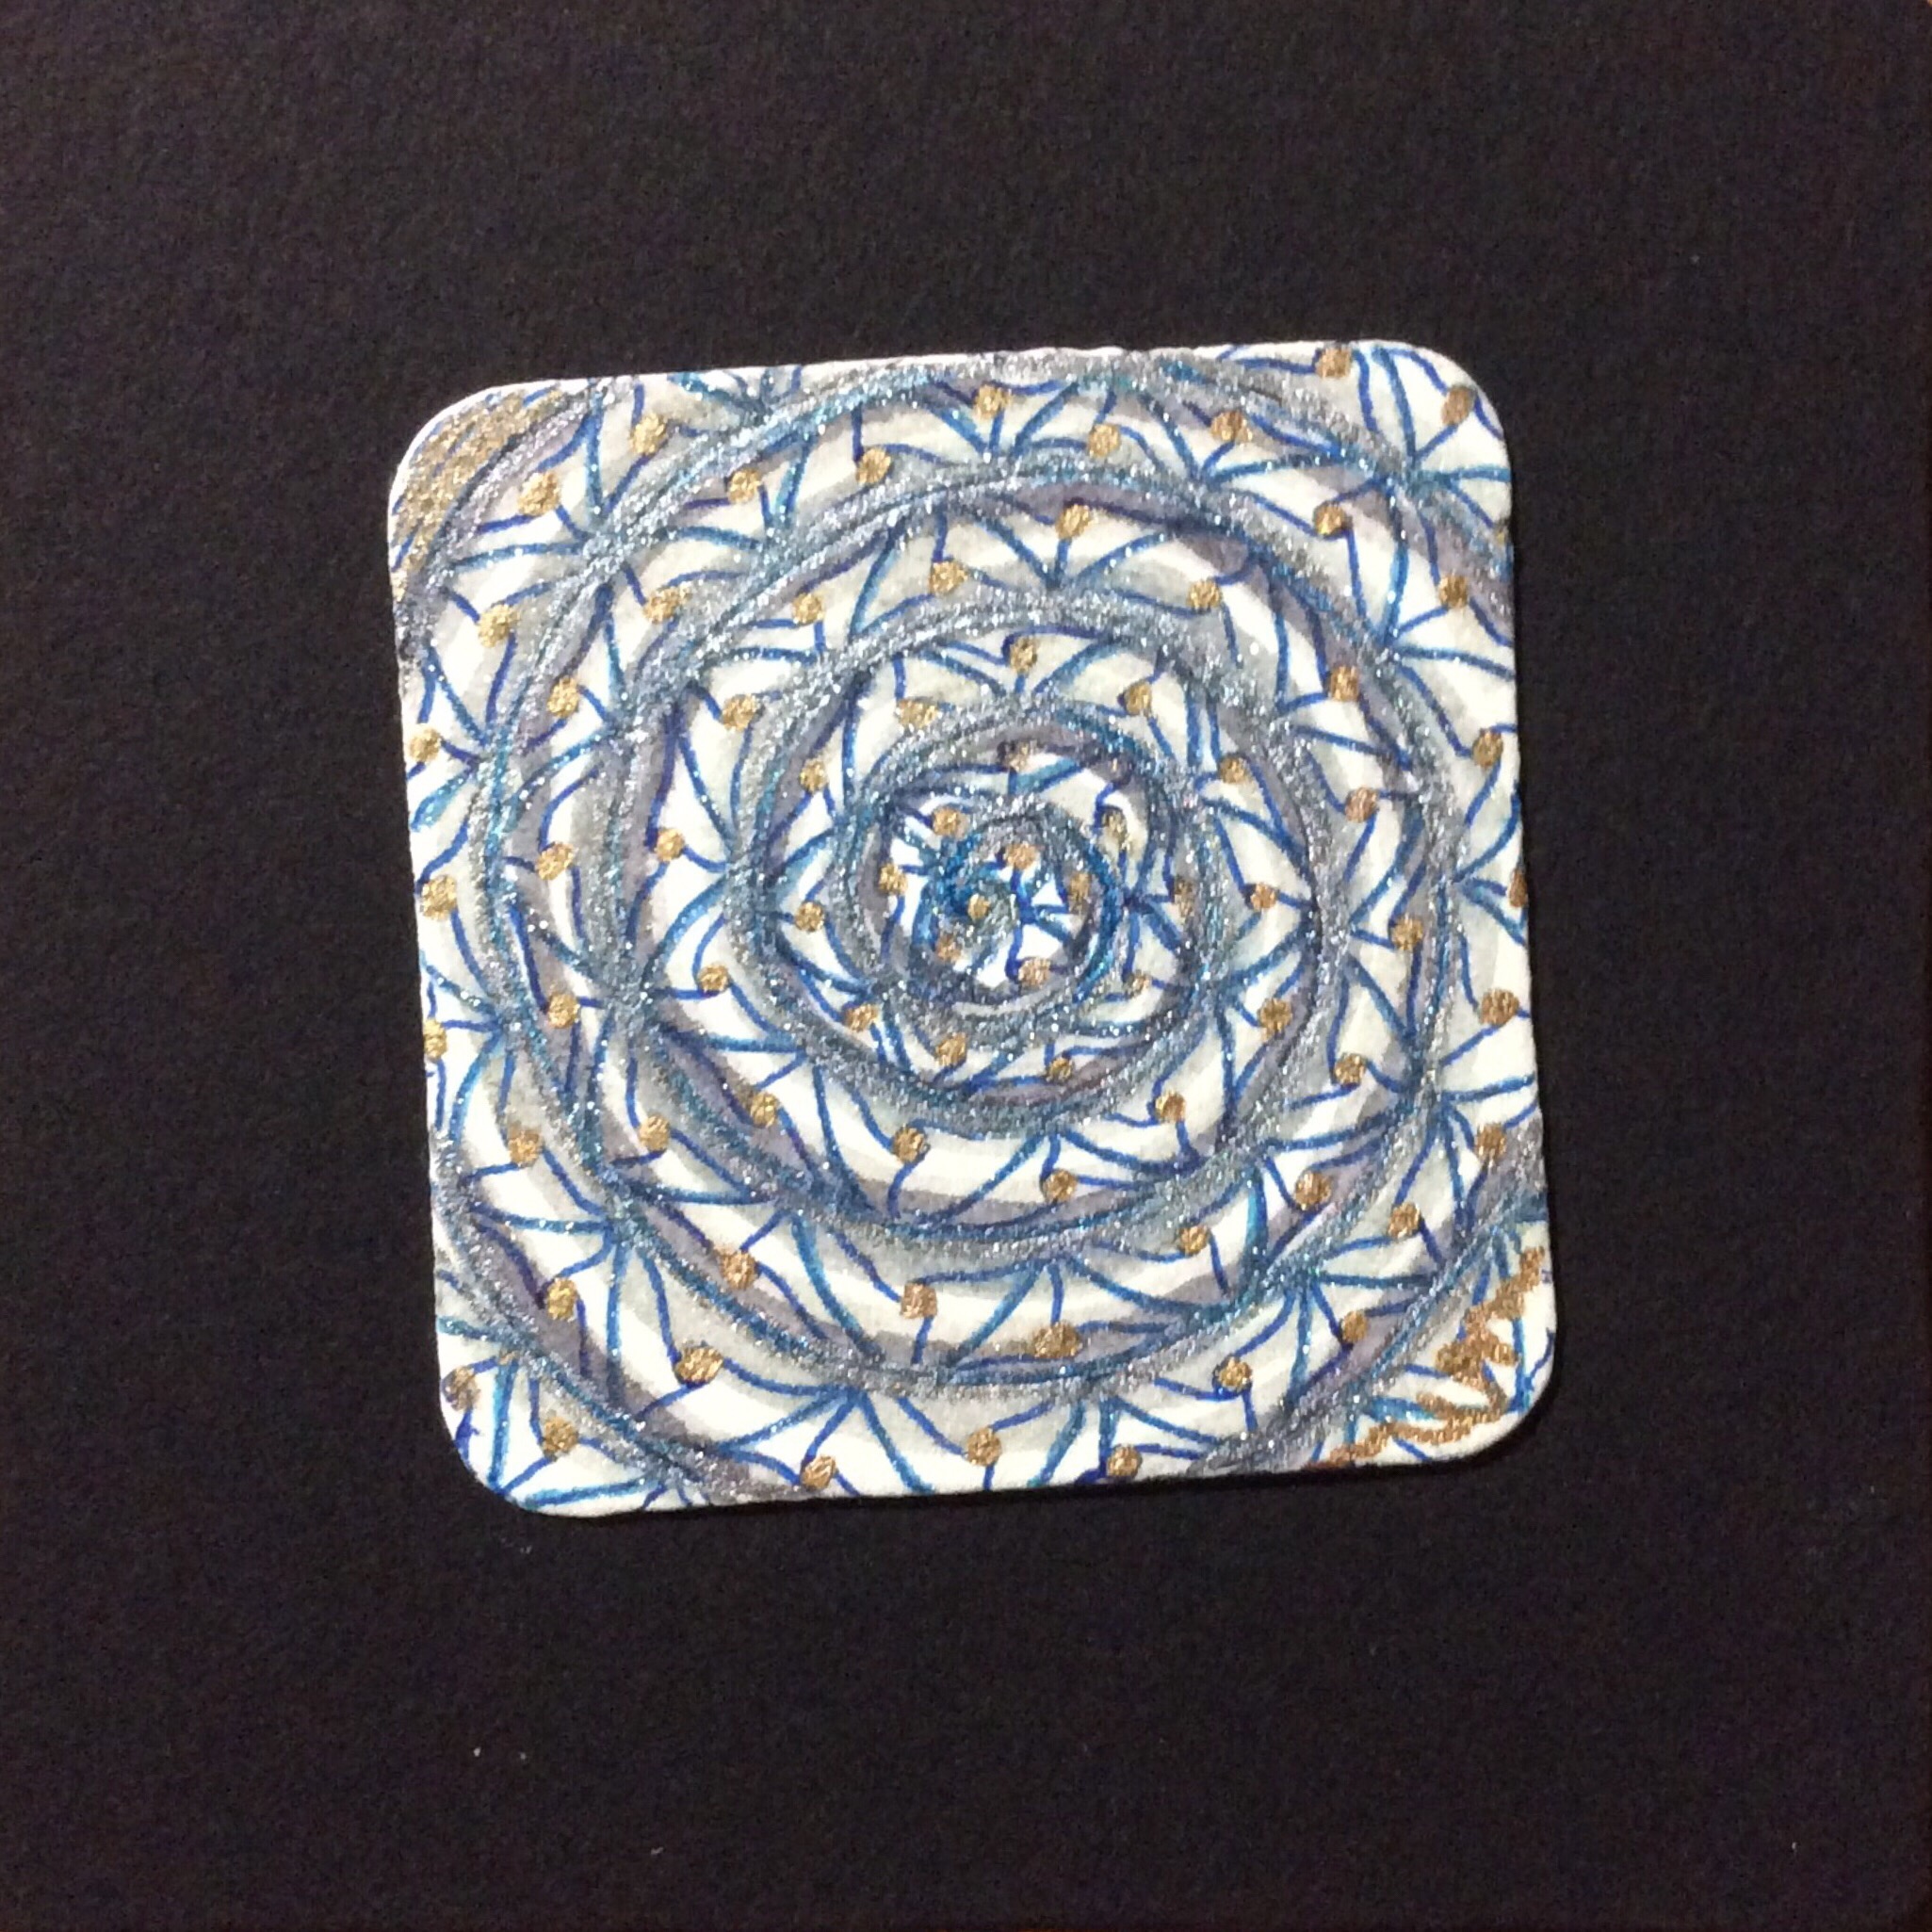
The first thing Ellie did was take out her Micron 08. Where she could, she smoothed out curves, redefined lines, fixed up dangly end where lines met and then some. It sort of tickled, but it also hurt a little. Next, she obliterated groups of lines that were supposed to be parallel but–well, let’s say they were lines that went in interesting directions, with some even crossing multiple others. That was really painful–like being deliberately abraided! Somehow, she managed to save and refine the mooka and fixed the fescue. Then she fixed up the crescent moons she had in some interesting corners, redefined some, and used blue gel ink to sort of shade them. None of that hurt as much as the abraiding feel, but it was still uncomfortable. Sitting back, she looked at all the white that disappeared under the black pen. And she stared and stared.
Finally, she picked up the white gel pen again and redrew those curved parallel lines she obliterated earlier. She looked at the variety of Sakura® gels pens she took out earlier, and I saw her smile.
First came a small Way Bop, filled in with flat and metallic pens. Then she fixed the corners with the parallel curves, Eni Oken style (or as close as she could get to that). She used that black Soufflé pen for the gray marker area, and added the “sparkle” to the curved areas with white Gellies. With the Stardust pens, she added glittery effects where areas seemed to need very subtle sparkle. Finally, she redefined lines and curves where they needed some clarity, and sat back. “What do you think?” she asked me. “Are you happy with your new look?”
My tile spirit floated to her shoulder and looked down. “Not bad,” I said. “Not bad at all!” I floated back into myself. “You know,” I told her. “You were really rough on my surface when you scrubbed away those awful white lines. I think I have all sorts of thinner spots, and you changed the texture of my surface in a lot of places. I should report you to the tile protection league, but you really came through. I really love my new look!”
“So, Glitter,” I said. ” I want to formally apologize for abraiding you and hurting you as I redefined lines. I am so sorry for any irreparable destruction I caused to your fragile tooth–that’s surface texture, if you’re wondering if I should send you to a dentist. I didn’t mean to hurt you, but there was no other way to restore your lovely surface. And you have to admit, this design is far nicer than those crazy white lines I drew all over you.”
“This new look suits me,” Glitter replied. I really like the colors–spots of gold, even!–and I feel sparkly and shiny!” Glitter paused for a moment, deep in thought. “Just promise me something.”
“Anything,” I reply.
“Never ever tangle when you’re taking those meds again. I don’t want any friends going through the same experience. Promise me that, and you are forgiven forever.”
“Not a problem, Glitter,” I replied. “I promise. I’ve learned my lesson. Not a problem at all.”
The week after returning from CZT (Certified Zentangle® Teacher) training in Providence, RI, I got brave enough to tangle two items I purchased, one a canvas portable Zentangle® tools wallet, the other a canvas pencil pouch. I had purchased all the materials I needed to complete these projects–a double-pointed Identi-pen® by Sakura®, a double-sided Fabrico® marker in cool gray, and an 8-ounce jar of Mod Podge Fabric® sealant–along with the items to be tangled, of course. I already had tons of disposable brushes, so I didn’t need to worry about application tools. But I took out one brush and set it along side the items and tools.
And I let it all sit a few days.
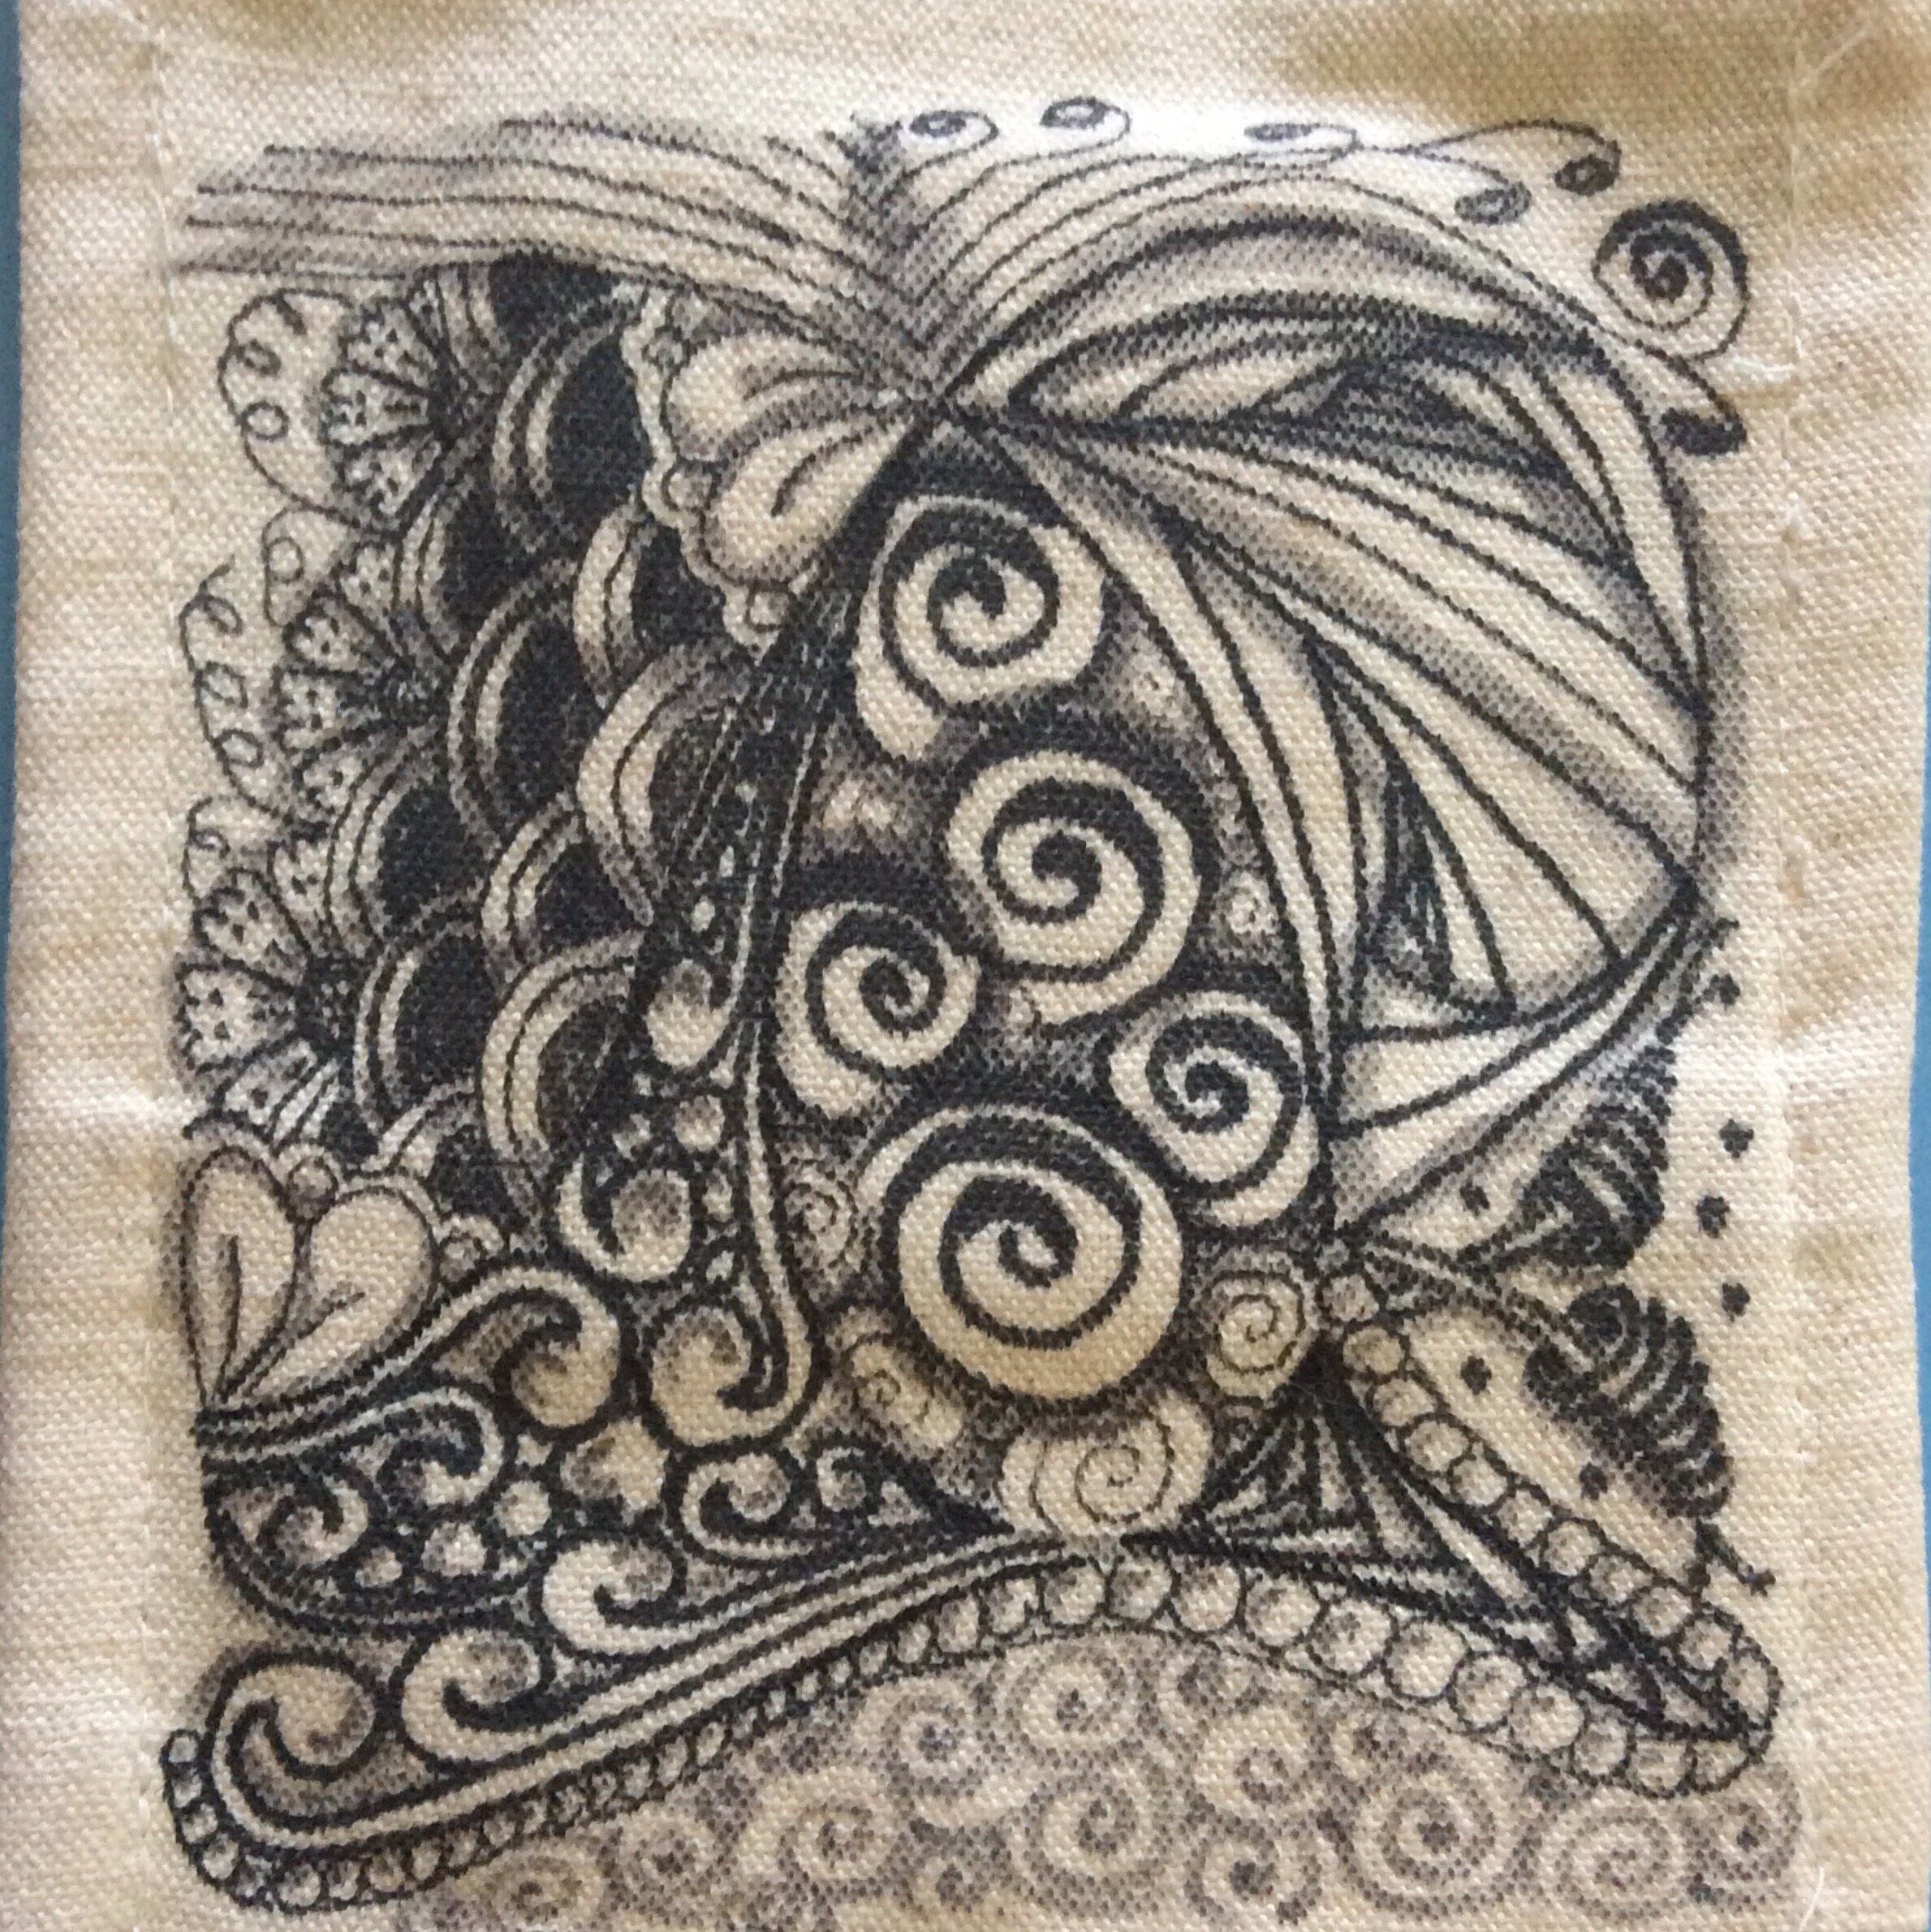
Under normal circumstances, I might have simply ditched the idea of uniquely decorating my canvas purchases and simply started using both the wallet and pouch in their natural state. Then one evening, my husband turned on a TV show in which I had no interest, it was too dark to do justice to a tile, and I just did not feel like crocheting or knitting because of the tropical stickiness, even in our air conditioned home. So I picked up the wallet and studied it. And an idea came into my head for a design. I picked up the gray Fabrico, and with the pointy marker side drew an initials string on one side of the wallet. Next, I picked up the Identi-pen and started to tangle without a thought to what I was drawing.
Hmmm… Not perfect, but not bad, either!
Next, I followed the same procedure on the second side, but with a more traditional string. I actually like this side better.
You may not be able to tell, but I then used the brush tip from the Fabrico to shade both sides of my tangle wallet. I also used the marker end to add lighter Printemps to the background of the initialed side as well as the other side.
My husband–who never notices anything that isn’t purple–glanced at what I was doing and complimented my work. This is a first–ever! He generally has no idea what I am dong.
For the final step, I had to leave the room and open alll the windows and door in the kitchen–yes, it was Mod Podge time! Although the canvas doesn’t really need protection as the color is completely colorfast, I was afraid I might accidentally scrub off or otherwise mess up the designs just by using it like I use all my tool bags–roughly. To protect my little masterpiece from normal wear-and-tear, I decided to seal and protect my work so I could just wipe the surface if I picked it up with graphite-, ink-, or pastel-stained fingers. The cool air may have been flowing out the kitchen portals, but I didn’t want to get dizzy. I suspect I have enough brain damage without adding more. Thus, the open windows and door, and the dread of an outrageous electric bill.
I covered the counter work space with parchment paper (wax paper works just as well, but parchment came to hand first). I placed my disposable brush and the opened up wallet on the paper, and finally opened the Mod Pdge Fabric jar. The sealant doesn’t smell as bad as some, but worse than others. What we sacrifice for our art! Stirring the goop with a wooden coffee stirrer, I figured it was a decent consistency to paint onto my work. Holding my breathe more from fear than aversion, I dipped the foam brush into the jar, let it “fill up” with the goop, and finally applied it to my work. It was much thicker than Elmer’s School Glue, but it was workable.
Starting with the stitching, I really pressed the Mod Podge into the machine-sewn depressions. Next I painted the edges. Finally, I painted the opened out decorated side(s) of the wallet–realizing for the first time that I could have tangled the whole thing end to end instead of one side, then the other. Ah, well. Next time. But back to painting on the sealer–I brushed lengthwise, then side to side, then across one diagonal, and finally across the other diagonal. The whole time I made sure I was working the glue-like substance as deeply between the threads of the weave as possible. Finally, I moved the wallet to a clean section of parchment to let it dry.
The following night, the Mod Podge was very dry to the touch. So I figured a second coat was needed. This time, I poured a little Mod Podge into a disposable cup and added just a drop of water–just enough to thin the consistency to a little thicker than Elmer’s Glue®. The second application was easier to apply, but it took longer to dry–about half a day longer. Two days later, I added a third and final coat. It took days to stop feeling tacky. Decided the third coat was overkill.
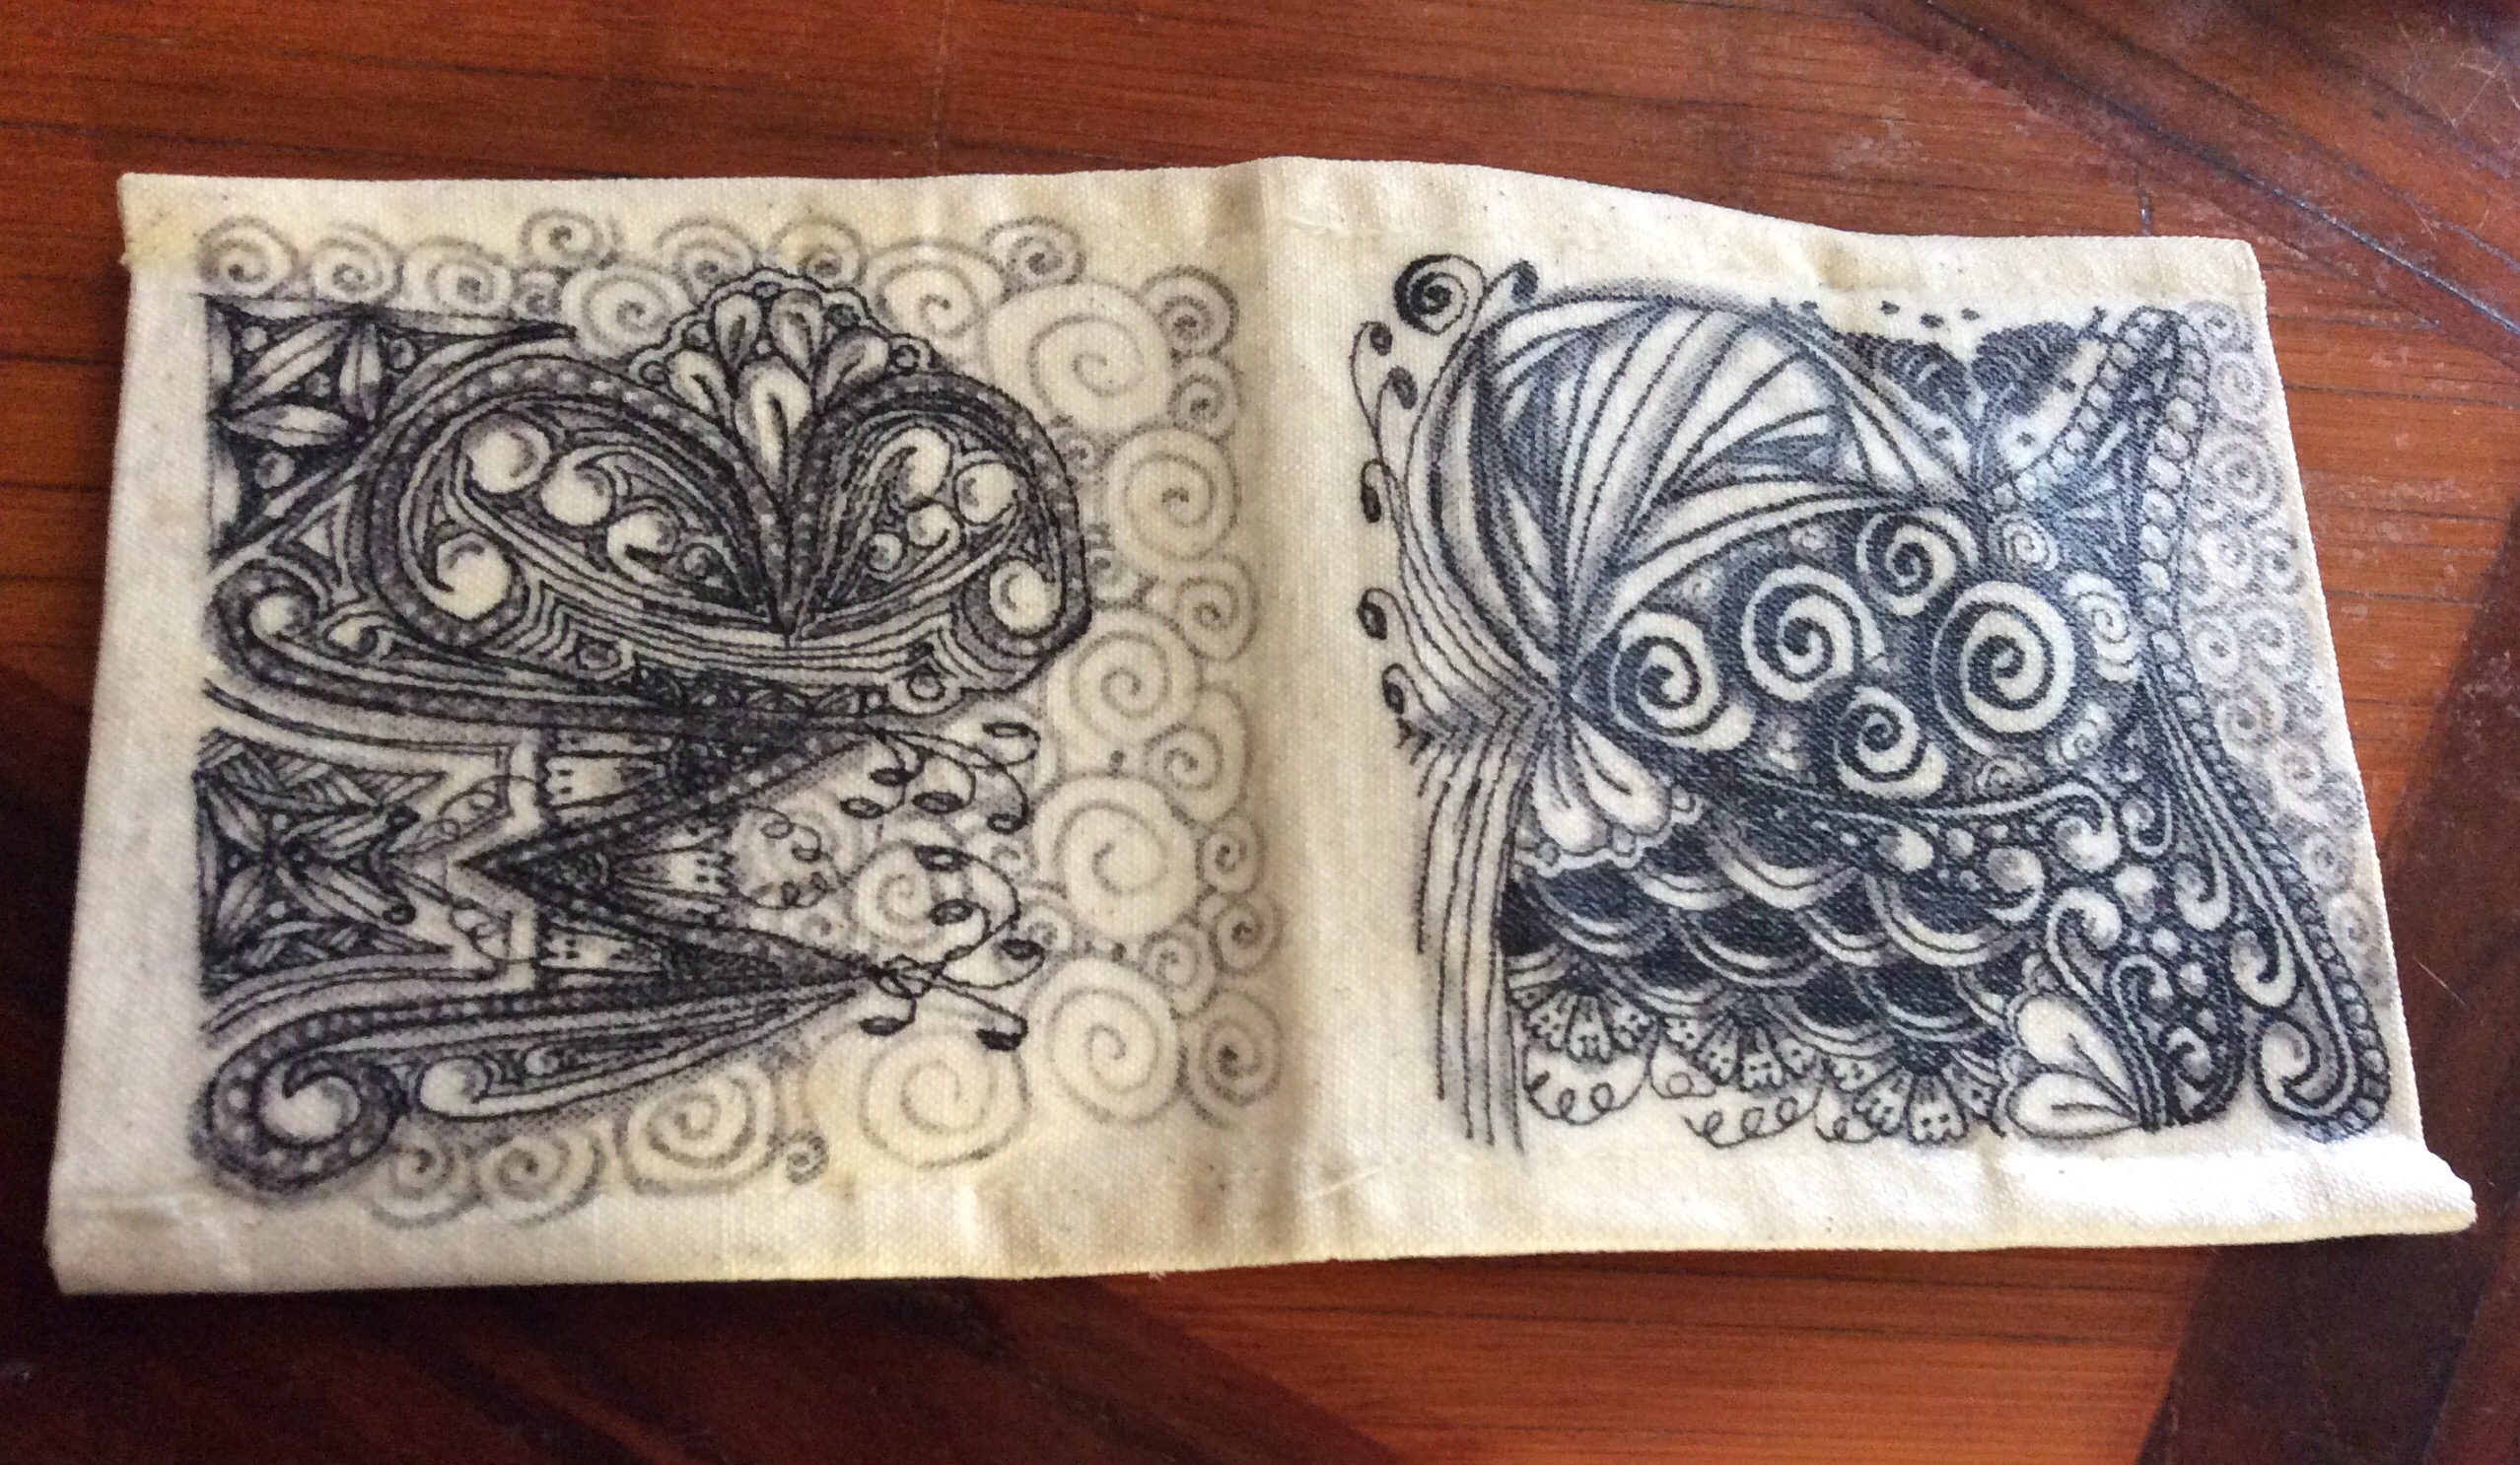
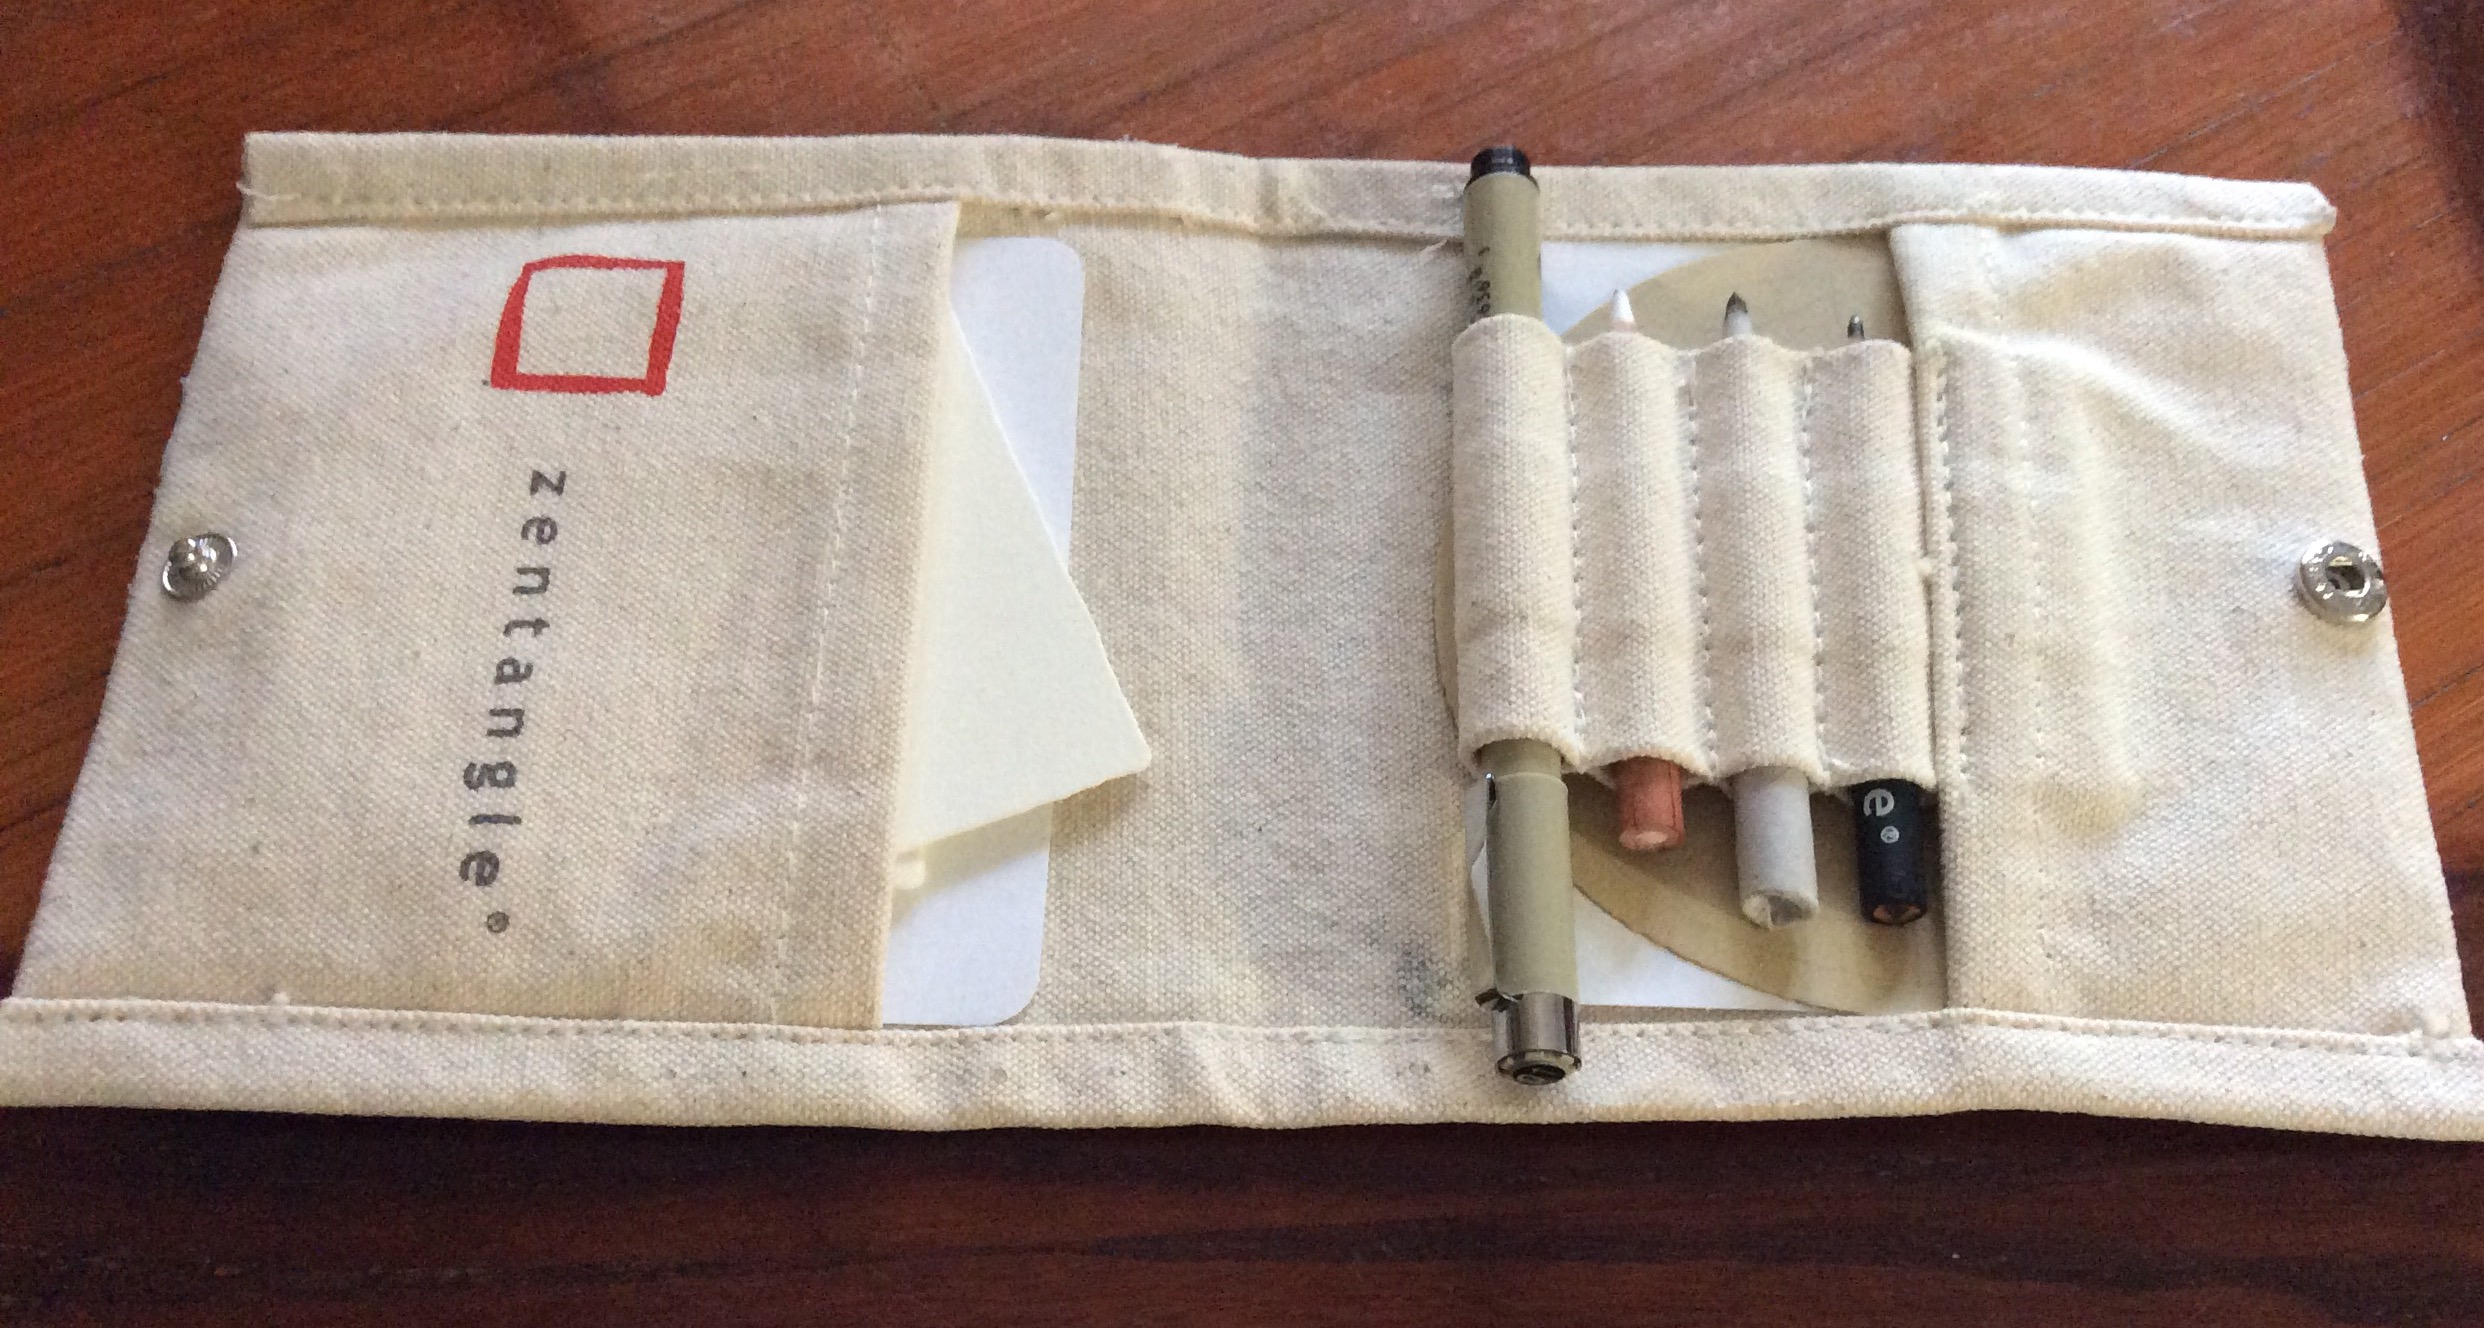
Here s the wallet opened up.
See what I mean about how I could have done one complete tangle instead of two? Oh, well.
As you can see, the wallet can hold your drawing tools and all tiles with the exception of Opus tiles–but those barely make it into my suitcase without getting crushed. (That’s a Zendala® tile below the tools and an Apprentice® tile below the standard tile on the left).l
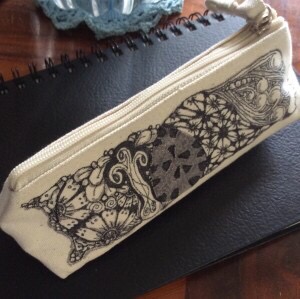
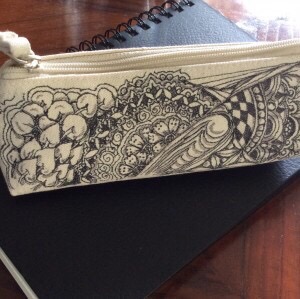
Having learned from my first project, I tangled my second project next–the pencil case. I did everything the same way except that I skipped the third coat of sealer.
One quick word of advice if you are going to try a similar project: wash the canvas or cloth item first, then press the cloth and (if you can) the canvas item. Cloth manufacturers put sizing and other stuff into cloth when they make it so it works better with the weaving and dying machines. This can interfere with sealing your item. But wash by hand, or on the delicate washing machine cycle. I haven’t been able to find my iron in the year since we moved to this home. It’s probably in one of the many unpacked boxes I have. As you can tell, I don’t iron much and only miss the appliance when I need it for a project. Lost iron is also why I have done no quilting in a year. But who needs an iron when I have tangling?
If you want to share your tangled creations here on my blog, just leave me a message under comments!