
Zentangle is a method first and foremost. It is a set of steps that enable the participant to achieve a state of meditation that results in relaxation and a small work of art to be proud of. Zentangle is also the resulting product, or tile.
The method itself consists of eight steps. The first four steps will be discussed in this post.
The first step in the method, as I currently understand it from books, is a preparation and centering step. After materials are gathered and the tangler is settled into theplace to create, the tangler begins to relax by taking what yoga instructors would call cleansing breaths. This begins the relaxation. In this step, the tangler takes time to appreciate and be grateful for the work space, the time, and the materials. This gratitude and appreciation helps him or her focus on the positive parts of one’s life and environment and helps the inner self to influence inspiration and creation.
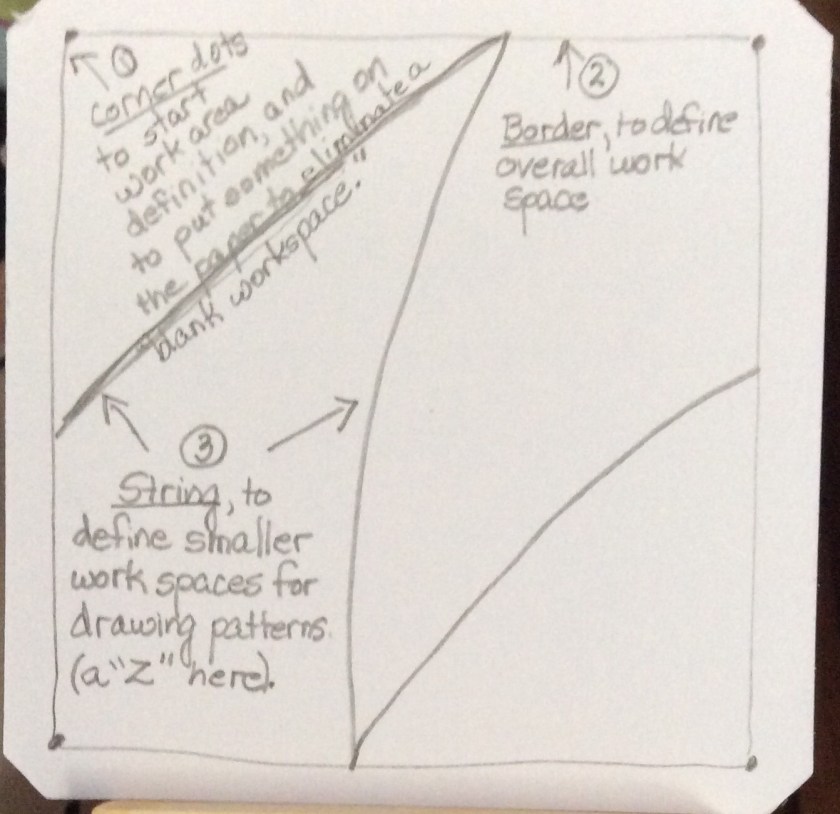
Step 2 is to draw a dot at or near each corner of the square tile, using a light hand and a light graphite pencil. These four dots are called corner dots, for obvious reasons. This step serves two purposes: to eliminate a blank drawing space, and to begin to define that drawing space.
 Step 3 is to draw (lightly and still with a pencil) the border by connecting the dots into a sort of frame in which the rest of the work will go. The border is loosely defined by the corner dots. The lines connecting the corner dots can be straight or curved. The only rule is to quickly join consecutive dots into a framing border.
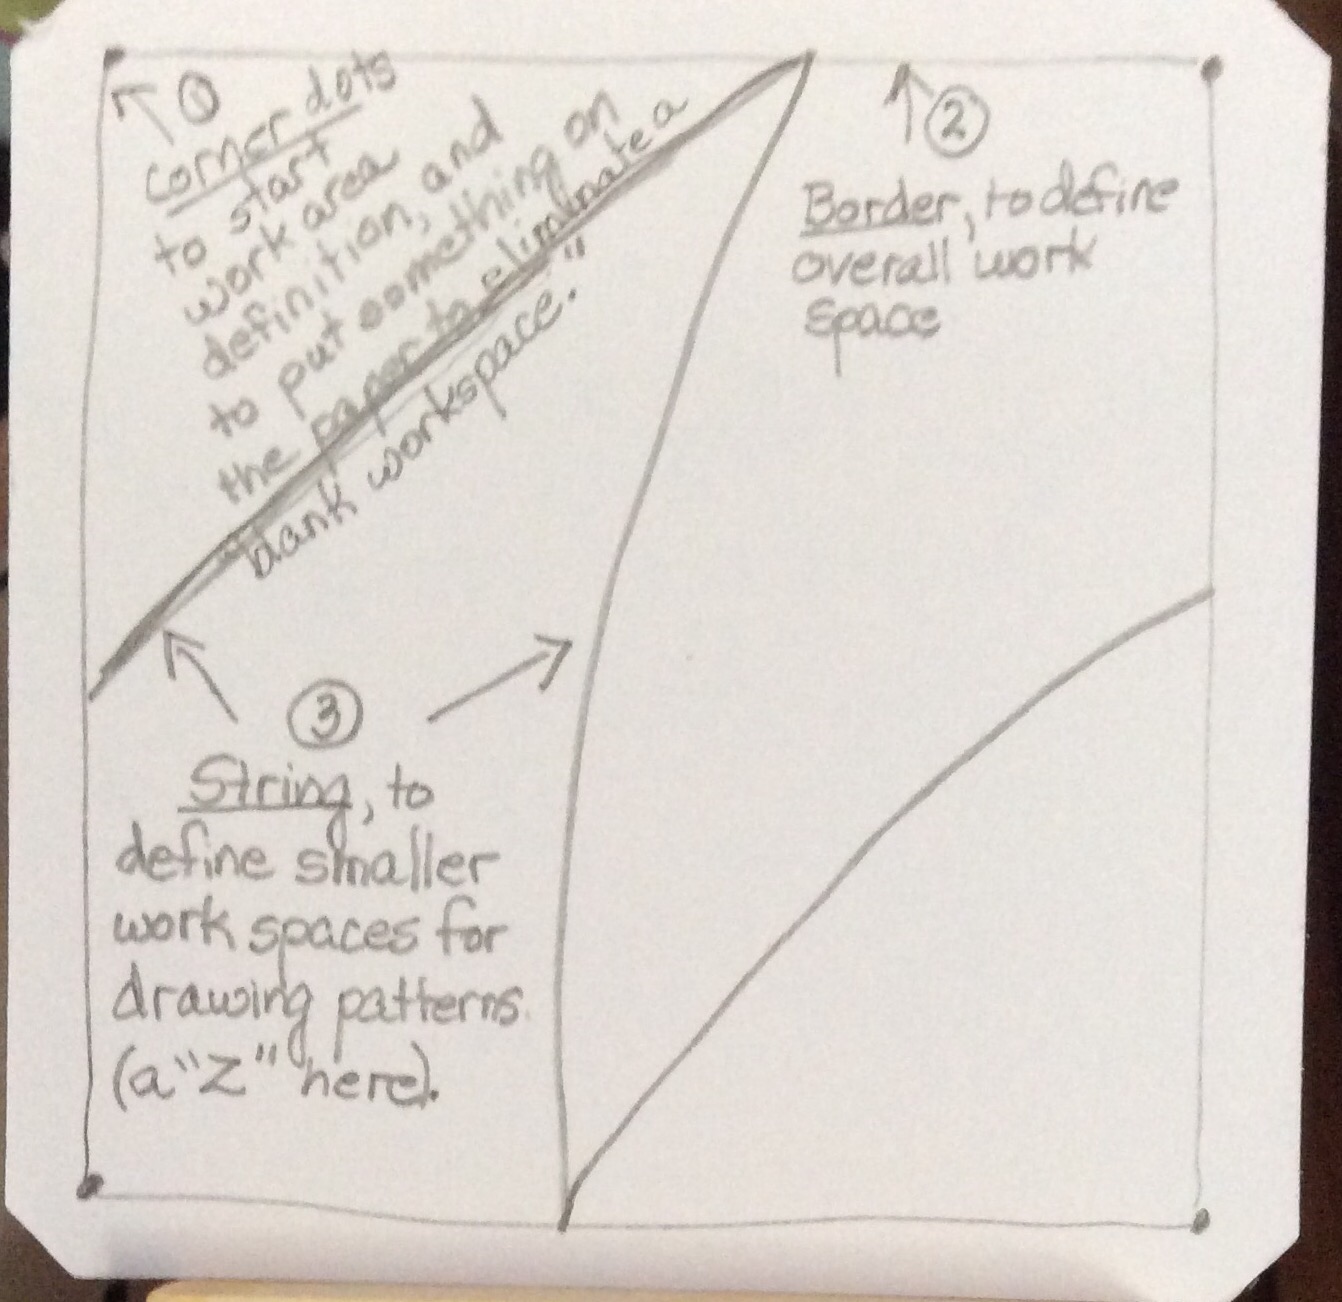
Step 4 is to draw a string inside the border., still using a pencil. A string is one or more lines that create smaller work spaces. In most “how-to” books on Zentangle, the first string is a Z (for Zentangle) that goes diagonally from one side of a border to another, as in the first picture. However, the shape(s) of the string are only limited by the tangler’s imagination (second picture). And when imagination doesn’t help, there are many places on the internet to find inspiration. One of these is TanglePatterns.com, another is Zentangle.com (the official Zentangle site created by Zentangle founders Maria Thomas and Rick Roberts). 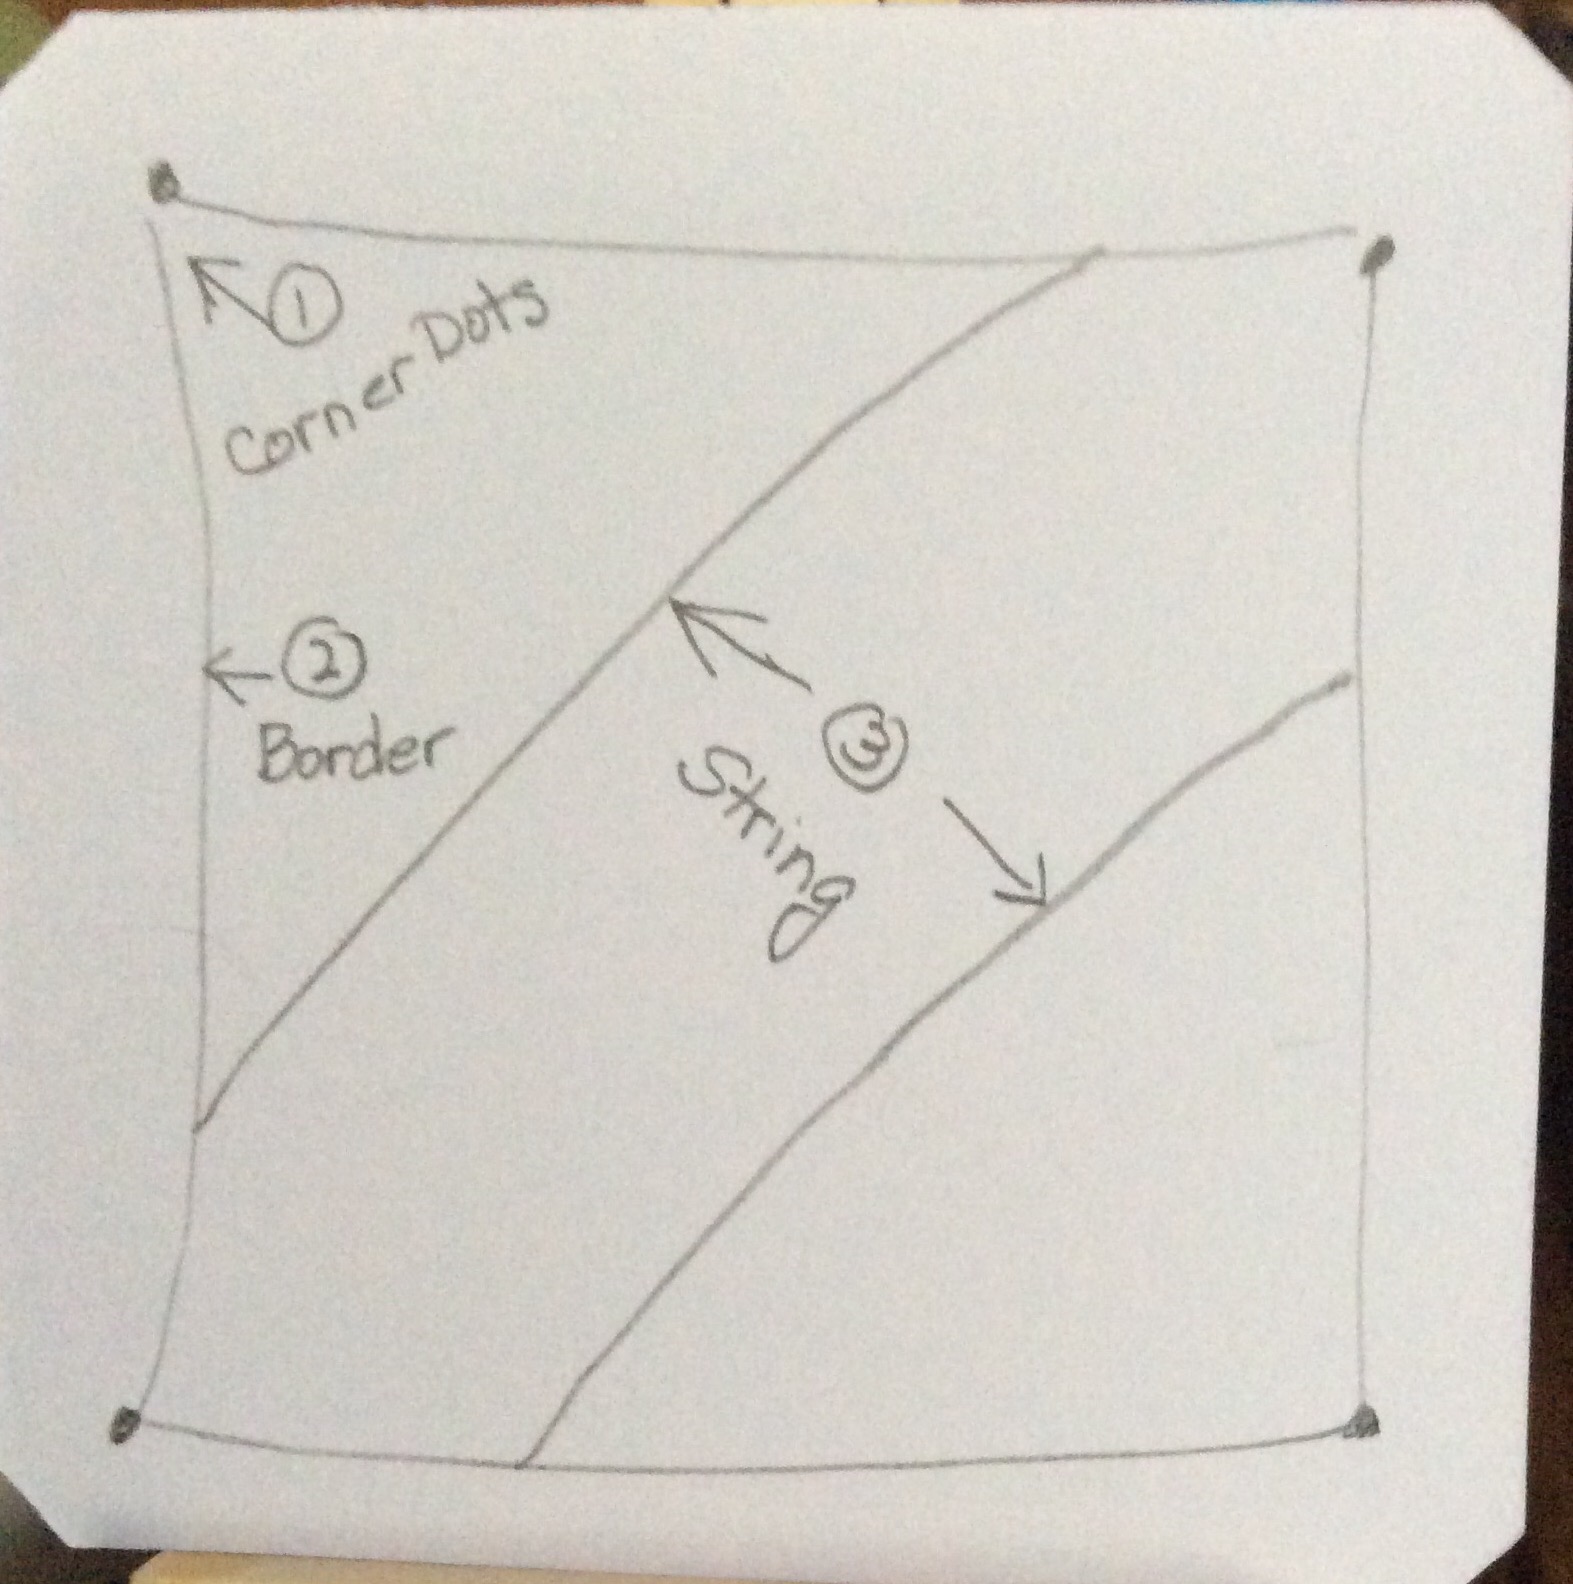
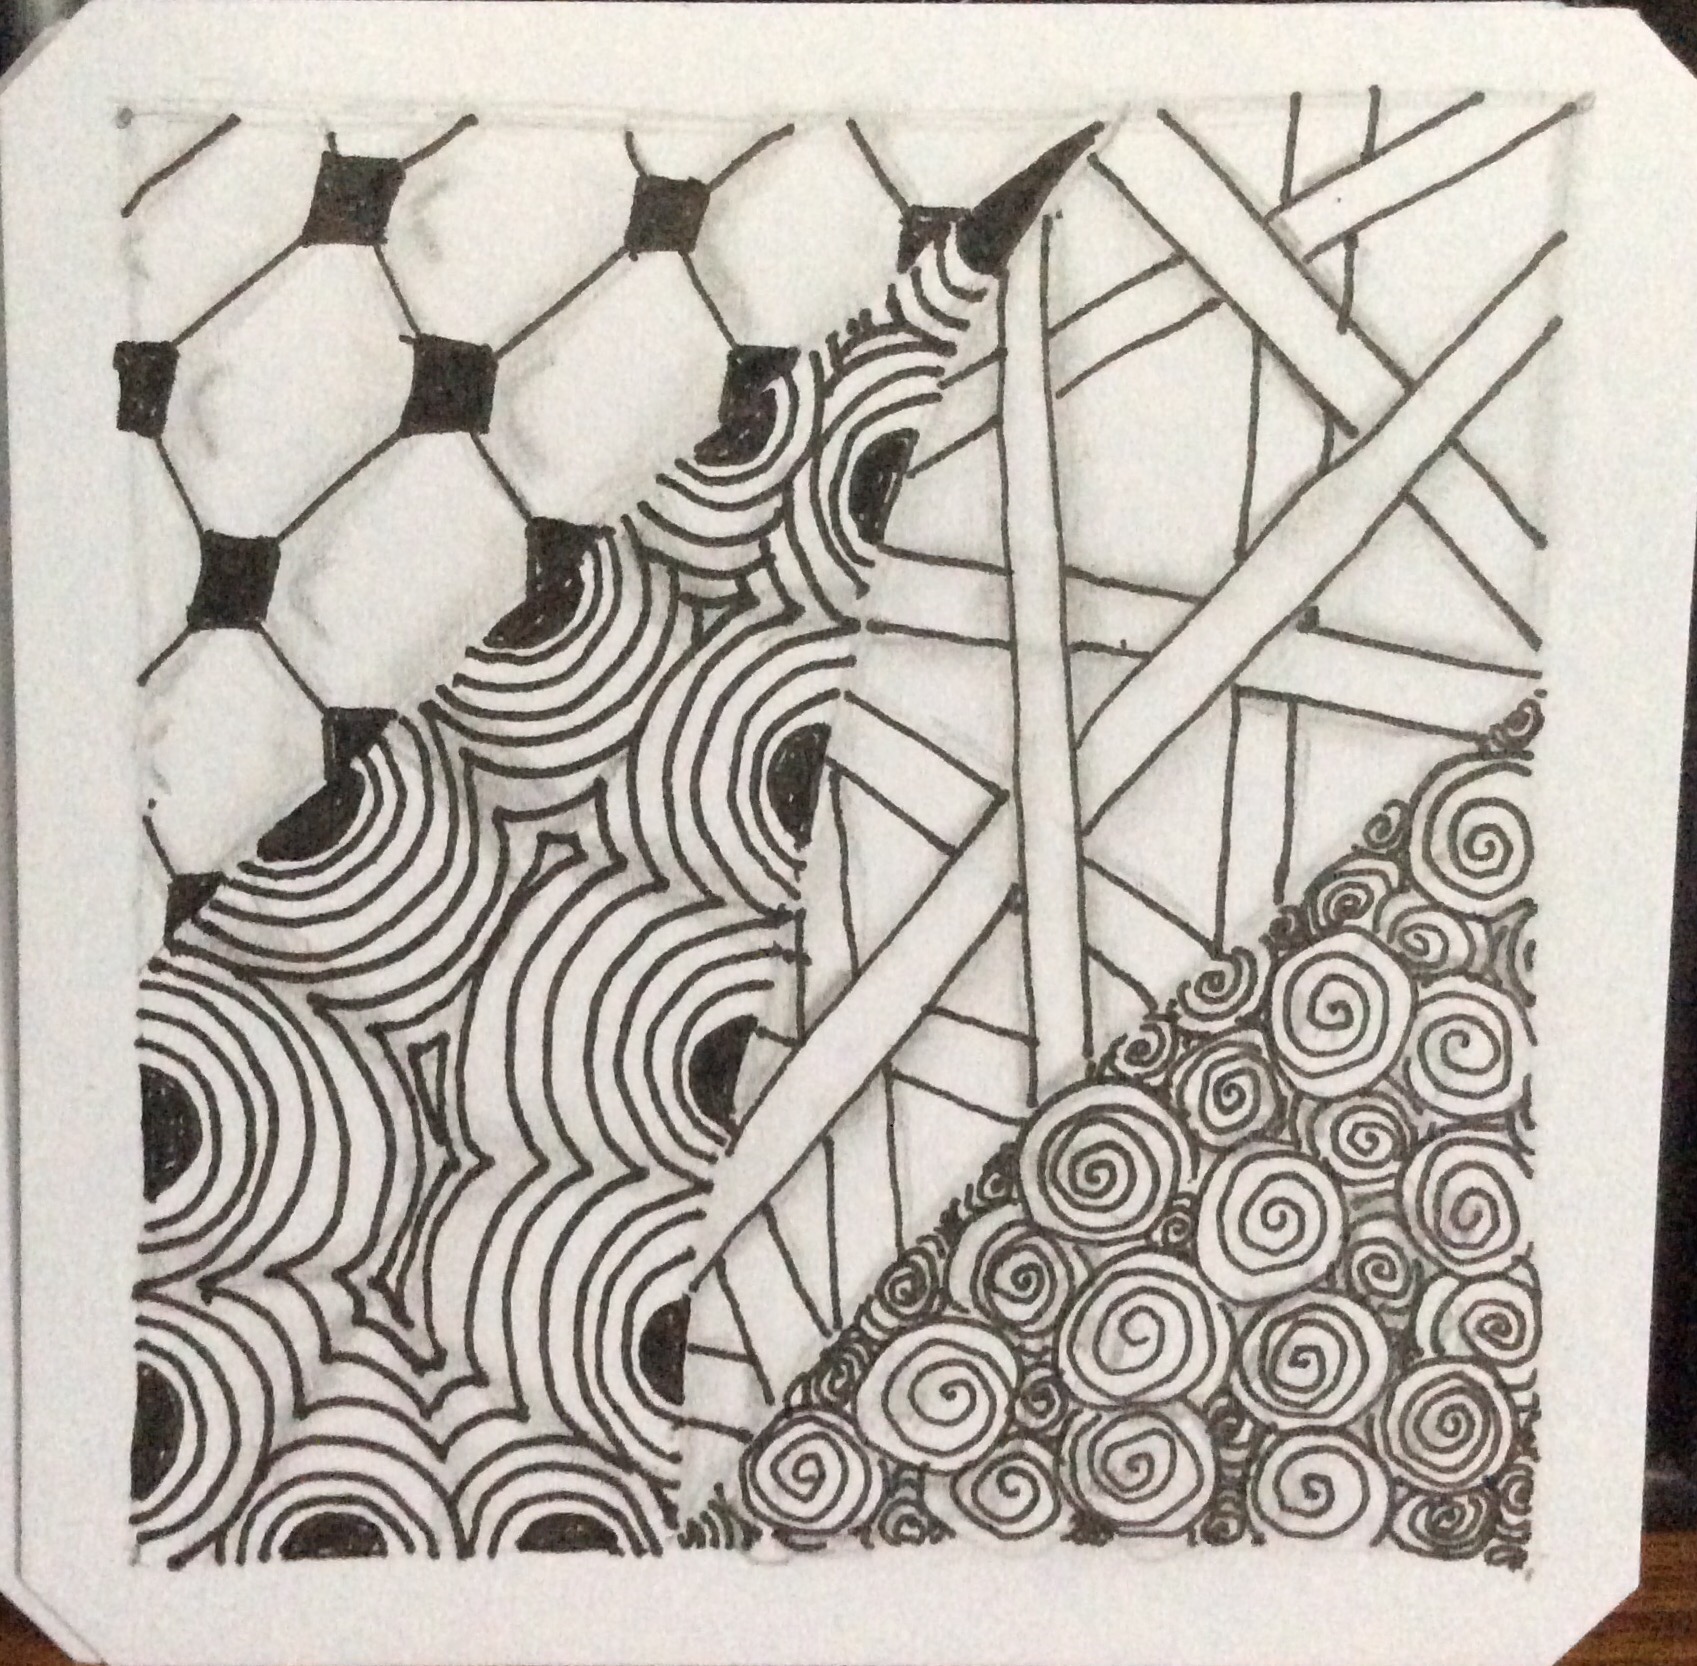
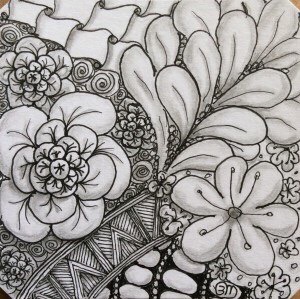
The sections formed by the string are generally used to fill with a different pattern in each area (see photo below, which is also shown in the previous post).
Among the reasons for using a string to define smaller areas within the workspace is that smaller spaces are less intimidating to many tanglers. Instead of seeing the entire work space as a single “canvas,” which can be almost as intimidating as a completely blank tile before the Step 2 dots are added, the tangler sees smaller spaces to fill up.
 A note on the drawing of corner dots, borders, and strings: use a hard pencil and draw as lightly as possible. Hard pencils are H, 2H, 3H, and so on. Hard pencils produce a lighter line than softer (B, 2B, 3B, etc.) pencils. The softer the pencil, the darker the line and the harder it is to hide later. Any school or home pencil usually fits the bill for the harder pencils, as soft graphite is generally found in pencils specifically for drawing.
The reason for a harder rated (lighter toned) graphite pencil is that you want the dots and lines to act only as guides that disappear into the final drawing. Erasers are a no-no in Zentangle. Light lines can be blended into the final artwork or simply disappear as patterns are drawn. In the tile on the left, you can see where the string is shaded into the patterns to produce soft borders between pattern areas and to give the tile a bit of depth. If I had wanted “harder” borders between the patterns, I could have left the original lightly drawn string unblinded. In many cases, the patterns themselves clearly define the string areas on their own. In this particular tile, the string is easy to “see” even without the shading because the patterns simply don’t cross over the line. It is OK to cross a string line, but I didn’t want to do that in this “lesson 1” tile so that the boundaries created by the string could be clearly seen.
 The point about using a hard pencil lightly is that, as a tangler becomes more experienced and confident, she or he may not want the string, border, or corner dots to be so obvious. In the tile on the right, I drew patterns along the string, often using both sides of the string, to create the borders. It is still easy to see the different sections filled with different patterns, but the string is much less obvious. Because I drew the string so lightly, it is almost impossible to see the original pencil line that broke the tile into sections.
Bottom line: the corner dots, border, and string should be drawn just dark enough to remind you where the sections break, but not so dark that an area where you decide to jump a line shows up to “ruin” a pattern element. Who wants to see a heavy line going through a beautiful petal or leaf in a weird place?
Before you pick up a pen to draw patterns on a tile, four steps of the Zentangle Method set the session tone and break the tile into small work areas. Step 1 is Gratitude and Appreciation. Step 2 is Corner Dots. Step 3 is Border, and Step 4 is String. The drawing begins in Step 5, called Tangle. But that discussion is for the next post.
Until next time, Happy Tangling!
#educ_dr

One thought on “What is Zentangle? Part 3”
Comments are closed.